


 本文详细介绍了Spring框架中Bean的概念,包括Bean的配置、实例化方式及依赖注入。探讨了XML配置下Bean的定义、作用域及属性设置,并演示了构造方法、静态工厂与实例工厂三种实例化Bean的方法。
Bean:在Spring的应用中,由Spring IoC容器创建,装配和配置应用的组件对象,这里的对象称之为Bean。
一.Bean的配置
<?xml version="1.0" encoding="UTF-8"?>
<beans xmlns="http://www.springframework.org/schema/beans"
    xmlns:xsi="http://www.w3.org/2001/XMLSchema-instance"
    xmlns:p="http://www.springframework.org/schema/p"
    xsi:schemaLocation="http://www.springframework.org/schema/beans http://www.springframework.org/schema/beans/spring-beans.xsd">

   <!-- 将指定的类TestDao配置给spring,让spring创建实例 -->
   <bean id="testdao"  class="dao.TestDaoImp"/>
   <!--通过构造方法进行注入  -->
   <bean id="testservice1" class="service.TestServiceImp">
        <!-- 通过构造方法注入对象 -->
        <constructor-arg index="0" ref="testdao"/>
   </bean>
</beans>
二.相关属性及其子元素
id:Bean在BeanFactory中的唯一标识
class:Bean的具体实现类
package test;

import org.springframework.beans.factory.BeanFactory;
import org.springframework.beans.factory.xml.XmlBeanFactory;
import org.springframework.core.io.FileSystemResource;

import dao.TestDao;

public class Test02 {

	public static void main(String[] args) {
		// TODO Auto-generated method stub
        BeanFactory beanfac=new XmlBeanFactory(new FileSystemResource("F:\\java_work\\spring01\\src\\applicationContext.xml"));
        //通过容器获取实例
        TestDao testdao=(TestDao) beanfac.getBean("it");
        testdao.sayHello();
	}

}
constructor-arg:使用构造方法注入式,指定构造方法参数
property:bean的子元素,用于设置属性。
scope:Bean实例作用域。
list:<property>元素的子元素,用于封装List或数组类型的依赖注入。
map:<property>元素的子元素,用于封装map类型的依赖注入。
set:<property>元素的子元素,用于封装set类型的依赖注入。
entry:<map>的子元素,用于设置一个键值对。
三.Bean的实例化
Spring实例化Bean有三种方式:构造方法实例化,静态工厂实例化和实例工厂实例化(其中最常用的方法是构造方法实例化)。
1.目录如下
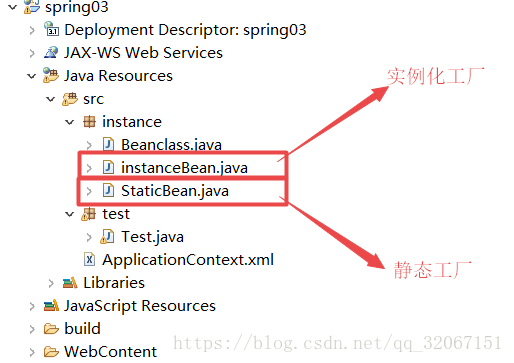
(2)创建Beanclass类
package instance;

public class Beanclass {
   public  String Message;
public Beanclass() {
	super();

	System.out.println("构造方法实例化!!!");
}
public Beanclass(String message) {
	super();
	Message = message;
	System.out.println(Message);

}

}
(3)创建静态工厂类——用于创建Beanclass实例
package instance;

public class Beanclass {
   public  String Message;
public Beanclass() {
	super();

	System.out.println("构造方法实例化!!!");
}
public Beanclass(String message) {
	super();
	Message = message;
	System.out.println(Message);

}

}
(4)创建实例工厂类——用于创建Beanclass实例
package instance;

public class instanceBean {
    public  Beanclass createBeanclass() {
    	System.out.println("实例工厂实例化");
    	return new Beanclass();
    }
}
(5)创建配置文件
<?xml version="1.0" encoding="UTF-8"?>
<beans xmlns="http://www.springframework.org/schema/beans"
    xmlns:xsi="http://www.w3.org/2001/XMLSchema-instance"
    xmlns:p="http://www.springframework.org/schema/p"
    xsi:schemaLocation="http://www.springframework.org/schema/beans http://www.springframework.org/schema/beans/spring-beans.xsd">
   <!-- 通过构造函数进行实例化 -->
   <bean id="conbean" class="instance.Beanclass"/>
   <!--通过静态工厂实例化 -->
   <bean id="staticbean" class="instance.StaticBean" factory-method="createbean"></bean>


   <!--通过实例工厂实例化  -->
   <!-- 配置工厂 -->
   <bean id="myFactory" class="instance.instanceBean"/>
   <!-- 使用factory-bean属性指定配置的工厂吗,使用factory-method属性指定使用工厂中的哪个方法实例化Bean -->
   <bean id="instancebean" factory-bean="myFactory" factory-method="createBeanclass" />
</beans>
(6)创建测试类
package test;

import org.springframework.context.ApplicationContext;
import org.springframework.context.support.ClassPathXmlApplicationContext;

import instance.Beanclass;

public class Test {
    public static void main(String[] args) {
		ApplicationContext appcon=new ClassPathXmlApplicationContext("ApplicationContext.xml");
		//通过构造方法实例化
		Beanclass bean= (Beanclass) appcon.getBean("conbean");
		//通过静态工厂实例化
		Beanclass bean2=(Beanclass) appcon.getBean("staticbean");
		//System.out.println(bean2.Message);
		//通过实例工厂实例化
		Beanclass bean3=(Beanclass) appcon.getBean("instancebean");
	}
}


 7486
7486

 被折叠的 条评论
为什么被折叠?
被折叠的 条评论
为什么被折叠?
 到【灌水乐园】发言


