


 本文详细介绍如何在Eclipse中使用Gradle构建Netty项目,包括环境配置、依赖管理、项目搭建及首个实例运行过程,适合初学者快速上手。
环境安装配置:
笔者使用的是eclipse ,用的gradle 构建管理项目
eclipse安装gradle 插件以及gradle 安装配置自行百度啦,这里不做过多的介绍
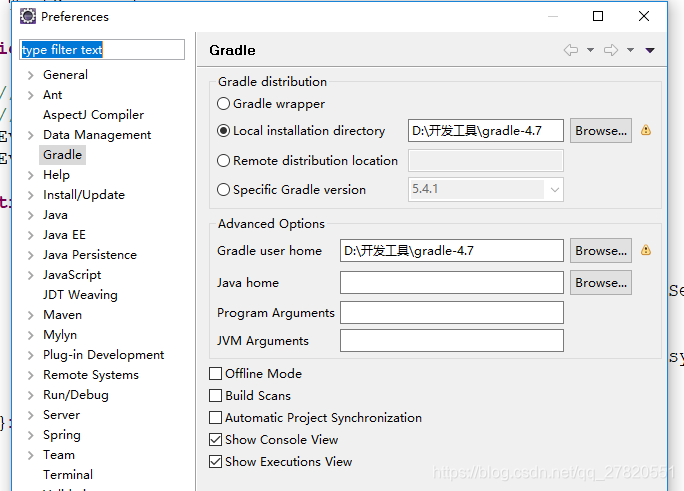
配置好之后,然后再新建一个gradle 项目,这里不做截图
然后在项目中build.gradle 文件,主要的依赖包管理在这个文件中写配置信息
/*
 * This file was generated by the Gradle 'init' task.
 *
 * This generated file contains a sample Java Library project to get you started.
 * For more details take a look at the Java Libraries chapter in the Gradle
 * user guide available at https://docs.gradle.org/4.7/userguide/java_library_plugin.html
 */

plugins {
    // Apply the java-library plugin to add support for Java Library
    id 'java-library'
}

dependencies {
    // This dependency is exported to consumers, that is to say found on their compile classpath.
    api 'org.apache.commons:commons-math3:3.6.1'

    // This dependency is used internally, and not exposed to consumers on their own compile classpath.
    implementation 'com.google.guava:guava:23.0'

    // Use JUnit test framework
    testImplementation 'junit:junit:4.12'
    compile(
    	"io.netty:netty-all:4.1.10.Final"
    )
}

// In this section you declare where to find the dependencies of your project
repositories {
    // Use jcenter for resolving your dependencies.
    // You can declare any Maven/Ivy/file repository here.
    mavenCentral()
}
这里将仓库改为mavenCentral()
引入了 io.netty:netty-all:4.1.10.Final 这个包,这是一个完整的netty 4.1.10包,里面包含了该版本所有的依赖文件,详情可以去GitHub上或者去官网上下载该包查看里面的具体结构,不做过多的介绍,那么到此为止开始上代码
TestServer.class :这个类的作用主要是启动服务,接收链接,并监听处理自定义处理器
public class TestServer {

		public static void main(String[] args) throws Exception {

			//NIOEventGroup一个死循环  类似Tomcat  不断监听客户端的请求,然后给出响应
			//bossgroup负责接受连接,然后转发给workergroup进行连接的后续处理
			EventLoopGroup bossGroup = new NioEventLoopGroup();
			EventLoopGroup workerGroup = new NioEventLoopGroup();

			try{
				//用来启动服务
				ServerBootstrap serverBootStrap = new ServerBootstrap();
				//childHandle 是自己的处理器
				serverBootStrap.group(bossGroup, workerGroup).channel(NioServerSocketChannel.class).
				childHandler(new TestServerInitializar());
				//绑定端口
				ChannelFuture channelFuture = serverBootStrap.bind(8899).sync();
				//关闭连接
				channelFuture.channel().closeFuture().sync();
			}finally{
				//关闭
				bossGroup.shutdownGracefully();
				workerGroup.shutdownGracefully();
			}
		}
}
TestServerInitializar.class :初始化器类,初始化通道,在pipeline管道中添加系统的处理器或者自定义处理器,用以类似拦截器,调用处理器中的方法,实现具体的业务逻辑
//初始化器
public class TestServerInitializar extends ChannelInitializer<SocketChannel> {

	@Override
	protected void initChannel(SocketChannel ch) throws Exception {
		//pipeline 管道  相当于拦截器,针对不同的业务有不同的处理方法
		ChannelPipeline pipeline = ch.pipeline();
		pipeline.addLast("httpServerCodec" ,new HttpServerCodec());
		pipeline.addLast("testHttpServerHandler",new TestHttpServerHandle());
	}
}
TestHttpServerHandle.class :实现SimpleChannelInboundHandle 接口,用来实现自己业务逻辑代码,这里是给客户端返回一个Hello world
//自定义处理器
public class TestHttpServerHandle extends SimpleChannelInboundHandler<HttpObject> {
		@Override
		//channelread0是实际获取到请求并给出真正响应的处理方法
		protected void channelRead0(ChannelHandlerContext ctx, HttpObject msg)
				throws Exception {
			// TODO Auto-generated method stub
			if(msg instanceof HttpRequest){
				//定义内容
				ByteBuf content  = Unpooled.copiedBuffer("Hello World", CharsetUtil.UTF_8);
				FullHttpResponse response = new DefaultFullHttpResponse(HttpVersion.HTTP_1_1,
						HttpResponseStatus.OK,content);
				//定义头
				response.headers().set(HttpHeaderNames.CONTENT_TYPE,"text/plain");
				response.headers().set(HttpHeaderNames.CONTENT_LENGTH,content.readableBytes());
				//一定要用writeAndFlush  write方法内容会在缓冲区不会真正写入
				ctx.writeAndFlush(response);
			}
		}
}
自此,启动testServer类,浏览器中输入 http://localhost:8899
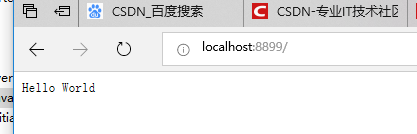
然后控制台没有抛出异常信息 OK了,第一个netty事例程序完美完成,后续再学习各个组件的详细内容及各种API的具体细节,bye!


 1672
1672

 被折叠的 条评论
为什么被折叠?
被折叠的 条评论
为什么被折叠?
 到【灌水乐园】发言


