


 本文详细介绍如何在TensorFlow中构建并训练CNN模型,用于手写数字识别,并演示了模型参数的存储与读取过程,确保模型可以在后续使用中被准确复现。
第一篇学习了CNN网络的构建以及代码的基础结构,第二篇则是实际项目过程中需要的网络模型的存储
先放上存储的代码:
#tf可以认为是全局变量,从该变量为类,从中取input_data变量
import tensorflow.examples.tutorials.mnist.input_data as input_data
import tensorflow as tf
import sys
#读取数据集
mnist = input_data.read_data_sets("MNIST_data/",one_hot=True)
"""
#softmax方法进行训练
#这里是变量的占位符,一般是输入输出使用该部分
x=tf.placeholder(tf.float32,[None,784])
y_=tf.placeholder("float",[None,10])
#定义参数变量
W=tf.Variable(tf.zeros([784,10]))
b=tf.Variable(tf.zeros([10]))
y=tf.nn.softmax(tf.matmul(x,W)+b)
#评价函数
cross_entropy=-tf.reduce_sum(y_*tf.log(y))
train_step=tf.train.GradientDescentOptimizer(0.01).minimize(cross_entropy)
#启动模型,Session建立这样一个对象,然后指定某种操作,并实际进行该步
init=tf.initialize_all_variables()
sess=tf.Session()
sess.run(init)
#数据读取部分
for i in range(1000):
batch_xs, batch_ys = mnist.train.next_batch(50)
#run第一个参数是fetch,可以是tensor也可以是Operation,第二个feed_dict是替换tensor的值
sess.run(train_step, feed_dict={x: batch_xs, y_: batch_ys})
print(batch_xs,batch_ys,i)
correct_prediction = tf.equal(tf.argmax(y,1), tf.argmax(y_,1))
accuracy = tf.reduce_mean(tf.cast(correct_prediction, "float"))
print (sess.run(accuracy, feed_dict={x: mnist.test.images, y_: mnist.test.labels}))
"""
#这里用CNN方法进行训练
#函数定义部分
def weight_variable(shape):
initial=tf.truncated_normal(shape,stddev=0.1)#随机权重赋值,不过truncated_normal代表如果是2倍标准差之外的结果重新选取该值
return tf.Variable(initial)
def bias_variable(shape):
initial=tf.constant(0.1,shape=shape)#偏置项
return tf.Variable(initial)
def conv2d(x,W):
return tf.nn.conv2d(x,W,strides=[1,1,1,1],padding='SAME')#SAME表示输出补边,这里输出与输入尺寸一致
def max_pool_2x2(x):
return tf.nn.max_pool(x,ksize=[1,2,2,1],strides=[1,2,2,1],padding='SAME')#ksize代表池化范围的大小,stride为扫描步长
# 这里是变量的占位符,一般是输入输出使用该部分
x=tf.placeholder(tf.float32,[None,784])
y_=tf.placeholder("float",[None,10])
x_image=tf.reshape(x,[-1,28,28,1])#-1表示自动计算该维度
#建立第一层
W_conv1=weight_variable([5,5,1,32])
b_conv1=bias_variable([32])
h_conv1=tf.nn.relu(conv2d(x_image,W_conv1)+b_conv1)
h_pool1=max_pool_2x2(h_conv1)
#第二层
W_conv2=weight_variable([5,5,32,64])
b_conv2=bias_variable([64])
h_conv2=tf.nn.relu(conv2d(h_pool1,W_conv2)+b_conv2)
h_pool2=max_pool_2x2(h_conv2)
#第三层,而且这里是全连接层
W_fc1=weight_variable([7*7*64,1024])
b_fc1=bias_variable([1024])
h_pool2_flat=tf.reshape(h_pool2,[-1,7*7*64])
h_fc1=tf.nn.relu(tf.matmul(h_pool2_flat,W_fc1)+b_fc1)
#dropout,注意这里也是有一个输入参数的,和x以及y一样
keep_prob=tf.placeholder(tf.float32)
h_fc1_drop=tf.nn.dropout(h_fc1,keep_prob)
W_fc2=weight_variable([1024,10])
b_fc2=bias_variable([10])
y_conv=tf.nn.softmax(tf.matmul(h_fc1_drop,W_fc2)+b_fc2)
# 评价函数
cross_entropy=-tf.reduce_sum(y_*tf.log(y_conv))
train_step=tf.train.AdamOptimizer(1e-4).minimize(cross_entropy)
correct_prediction=tf.equal(tf.argmax(y_conv,1),tf.argmax(y_,1))
accuracy=tf.reduce_mean(tf.cast(correct_prediction,tf.float32))
# 启动模型,Session建立这样一个对象,然后指定某种操作,并实际进行该步
init=tf.initialize_all_variables()
sess=tf.Session()
sess.run(init)
#数据读取部分
for i in range(1000):
batch_xs, batch_ys = mnist.train.next_batch(50)#这里貌似是代表读取50张图像数据
#run第一个参数是fetch,可以是tensor也可以是Operation,第二个feed_dict是替换tensor的值
'''
if i % 10 == 0:
train_accuracy = accuracy.eval(feed_dict={x: batch_xs, y_: batch_ys, keep_prob: 0.5})
print("step:%d,accuracy:%g" % (i, train_accuracy))
'''
sess.run(train_step, feed_dict={x: batch_xs, y_: batch_ys, keep_prob: 0.5})#sess.run第一个参数是想要运行的位置,一般有train,accuracy,initdeng
#第二个参数feed_dict,一般是输入参数,该代码里有x,y以及drop的参数
if i%20==0 :
print(i)
print("train accuracy:%g"%sess.run(accuracy, feed_dict={x: batch_xs, y_: batch_ys, keep_prob: 0.5}))
print("test accuracy:%g"%sess.run(accuracy, feed_dict={x: mnist.test.images, y_: mnist.test.labels, keep_prob: 1}))
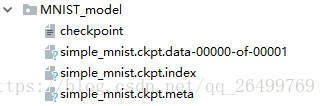
#保存模型
model_path='MNIST_model/simple_mnist.ckpt'
saver=tf.train.Saver()
saver_path=saver.save(sess,model_path)
print("model saved in file:", saver_path)
保存的代码实际上只有后半部分,前面的代码是第一篇中讲到的。第一篇链接:https://blog.youkuaiyun.com/qq_26499769/article/details/82896046
运行代码的结果如下:
读取的代码如下:
import tensorflow.examples.tutorials.mnist.input_data as input_data
import tensorflow as tf
import sys
#读取数据集
mnist = input_data.read_data_sets("MNIST_data/",one_hot=True)


#前半部分主要以网络的构建为主
#这里用CNN方法进行训练
#函数定义部分
def weight_variable(shape):
    initial=tf.truncated_normal(shape,stddev=0.1)#随机权重赋值,不过truncated_normal代表如果是2倍标准差之外的结果重新选取该值
    return tf.Variable(initial)

def bias_variable(shape):
    initial=tf.constant(0.1,shape=shape)#偏置项
    return tf.Variable(initial)

def conv2d(x,W):
    return tf.nn.conv2d(x,W,strides=[1,1,1,1],padding='SAME')#SAME表示输出补边,这里输出与输入尺寸一致

def max_pool_2x2(x):
    return tf.nn.max_pool(x,ksize=[1,2,2,1],strides=[1,2,2,1],padding='SAME')#ksize代表池化范围的大小,stride为扫描步长

# 这里是变量的占位符,一般是输入输出使用该部分
x=tf.placeholder(tf.float32,[None,784])
y_=tf.placeholder("float",[None,10])
x_image=tf.reshape(x,[-1,28,28,1])#-1表示自动计算该维度
#建立第一层
W_conv1=weight_variable([5,5,1,32])
b_conv1=bias_variable([32])
h_conv1=tf.nn.relu(conv2d(x_image,W_conv1)+b_conv1)
h_pool1=max_pool_2x2(h_conv1)
#第二层
W_conv2=weight_variable([5,5,32,64])
b_conv2=bias_variable([64])
h_conv2=tf.nn.relu(conv2d(h_pool1,W_conv2)+b_conv2)
h_pool2=max_pool_2x2(h_conv2)


#第三层,而且这里是全连接层
W_fc1=weight_variable([7*7*64,1024])
b_fc1=bias_variable([1024])

h_pool2_flat=tf.reshape(h_pool2,[-1,7*7*64])
h_fc1=tf.nn.relu(tf.matmul(h_pool2_flat,W_fc1)+b_fc1)
#dropout,注意这里也是有一个输入参数的,和x以及y一样
keep_prob=tf.placeholder(tf.float32)
h_fc1_drop=tf.nn.dropout(h_fc1,keep_prob)

W_fc2=weight_variable([1024,10])
b_fc2=bias_variable([10])
y_conv=tf.nn.softmax(tf.matmul(h_fc1_drop,W_fc2)+b_fc2)


# 评价函数
cross_entropy=-tf.reduce_sum(y_*tf.log(y_conv))
train_step=tf.train.AdamOptimizer(1e-4).minimize(cross_entropy)
correct_prediction=tf.equal(tf.argmax(y_conv,1),tf.argmax(y_,1))
accuracy=tf.reduce_mean(tf.cast(correct_prediction,tf.float32))


# 启动模型,Session建立这样一个对象,然后指定某种操作,并实际进行该步

sess=tf.Session()

#后半部分,进行参数的下载
#模型下载,(新人,可能理解错误,网络还是需要先定义好,然后进行参数的下载,对于自己的网络这样的方法没有问题,但是他人的网络在不知道具体的网络时,没办法通过下载去复现网络模型)
saver=tf.train.Saver()
saver.restore(sess,"MNIST_model/simple_mnist.ckpt")
print("test accuracy:%g"%sess.run(accuracy, feed_dict={x: mnist.test.images, y_: mnist.test.labels, keep_prob: 1}))
读取代码也只有最后的一部分,运行结果如下:

这是之前CNN的训练结果,可以看到完整的下载了参数。
有一个说明的很好的教程:https://www.bilibili.com/video/av16001891/?p=29


 1035
1035

 被折叠的 条评论
为什么被折叠?
被折叠的 条评论
为什么被折叠?
 到【灌水乐园】发言


