


springcloud配置管理中心可以读取其他服务器或者svn或者git上面的配置文件,
为什么要用配置管理中心?
1:实现配置集中管理
2:出于安全考虑,我们一个大项目很难说全部都是由一批人完成的,难免会有人员更换,作为程序员的话走习惯将代码带走,因为代码也是我们程序员的财富,但是这样会造成安全隐患,如果统一读取一个地址的配置文件,开发人员只知道业务代码那安全率就高得多
好了,废话说了这么多,接下来就在配置一个
还是用之前的代码(文字结尾有源码地址)
首先,我们还是先创建一个module,取名为config-service,在创建一个取名config-1 ,
项目结构如下
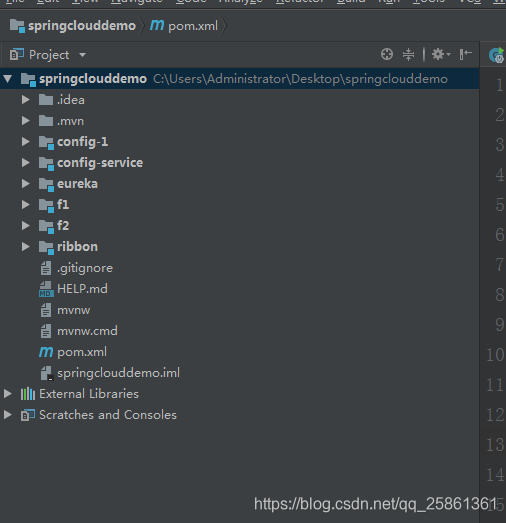
当然,其实配置中心用不到之前的项目,配置中心是不需要注册的,这里只是为了把代码整合到一起
首先,我们修改config-service项目的pom文件,添加如下依赖,
   <dependency>
            <groupId>org.springframework.cloud</groupId>
            <artifactId>spring-cloud-config-server</artifactId>
        </dependency>
在启动文件加入@EnableConfigServer,这个注解告诉spring这是我们的配置项目
代码如下
package org.configservice.demo;

import org.springframework.boot.SpringApplication;
import org.springframework.boot.autoconfigure.SpringBootApplication;
import org.springframework.cloud.config.server.EnableConfigServer;

@SpringBootApplication
@EnableConfigServer
public class ConfigServiceApplication {

    public static void main(String[] args) {
        SpringApplication.run(ConfigServiceApplication.class, args);
    }

}
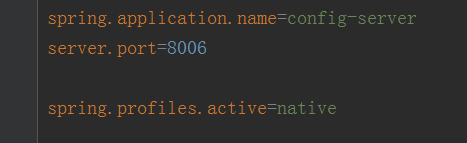
修改配置文件,如图所示
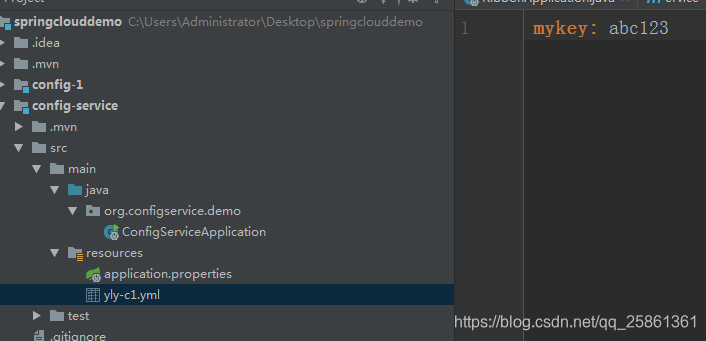
在添加一个配置文件,取名yly-c1.yml,这里个名字无所谓,我们在里面添加一个配置,如图所示
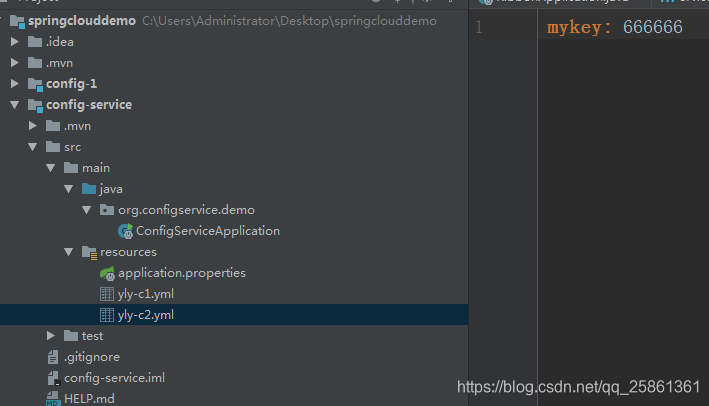
我们在添加一个配置文件,取名yly-c2.yml,同样添加一个配置,如图
然后,我们在config-1项目添加上springcloud配置客户机的依赖
 <dependency>
            <groupId>org.springframework.cloud</groupId>
            <artifactId>spring-cloud-starter-config</artifactId>
            <version>2.1.2.RELEASE</version>
        </dependency>
然后我们修改一下启动文件,加入2个注解
@RefreshScope:这个注解告诉spring,我们的资源需要刷新
@RestController:这个注解是Controller
我们在添加一个接口,代码如下
package org.config1.demo;

import org.springframework.beans.factory.annotation.Value;
import org.springframework.boot.SpringApplication;
import org.springframework.boot.autoconfigure.SpringBootApplication;
import org.springframework.cloud.context.config.annotation.RefreshScope;
import org.springframework.web.bind.annotation.RequestMapping;
import org.springframework.web.bind.annotation.RequestMethod;
import org.springframework.web.bind.annotation.RestController;

@SpringBootApplication
@RefreshScope
@RestController
public class Config1Application {

    public static void main(String[] args) {
        SpringApplication.run(Config1Application.class, args);
    }

    @Value("${mykey}")
    private String mykey;

    @RequestMapping(value = "/getmykey" ,method = RequestMethod.GET)
    public String getmykey() {
        return "mykey="+mykey ;
    }
}
我们在加入一个配置文件,取名bootstrap.yml(这里必须叫这个名字,这是spring的启动配置文件)配置如下
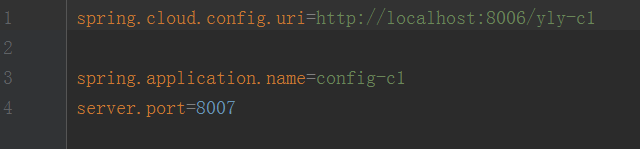
uri:配置文件地址
我们把项目依次启动,config-service===config-1
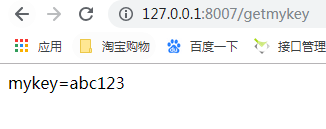
我们测试一下
我们再把config-1项目停止了,然后修改一下配置文件
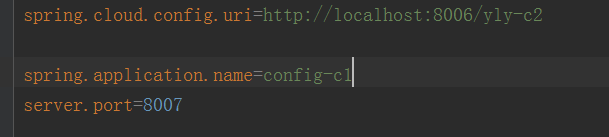
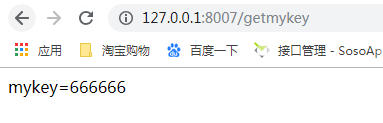
我们把配置文件从c1切换到c2,在测试一下
这样的话我们就可以很轻松的将配置文件和项目分割开来
配套源码:https://gitee.com/ww2510095/spring_cloud_learning


 898
898

 被折叠的 条评论
为什么被折叠?
被折叠的 条评论
为什么被折叠?
 到【灌水乐园】发言


