


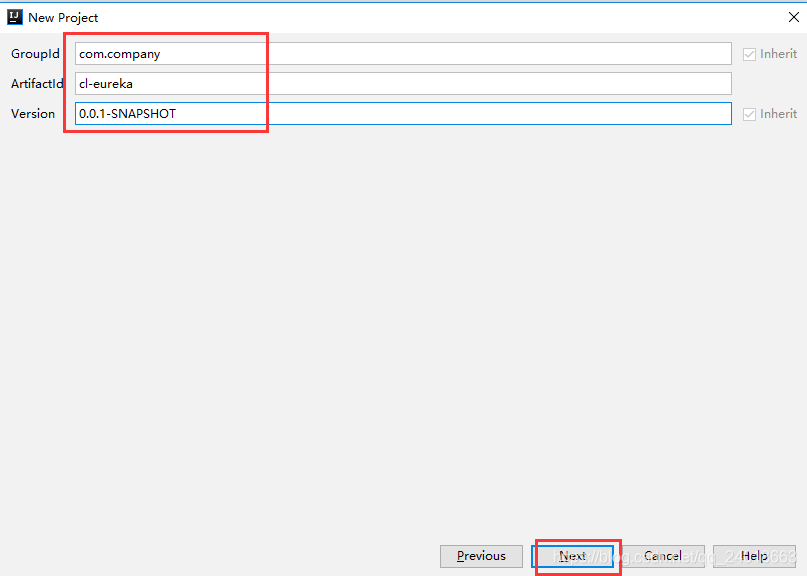
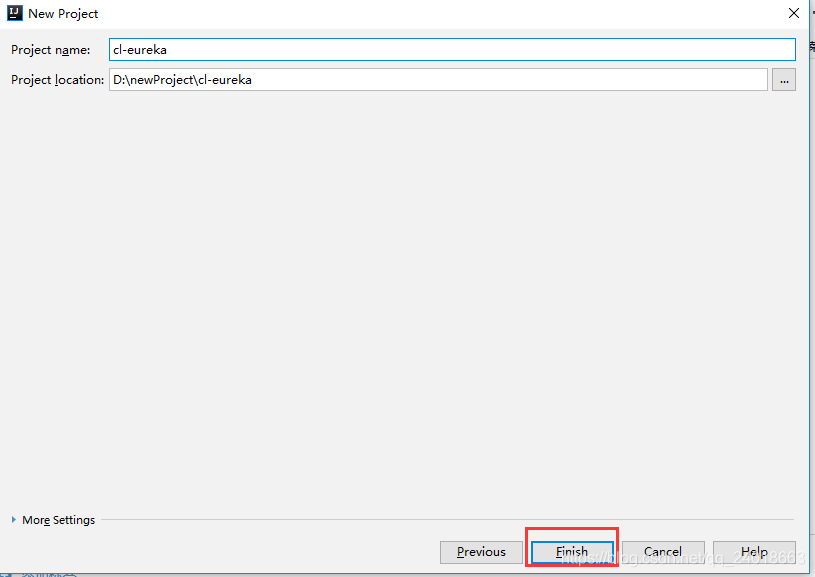
1、创建maven主工程
在其pom文件添加依赖,spring Boot版本为2.0.3.RELEASE,Spring Cloud版本为Finchley.RELEASE。这个pom文件作为父pom文件,起到依赖版本控制的作用,其他module工程继承该pom,不再赘述。
maven主工程pom文件
<?xml version="1.0" encoding="UTF-8"?>
<project xmlns="http://maven.apache.org/POM/4.0.0" xmlns:xsi="http://www.w3.org/2001/XMLSchema-instance"
         xsi:schemaLocation="http://maven.apache.org/POM/4.0.0 http://maven.apache.org/xsd/maven-4.0.0.xsd">
    <modelVersion>4.0.0</modelVersion>

    <groupId>com.company</groupId>
    <artifactId>cl-eureka</artifactId>
    <version>0.0.1-SNAPSHOT</version>
    <packaging>pom</packaging>

    <name>cl-eureka</name>
    <description>Demo project for Spring Boot</description>

    <parent>
        <groupId>org.springframework.boot</groupId>
        <artifactId>spring-boot-starter-parent</artifactId>
        <version>2.0.3.RELEASE</version>
        <relativePath/>
    </parent>


    <properties>
        <project.build.sourceEncoding>UTF-8</project.build.sourceEncoding>
        <project.reporting.outputEncoding>UTF-8</project.reporting.outputEncoding>
        <java.version>1.8</java.version>
        <spring-cloud.version>Finchley.RELEASE</spring-cloud.version>
    </properties>

    <dependencies>
        <dependency>
            <groupId>org.springframework.boot</groupId>
            <artifactId>spring-boot-starter-test</artifactId>
            <scope>test</scope>
        </dependency>
    </dependencies>

    <dependencyManagement>
        <dependencies>
            <dependency>
                <groupId>org.springframework.cloud</groupId>
                <artifactId>spring-cloud-dependencies</artifactId>
                <version>${spring-cloud.version}</version>
                <type>pom</type>
                <scope>import</scope>
            </dependency>
        </dependencies>
    </dependencyManagement>

    <build>
        <plugins>
            <plugin>
                <groupId>org.springframework.boot</groupId>
                <artifactId>spring-boot-maven-plugin</artifactId>
            </plugin>
        </plugins>
    </build>

</project>
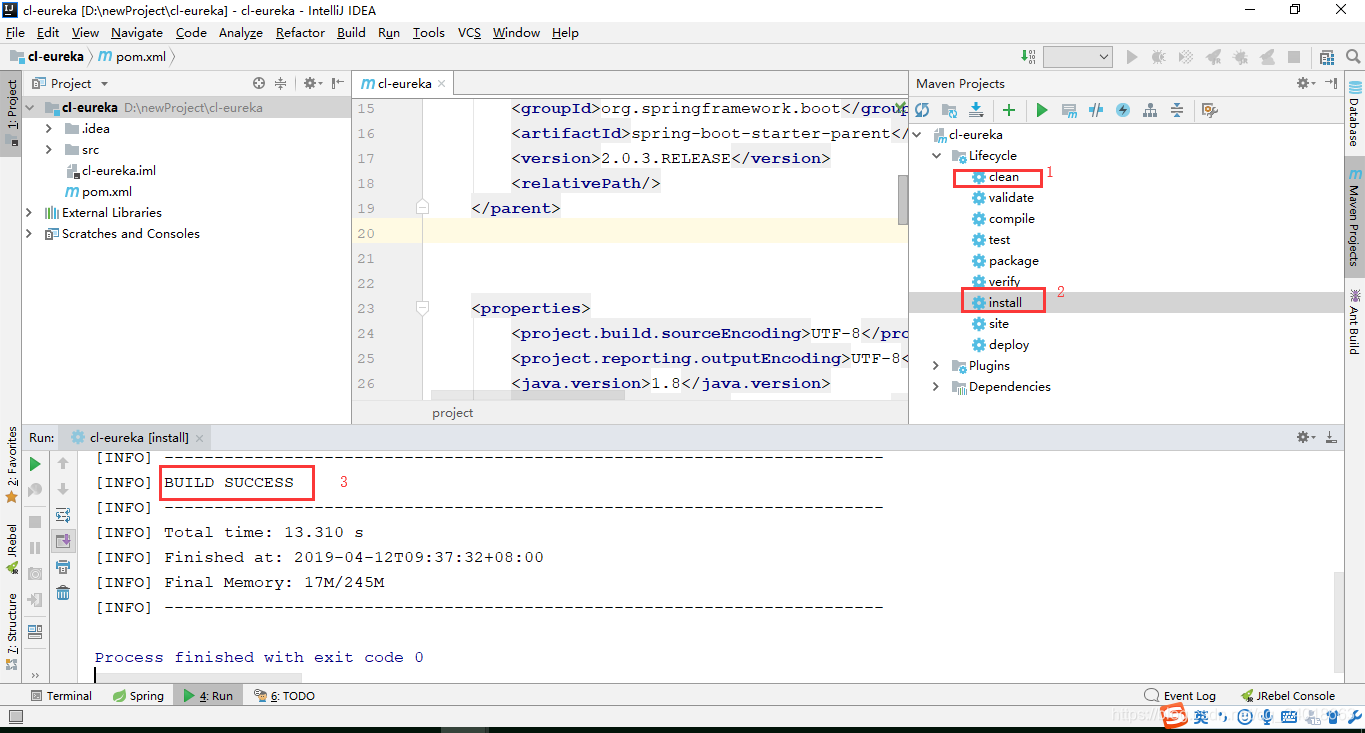
maven主工程创建完毕
===============================分割线===============================
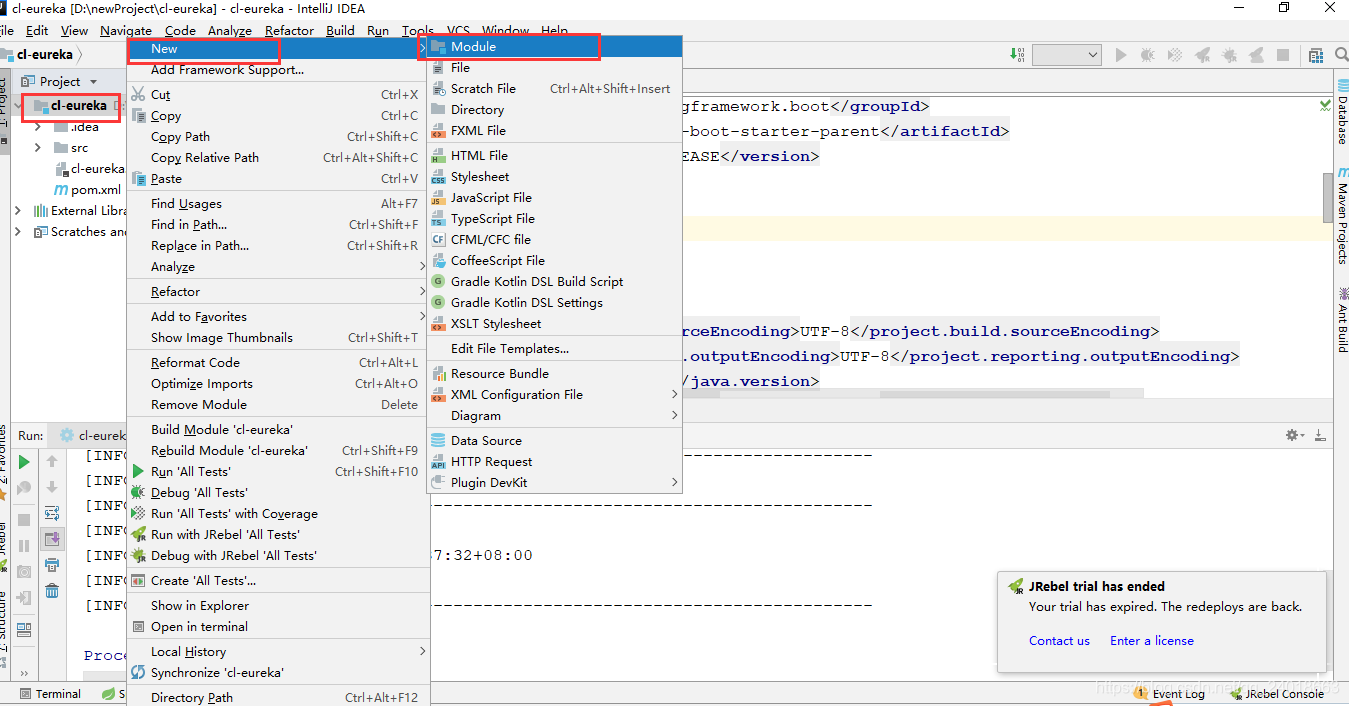
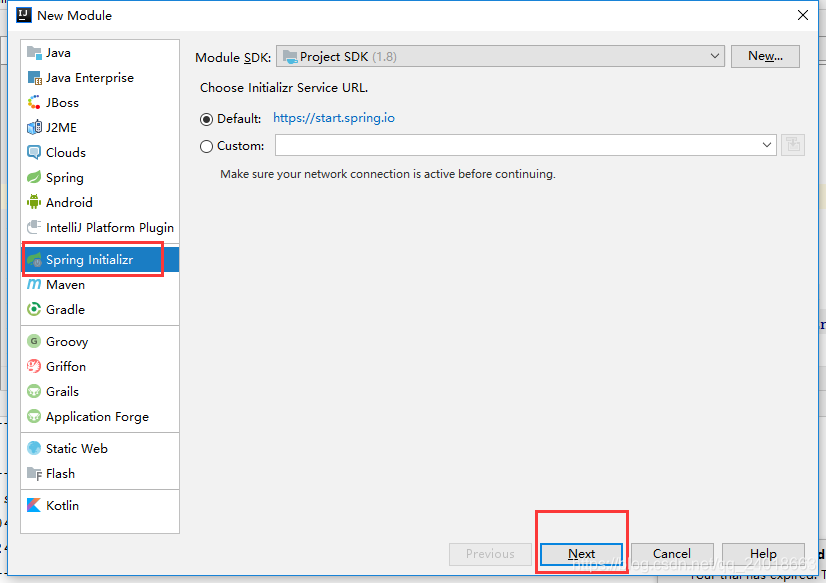
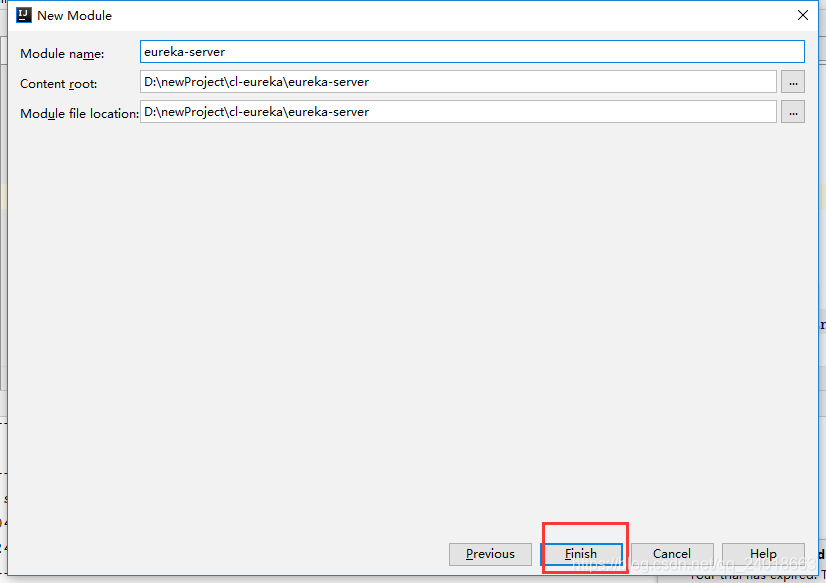
2创建eureka注册中心eureka-server
在maven主工程上点击右键-new-module
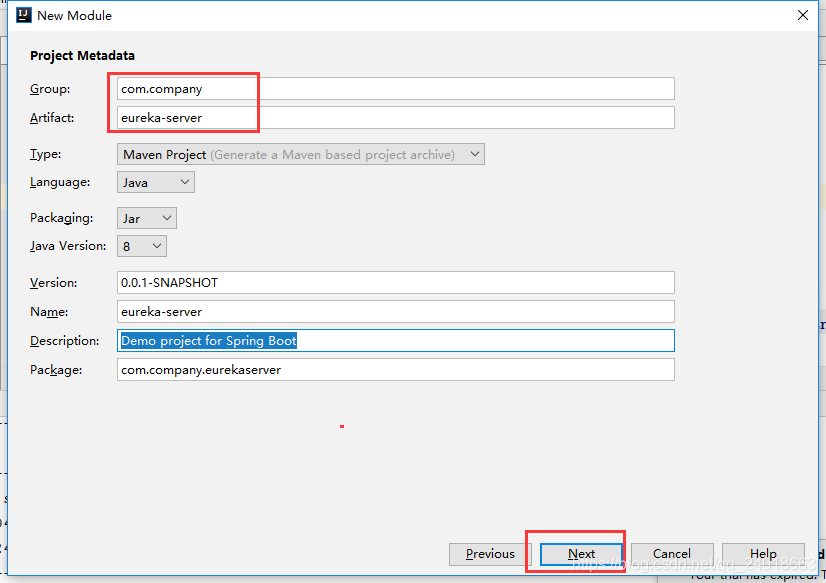
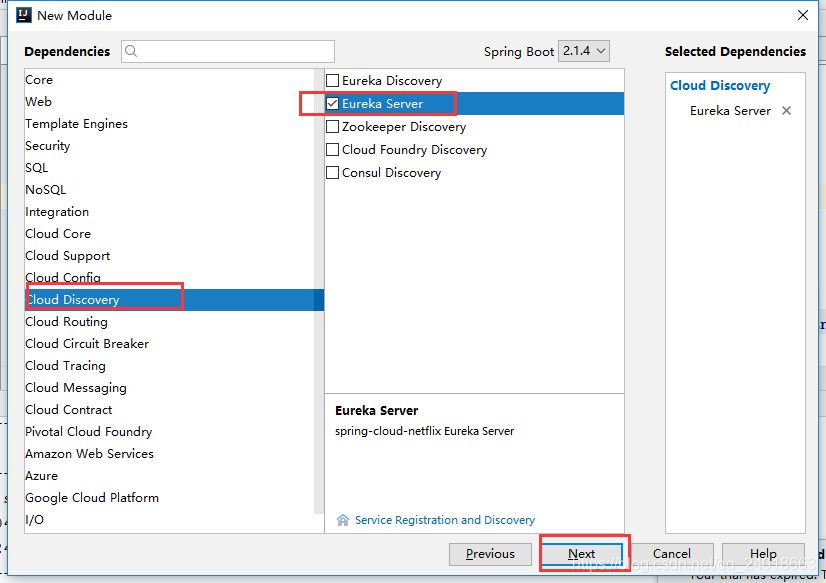
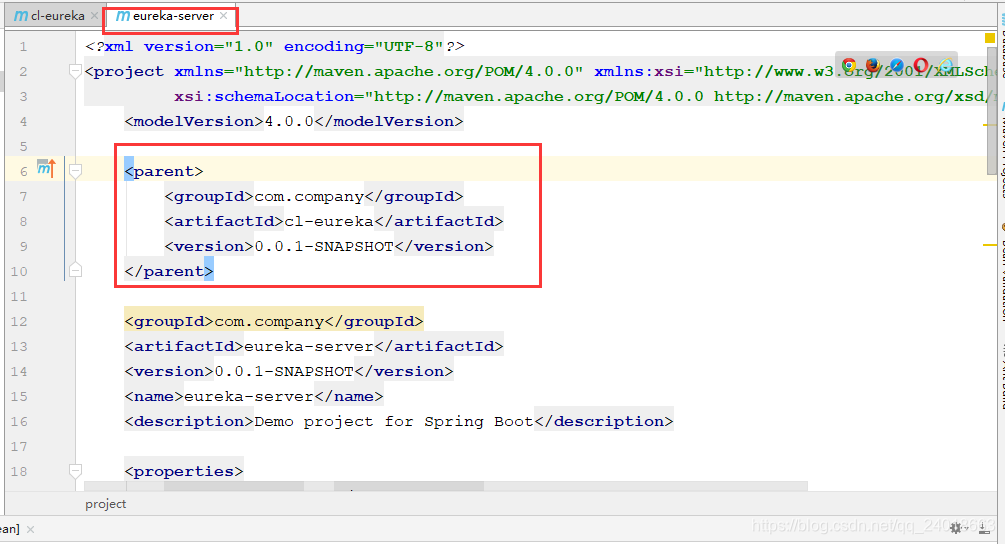
完善eureka-server的pox文件
<?xml version="1.0" encoding="UTF-8"?>
<project xmlns="http://maven.apache.org/POM/4.0.0" xmlns:xsi="http://www.w3.org/2001/XMLSchema-instance"
         xsi:schemaLocation="http://maven.apache.org/POM/4.0.0 http://maven.apache.org/xsd/maven-4.0.0.xsd">
    <modelVersion>4.0.0</modelVersion>

    <groupId>com.company</groupId>
    <artifactId>eureka-server</artifactId>
    <version>0.0.1-SNAPSHOT</version>
    <packaging>jar</packaging>

    <name>eureka-server</name>
    <description>Demo project for Spring Boot</description>

    <parent>
        <groupId>com.company</groupId>
        <artifactId>cl-eureka</artifactId>
        <version>0.0.1-SNAPSHOT</version>
    </parent>

    <dependencies>
        <dependency>
            <groupId>org.springframework.cloud</groupId>
            <artifactId>spring-cloud-starter-netflix-eureka-server</artifactId>
        </dependency>
    </dependencies>

</project>
在主工程的pom文件中添加eureka-server module依赖
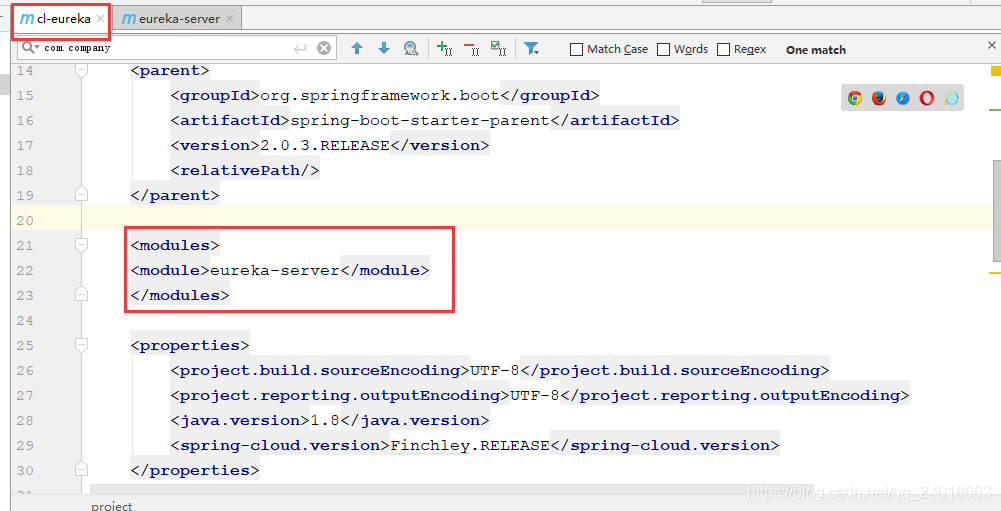
<modules>
<module>eureka-server</module>
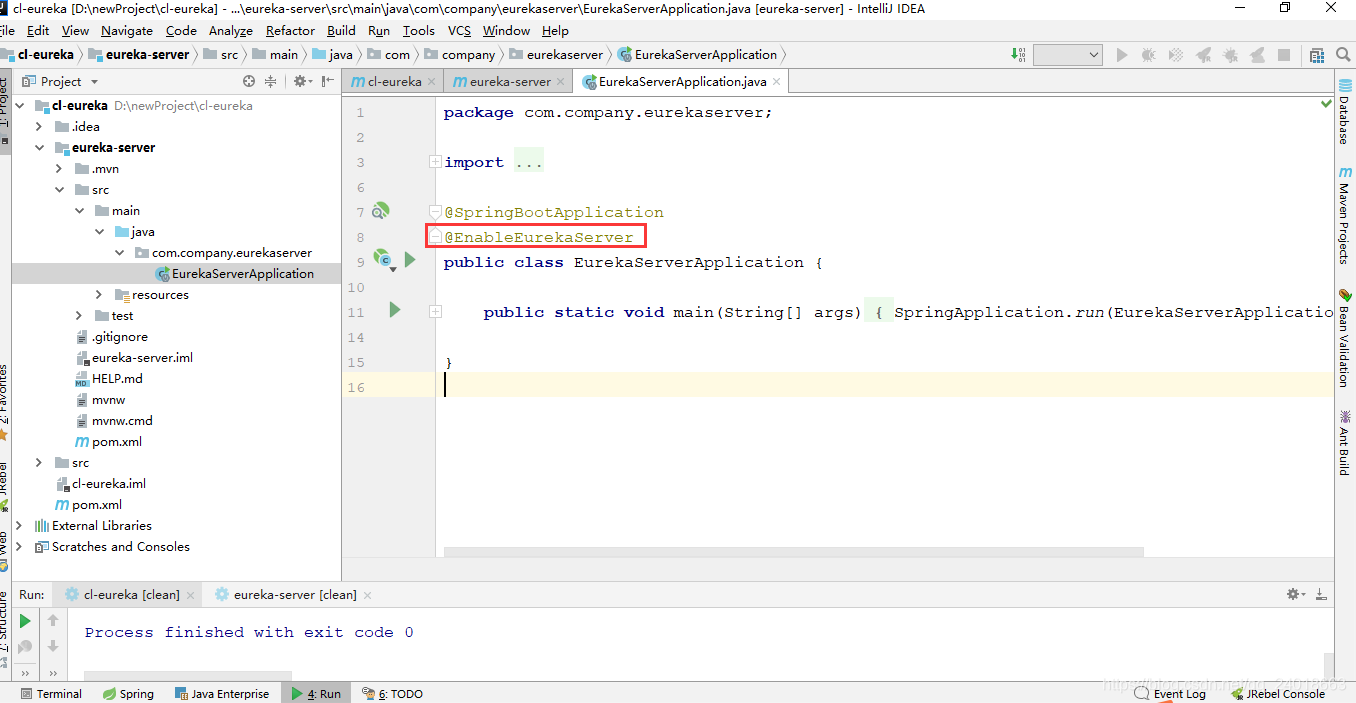
</modules>打开eureka-server的入口函数,添加@EnableEurekaServer注解
新建yml配置文件
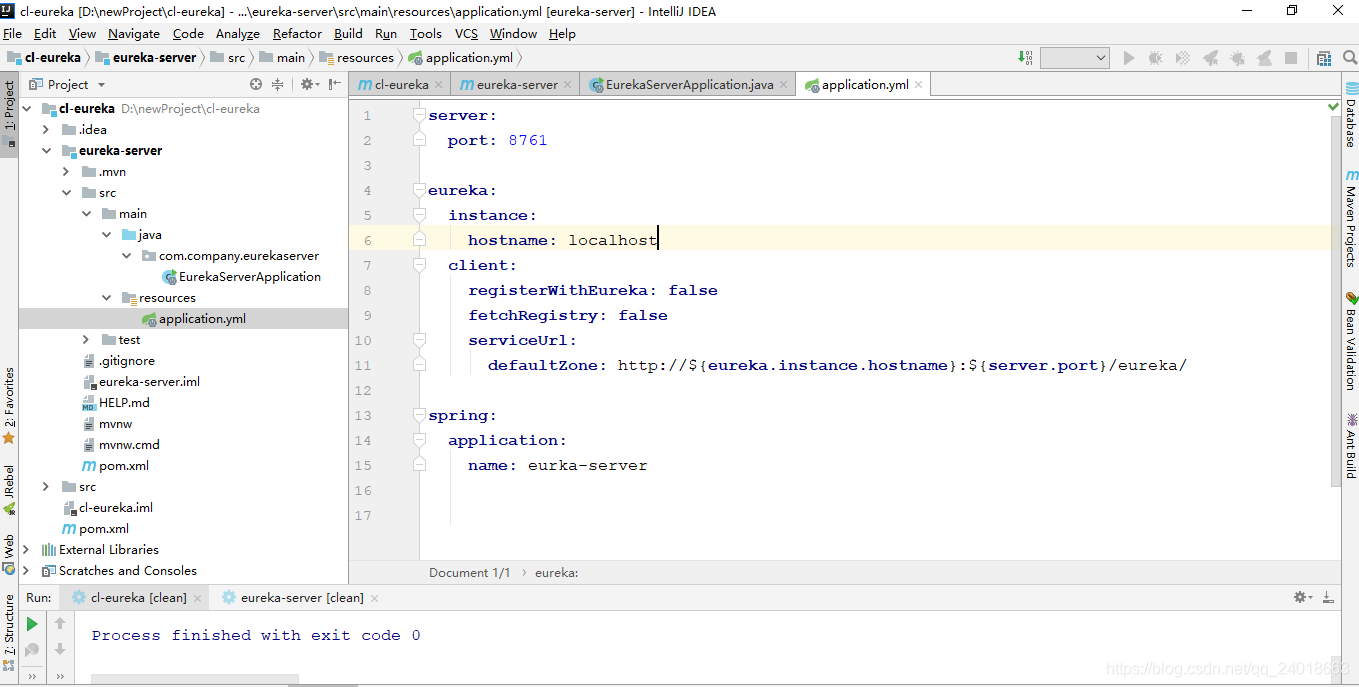
server:
port: 8761
eureka:
instance:
hostname: localhost
client:
registerWithEureka: false
fetchRegistry: false
serviceUrl:
defaultZone: http://${eureka.instance.hostname}:${server.port}/eureka/
spring:
application:
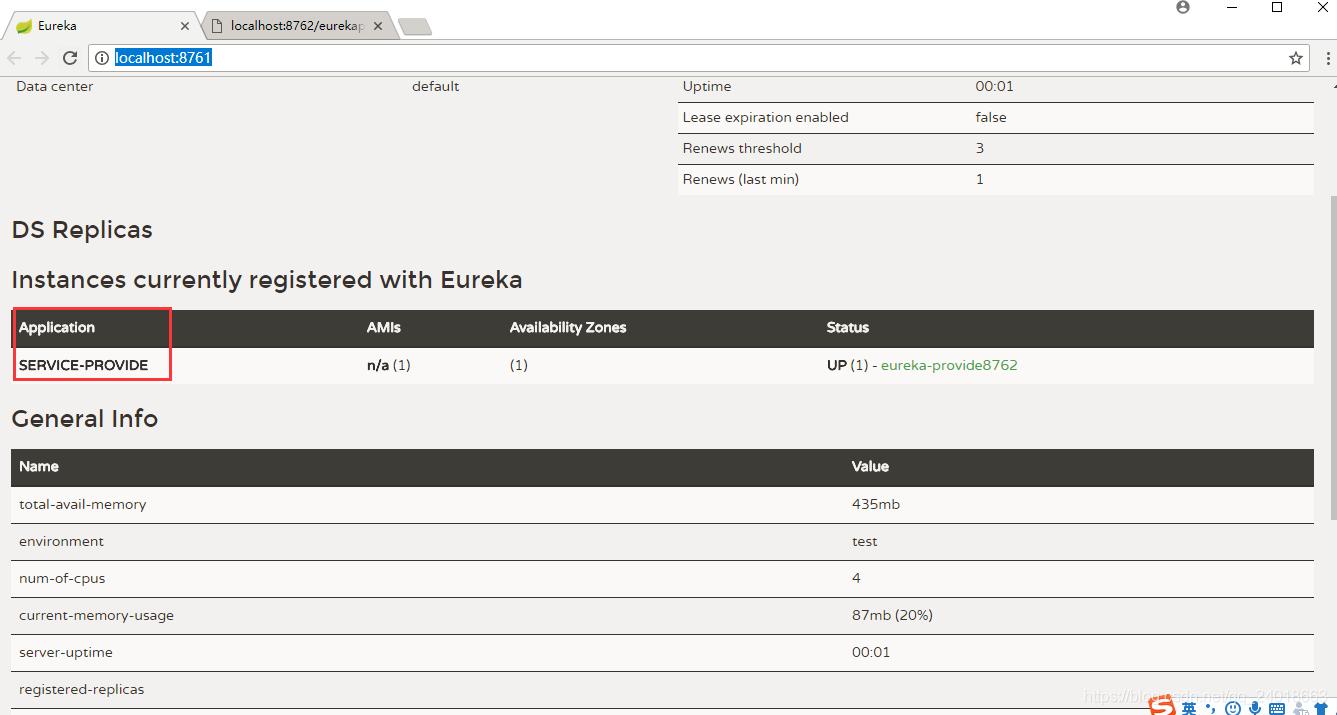
name: eurka-server启动EurekaServerApplication工程,访问 http://localhost:8761
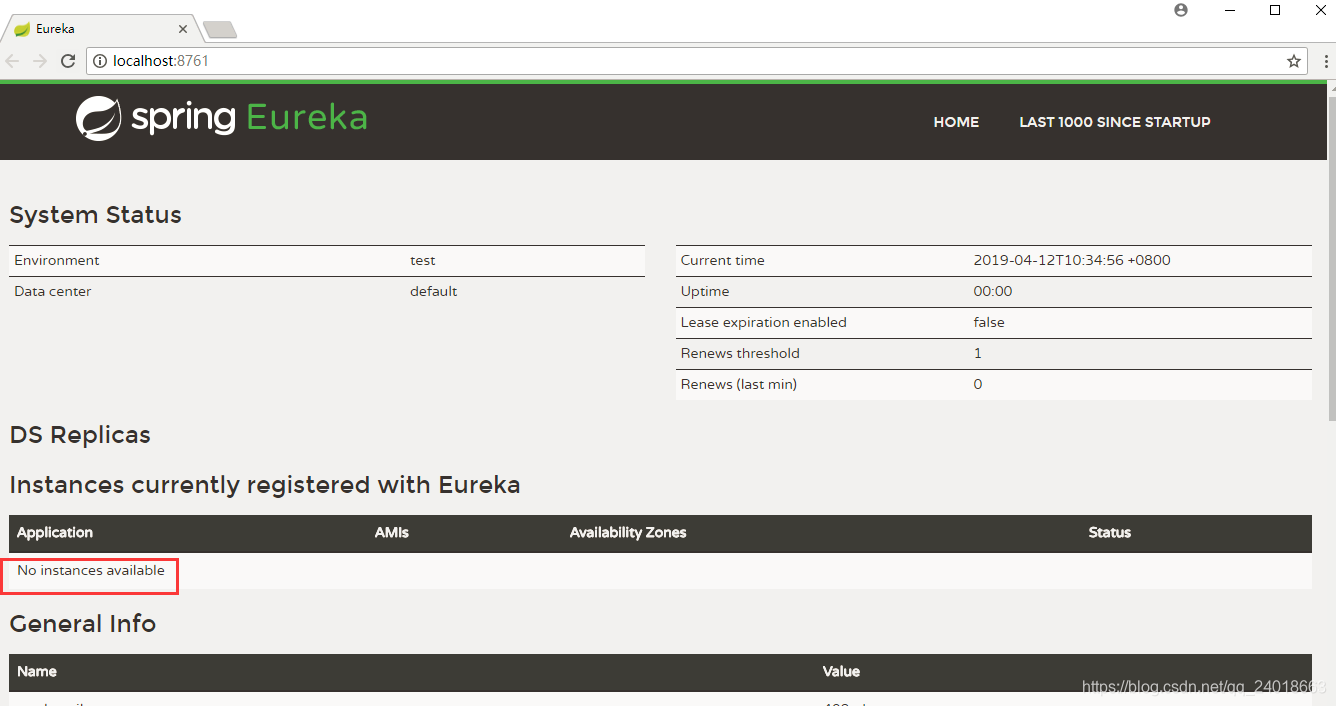
出现此界面,说明eureka-server注册中心搭建完成。
===============================分割线===============================
3搭建服务提供者并注册到eureka中
和搭建eureka-server一样,新建一个module作为服务提供者
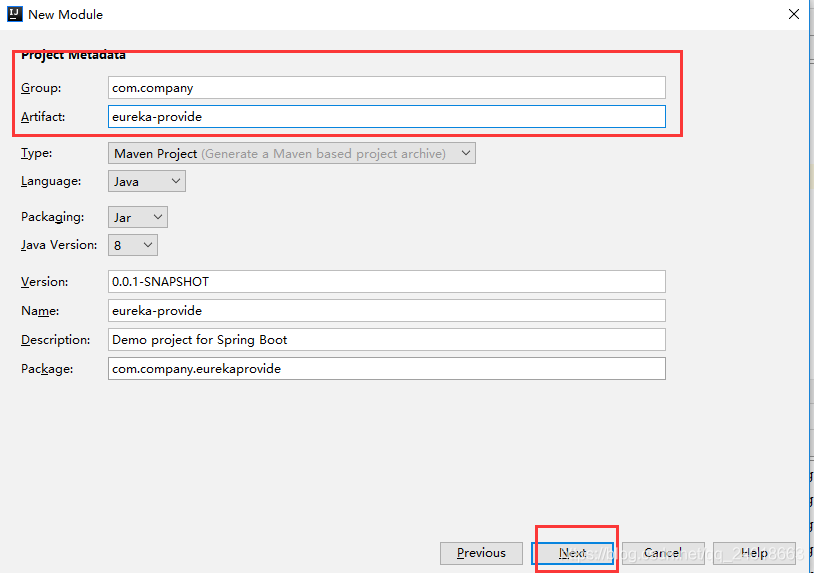
一路next到finish。module新建完毕后,添加eure-provide的pom依赖
<?xml version="1.0" encoding="UTF-8"?>
<project xmlns="http://maven.apache.org/POM/4.0.0" xmlns:xsi="http://www.w3.org/2001/XMLSchema-instance"
         xsi:schemaLocation="http://maven.apache.org/POM/4.0.0 http://maven.apache.org/xsd/maven-4.0.0.xsd">
    <modelVersion>4.0.0</modelVersion>

    <groupId>com.company</groupId>
    <artifactId>service-provide</artifactId>
    <version>0.0.1-SNAPSHOT</version>
    <packaging>jar</packaging>

    <name>service-provide</name>
    <description>Demo project for Spring Boot</description>

    <parent>
        <groupId>org.springframework.boot</groupId>
        <artifactId>spring-boot-starter-parent</artifactId>
        <version>1.5.2.RELEASE</version>
        <relativePath/> <!-- lookup parent from repository -->
    </parent>

    <properties>
        <project.build.sourceEncoding>UTF-8</project.build.sourceEncoding>
        <project.reporting.outputEncoding>UTF-8</project.reporting.outputEncoding>
        <java.version>1.8</java.version>
    </properties>

    <dependencies>
        <dependency>
            <groupId>org.springframework.cloud</groupId>
            <artifactId>spring-cloud-starter-eureka</artifactId>
        </dependency>
        <dependency>
            <groupId>org.springframework.boot</groupId>
            <artifactId>spring-boot-starter-web</artifactId>
        </dependency>

        <dependency>
            <groupId>org.springframework.boot</groupId>
            <artifactId>spring-boot-starter-test</artifactId>
            <scope>test</scope>
        </dependency>
    </dependencies>

    <dependencyManagement>
        <dependencies>
            <dependency>
                <groupId>org.springframework.cloud</groupId>
                <artifactId>spring-cloud-dependencies</artifactId>
                <version>Dalston.RC1</version>
                <type>pom</type>
                <scope>import</scope>
            </dependency>
        </dependencies>
    </dependencyManagement>

    <build>
        <plugins>
            <plugin>
                <groupId>org.springframework.boot</groupId>
                <artifactId>spring-boot-maven-plugin</artifactId>
            </plugin>
        </plugins>
    </build>

    <repositories>
        <repository>
            <id>spring-milestones</id>
            <name>Spring Milestones</name>
            <url>https://repo.spring.io/milestone</url>
            <snapshots>
                <enabled>false</enabled>
            </snapshots>
        </repository>
    </repositories>


</project>
打开maven主工程pom文件,添加该module依赖
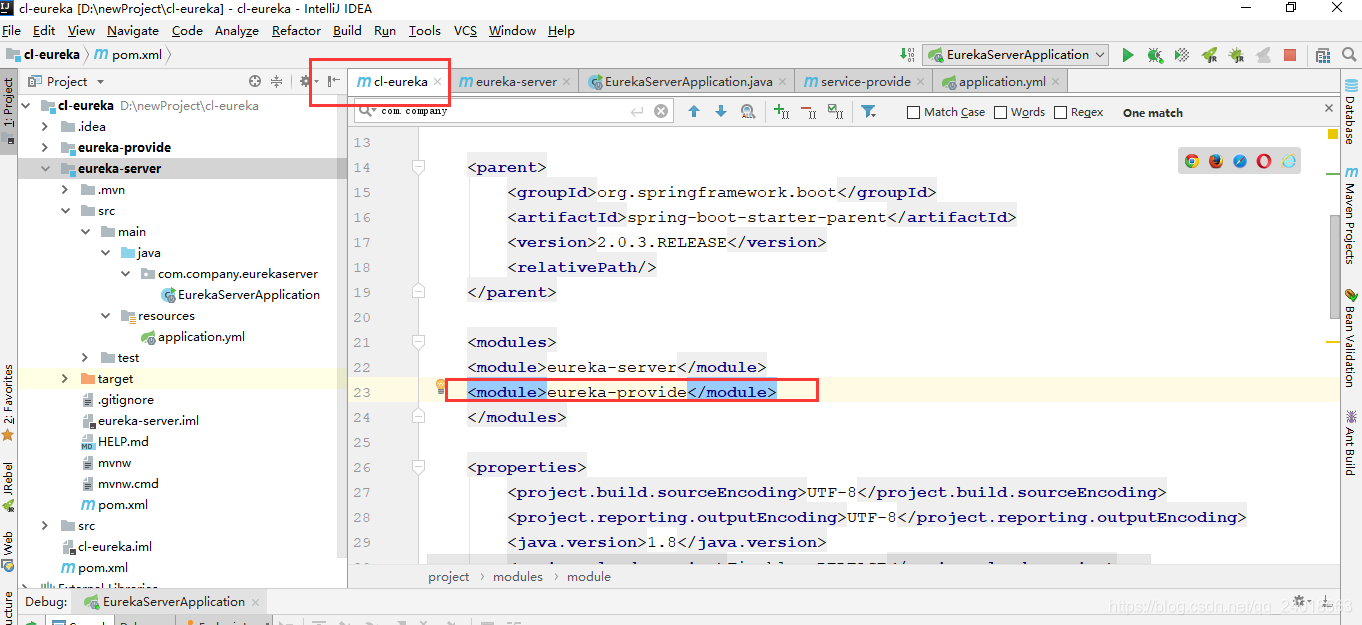
<module>eureka-provide</module>在eureka-provide中添加yml配置文件
server:
  port: 8762
  context-path: /eurekaprovide

spring:
  application:
    name: service-provide

eureka:
  client:
    serviceUrl:
      defaultZone: http://localhost:8761/eureka/
  instance:
    instance-id:  eureka-provide8762  #自定义eureka的注册名称
    prefer-ip-address: true           #访问路径显示IP地址
打开入口函数,在里面写个测试方法,并添加以下注解
@EnableEurekaClient
@RestController
@EnableDiscoveryClient
package com.company.eurekaprovide;
import org.springframework.beans.factory.annotation.Value;
import org.springframework.boot.SpringApplication;
import org.springframework.boot.autoconfigure.SpringBootApplication;
import org.springframework.cloud.client.discovery.EnableDiscoveryClient;
import org.springframework.cloud.netflix.eureka.EnableEurekaClient;
import org.springframework.web.bind.annotation.PathVariable;
import org.springframework.web.bind.annotation.RequestMapping;
import org.springframework.web.bind.annotation.RequestMethod;
import org.springframework.web.bind.annotation.RestController;
@SpringBootApplication
@EnableEurekaClient //本服务启动后会自动注册进eureka服务中
@RestController
@EnableDiscoveryClient //服务发现
public class EurekaProvideApplication {
public static void main(String[] args) {
SpringApplication.run(EurekaProvideApplication.class, args);
}
@Value("${server.port}")
String port;
@RequestMapping(value = "/dept/get/{name}", method = RequestMethod.GET)
public String get(@PathVariable("name") String name)
{
return "hi " + name + " ,i am from port:" + port;
}
}
application中出现SERVICE-PROVIDE,说明服务注册成功
访问http://localhost:8762/eurekaprovide/dept/get/hello,eureka
测试写的方法是否成功
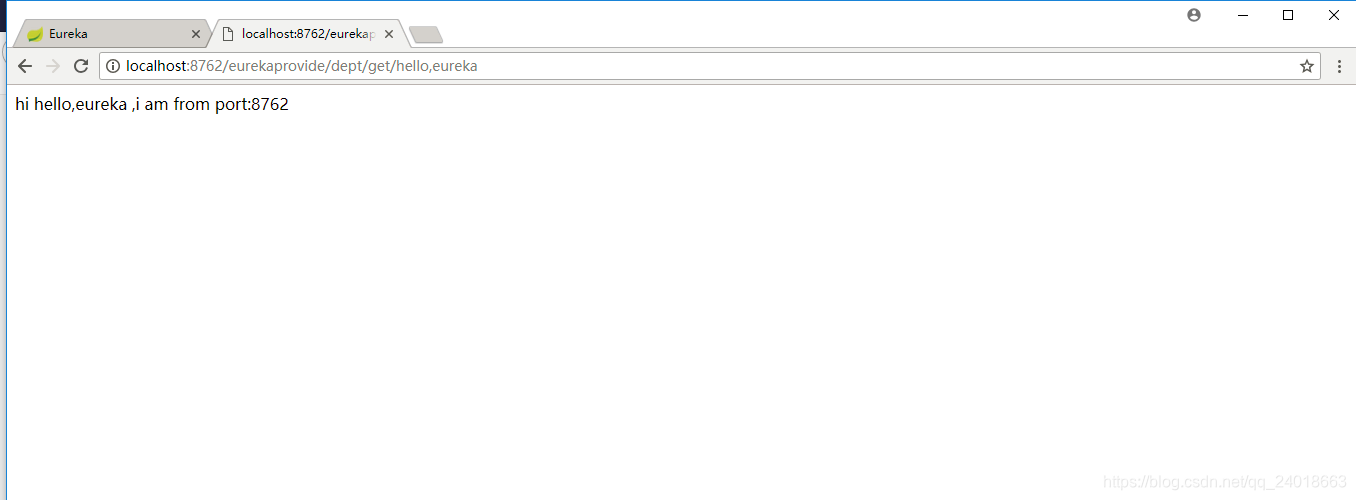
至此,消费者成功注册到eureka中
===============================分割线===============================
4新建消费者,并注入到eureka中
按照同样的步骤新建一个module,为消费者(只说关键步骤)
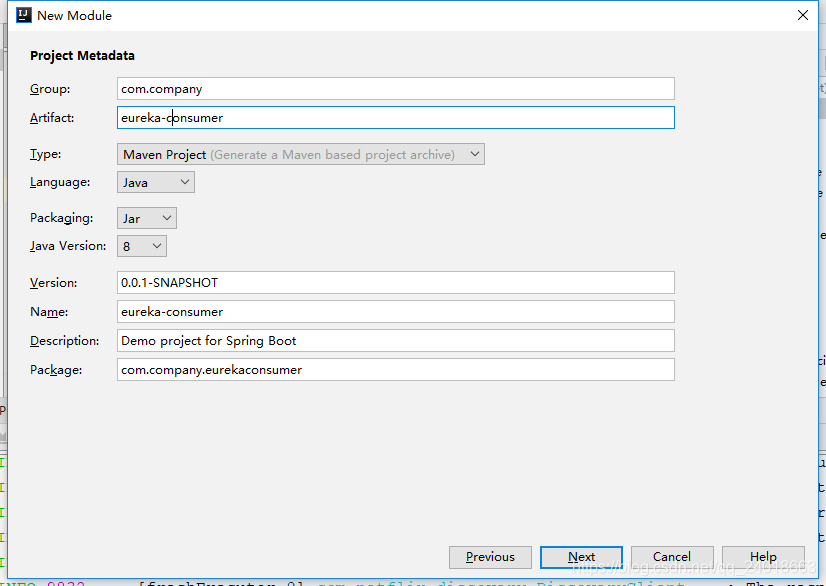
配置pom文件
<?xml version="1.0" encoding="UTF-8"?>
<project xmlns="http://maven.apache.org/POM/4.0.0" xmlns:xsi="http://www.w3.org/2001/XMLSchema-instance"
         xsi:schemaLocation="http://maven.apache.org/POM/4.0.0 http://maven.apache.org/xsd/maven-4.0.0.xsd">
    <modelVersion>4.0.0</modelVersion>

    <groupId>com.company</groupId>
    <artifactId>eureka-consumer</artifactId>
    <version>0.0.1-SNAPSHOT</version>
    <packaging>jar</packaging>

    <name>eureka-consumer</name>
    <description>消费者</description>

    <parent>
        <groupId>org.springframework.boot</groupId>
        <artifactId>spring-boot-starter-parent</artifactId>
        <version>1.5.2.RELEASE</version>
        <relativePath/> <!-- lookup parent from repository -->
    </parent>

    <properties>
        <project.build.sourceEncoding>UTF-8</project.build.sourceEncoding>
        <project.reporting.outputEncoding>UTF-8</project.reporting.outputEncoding>
        <java.version>1.8</java.version>
    </properties>

    <dependencies>
        <dependency>
            <groupId>org.springframework.cloud</groupId>
            <artifactId>spring-cloud-starter-eureka</artifactId>
        </dependency>
        <dependency>
            <groupId>org.springframework.boot</groupId>
            <artifactId>spring-boot-starter-web</artifactId>
        </dependency>

        <dependency>
            <groupId>org.springframework.cloud</groupId>
            <artifactId>spring-cloud-starter-config</artifactId>
        </dependency>

        <dependency>
            <groupId>org.springframework.boot</groupId>
            <artifactId>spring-boot-starter-test</artifactId>
            <scope>test</scope>
        </dependency>
        <dependency>
            <groupId>org.apache.httpcomponents</groupId>
            <artifactId>httpclient</artifactId>
        </dependency>
    </dependencies>

    <dependencyManagement>
        <dependencies>
            <dependency>
                <groupId>org.springframework.cloud</groupId>
                <artifactId>spring-cloud-dependencies</artifactId>
                <version>Dalston.RC1</version>
                <type>pom</type>
                <scope>import</scope>
            </dependency>
        </dependencies>
    </dependencyManagement>

    <build>
        <plugins>
            <plugin>
                <groupId>org.springframework.boot</groupId>
                <artifactId>spring-boot-maven-plugin</artifactId>
            </plugin>
        </plugins>
    </build>

    <repositories>
        <repository>
            <id>spring-milestones</id>
            <name>Spring Milestones</name>
            <url>https://repo.spring.io/milestone</url>
            <snapshots>
                <enabled>false</enabled>
            </snapshots>
        </repository>
    </repositories>


</project>
配置yml文件
server:
  port: 80
  context-path: /consumer

spring:
  application:
    name: consumer

eureka:
  client:
    serviceUrl:
      defaultZone: http://localhost:8761/eureka/
  instance:
    instance-id:  consumer80 #自定义eureka的注册名称
    prefer-ip-address: true #访问路径显示IP地址
主函数添加@EnableEurekaClient注解
package com.company.eurekaconsumer;

import org.springframework.boot.SpringApplication;
import org.springframework.boot.autoconfigure.SpringBootApplication;
import org.springframework.cloud.netflix.eureka.EnableEurekaClient;

@SpringBootApplication
@EnableEurekaClient
public class EurekaConsumerApplication {

    public static void main(String[] args) {
        SpringApplication.run(EurekaConsumerApplication.class, args);
    }

}
在maven主函数中添加module依赖
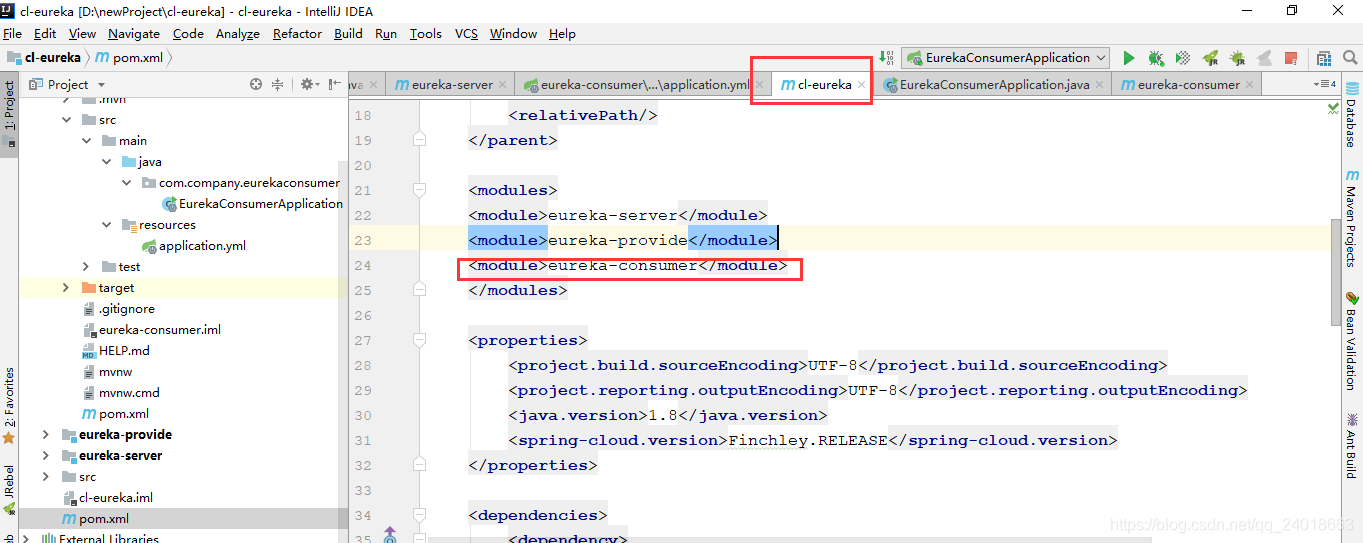
<module>eureka-consumer</module>启动EurekaConsumer工程,访问http://localhost:8761/
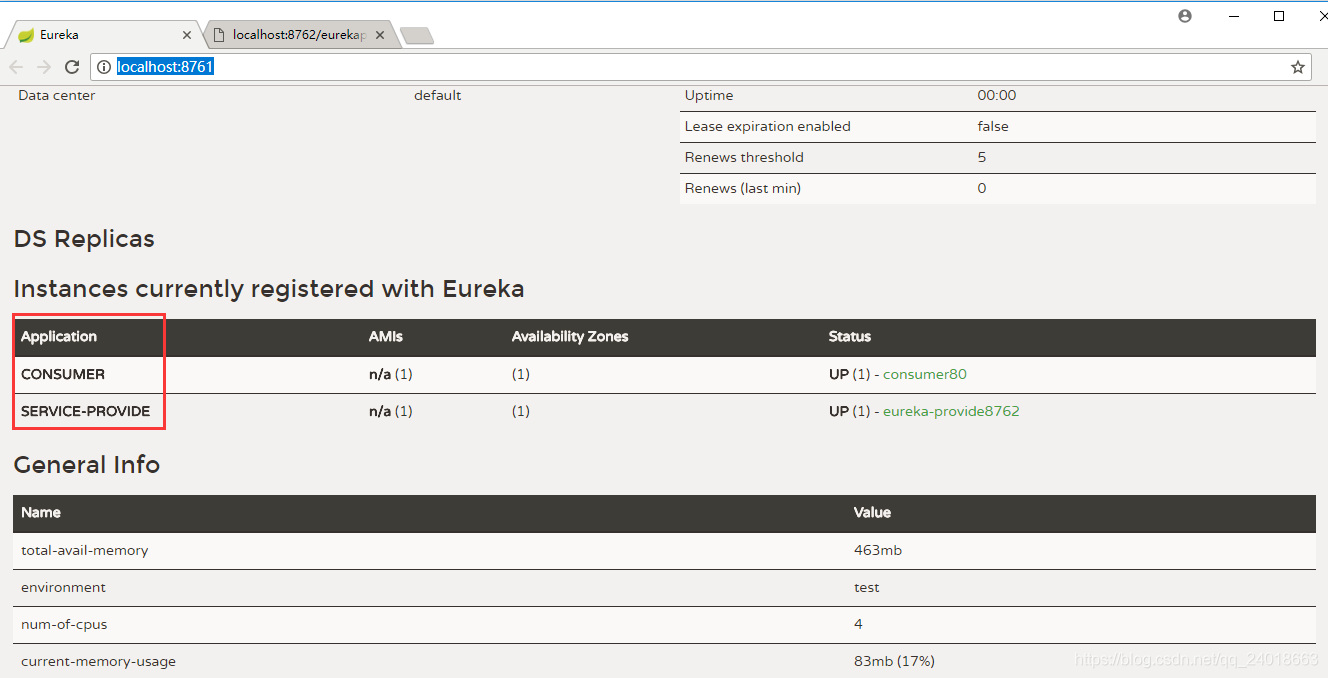
出现选中的服务,说明消费者、提供者都成功注册到eurek中
===============================分割线===============================
5消费者通过eureka中暴露的提供者接口访问服务
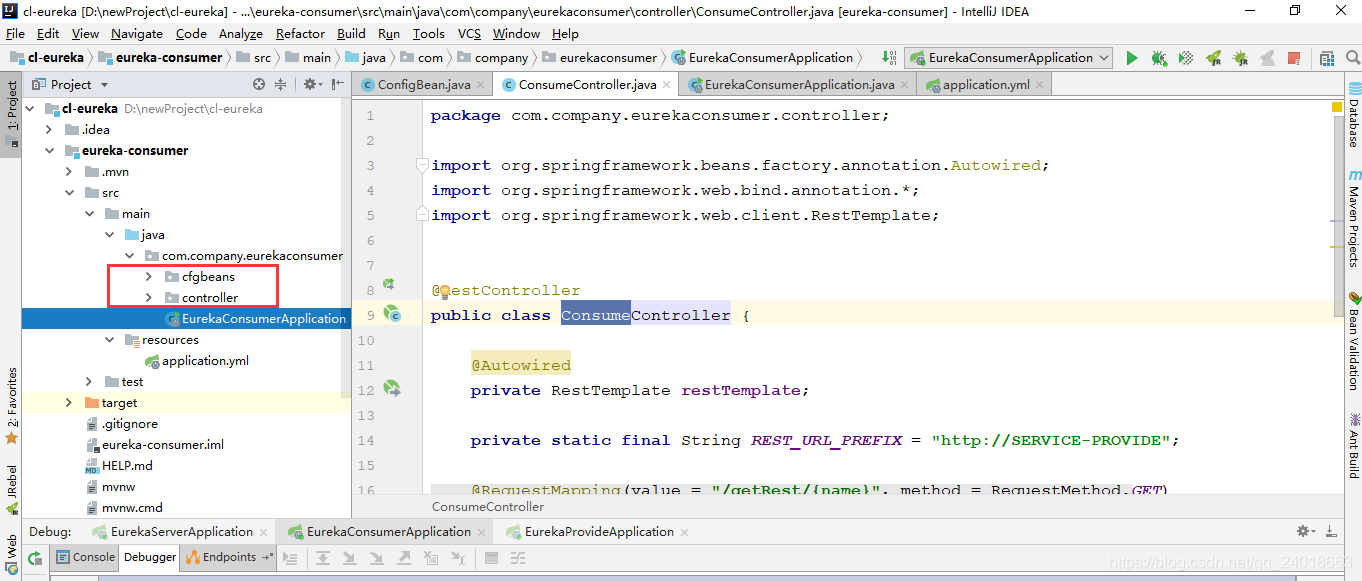
在eurek-consume中新建两个包cfgbeans、controller
在cfgbeans包中新建一个ConfigBean类
配置类:
package com.company.eurekaconsumer.cfgbeans;

import org.springframework.cloud.client.loadbalancer.LoadBalanced;
import org.springframework.context.annotation.Bean;
import org.springframework.context.annotation.Configuration;
import org.springframework.web.client.RestTemplate;

@Configuration
public class ConfigBean //boot -->spring   applicationContext.xml --- @Configuration配置   ConfigBean = applicationContext.xml
{
	@Bean
	@LoadBalanced//Spring Cloud Ribbon是基于Netflix Ribbon实现的一套客户端       负载均衡的工具。
	public RestTemplate getRestTemplate()
	{
		return new RestTemplate();
	}

}
在controller包中新建一个ConsumeController测试类:
把访问地址定义为eureka中暴露的名称http://SERVICE-PROVIDE,通过访问该地址,来测试服务是否畅通
package com.company.eurekaconsumer.controller;

import org.springframework.beans.factory.annotation.Autowired;
import org.springframework.web.bind.annotation.*;
import org.springframework.web.client.RestTemplate;


@RestController
public class ConsumeController {

    @Autowired
    private RestTemplate restTemplate;

    private static final String REST_URL_PREFIX = "http://SERVICE-PROVIDE";

    @RequestMapping(value = "/getRest/{name}", method = RequestMethod.GET)
    public String getRest(@PathVariable("name") String name) {
        return restTemplate.getForObject(  REST_URL_PREFIX+"/eurekaprovide/dept/get/" + name, String.class);
    }


}
重启消费者服务,访问测试类http://localhost/consumer/getRest/hello
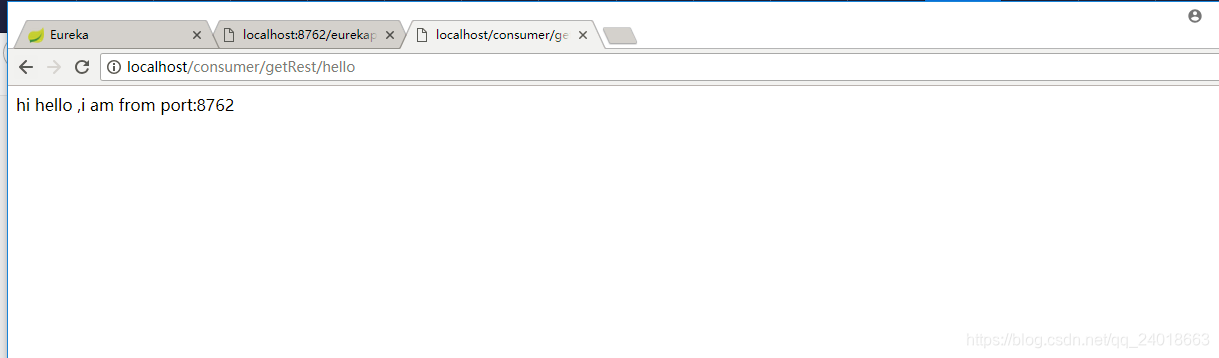
通过访问eureka暴露的接口,可以访问成功
完毕
完整源码下载地址:https://download.youkuaiyun.com/download/qq_24018663/11109732


 被折叠的 条评论
为什么被折叠?
被折叠的 条评论
为什么被折叠?
 到【灌水乐园】发言


