


目录
前言
之前学习搭建了maven私服的插件制作上传,之后联想到vue的包应该也有私服,于是想到做到,根据网上的教程开始搭建,同时记录一下其中的坑点,本次是win10搭建。
一、私服的选择以及前奏
私服搭建选用的是verdaccio,配置简单易上手。我说一下重点,nodejs的安装问题,一开始我是安装在C盘中,这样的话缓存的插件也在C盘,C盘严重不够,所以我卸载后重新装到了其它盘,但是这个没有太大的效果,我们还要手动用命令去改变缓存目录,因为默认是在C:\Users\用户名\AppData\Roaming\npm\node_modules下。
执行命令npm config ls:
C:\Users\Administrator>npm config ls
; "builtin" config from D:\gongju\nodejs\node_modules\npm\npmrc

; prefix = "C:\\Users\\Administrator\\AppData\\Roaming\\npm" ; overridden by user

; "user" config from C:\Users\Administrator\.npmrc

cache = "D:\\gongju\\node\\node_cache"
prefix = "D:\\gongju\\node\\node_global"
registry = "http://www.msq.cool:14873/"

; node bin location = D:\gongju\nodejs\node.exe
; node version = v18.10.0
; npm local prefix = C:\Users\Administrator
; npm version = 8.19.2
; cwd = C:\Users\Administrator
; HOME = C:\Users\Administrator
; Run `npm config ls -l` to show all defaults.

C:\Users\Administrator>
这里的cache和prefix是经过我改过的 ,执行如下两个命令就可以。
npm config set prefix "D:\gongju\node\node_global"
npm config set cache "D:\gongju\node\node_cache"
之后要再环境变量的path中新建D:\gongju\node\node_global,这样安装的地方插件才能执行命令。但是到这里还有一个坑,执行第三方插件命令是总会报错,回去到C盘找,可是我们已经安装到了D盘,怎么办呢?研究了许久发现,我们改的配置只在C:\Users\Administrator\中改变了,没有在D:\gongju\nodejs\node_modules\npm\中生效,办法就是复制C:\Users\Administrator\npmrc到D:\gongju\nodejs\node_modules\npm\里面,如果C:\Users\Administrator\中没有就执行一下npm config ls,就会生成。
二、搭建步骤
1.下载插件
全局安装verdaccio
npm install -g verdaccio查看全局安装的位置:
npm root -gverdaccio的配置文件在C:\Users\Administrator\AppData\Roaming\verdaccio\目录下,有个文件是config.yaml,打开后如下:
#
# This is the default configuration file. It allows all users to do anything,
# please read carefully the documentation and best practices to
# improve security.
#
# Look here for more config file examples:
# https://github.com/verdaccio/verdaccio/tree/5.x/conf
#
# Read about the best practices
# https://verdaccio.org/docs/best

# 配置的缓存地址
storage: I:/verdaccio/storage
# 配置的组件地址
plugins: I:/verdaccio/plugins

# https://verdaccio.org/docs/webui
web:
  title: Verdaccio
  # comment out to disable gravatar support
  # gravatar: false
  # by default packages are ordercer ascendant (asc|desc)
  # sort_packages: asc
  # convert your UI to the dark side
  # darkMode: true
  # html_cache: true
  # by default all features are displayed
  # login: true
  # showInfo: true
  # showSettings: true
  # In combination with darkMode you can force specific theme
  # showThemeSwitch: true
  # showFooter: true
  # showSearch: true
  # showRaw: true
  # showDownloadTarball: true
  #  HTML tags injected after manifest <scripts/>
  # scriptsBodyAfter:
  #    - '<script type="text/javascript" src="https://my.company.com/customJS.min.js"></script>'
  #  HTML tags injected before ends </head>
  #  metaScripts:
  #    - '<script type="text/javascript" src="https://code.jquery.com/jquery-3.5.1.slim.min.js"></script>'
  #    - '<script type="text/javascript" src="https://browser.sentry-cdn.com/5.15.5/bundle.min.js"></script>'
  #    - '<meta name="robots" content="noindex" />'
  #  HTML tags injected first child at <body/>
  #  bodyBefore:
  #    - '<div id="myId">html before webpack scripts</div>'
  #  Public path for template manifest scripts (only manifest)
  #  publicPath: http://somedomain.org/

# https://verdaccio.org/docs/configuration#authentication
auth:
  htpasswd:
    file: ./htpasswd
    # Maximum amount of users allowed to register, defaults to "+inf".
    # You can set this to -1 to disable registration.
    # max_users: 1000
    # Hash algorithm, possible options are: "bcrypt", "md5", "sha1", "crypt".
    # algorithm: bcrypt # by default is crypt, but is recommended use bcrypt for new installations
    # Rounds number for "bcrypt", will be ignored for other algorithms.
    # rounds: 10

# https://verdaccio.org/docs/configuration#uplinks
# a list of other known repositories we can talk to
uplinks:
  npmjs:
    url: https://registry.npmjs.org/

# Learn how to protect your packages
# https://verdaccio.org/docs/protect-your-dependencies/
# https://verdaccio.org/docs/configuration#packages
packages:
  '@*/*':
    # scoped packages
    access: $all
    publish: $authenticated
    unpublish: $authenticated
    proxy: npmjs

  '**':
    # allow all users (including non-authenticated users) to read and
    # publish all packages
    #
    # you can specify usernames/groupnames (depending on your auth plugin)
    # and three keywords: "$all", "$anonymous", "$authenticated"
    access: $all

    # allow all known users to publish/publish packages
    # (anyone can register by default, remember?)
    publish: $authenticated
    unpublish: $authenticated

    # if package is not available locally, proxy requests to 'npmjs' registry
    proxy: npmjs

# To improve your security configuration and  avoid dependency confusion
# consider removing the proxy property for private packages
# https://verdaccio.org/docs/best#remove-proxy-to-increase-security-at-private-packages

# https://verdaccio.org/docs/configuration#server
# You can specify HTTP/1.1 server keep alive timeout in seconds for incoming connections.
# A value of 0 makes the http server behave similarly to Node.js versions prior to 8.0.0, which did not have a keep-alive timeout.
# WORKAROUND: Through given configuration you can workaround following issue https://github.com/verdaccio/verdaccio/issues/301. Set to 0 in case 60 is not enough.
server:
  keepAliveTimeout: 60
  # Allow `req.ip` to resolve properly when Verdaccio is behind a proxy or load-balancer
  # See: https://expressjs.com/en/guide/behind-proxies.html
  # trustProxy: '127.0.0.1'

# https://verdaccio.org/docs/configuration#offline-publish
# publish:
#   allow_offline: false

# https://verdaccio.org/docs/configuration#url-prefix
# url_prefix: /verdaccio/
# VERDACCIO_PUBLIC_URL='https://somedomain.org';
# url_prefix: '/my_prefix'
# // url -> https://somedomain.org/my_prefix/
# VERDACCIO_PUBLIC_URL='https://somedomain.org';
# url_prefix: '/'
# // url -> https://somedomain.org/
# VERDACCIO_PUBLIC_URL='https://somedomain.org/first_prefix';
# url_prefix: '/second_prefix'
# // url -> https://somedomain.org/second_prefix/'

# https://verdaccio.org/docs/configuration#security
# security:
#   api:
#     legacy: true
#     jwt:
#       sign:
#         expiresIn: 29d
#       verify:
#         someProp: [value]
#    web:
#      sign:
#        expiresIn: 1h # 1 hour by default
#      verify:
#         someProp: [value]

# https://verdaccio.org/docs/configuration#user-rate-limit
# userRateLimit:
#   windowMs: 50000
#   max: 1000

# https://verdaccio.org/docs/configuration#max-body-size
# max_body_size: 10mb

# https://verdaccio.org/docs/configuration#listen-port
# listen:
# - localhost:4873            # default value
# - http://localhost:4873     # same thing
# - 0.0.0.0:4873              # listen on all addresses (INADDR_ANY)
# - https://example.org:4873  # if you want to use https
# - "[::1]:4873"                # ipv6
# - unix:/tmp/verdaccio.sock    # unix socket

# The HTTPS configuration is useful if you do not consider use a HTTP Proxy
# https://verdaccio.org/docs/configuration#https
# https:
#   key: ./path/verdaccio-key.pem
#   cert: ./path/verdaccio-cert.pem
#   ca: ./path/verdaccio-csr.pem

# https://verdaccio.org/docs/configuration#proxy
# http_proxy: http://something.local/
# https_proxy: https://something.local/

# https://verdaccio.org/docs/configuration#notifications
# notify:
#   method: POST
#   headers: [{ "Content-Type": "application/json" }]
#   endpoint: https://usagge.hipchat.com/v2/room/3729485/notification?auth_token=mySecretToken
#   content: '{"color":"green","message":"New package published: * {{ name }}*","notify":true,"message_format":"text"}'

middlewares:
  audit:
    enabled: true

# https://verdaccio.org/docs/logger
# log settings
logs: { type: stdout, format: pretty, level: http }
#experiments:
#  # support for npm token command
#  token: false
#  # disable writing body size to logs, read more on ticket 1912
#  bytesin_off: false
#  # enable tarball URL redirect for hosting tarball with a different server, the tarball_url_redirect can be a template string
#  tarball_url_redirect: 'https://mycdn.com/verdaccio/${packageName}/${filename}'
#  # the tarball_url_redirect can be a function, takes packageName and filename and returns the url, when working with a js configuration file
#  tarball_url_redirect(packageName, filename) {
#    const signedUrl = // generate a signed url
#    return signedUrl;
#  }

# translate your registry, api i18n not available yet
# i18n:
# list of the available translations https://github.com/verdaccio/verdaccio/blob/master/packages/plugins/ui-theme/src/i18n/ABOUT_TRANSLATIONS.md
#   web: en-US
#要想对外开放访问就要配置这个
listen: 192.168.31.176:4873
上述文件中我把地址从C盘改到其他盘了,毕竟C盘空间不足。
启动verdaccio服务
C:\Users\Administrator>verdaccio
 warn --- config file  - C:\Users\Administrator\AppData\Roaming\verdaccio\config.yaml
 warn --- "crypt" algorithm is deprecated consider switch to "bcrypt". Read more: https://github.com/verdaccio/monorepo/pull/580
 info --- plugin successfully loaded: verdaccio-htpasswd
 info --- plugin successfully loaded: verdaccio-audit
 warn --- http address - http://192.168.31.176:4873/ - verdaccio/5.15.4
访问地址就可以进入页面了,但是还无法登陆,下面我们要创建登陆用户:
# 添加用户密码
$ npm adduser --registry http://192.168.31.176:4873/
username: # 输入用户名
password: # 输入密码
email: #输入邮箱账号然后我们访问http://192.168.31.176:4873/ 进行登陆。
2.守护进程启动
我们不能一直开着窗口,但是关闭窗口后服务就关了,这可不行,所以我们要使用pm2 启动verdaccio,下载pm2 。
npm install pm2 -gpm2相关命令:
# 安装 pm2
$ npm install pm2 -g

# 启动 verdaccio
$ pm2 start verdaccio

# 停止 verdaccio
$ pm2 stop verdaccio

# 重启 verdaccio
$ pm2 restart verdaccio

# 删除 verdaccio
$ pm2 delete verdaccio

# 查看 verdaccio 日志
$ pm2 logs verdaccio
这里提出一点直接运行 pm2 start verdaccio 可能会启动失败,所以最后我们找到verdaccio的安装目录 进行全路径启动,这样就可以启动成功了,窗口关闭服务也不会停。
pm2 start I:\node\node_global\node_modules\verdaccio\bin\verdaccio

[PM2] Applying action restartProcessId on app [verdaccio](ids: [ 0 ])
[PM2] [verdaccio](0) ✓
[PM2] Process successfully started
┌─────┬──────────────┬─────────────┬─────────┬─────────┬──────────┬────────┬──────┬───────────┬──────────┬──────────┬──────────┬──────────┐
│ id  │ name         │ namespace   │ version │ mode    │ pid      │ uptime │ ↺    │ status    │ cpu      │ mem      │ user     │ watching │
├─────┼──────────────┼─────────────┼─────────┼─────────┼──────────┼────────┼──────┼───────────┼──────────┼──────────┼──────────┼──────────┤
│ 0   │ verdaccio    │ default     │ 5.15.4  │ fork    │ 2984     │ 0s     │ 0    │ online    │ 0%       │ 63.7mb   │ Adm… │ disabled │
└─────┴──────────────┴─────────────┴─────────┴─────────┴──────────┴────────┴──────┴───────────┴──────────┴──────────┴──────────┴──────────┘
3.自定义组件上传测试
现在vue3出来很长一段时间了,所以测试采用vue3+vite 创建项目及插件打包
cmd 进入要创建项目的文件夹执行
npm init vite@latest会出现几个选项,选择vue,选择javaScript,这样项目就生成了。
接下来在src/components/下创建组件文件夹,再创建组件,我的是 /msqtest/MsqTest.vue
<template>
    这个是测试自定义插件
    <h2 v-text="title"></h2>
</template>

<script>
    export default {
        name: "MsqTest",
        props:{
            title:{
                type:String,
                default:"我是漠水情"
            }
        },
    }
</script>

<style scoped>

</style>
简单的测试页面
接下来在components下新建index.js
import MsqTest from './msqtest/MsqTest.vue'; // 引入封装好的组件

export { MsqTest } //实现按需引入*


const components = [MsqTest];
const install = function(App, options) {
    components.forEach((component) => {
        App.component(component.name,component);
    });
};
export default { install } // 批量的引入*
修改根目录的vite.config.js
import { defineConfig } from 'vite'
import vue from '@vitejs/plugin-vue'
import path from 'path'
export default defineConfig({
  plugins: [vue()],
  build: {
    //打包文件夹
    outDir:'msq',
    lib: {
        //指向你新建的index.js文件
      entry: path.resolve(__dirname, 'src/components/index.js'),
      name: 'MsqTest',
      fileName: (format) => `msq-test.${format}.js`
    },
    rollupOptions: {
      // 确保外部化处理那些你不想打包进库的依赖
      external: ['vue'],
      output: {
        // 在 UMD 构建模式下为这些外部化的依赖提供一个全局变量
        globals: {
          vue: 'Vue'
        }
      }
    }
  }
})
修改package.json
{
  "name": "msq-test",
  "private": false,
  "version": "0.0.1",
  "scripts": {
    "dev": "vite",
    "build": "vite build",
    "preview": "vite preview"
  },
  "files": ["msq"],
  "main": "./msq/msq-test.umd.js",
  "module": "./msq/msq-test.es.js",
  "exports": {
    ".": {
      "import": "./msq/msq-test.es.js",
      "require": "./msq/msq-test.umd.js"
    }
  },
  "dependencies": {
    "vue": "^3.2.37",
    "yarn": "^1.22.19"
  },
  "devDependencies": {
    "@vitejs/plugin-vue": "^3.1.0",
    "vite": "^3.1.0"
  }
}
一切都准备好了,开始打包执行
npm build会在msq文件夹生成文件,cmd 进入该文件夹执行
npm init -y会生成package.json
{
  "name": "msq-test",
  "version": "0.0.1",
  "description": "漠水情测试自定义插件上传",
  "main": "msq-test.es.js",
  "scripts": {
    "test": "echo \"Error: no test specified\" && exit 1"
  },
  "keywords": [],
  "author": "漠水情",
  "license": "ISC"
}
接着再此文件夹下执行npm命令
PS E:\webStromWork\msq-test\msq> cmd
Microsoft Windows [版本 10.0.19043.928]
(c) Microsoft Corporation。保留所有权利。
E:\webStromWork\msq-test\msq>npm publish --registry http://192.168.31.176:4873/
npm notice
npm notice package: msq-test@0.0.1
npm notice === Tarball Contents ===
npm notice 811B msq-test.es.js
npm notice 897B msq-test.umd.js
npm notice 273B package.json
npm notice 1.5kB vite.svg
npm notice === Tarball Details ===
npm notice name: msq-test
npm notice version: 0.0.1
npm notice filename: msq-test-0.0.1.tgz
npm notice package size: 2.0 kB
npm notice unpacked size: 3.5 kB
npm notice shasum: e1d50dade987316c348bcd08941d904284e95574
npm notice integrity: sha512-ZHA6Gmp5Iz9IB[...]sUjuGazDBYi+w==
npm notice total files: 4
npm notice
npm notice Publishing to http://www.msq.cool:14873/
+ msq-test@0.0.1
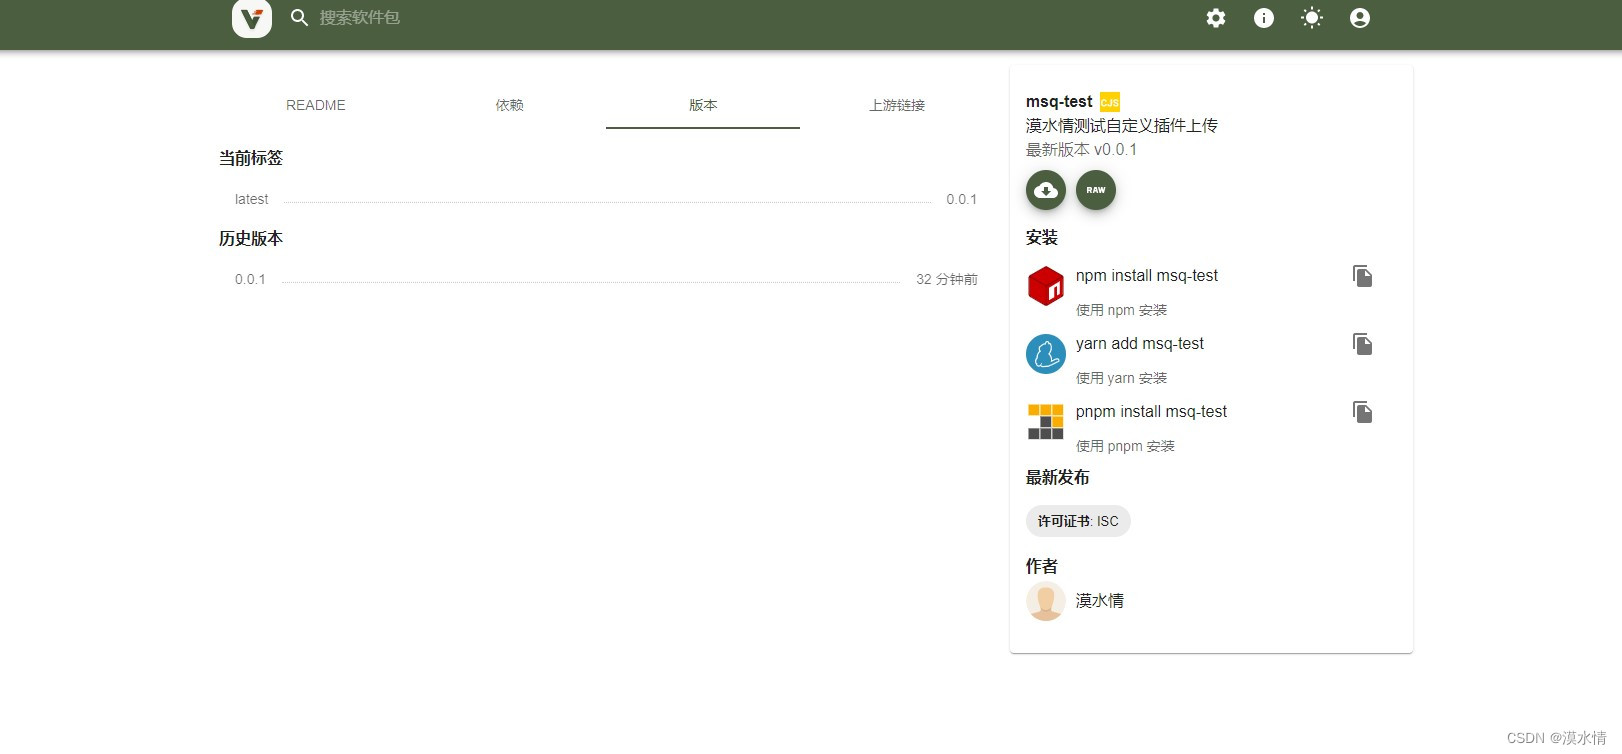
E:\webStromWork\msq-test\msq>上传完毕
4使用自定义的组件
首先将自己的远程地址改为私服地址
npm config set registry registry http://192.168.31.176:4873/然后就可以下载使用了,创建test项目,执行下载命令:
npm install msq-test在 main.js 中使用
import { createApp } from 'vue'
import App from './App.vue'
import msqTest from 'msq-test'
const app = createApp(App)
app.use(msqTest)
app.mount('#app')
页面上调用
<template>
 <msq-test title="你好哈哈哈"></msq-test>
</template>

<script>
export default {
  name: 'App',
  components: {

  }
}
</script>

<style>
#app {
  font-family: Avenir, Helvetica, Arial, sans-serif;
  -webkit-font-smoothing: antialiased;
  -moz-osx-font-smoothing: grayscale;
  text-align: center;
  color: #2c3e50;
  margin-top: 60px;
}
</style>
页面显示效果
基本流程走完了,后面我们可以自己上传更加复杂的插件功能。
总结
学习新技术是一件非常感有趣的事,现在我打通了mavne的私服,后台的插件制作与上传,android端module的的制作与上传,现在npm私服也实现了,下面开始实现我的最终目的,搭建一个基于公司项目与业务的私有库管理库项目,将业务封装,避免每次使用时都是复制代码方式,而是通过pom引入,gradle引入和npm引入,将相关的业务功能引入,最重要的是多端实现关联,将模块化的项目积木化。


 1133
1133

 被折叠的 条评论
为什么被折叠?
被折叠的 条评论
为什么被折叠?
 到【灌水乐园】发言


