


 本文详细介绍了如何在Java中不整合Spring的情况下创建和发布Web Service,包括服务类的定义、发布以及客户端调用。此外,还讲解了整合Spring的Web Service实现,包括web.xml和Spring配置文件的设置,以及客户端调用的步骤。
一、纯java 编写,不整合spring
服务类(webservice):
1. 建立java project ,导入jar包
2.创建服务类,添加注解@WebService
3.发布webservice
4.直接上代码:
1.整体架构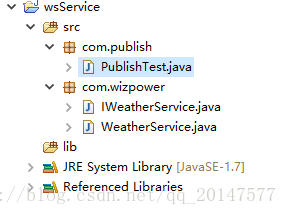
2.import javax.jws.WebService;
@WebService
public interface IWeatherService {
/**
* 根据city 城市名返回天气
* @param city
* @return
*/
public String getWeather(String city);
}
public class WeatherService implements IWeatherService{
@Override
public String getWeather(String city) {
if("南京".equals(city)){
return "大雨";
}else{
return "查询失败";
}
}
}
public class PublishTest {
发布webservice ,run as java
public static void main(String[] args) {
JaxWsServerFactoryBean factory = new JaxWsServerFactoryBean();
factory.setAddress("http://localhost:12345/weather");
factory.setServiceBean(new WeatherService());
factory.create();
}
}
访问网址 localhost:12345/weather?wsdl
客户端:
1 建立Java 工程,导入jar包
2 wsimport 生成webservice 的本地代码
在cmd 切换到src 目录下,
执行命令:wsimport -s . localhost:12345/weather?wsdl
(wsClient 项目src 的目录是 D:\workspaceMyec\wsClient\src)
3. 编写测试类
public class WeatherServiceInvoking {
@Test
public void Test() {
JaxWsProxyFactoryBean factory = new JaxWsProxyFactoryBean();
factory.setAddress("http://localhost:12345/weather?wsdl");
factory.setServiceClass(IWeatherService.class);
IWeatherService iws = (IWeatherService) factory.create();
String result = iws.getWeather("南京");
System.out.println(result);
}
}
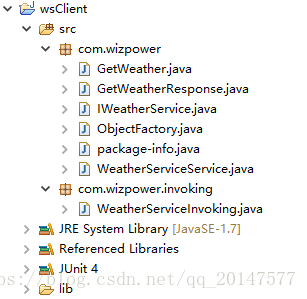
结构图
二、整合spring 的webservice demo
1.建立web 项目 导入jar
2.web.xml 如下,
<?xml version="1.0" encoding="UTF-8"?>
<web-app xmlns:xsi="http://www.w3.org/2001/XMLSchema-instance"
xmlns="http://java.sun.com/xml/ns/javaee"
xsi:schemaLocation="http://java.sun.com/xml/ns/javaee http://java.sun.com/xml/ns/javaee/web-app_3_0.xsd"
id="WebApp_ID" version="3.0">
<display-name>webwsService</display-name>
<welcome-file-list>
<welcome-file>index.html</welcome-file>
<welcome-file>index.htm</welcome-file>
<welcome-file>index.jsp</welcome-file>
<welcome-file>default.html</welcome-file>
<welcome-file>default.htm</welcome-file>
<welcome-file>default.jsp</welcome-file>
</welcome-file-list>
<!-- jianting -->
<listener>
<listener-class>org.springframework.web.context.ContextLoaderListener</listener-class>
</listener>
<!-- 配置 spring的配置文件 -->
<context-param>
<param-name>contextConfigLocation</param-name>
<param-value>classpath:applicationContext.xml</param-value>
</context-param>
<!-- CXF 核心控制器 -->
<servlet>
<servlet-name>cxf</servlet-name>
<servlet-class>org.apache.cxf.transport.servlet.CXFServlet</servlet-class>
</servlet>
<servlet-mapping>
<servlet-name>cxf</servlet-name>
<url-pattern>/ws/*</url-pattern>
</servlet-mapping>
</web-app>
3.spring配置文件如下:
<?xml version="1.0" encoding="UTF-8"?>
<beans xmlns="http://www.springframework.org/schema/beans"
xmlns:xsi="http://www.w3.org/2001/XMLSchema-instance"
xmlns:cxf="http://cxf.apache.org/core"
xmlns:jaxws="http://cxf.apache.org/jaxws"
xmlns:jaxrs="http://cxf.apache.org/jaxrs"
xsi:schemaLocation="
http://www.springframework.org/schema/beans
http://www.springframework.org/schema/beans/spring-beans.xsd
http://cxf.apache.org/core
http://cxf.apache.org/schemas/core.xsd
http://cxf.apache.org/jaxws
http://cxf.apache.org/schemas/jaxws.xsd
http://cxf.apache.org/jaxrs
http://cxf.apache.org/schemas/jaxrs.xsd">
<!-- 服务类 -->
<bean id="weatherService" class="com.wizpower.WeatherService" >
</bean>
<!-- 发布服务 weather 访问地址 localhost:8080/webwsService/ws/weather?wsdl -->
<jaxws:server address="/weather">
<jaxws:serviceBean>
<ref bean="weatherService" />
</jaxws:serviceBean>
</jaxws:server>
</beans>
3.发布到tomcat
4.访问地址:localhost:8080/项目名/ws/weather?wsdl (具体原因和上面对照address 和 /ws/*)
客户端:
1. 建立java project 就可以 导入jar
2. wsimport -s . localhost:8080/项目名/ws/weather?wsdl 与纯java 类似
3.applicetionContext.xml:
<?xml version="1.0" encoding="UTF-8"?>
<beans xmlns="http://www.springframework.org/schema/beans"
xmlns:xsi="http://www.w3.org/2001/XMLSchema-instance"
xmlns:cxf="http://cxf.apache.org/core"
xmlns:jaxws="http://cxf.apache.org/jaxws"
xmlns:jaxrs="http://cxf.apache.org/jaxrs"
xsi:schemaLocation="
http://www.springframework.org/schema/beans
http://www.springframework.org/schema/beans/spring-beans.xsd
http://cxf.apache.org/core
http://cxf.apache.org/schemas/core.xsd
http://cxf.apache.org/jaxws
http://cxf.apache.org/schemas/jaxws.xsd
http://cxf.apache.org/jaxrs
http://cxf.apache.org/schemas/jaxrs.xsd">
<!-- 配置客户端 -->
<jaxws:client id="weatherBean" address="http://localhost:8080/webwsService/ws/weather?wsdl"
serviceClass="com.wizpower.IWeatherService">
</jaxws:client>
</beans>
4.测试;
public class SpringCxfTest {
@Test
public void fun(){
ApplicationContext application = new ClassPathXmlApplicationContext("classpath:applicationContext.xml");
IWeatherService iw = (IWeatherService) application.getBean("weatherBean");
String s = iw.getWeather("xuz ");
System.out.println(s);
}
}


 1133
1133

 被折叠的 条评论
为什么被折叠?
被折叠的 条评论
为什么被折叠?
 到【灌水乐园】发言


