


 本文介绍如何使用Spring、Redis和Nginx实现Tomcat集群的Session共享,包括安装配置Redis、集成Spring Session、配置Nginx负载均衡等内容。
spring4+redis3+nginx1实现tomcat7集群实现session共享,我的操作系统为winodw7 64位系统
1.下载redis,我下载的是Redis-x64-3.2.100版本,下载后解压如下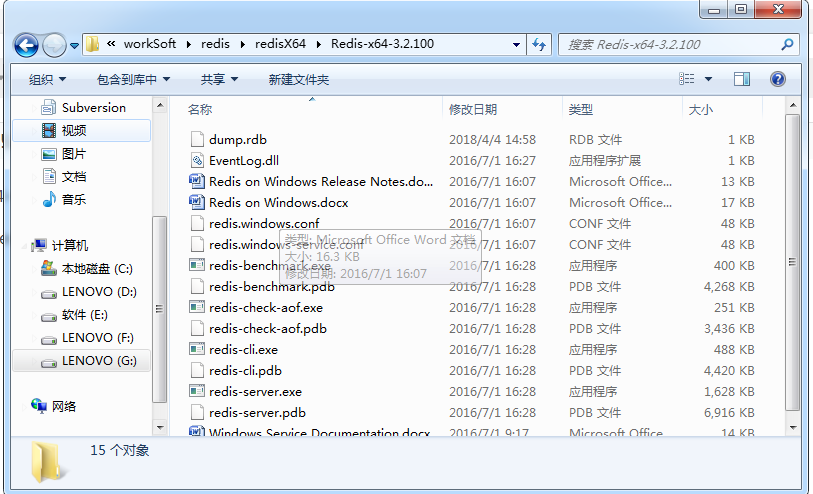
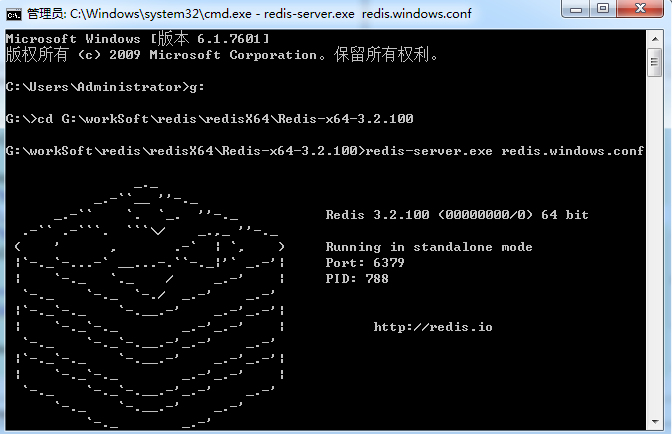
通过cmd窗口启动redis 如下图所示,启动后默认端口号为6379,cmd窗口不能关闭
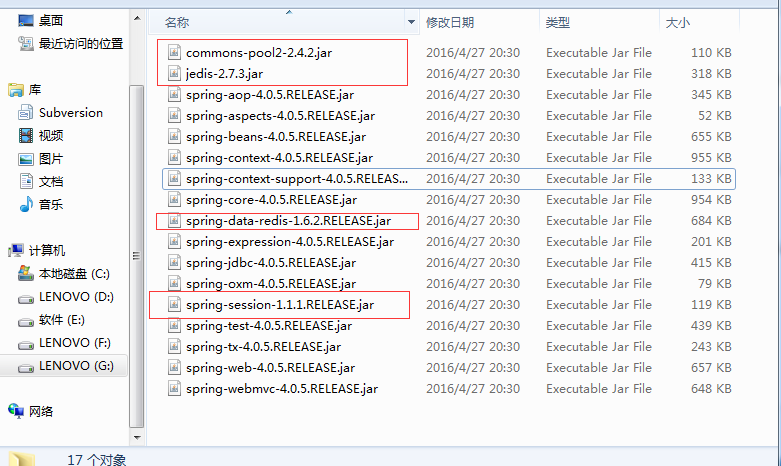
2.使用spring集成redis 我之前的项目是spring3开发的不支持spring-session,所以我把spring的相关jar包升级到了spring4版本,
首先保证用spring4以上版本搭建的web程序可以正常启动,然后添加spring-redis,spring-session等相关的jar。
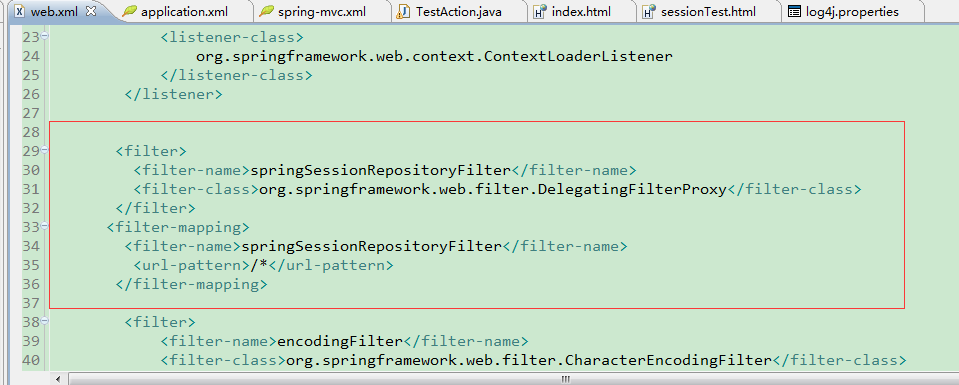
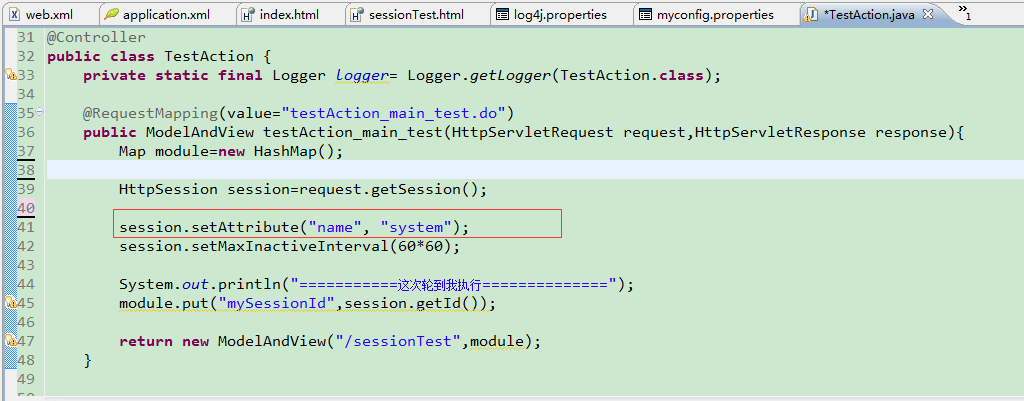
配置web项目 web.xml文件,配置请求拦截器让spring来代理管理httpsession
   <filter>
          <filter-name>springSessionRepositoryFilter</filter-name>
          <filter-class>org.springframework.web.filter.DelegatingFilterProxy</filter-class>
   </filter>
   <filter-mapping>
      <filter-name>springSessionRepositoryFilter</filter-name>
      <url-pattern>/*</url-pattern>
   </filter-mapping>
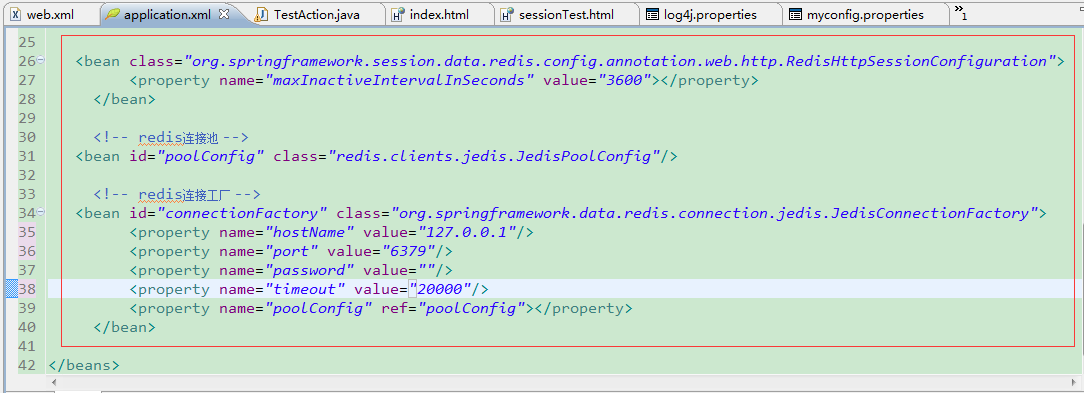
spring配置文件 增加如下代码
<bean class="org.springframework.session.data.redis.config.annotation.web.http.RedisHttpSessionConfiguration">
         <property name="maxInactiveIntervalInSeconds" value="3600"></property>
     </bean>

     <!-- redis连接池 -->
   <bean id="poolConfig" class="redis.clients.jedis.JedisPoolConfig"/>

     <!-- redis连接工厂 -->
   <bean id="connectionFactory" class="org.springframework.data.redis.connection.jedis.JedisConnectionFactory">
         <property name="hostName" value="127.0.0.1"/>
         <property name="port" value="6379"/>
         <property name="password" value=""/>
         <property name="timeout" value="20000"/>
         <property name="poolConfig" ref="poolConfig"></property>
     </bean>
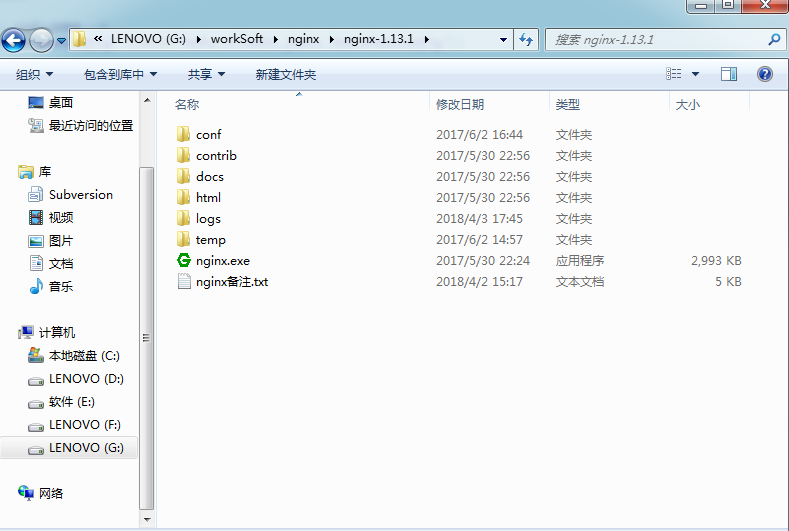
3.下载nginx,我下载版本为nginx-1.13.1
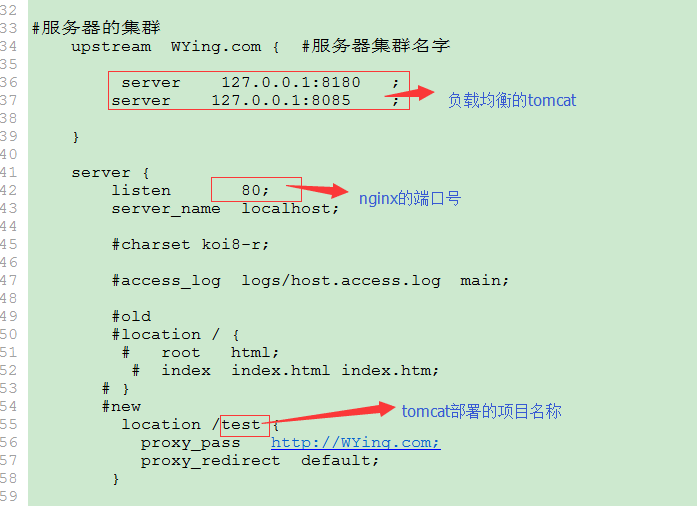
配置nginx,配置文件路径 XXX\nginx\nginx-1.13.1\conf\nginx.conf
#user  nobody;
worker_processes  1;


#error_log  logs/error.log;
#error_log  logs/error.log  notice;
#error_log  logs/error.log  info;


#pid        logs/nginx.pid;

events {
    worker_connections  1024;
}


http {
    include       mime.types;
    default_type  application/octet-stream;


sendfile        on;
    #tcp_nopush     on;


    #keepalive_timeout  0;
    keepalive_timeout  10;

proxy_connect_timeout       10;
   # proxy_read_timeout          1;
   # proxy_send_timeout          1;


    #gzip  on;


#服务器的集群
    upstream  WYing.com {  #服务器集群名字

         server    127.0.0.1:8180   ;
        server    127.0.0.1:8181    ;

    }


    server {
        listen       80;
        server_name  localhost;


        #charset koi8-r;


        #access_log  logs/host.access.log  main;
        #old
        #location / {
         #   root   html;
          #  index  index.html index.htm;
       # }
       #new
         location /test {
           proxy_pass   http://WYing.com;
           proxy_redirect  default;
        }


        #error_page  404              /404.html;


        # redirect server error pages to the static page /50x.html
        #
        error_page   500 502 503 504  /50x.html;
        location = /50x.html {
            root   html;
        }
  }
}
我这里直接把我配置好的贴上,负载均衡我采用的默认的轮询方式,你们根据你们的实际部署的tomcat在我的基础上修改下就行,需要修改的地方如下
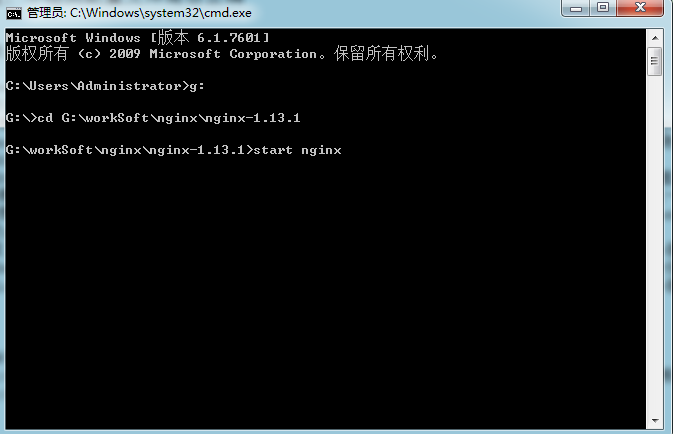
4.使用nginx配置文件里配置的负载均衡的tomcat部署你的web应用, 然后分别启动tomcat,我用的tomcat7+jdk1.7
tomcat启动完毕后使用cmd启动nginx
如果前面步骤的顺利的话,那么打开浏览器,试试效果吧
这里我通过nginx访问我的web项目,并且重复刷新了几次页面,可以看到我的2个tomcat都有输出信息,说明nginx会根据轮询机制指定本次请求哪个tomcat处理,然后浏览器测试页面每次输出的sessionID都是一样的,说明spring已经通过redis实现了session共享
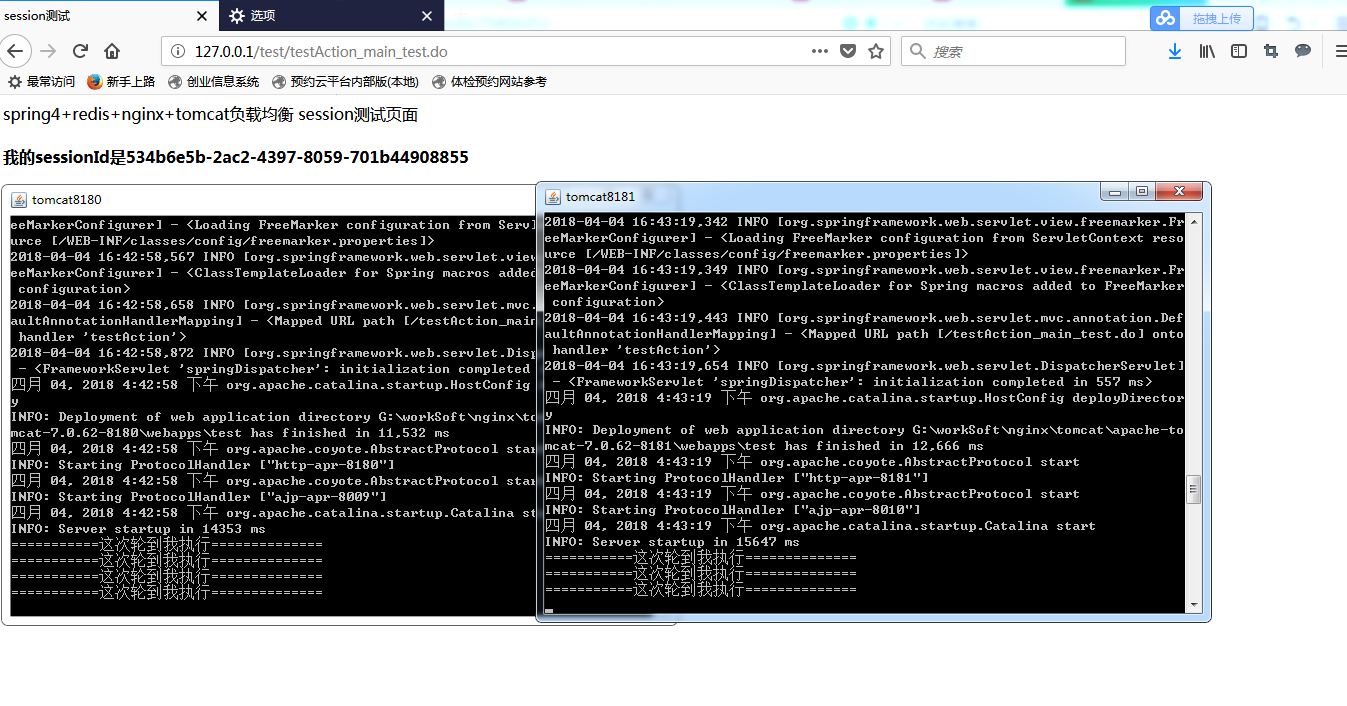
通过spring代理的session共享我们不需要修改任何业务代码,程序里依然通过request.getSession()使用session,最大化的减少了程序的耦合
既然spring把session存到了redis里,那么我们不妨去redis看一下spring存储的session把
这里我在session存了一个属性name,我们通过redis自带的客户端查看
打开cmd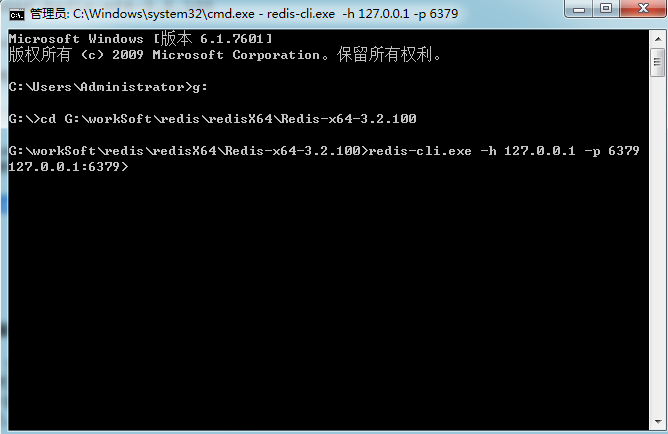
连接到redis后获取所有key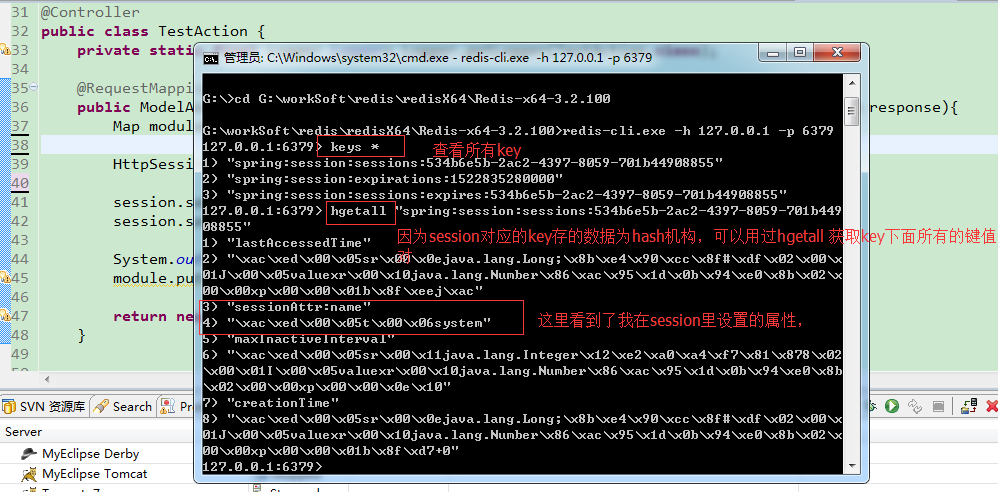
结束了,希望能对大家有所帮助,有不对的地方请指教。
附上我搭建环境用到的redis,nginx和我的web项目源码☺,下载地址https://download.youkuaiyun.com/download/qq445829096/10327902
补充:如果项目session没有实现session共享 又想使用负载均衡增加并发等,nginx提供了ip_hash的方式
(固定一部分IP请求一台服务器,另一部分访问另一台服务器 使用ip_hash不用考虑session共享问题)
 upstream  WYing.com {  #服务器集群名字
	ip_hash;
        server    127.0.0.1:8085 max_fails=1 fail_timeout=40s ;
        server    10.8.0.63:8082  max_fails=1 fail_timeout=40s ;

    }
当某个服务宕机时遇到的问题及解决方法(服务都正常运行时负载均衡是没太大问题)
upstream WYing.com { #服务器集群名字
ip_hash;
server 127.0.0.1:8085 ;
server 10.8.0.63:8082 ;
}
使用ip_hash不设置健康检测机制 当8082宕机后 分配的8082请求的IP还是会去请求8082
请求超时默认好像1分钟,nginx才去请求8085,这样导致分配到8082的IP访问网页响应好慢,根本不现实
通过设置proxy_connect_timeout 1;
proxy_read_timeout 1;
proxy_send_timeout 1;
请求超时为1秒 这样当8082宕机后 分配的8082请求的IP去请求8082 1秒没响应
nginx就吧请求分配到8085。这样1秒用户暂时还能接受 ,
但是问题来了,我一个url逻辑比价复杂,需要处理几秒钟,这样1秒钟没响应nginx也当成8082宕机了,
所以我认为proxy_connect_timeout 1; 也不可取
proxy_connect_timeout
后端服务器连接的超时时间_发起握手等候响应超时时间
proxy_read_timeout
连接成功后_等候后端服务器响应时间_其实已经进入后端的排队之中等候处理(也可以说是后端服务器处理请求的时间)
proxy_send_timeout
后端服务器数据回传时间_就是在规定时间之内后端服务器必须传完所有的数据
 upstream  WYing.com {  #服务器集群名字
    ip_hash;
        server    127.0.0.1:8085 max_fails=1 fail_timeout=40s ;
        server    10.8.0.63:8082  max_fails=1 fail_timeout=40s ;

    }
通过这样配置 表示开启健康检测机制
max_fails=1 请求无响应最多失败1次
fail_timeout=40s表示请求无响应失败1次后40S不再去访问这个服务器,
40秒后继续访问 ,这样我们只要把fail_timeout调整足够大,
用户请求失败一次后要好久才会重现上述延迟,好像也是可以的
========之前对proxy_connect_timeout 等理解有误
通过设置
proxy_connect_timeout 1;
不设置 proxy_read_timeout ,proxy_send_timeout
proxy_connect_timeout表示nginx发起握手等待响应的时间 ,因为http握手只要服务器没宕机基本很快响应的,
只有响应后才发送request过去,我之前理解为proxy_connect_timeout为发送请求到返回response响应的时间,
现在即使不配置健康检查机制 只要proxy_connect_timeout ;设为1就行,
我认为理论上只要服务器没宕机握手的话医院内网一秒会响应的,当然如果不是内网,外网访问的话网络延迟1秒不能完成也是可能的。。
我们也可以把proxy_connect_timeout稍微调大点,比如3秒,外网的话3秒应该要握手成功吧,如果3秒没成功,默认服务器宕机了,
请求别的服务器,这样用户一个操作要3秒+,虽然慢点,但是可以操作,及时通知管理员重启下宕机服务器就行了
最后附上我正式环境的一个配置 使用的ip_hash 因为程序之前没实现session共享,改造工作量大
该配置文件代理了healthManager,platform项目,同时cytj系统因为并发大,要求稳定性高,做了ip_hash负载均衡
proxy_connect_timeout 3;表示握手3S无响应及判定请求的服务宕机
如果请求healthManager,platform项目,3S无响应返回错误 进去 error_page 500 502 503 504 /50x.html; 错误处理页面
如果请求cytj,3S无响应则去请求另外一个负载服务
#user  nobody;
worker_processes  1;

#error_log  logs/error.log;
#error_log  logs/error.log  notice;
#error_log  logs/error.log  info;

#pid        logs/nginx.pid;


events {
    worker_connections  1024;
}


http {
    include       mime.types;
    default_type  application/octet-stream;

    #log_format  main  '$remote_addr - $remote_user [$time_local] "$request" '
    #                  '$status $body_bytes_sent "$http_referer" '
    #                  '"$http_user_agent" "$http_x_forwarded_for"';

    #access_log  logs/access.log  main;

    sendfile        on;
    #tcp_nopush     on;

    #keepalive_timeout  0;
    keepalive_timeout  65;

   proxy_connect_timeout   3;

    #gzip  on;

     proxy_set_header Host $http_host;
     client_max_body_size    30m; #最大接受30m文件以内的


     upstream  bsoft.com {  #服务器集群名字
	 ip_hash;
        server    127.0.0.1:8089 max_fails=1 fail_timeout=100s ;
        server    127.0.0.1:8083 max_fails=1 fail_timeout=100s ;

    }

    server {
        listen       8086;
        server_name  localhost;

        #charset koi8-r;

        #access_log  logs/host.access.log  main;

        location / {
            root   html;
            index  index.html index.htm;
        }

	location /healthManager/ {

            proxy_pass   http://127.0.0.1:8089/healthManager/;
	}

	location /platform/ {

            proxy_pass   http://127.0.0.1:8089/platform/;
	}

	location /cytj/ {
           proxy_pass   http://bsoft.com;
           proxy_redirect  default;
        }


        error_page  404              /404.html;

        # redirect server error pages to the static page /50x.html
        #
        error_page   500 502 503 504  /50x.html;
        location = /50x.html {
            root   html;
        }

        # proxy the PHP scripts to Apache listening on 127.0.0.1:80
        #
        #location ~ \.php$ {
        #    proxy_pass   http://127.0.0.1;
        #}

        # pass the PHP scripts to FastCGI server listening on 127.0.0.1:9000
        #
        #location ~ \.php$ {
        #    root           html;
        #    fastcgi_pass   127.0.0.1:9000;
        #    fastcgi_index  index.php;
        #    fastcgi_param  SCRIPT_FILENAME  /scripts$fastcgi_script_name;
        #    include        fastcgi_params;
        #}

        # deny access to .htaccess files, if Apache's document root
        # concurs with nginx's one
        #
        #location ~ /\.ht {
        #    deny  all;
        #}
    }


    # another virtual host using mix of IP-, name-, and port-based configuration
    #
    #server {
    #    listen       8000;
    #    listen       somename:8080;
    #    server_name  somename  alias  another.alias;

    #    location / {
    #        root   html;
    #        index  index.html index.htm;
    #    }
    #}


    # HTTPS server
    #
    #server {
    #    listen       443 ssl;
    #    server_name  localhost;

    #    ssl_certificate      cert.pem;
    #    ssl_certificate_key  cert.key;

    #    ssl_session_cache    shared:SSL:1m;
    #    ssl_session_timeout  5m;

    #    ssl_ciphers  HIGH:!aNULL:!MD5;
    #    ssl_prefer_server_ciphers  on;

    #    location / {
    #        root   html;
    #        index  index.html index.htm;
    #    }
    #}

}


 38
38

 被折叠的 条评论
为什么被折叠?
被折叠的 条评论
为什么被折叠?
 到【灌水乐园】发言


