


 本文详细介绍了面向切面编程(AOP)在Spring框架中的应用,包括AOP的基本概念、如何使用注解和XML配置实现AOP,以及环绕通知和引入的概念。通过具体的代码示例,展示了AOP如何简化传统JDBC编程中的错误处理和资源管理。
AOP:面向切面的编程
使用的原因:对于JDBC来说可以去除大量的try语句,更加容易维护
传统JDBC
传统的JDBC的使用:
public class JdbcTest {
    public static void main(String[] args) {
        Connection connection = null;
        Statement sta = null;
        try {
            Class.forName("com.mysql.jdbc.Driver");
            try {
                 connection = DriverManager.getConnection("jdbc:mysql://localhost:3306/test","root","157382");
                 sta = connection.createStatement();
            } catch (SQLException e) {
                e.printStackTrace();
            }
        } catch (ClassNotFoundException e) {
            e.printStackTrace();
        }finally {
            if(sta!=null){
                try {
                    sta.close();
                } catch (SQLException e) {
                    e.printStackTrace();
                }finally {
                    if(connection != null){
                        try {
                            connection.close();
                        } catch (SQLException e) {
                            e.printStackTrace();
                        }
                    }
                }
            }
        }
    }
}
可见,其中有大量的try语句,代码显得特别凌乱,这就是为什么需要使用AOP
在使用AOP编程之前,我们要了解几个概念
切面:就是在一个什么养的环境中,在注解中,使用@AspectJ注解的类就是一个切面
通知(Advice):通知就是切面开启后,类似拦截器的方法,可以添加逻辑代码
前置通知:在原有对象执行方法之前或者环绕通知执行之前执行
后置通知:在原有对象执行方法之前或者环绕通知执行之后执行
返回通知:在原有对象执行方法之前或者环绕通知正常执行后执行的通知
异常通知:在原有对象执行方法之前或者环绕通知执行中发生异常后执行的通知
环绕通知:在动态代理中,他可以取代当前被拦截对象的方法,提供回调原有被拦截对象的方法
引入:引入允许我们在现有类中添加自定义的类和方法
切点:告诉Spring AOP什么时候开启拦截并织入对应流程
连接点:具体需要拦截的东西
织入:是一个生成代理对象并将切面内容放入到流程中的过程
或许你对这些概念很迷惑,那么让我们来看看代码,相信你会明白的
AOP的流程图:
Spring对AOP的支持,有4种方法实现AOP的拦截功能
使用ProxyFactoryBean和对应的接口实现(很少使用)
使用XML配置AOP
使用@AspectJ注解驱动切面(最为常用)
使用@AspectJ注入切面(很少使用)
这里重点介绍注解驱动切面和XML配置
注解驱动切面:
选择连接点:即确定要拦截谁的调用,这里选用MyRoleServicImpl为连接点
服务接口:
public interface MyRoleService {
    public String printRole(MyRole myRole);
}

接口实现类:连接点
@Component
public class MyServiceImpl implements MyRoleService {

    @Override
    public String printRole(MyRole myRole) {
        System.out.println("MyRole的名字"+myRole.getName());
        return "successful";
    }
}
创建切面:即类似拦截器的东西
定义切点:为了不用写这么多遍正则表达式
@Aspect
public class MyRoleAspect {
    @Pointcut("execution(* spring.aop1.MyServiceImpl.printRole(..))")
    public void pointCut(){

    }
    @Before("pointCut()")
    public void before(){
        System.out.println("before...");
    }
    @After("pointCut()")
    public void after(){
        System.out.println("after...");
    }
    @AfterReturning("pointCut()")
    public void afterReturning(){
        System.out.println("afterReturning ...");
    }
    @AfterThrowing("pointCut()")
    public void afterThrowing(){
        System.out.println("afterThrowing...");
    }
}
正则表达式说明:execution:代表执行方法的时候会触发
*:代表任意返回类型的方法
spring.aop1.MyServiceImpl:代表类的全限定名
printRole:被拦截方法名称
(..):任意的参数
测试AOP:
配置类:@EnableAspectJAutoProxy:启用AspectJ框架的自动代理
@ComponentScan()
@EnableAspectJAutoProxy
public class AopConfig {

}
测试程序:
public class AopTest {
    public static void main(String[] args) {
        ApplicationContext context = new AnnotationConfigApplicationContext(AopConfig.class);
//        MyRoleService service = context.getBean(MyRoleService.class);
        MyRoleService service1 = (MyRoleService)context.getBean("myServiceImpl");
        MyRole role = new MyRole();
        role.setName("黎明");
        service1.printRole(role);
    }
}
也可以使用XML配置AOP,其原理一样
<?xml version="1.0" encoding="UTF-8"?>
<beans xmlns="http://www.springframework.org/schema/beans"
       xmlns:xsi="http://www.w3.org/2001/XMLSchema-instance"
       xmlns:context="http://www.springframework.org/schema/context"
       xmlns:aop="http://www.springframework.org/schema/aop"

       xsi:schemaLocation="http://www.springframework.org/schema/beans
                           http://www.springframework.org/schema/beans/spring-beans.xsd
                           http://www.springframework.org/schema/context
                           http://www.springframework.org/schema/context/spring-context.xsd http://www.springframework.org/schema/aop http://www.springframework.org/schema/aop/spring-aop.xsd">
<aop:aspectj-autoproxy></aop:aspectj-autoproxy>
    <bean id="myRoleService" class="spring.aop1.MyServiceImpl"></bean>
    <bean id="myRoleAspect" class="spring.aop1.MyRoleAspect"></bean>
</beans>
<aop:aspectj-autoproxy></aop:aspectj-autoproxy>:与注解@EnableAspectJAutoProxy用途一样
环绕通知
在MyRoleAspect中添加一个方法:
   @Around("pointCut()")
    public void arround(ProceedingJoinPoint jp){
        System.out.println("around before ....");
        try {
            jp.proceed();
        } catch (Throwable throwable) {
            throwable.printStackTrace();
        }
        System.out.println("around after ....");
    }
然后运行测试程序,结果如下
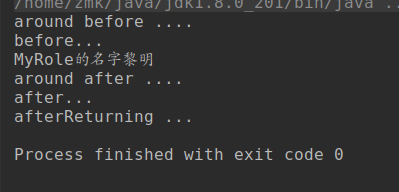
可知:注解情况下,环绕通知要在优先调用,早于前置通知
给通知传入参数:将要传入参数的方法的注解改为:@Before("pointCut()"+"&& args(role)")
引入:引入其他方法
需要在写好引用方法的时候,在切面中配置新属性
  @DeclareParents(value="spring.aop1.MyServiceImpl+",defaultImpl = MyRoleVerifierImpl.class)
    public MyRoleVerifier myRoleVerifier;
然后调用如下
public class AopTest {
    public static void main(String[] args) {
        ApplicationContext context = new AnnotationConfigApplicationContext(AopConfig.class);
//        MyRoleService service = context.getBean(MyRoleService.class);
        MyRoleService service1 = (MyRoleService)context.getBean("myServiceImpl");
        MyRole role = new MyRole();
        role.setName("黎明");
        MyRoleVerifier myRoleVerifier = (MyRoleVerifier)service1;
        if (myRoleVerifier.verify(role)) {
            service1.printRole(role);
        }

    }
}
XML配置AOP
    <bean id="myRoleAspect" class="spring.aop1.MyRoleAspect"></bean>
    <aop:config>
        <aop:aspect ref="myRoleAspect">
            <aop:declare-parents types-matching="spring.aop1.MyRoleVerifierImpl+" implement-interface="spring.aop1.MyRoleVerifier" default-impl="spring.aop1.MyRoleVerifierImpl"></aop:declare-parents>
            <aop:pointcut id="pointCut" expression="execution(* spring.aop1.MyServiceImpl.printRole(..))"></aop:pointcut>
            <aop:before method="before" arg-names="role" pointcut-ref="pointCut"></aop:before>
            <aop:after method="after" pointcut-ref="pointCut"></aop:after>
            <aop:after-returning method="afterReturning" pointcut-ref="pointCut"></aop:after-returning>
            <aop:after-throwing method="afterThrowing" pointcut-ref="pointCut"></aop:after-throwing>
        </aop:aspect>
    </aop:config>


 被折叠的 条评论
为什么被折叠?
被折叠的 条评论
为什么被折叠?
 到【灌水乐园】发言


