


 本文详细介绍了在Ubuntu虚拟机环境下,如何安装配置Nginx与FastDFS,并集成fastdfs-nginx-module模块,实现文件存储和访问功能。包括解压安装包、编译配置、错误排查、配置文件修改等关键步骤。
(声明:我是在虚拟机ubantu中安装的~)
介绍软件包:
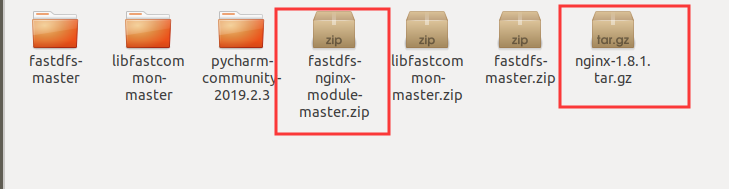
- nginx-1.8.1.tar.zip : nginx安装包。
- fastdfs-nginx-module-master.zip : 想要 nginx 配合 FastDFS 使用,需要安装这个附加的模块。
下面直入主题,进行安装:
安装nginx及fastdfs-nginx-module
1. 解压缩 nginx-1.8.1.tar.gz
2. 解压缩 fastdfs-nginx-module-master.zip
提示:
解压缩zip,使用 unzip 压缩包名。
tar -xzvf nginx-1.8.1.tar.gz

3. 进入nginx-1.8.1目录中
4. 执行:(执行一个预编译的命令)  --prefix= 后面是指定的nginx安装路径, --add-module 意思是在安装的时候,把一个模块加入进去(这里加入的就是fastdfs-nginx-module-master这个模块)
sudo ./configure --prefix=/usr/local/nginx/ --add-module=fastdfs-nginx-module-master解压后的目录的绝对路径/src
看下我的指令:
sudo ./configure --prefix=/usr/local/nginx/ --add-module=/home/huangdonglin/下载/fastdfs-nginx-module-master/src
但是执行之后会报错:
error: the HTTP rewrite module requires the PCRE library
那么就参照文章:https://blog.youkuaiyun.com/nyist327/article/details/41278825
安装相应的模块。之后再运行就好啦!
接着执行:
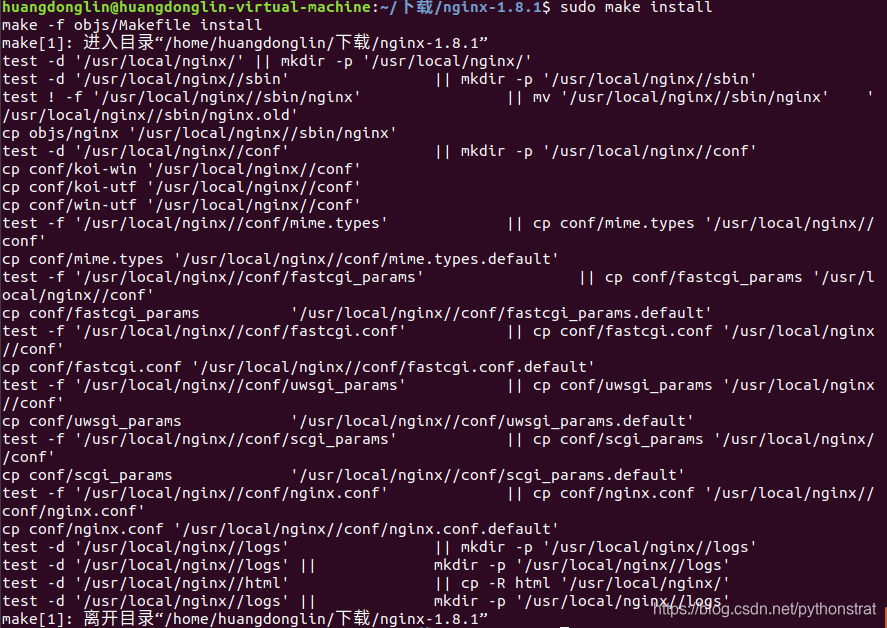
sudo ./make 如果提示找不到命令,那么就执行: sudo make
sudo ./make install 同上,找不到命令就执行: sudo make install
这里在执行sudo make是可能会报错:
cc1: all warnings being treated as errors objs/Makefile:440: recipe for target 'objs/src/core/ngx_murmurhash.o' failed make[1]: *** [objs/src/core/ngx_murmurhash.o] Error 1 make[1]: 离开目录“/home/huangdonglin/下载/nginx-1.8.1” Makefile:8: recipe for target 'build' failed make: *** [build] Error 2
此时可以参照这篇文章:https://blog.youkuaiyun.com/qq_36638599/article/details/79424878
将对应的makefile文件夹中(如本文中在 /nginx-1.10.3/objs/Makefile) 找到 -Werrori 并去掉 在重新make即可便可以解决对应的问题,这个-Werrori就在文章开头的前几行位置。 下面来看我运行之后的结果
接着:
5. sudo cp fastdfs-nginx-module-master解压后的目录中src下的mod_fastdfs.conf  /etc/fdfs/mod_fastdfs.conf
我的指令:
sudo cp  /home/huangdonglin/下载/fastdfs-nginx-module-master/src/mod_fastdfs.conf /etc/fdfs/mod_fastdfs.conf

接着进到复制的文件里面去。修改一些内容
6. sudo vim /etc/fdfs/mod_fastdfs.conf
修改内容:
connect_timeout=10
tracker_server=自己ubuntu虚拟机的ip地址:22122
url_have_group_name=true   # 当你访问FastDFS里的文件时,是否显示组的信息
store_path0=/home/用户xx/fastdfs/storage  # 指定文件存储位置

7. sudo cp 解压缩的fastdfs-master目录中的http.conf  /etc/fdfs/http.conf
(这里涉及到上一节中安装的 fastdfs-master里的配置文件,需要的话,可以看看我上一篇文章)
我的指令:
sudo cp /home/huangdonglin/下载/fastdfs-master/conf/http.conf /etc/fdfs/http.conf

8. sudo cp 解压缩的fastdfs-master目录中的mime.types /etc/fdfs/mime.types
我的指令:
sudo cp /home/huangdonglin/下载/fastdfs-master/conf/mime.types /etc/fdfs/mime.types

接着编写nginx的配置文件
9.sudo vim /usr/local/nginx/conf/nginx.conf
在http部分中添加配置信息如下:
server {
            listen       8888;
            server_name  localhost;
            location ~/group[0-9]/ {             # 相当于url
                ngx_fastdfs_module;
            }
            error_page   500 502 503 504  /50x.html;
            location = /50x.html {
            root   html;
            }
        }
更改如下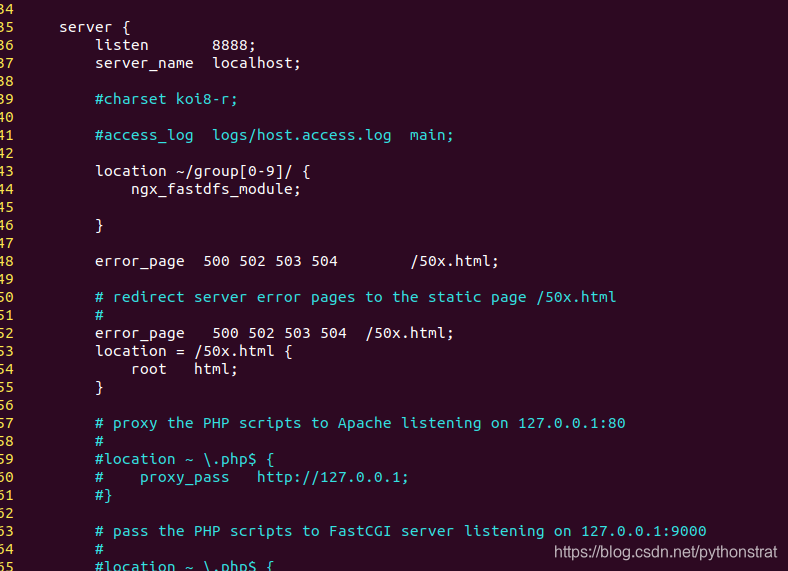
最后:
10. 启动nginx
sudo /usr/local/nginx/sbin/nginx

查看是否运行: ps aux | grep nginx

11. 关闭nginx
sudo /usr/local/nginx/sbin/nginx -s stop

12. 重启nginx
sudo /usr/local/nginx/sbin/nginx -s reload


 9999
9999

 被折叠的 条评论
为什么被折叠?
被折叠的 条评论
为什么被折叠?
 到【灌水乐园】发言


