


主项目vue2 、子项目vue2、vue3、
一、 下载安装"qiankun": “^2.10.13”
参考官网地址
二、 手动调用qiankun,使用vue脚手架搭建的项目
1. 主项目配置(我使用的是手动调用乾坤,在指定页面显示内容)
1. 要使用的页面中引入乾坤
<template>
  <div class="xin">
    <p> 个人项目</p>
     <keep-alive>
      <div id="baixianHome"></div>
    </keep-alive>
    <!--xinHome 为放置子项目的盒子  -->
  </div>
</template>

<script>
import { loadMicroApp, start } from 'qiankun';//引入手动调用方法

export default {
  name: 'XinVue2',
  data() {
    return {

    }
  },
  created() {
    this.$nextTick(() => {
      // hash模式下配置
      const getActiveRule = (hash) => (location) => location.hash.startsWith(hash);
      this.vueApp = loadMicroApp({
        name: 'qiankun-children',
        entry: '//localhost:8081/',
        container: '#xinHome',
        activeRule: getActiveRule('#/'),
      });
      //启动乾坤函数
      start({ singular: false });
    })
  },
  beforeDestroy(){
    console.log( this.vueApp.unmount({ name: 'qiankun-children' }))
    this.vueApp.unmount({ name: 'qiankun-children' });
  },
  methods: {

  }
}
2. router设置
- router/index.js文件配置
import Vue from 'vue'
import VueRouter from 'vue-router';
Vue.use(VueRouter)

const router = new VueRouter({
    base: window.__POWERED_BY_QIANKUN__ ? '/qiankun-children/' : '/',  //使用 history模式必须配置
    mode: 'history',
    routes: [
        {
            path: '/xin',
            name: 'xin',
            component: () => import('@/views/xin-vue2/home'),
        }, {
            path: '/mq',
            name: 'mq',
            component: () => import('@/views/mq-vue2/home'),
        }
    ],
});
export default router
- main.js配置 引入并使用VueRouter
import VueRouter from 'vue-router';
import router from './router/index'
Vue.config.productionTip = false
Vue.use(VueRouter)
new Vue({
  router,
  render: h => h(App),
}).$mount('#appAdmin')
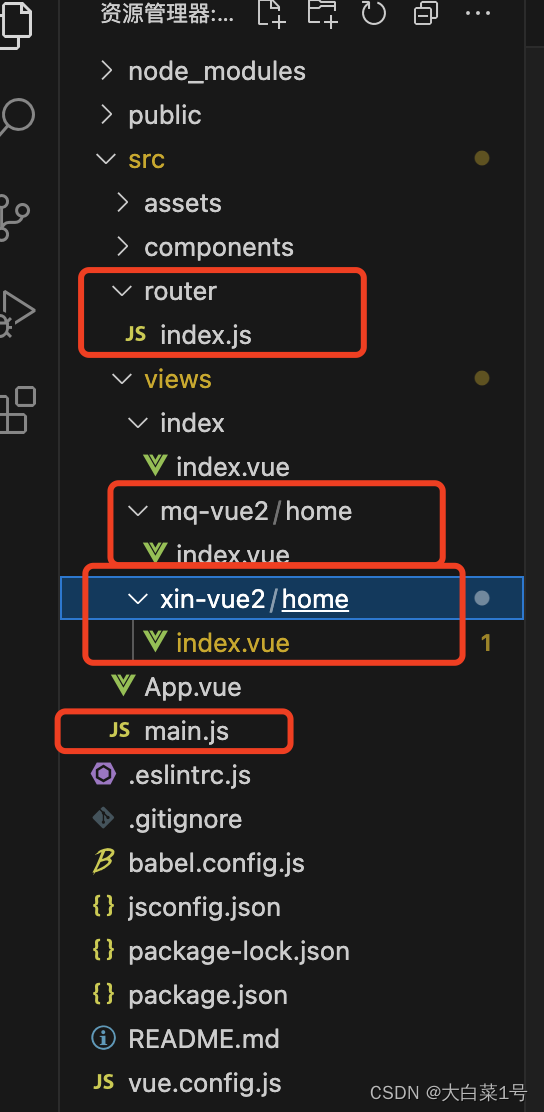
- 文件目录结构
2. 子项目配置(我用的hash模式)
1. 在src目录下新建public-path.js文件
__webpack_public_path__ = window.__POWERED_BY_QIANKUN__
  ? window.__INJECTED_PUBLIC_PATH_BY_QIANKUN__
  : `http://localhost:8081/`; // 填写你当前子项目的实际部署地址
1. main.js 配置
import './public-path';//要放最上边
import Vue from 'vue';
import VueRouter from 'vue-router';
import ElementUI from 'element-ui';
import 'element-ui/lib/theme-chalk/index.css';
import App from './App.vue';
import store from './store';
import Home from './views/home/index.vue'

Vue.config.productionTip = false;
Vue.use(ElementUI);
Vue.use(VueRouter)
let router = null;
let instance = null;
function render(props = {}) {
  const { container } = props;
  router = new VueRouter({
    scrollBehavior: () => ({ y: 0 }),
    routes:[
      {
        path: '/home',
        name: 'Home',
        component: Home
      }
    ],
  });

  instance = new Vue({
    router,
    store,
    render: (h) => h(App),
  }).$mount(container ? container.querySelector('#app') : '#app');
}

// 独立运行时
if (!window.__POWERED_BY_QIANKUN__) {
  render();
}

export async function bootstrap() {
  console.log('[vue] vue app bootstraped');
}
export async function mount(props) {
  console.log('[vue] props from main framework', props);
  render(props);
}
export async function unmount() {
  instance.$destroy();
  instance.$el.innerHTML = '';
  instance = null;
  router = null;
}
2. vue.config.js 配置
const { defineConfig } = require('@vue/cli-service')
const packageName = require('./package.json').name;
module.exports = defineConfig({
  transpileDependencies: true,
  devServer: {
    headers: {
      'Access-Control-Allow-Origin': '*',
    },
  },
  configureWebpack: {
    output: {
      library: `${packageName}-[name]`,
      libraryTarget: 'umd',
      chunkLoadingGlobal: `webpackJsonp_${packageName}`,
      publicPath: '/'
    },
  },
})
3. 运行后使用
-
先运行主项目在运行子项目
-
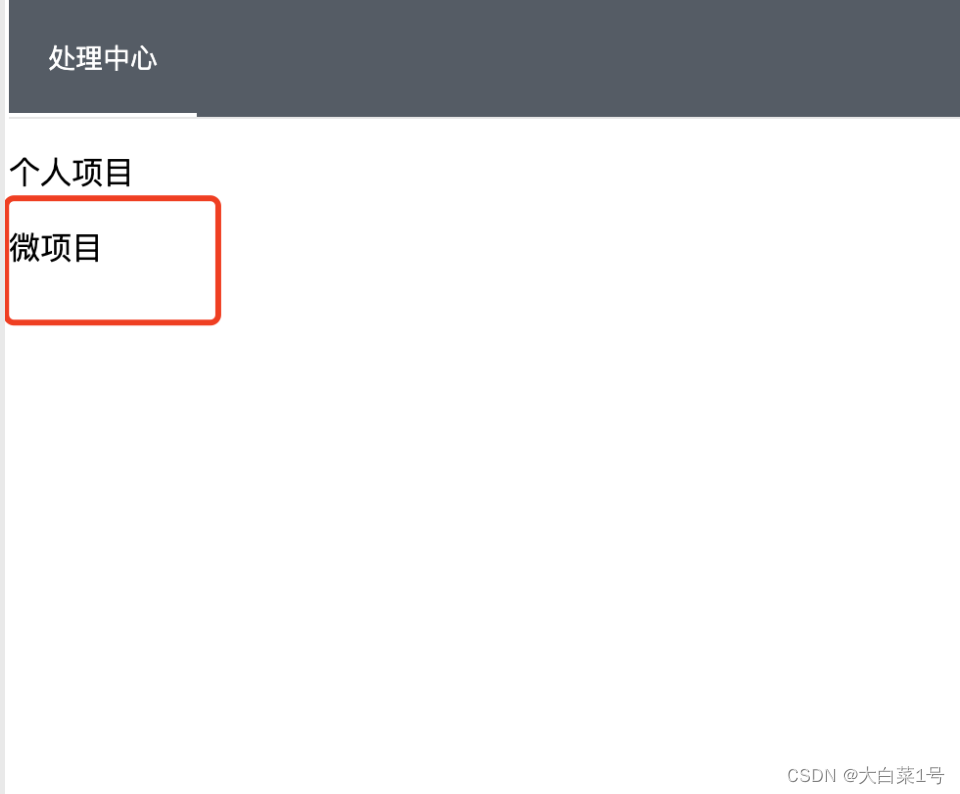
首页效果
-
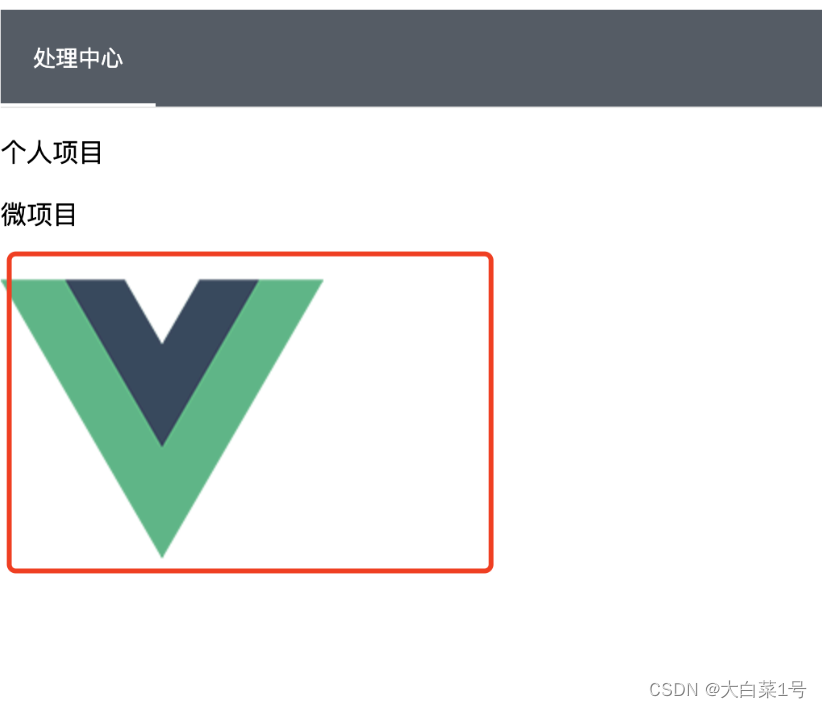
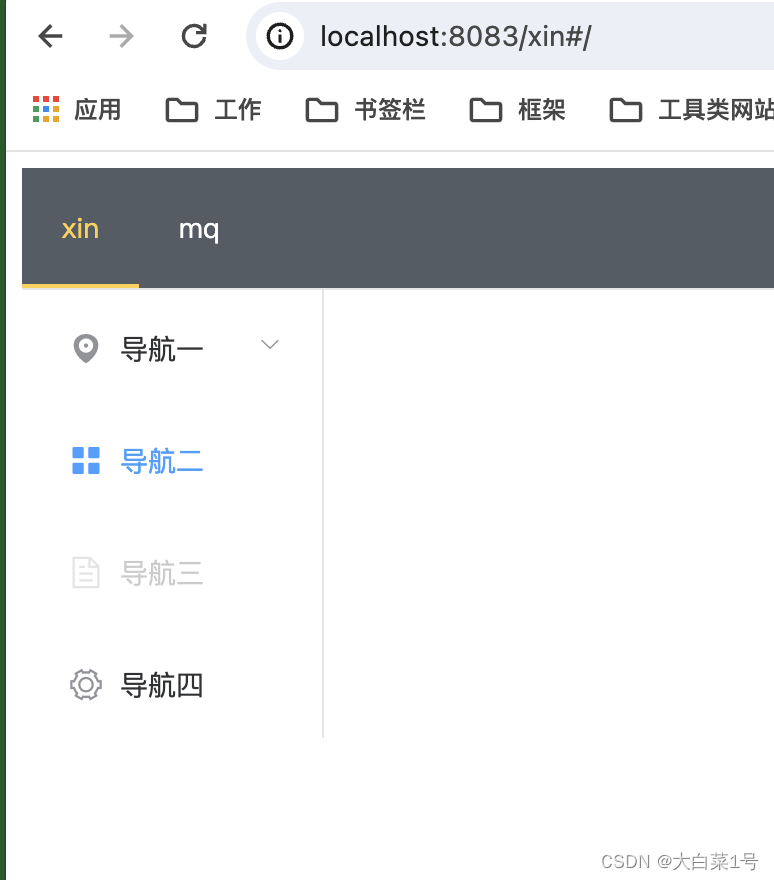
进入调用乾坤页面
地址:http://localhost:8081/xin#/
-
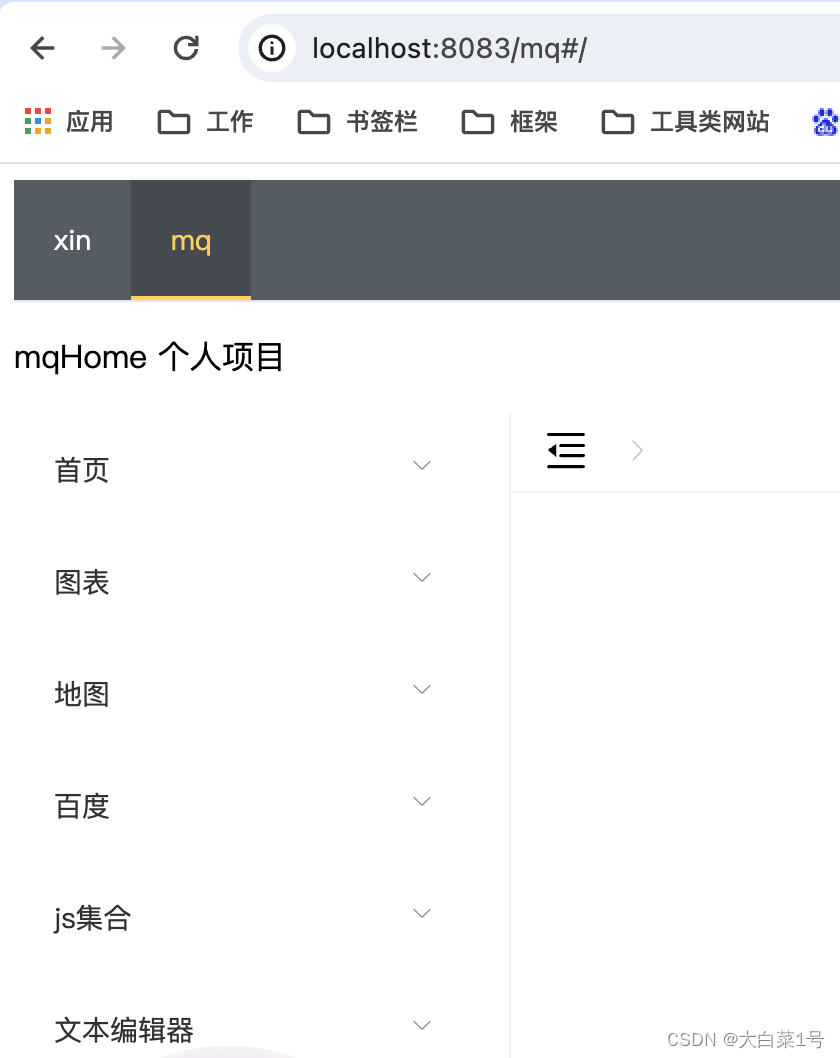
使用子项目路由,进入子项目home页面
地址:http://localhost:8081/xin#/home
三、 vue2 旧项目修改成乾坤子项目
1. main.js 配置修改(添加一下)
let router = null;
let instance = null;
function render(props = {}) {
  const { container } = props;
  router = homeRoutes
  instance = new Vue({
    router,
    render: (h) => h(App),
  }).$mount(container ? container.querySelector('#app') : '#app');
}

// // 独立运行时
if (!window.__POWERED_BY_QIANKUN__) {
  render();
}

export async function bootstrap() {
  console.log('[vue] vue app bootstraped');
}
export async function mount(props) {
  console.log('[vue] props from main framework', props);
  render(props);
}
export async function unmount() {
  instance.$destroy();
  instance.$el.innerHTML = '';
  instance = null;
  router = null;
}
// 微应用中增加 update 钩子以便主应用手动更新微应用
export async function update(props) {
  render(props);
}
2. router.js 配置修改(添加一下)
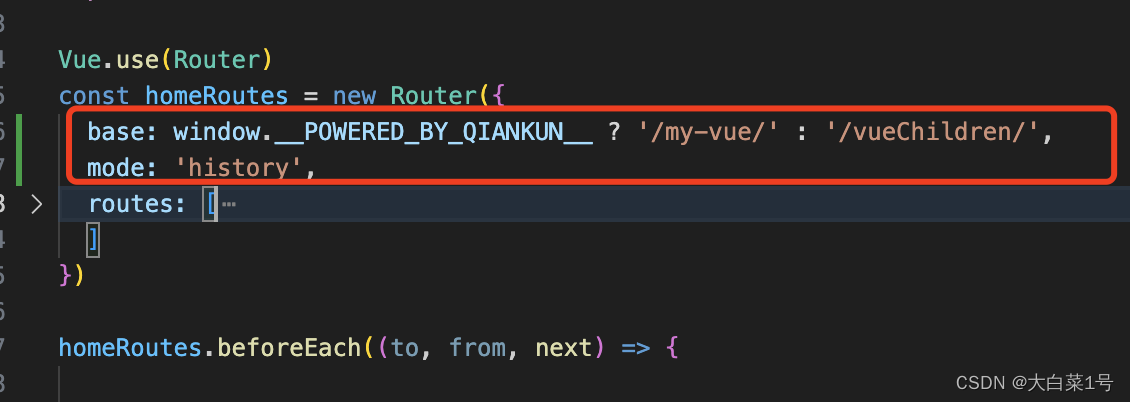
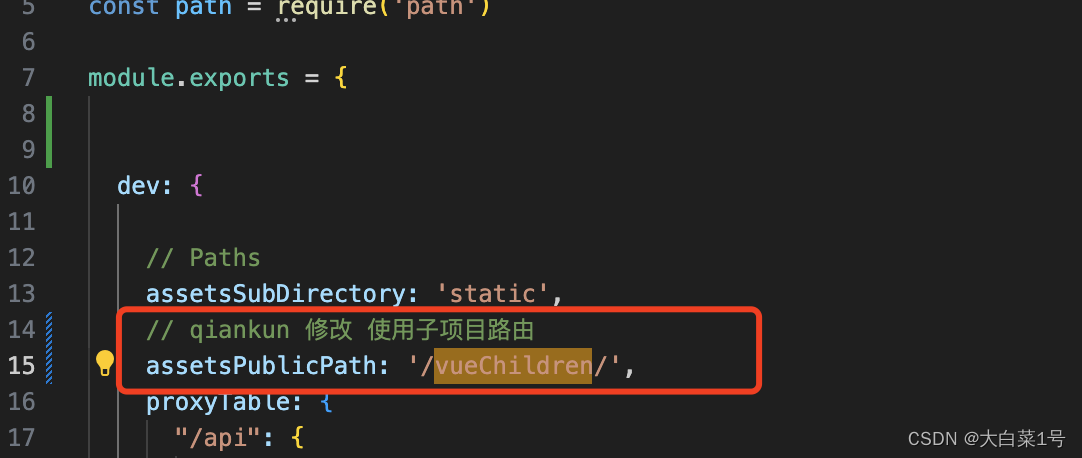
3. 添加vue.config.js 配置

4. 运行后使用
四、 报错:
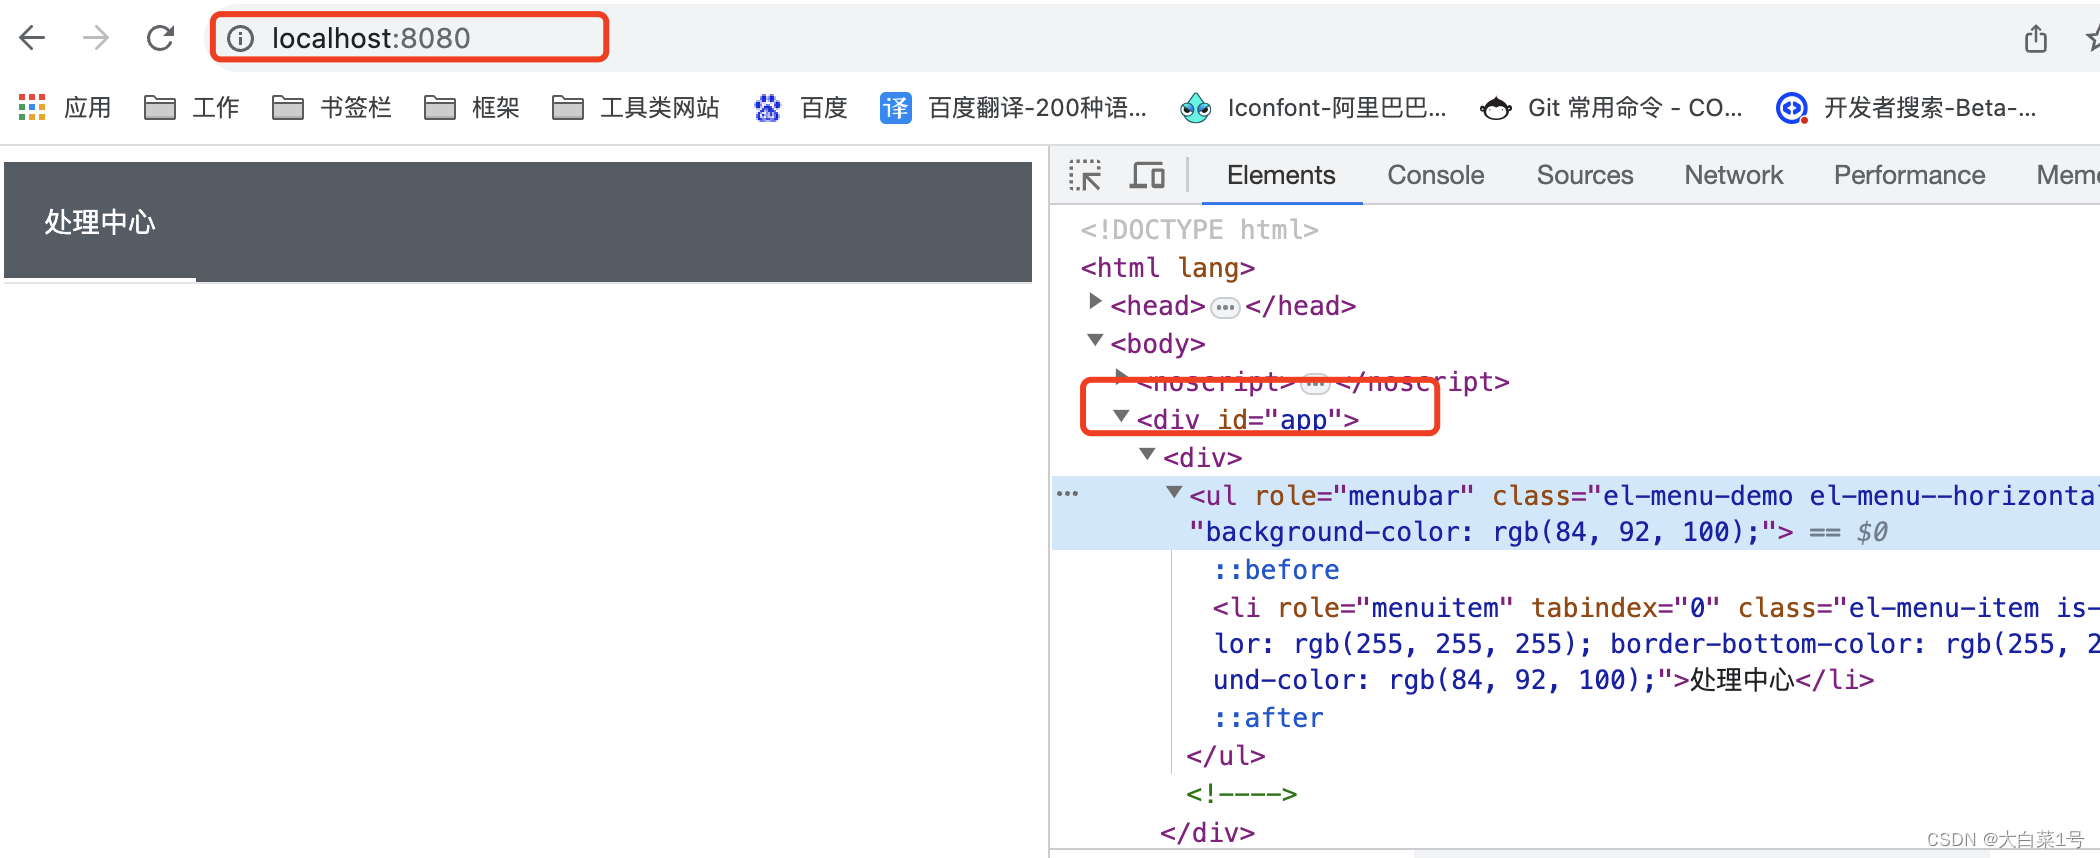
1.报错一:static/fonts/element-icons.535877f.woff:1 GET http://localhost:8080/static/fonts/element-icons.535877f.woff net::ERR_ABORTED 404 (Not Found)
static/fonts/element-icons.732389d.ttf:1 GET http://localhost:8080/static/fonts/element-icons.732389d.ttf net::ERR_ABORTED 404 (Not Found)
官网地址跳转
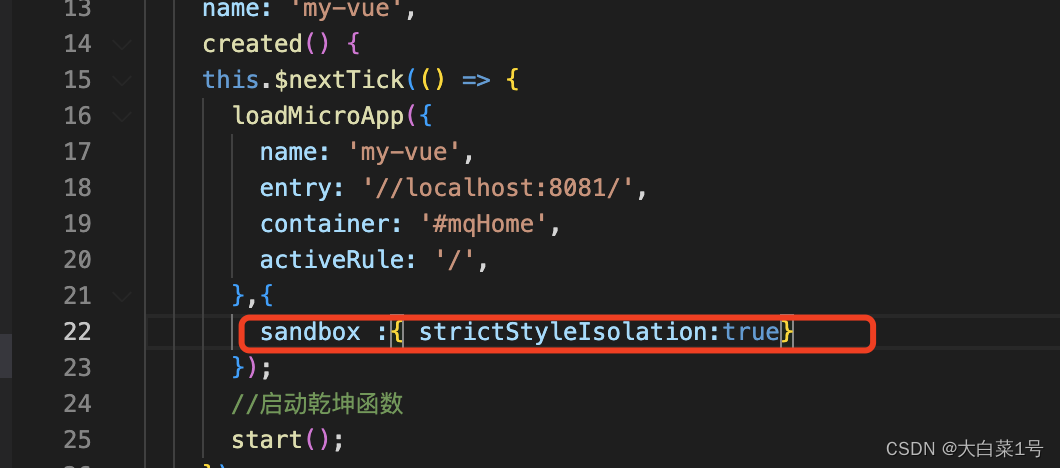
默认情况下沙箱可以确保单实例场景子应用之间的样式隔离,但是无法确保主应用跟子应用、或者多实例场景的子应用样式隔离。当配置为 {
strictStyleIsolation: true } 时表示开启严格的样式隔离模式。这种模式下 qiankun
会为每个微应用的容器包裹上一个 shadow dom 节点,从而确保微应用的样式不会对全局造成影响。
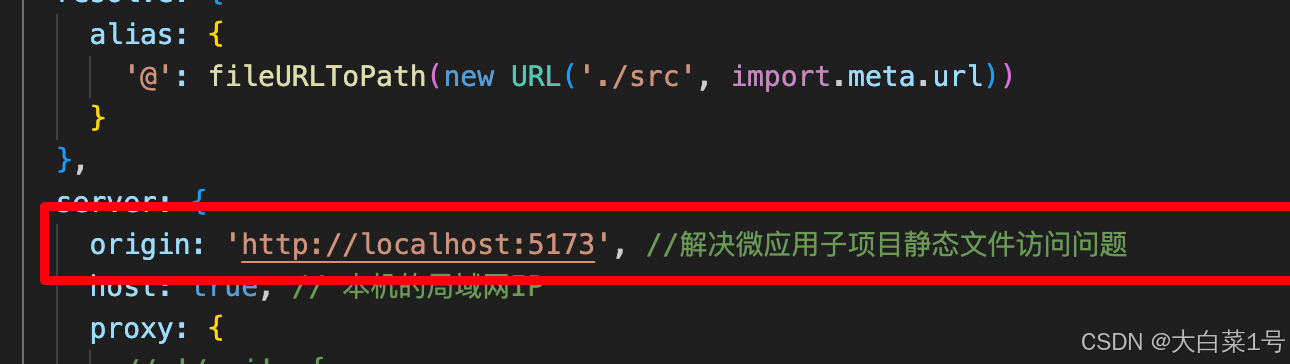
2. 子项目静态文件报错404
原因是本地调试没找到地址,需要在子项目中配置固定地址,添加如下设置就可以了,具体地址根据自己项目改
五、 vue3 + vite 旧项目修改成qiankun子项目
— 下载安装插件
npm i vite-plugin-qiankun 或者yarn add vite-plugin-qiankun都不成功再试试其他安装方法
— main.js文件修改
import { createApp,defineAsyncComponent } from 'vue'
import { createPinia } from 'pinia'
import {
  renderWithQiankun,
  qiankunWindow,
  QiankunProps,
} from 'vite-plugin-qiankun/dist/helper'//引入乾坤插件
import App from './App.vue'

import ElementPlus from 'element-plus'
import * as ElementPlusIconsVue from '@element-plus/icons-vue'
import 'element-plus/dist/index.css';

import router from './router'

const app = createApp(App);
for (const [key, component] of Object.entries(ElementPlusIconsVue)) {
  app.component(key, component)
}
const render = (props: QiankunProps = {}) => {
    const { container } = props
    const app2: string | Element = container?.querySelector('#app') || '#app' // 避免 id 重复导致微应用挂载失败

    app.use(router)
    app.use(createPinia())
    app.mount(app2)
  }

  const initQianKun = () => {
    renderWithQiankun({
      bootstrap() {
      },
      mount(props) { // 主项目传入数据
        console.log(props)
        render(props)
      },
      unmount(props) {
      },
      update(props) {
      },
    })
  }
  qiankunWindow.__POWERED_BY_QIANKUN__ ? initQianKun() : render() // 判断是否使用 qiankun
vite.config.ts文件修改
base: "/wss", //必须和基座也就是主应用的activeRule值一致
plugins: [
vue(),
vueJsx(),
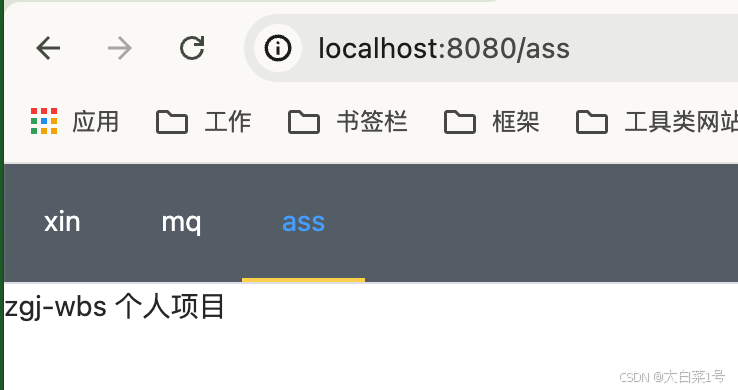
qiankun("ass", {
useDevMode: true,
}),
],
路由设置
const router = createRouter({

  history: createWebHistory(qiankunWindow.__POWERED_BY_QIANKUN__ ? '/ass' : '/'),//wbs与子项目名称一样
  routes:  [
    // 质量监督台
    {
      path: '/',
      name: 'home',
      component: () => import('../views/home.vue'),
    },
    ]
  })
主项目添加使用方法
<template>
    <div>
      <p>zgj-个人项目</p>
      <keep-alive>
        <div id="wbome"></div>
      </keep-alive>
    </div>
  </template>

  <script>
  import { loadMicroApp, start } from 'qiankun';//引入手动调用方法

  export default {
    name: 'ass',//与子项目名称一样
    beforeDestroy() {
      console.log(this.vueApp)
      this.vueApp.unmount({ name: 'ass' });
    },
    created() {
      this.$nextTick(() => {
        this.vueApp = loadMicroApp({
          name: 'ass',//子项目名称
          entry: '//localhost:5173',
          container: '#wbome',
          activeRule: '/wss',//与config文件配置路由一样
        },
        //启动乾坤函数
        start({ singular: false });
      })
    },
    methods: {
    },
    beforeDestroy(){
      console.log( this.vueApp.unmount({ name: 'ass' }))
      this.vueApp.unmount({ name: 'ass' });
    },

  }

  </script>


 3028
3028

 被折叠的 条评论
为什么被折叠?
被折叠的 条评论
为什么被折叠?
 到【灌水乐园】发言


