


 本文记录了在SpringBoot项目中配置Swagger2的过程,包括在pom.xml添加依赖,创建SwaggerConfig类,启用@EnableSwagger2注解,并分享了在配置过程中遇到的问题及解决方法。通过配置,可以在http://localhost:8083/swagger-ui.html访问Swagger界面进行接口测试。
配置swagger2
在开发过程中,配置swagger可以让我们开发的接口一目了然,便于测试,在配置过程中踩了几次坑,特将这个过程记录下来
- pom.xml中加入依赖
  <dependency>
            <groupId>io.springfox</groupId>
            <artifactId>springfox-swagger2</artifactId>
            <version>2.4.0</version>
        </dependency>
        <dependency>
            <groupId>io.springfox</groupId>
            <artifactId>springfox-swagger-ui</artifactId>
            <version>2.4.0</version>
        </dependency>
在与application文件同级的地方加入swaggerConfig类,我的项目结构如下
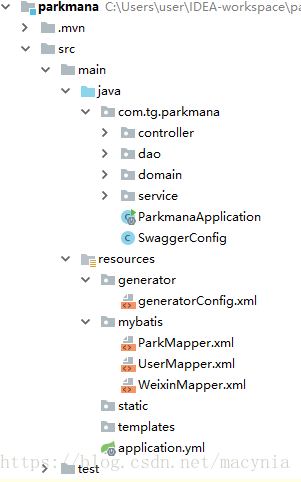
SwaggerConfig.class
package com.tg.parkmana;


import org.springframework.context.annotation.Bean;
import org.springframework.context.annotation.Configuration;
import springfox.documentation.builders.ApiInfoBuilder;
import springfox.documentation.builders.PathSelectors;
import springfox.documentation.builders.RequestHandlerSelectors;
import springfox.documentation.service.ApiInfo;
import springfox.documentation.spi.DocumentationType;
import springfox.documentation.spring.web.plugins.Docket;
import springfox.documentation.swagger2.annotations.EnableSwagger2;
@EnableSwagger2
@Configuration
public class SwaggerConfig {
    @Bean
    public Docket createRestApi(){
        return new Docket(DocumentationType.SWAGGER_2)
                .apiInfo(apiInfo())
                .select()
                .apis(RequestHandlerSelectors.basePackage("com.tg.parkmana.controller"))
                .paths(PathSelectors.any())
                .build();

    }

    private ApiInfo apiInfo() {
        return new ApiInfoBuilder()
                .title("后端测试接口")
                .description("停车场后台配置管理系统后端测试接口")
                .termsOfServiceUrl("none")
                .version("1.0").build();
    }


}
在工程的application类(在我的工程中就是parkmanaApplication)中加入注解@EnableSwagger2
@MapperScan("com.tg.parkmana.dao")
@SpringBootApplication
@EnableSwagger2
public class ParkmanaApplication {

    public static void main(String[] args) {
        SpringApplication.run(ParkmanaApplication.class, args);
    }
}
此时运行工程,输入网址就可以看到swagger页面了。我的appliction.yml文件中的配置的是
server:
port: 8083所以我访问的网址是http://localhost:8083/swagger-ui.html。


 6344
6344

 被折叠的 条评论
为什么被折叠?
被折叠的 条评论
为什么被折叠?
 到【灌水乐园】发言


