


1、创建react xyflow项目
1.创建react项目,见本专栏第一篇文章React Flow快速上手教程-优快云博客
2、安装后端库,启动后端服务
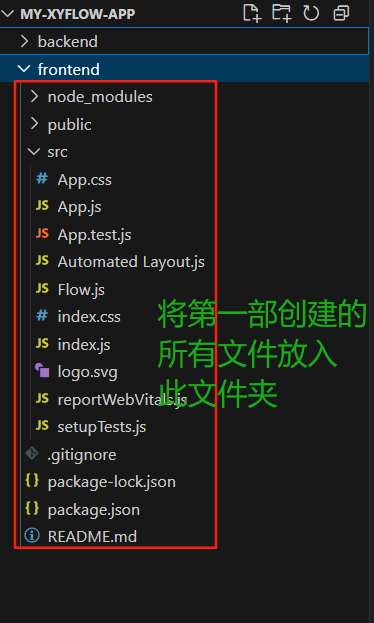
2.新建一个frontend文件夹,将创建的前端文件全部放进frontend文件夹,然后在项目目录下创建一个banckend文件夹,用来存放后端代码。
3.进入项目backend文件夹,安装express库
npm init -y
npm install express
4、在backend文件夹下新建server.js,粘贴以下代码用作后端服务
// server.js
const express = require('express');
const app = express();
const port = 4000;

app.use(express.json());

app.get('/api/graph', (req, res) => {
  const nodes = [
    { id: '1', data: { label: 'Start' }, position: { x: 0, y: 0 } },
    { id: '2', data: { label: 'Process' }, position: { x: 0, y: 0 } },
    { id: '3', data: { label: 'End' }, position: { x: 0, y: 0 } },
  ];

  const edges = [
    { id: 'e1-2', source: '1', target: '2', type: 'smoothstep' },
    { id: 'e2-3', source: '2', target: '3', type: 'smoothstep' },
  ];

  res.json({ nodes, edges });
});

app.listen(port, () => {
  console.log(`Server running at http://localhost:${port}`);
});
5.启动后端服务
node server.js3、构建xyflow自动化布局前端
1.安装所需依赖
npm install dagre1.在frontend文件夹下,新建AutomatedLayout.js文件
import React, { useState, useCallback, useRef, useEffect } from 'react';
import {
  ReactFlow,
  MiniMap,
  Controls,
  Background,
  useNodesState,
  useEdgesState,
  addEdge,
  MarkerType,
} from '@xyflow/react';
import '@xyflow/react/dist/style.css';
import dagre from 'dagre';

const dagreGraph = new dagre.graphlib.Graph();
dagreGraph.setDefaultEdgeLabel(() => ({}));

const nodeWidth = 172;
const nodeHeight = 36;

const getLayoutedElements = (nodes, edges) => {
  dagreGraph.setGraph({ rankdir: 'TB' });

  nodes.forEach((node) => {
    dagreGraph.setNode(node.id, { width: nodeWidth, height: nodeHeight });
  });

  edges.forEach((edge) => {
    dagreGraph.setEdge(edge.source, edge.target);
  });

  dagre.layout(dagreGraph);

  const layoutedNodes = nodes.map((node) => {
    cons
最低0.47元/天 解锁文章


 1136
1136

 被折叠的 条评论
为什么被折叠?
被折叠的 条评论
为什么被折叠?
 到【灌水乐园】发言


