本地springboot项目接入deepseek大模型,详细版教程来了!

哈喽小伙伴们大家好,我是小李。

最近听说deepseek 挺火的,今天,咱也来本地接入一个玩玩。先说一下前置环境:jdk 8及以上,maven 3.x系列(这里maven的镜像建议配置阿里云的官方镜像,防止后面安装依赖的时候出现一些乱七八糟的问题)只要具备上面两个环境,你就可以在本地使用java语言调一个大模型。

在这里我们选择硅基流动这款ai大模型的云服务平台,你也可以使用其他的平台,例如豆包,openai,智谱,百度智能云这些都可以,调用方式大同小异。今天,直接分享我目前调用成功的方式。

3,2,1 !上链接

  1. 硅基流动统一登录

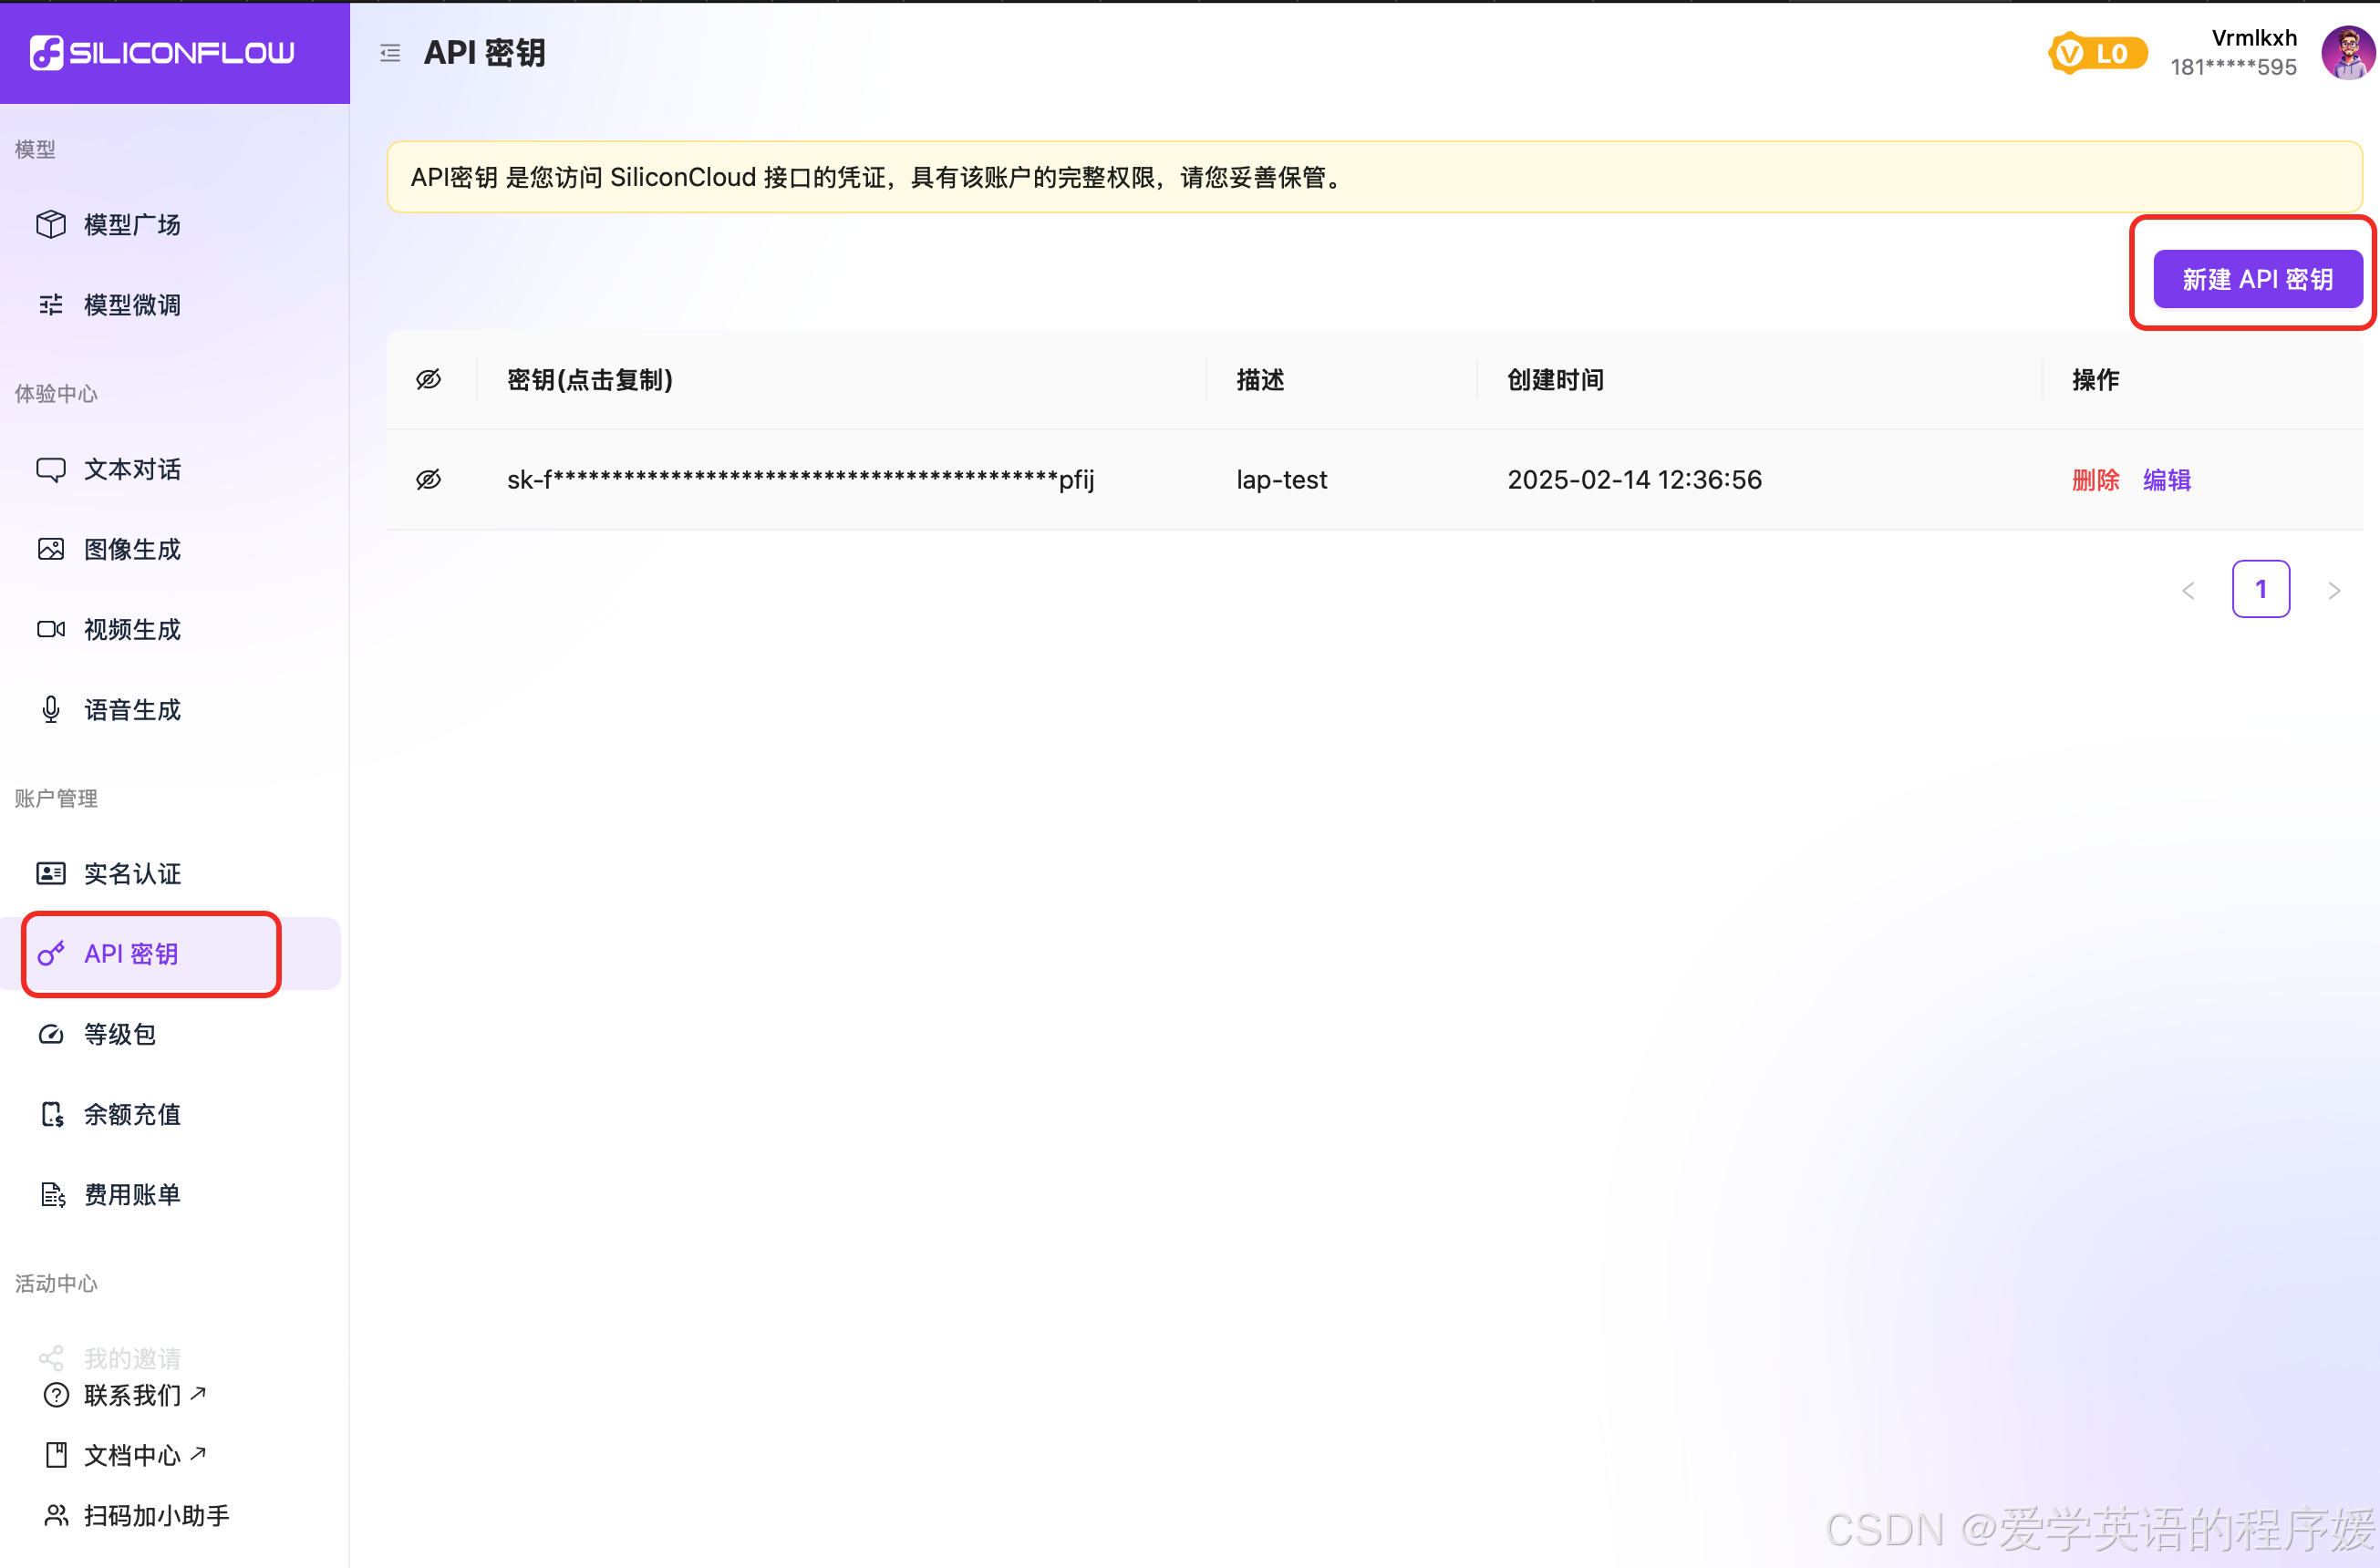
进入官网之后,需要先注册一个账号,注册完之后需要先申请一个apikey,这是你调用大模型的唯一凭证,注意不要暴露给任何人,如果不小心暴露出去了,刷的可是你白花花的💵啊

创建好点击右上角的体验中心,

进来之后,可以看到很多模型

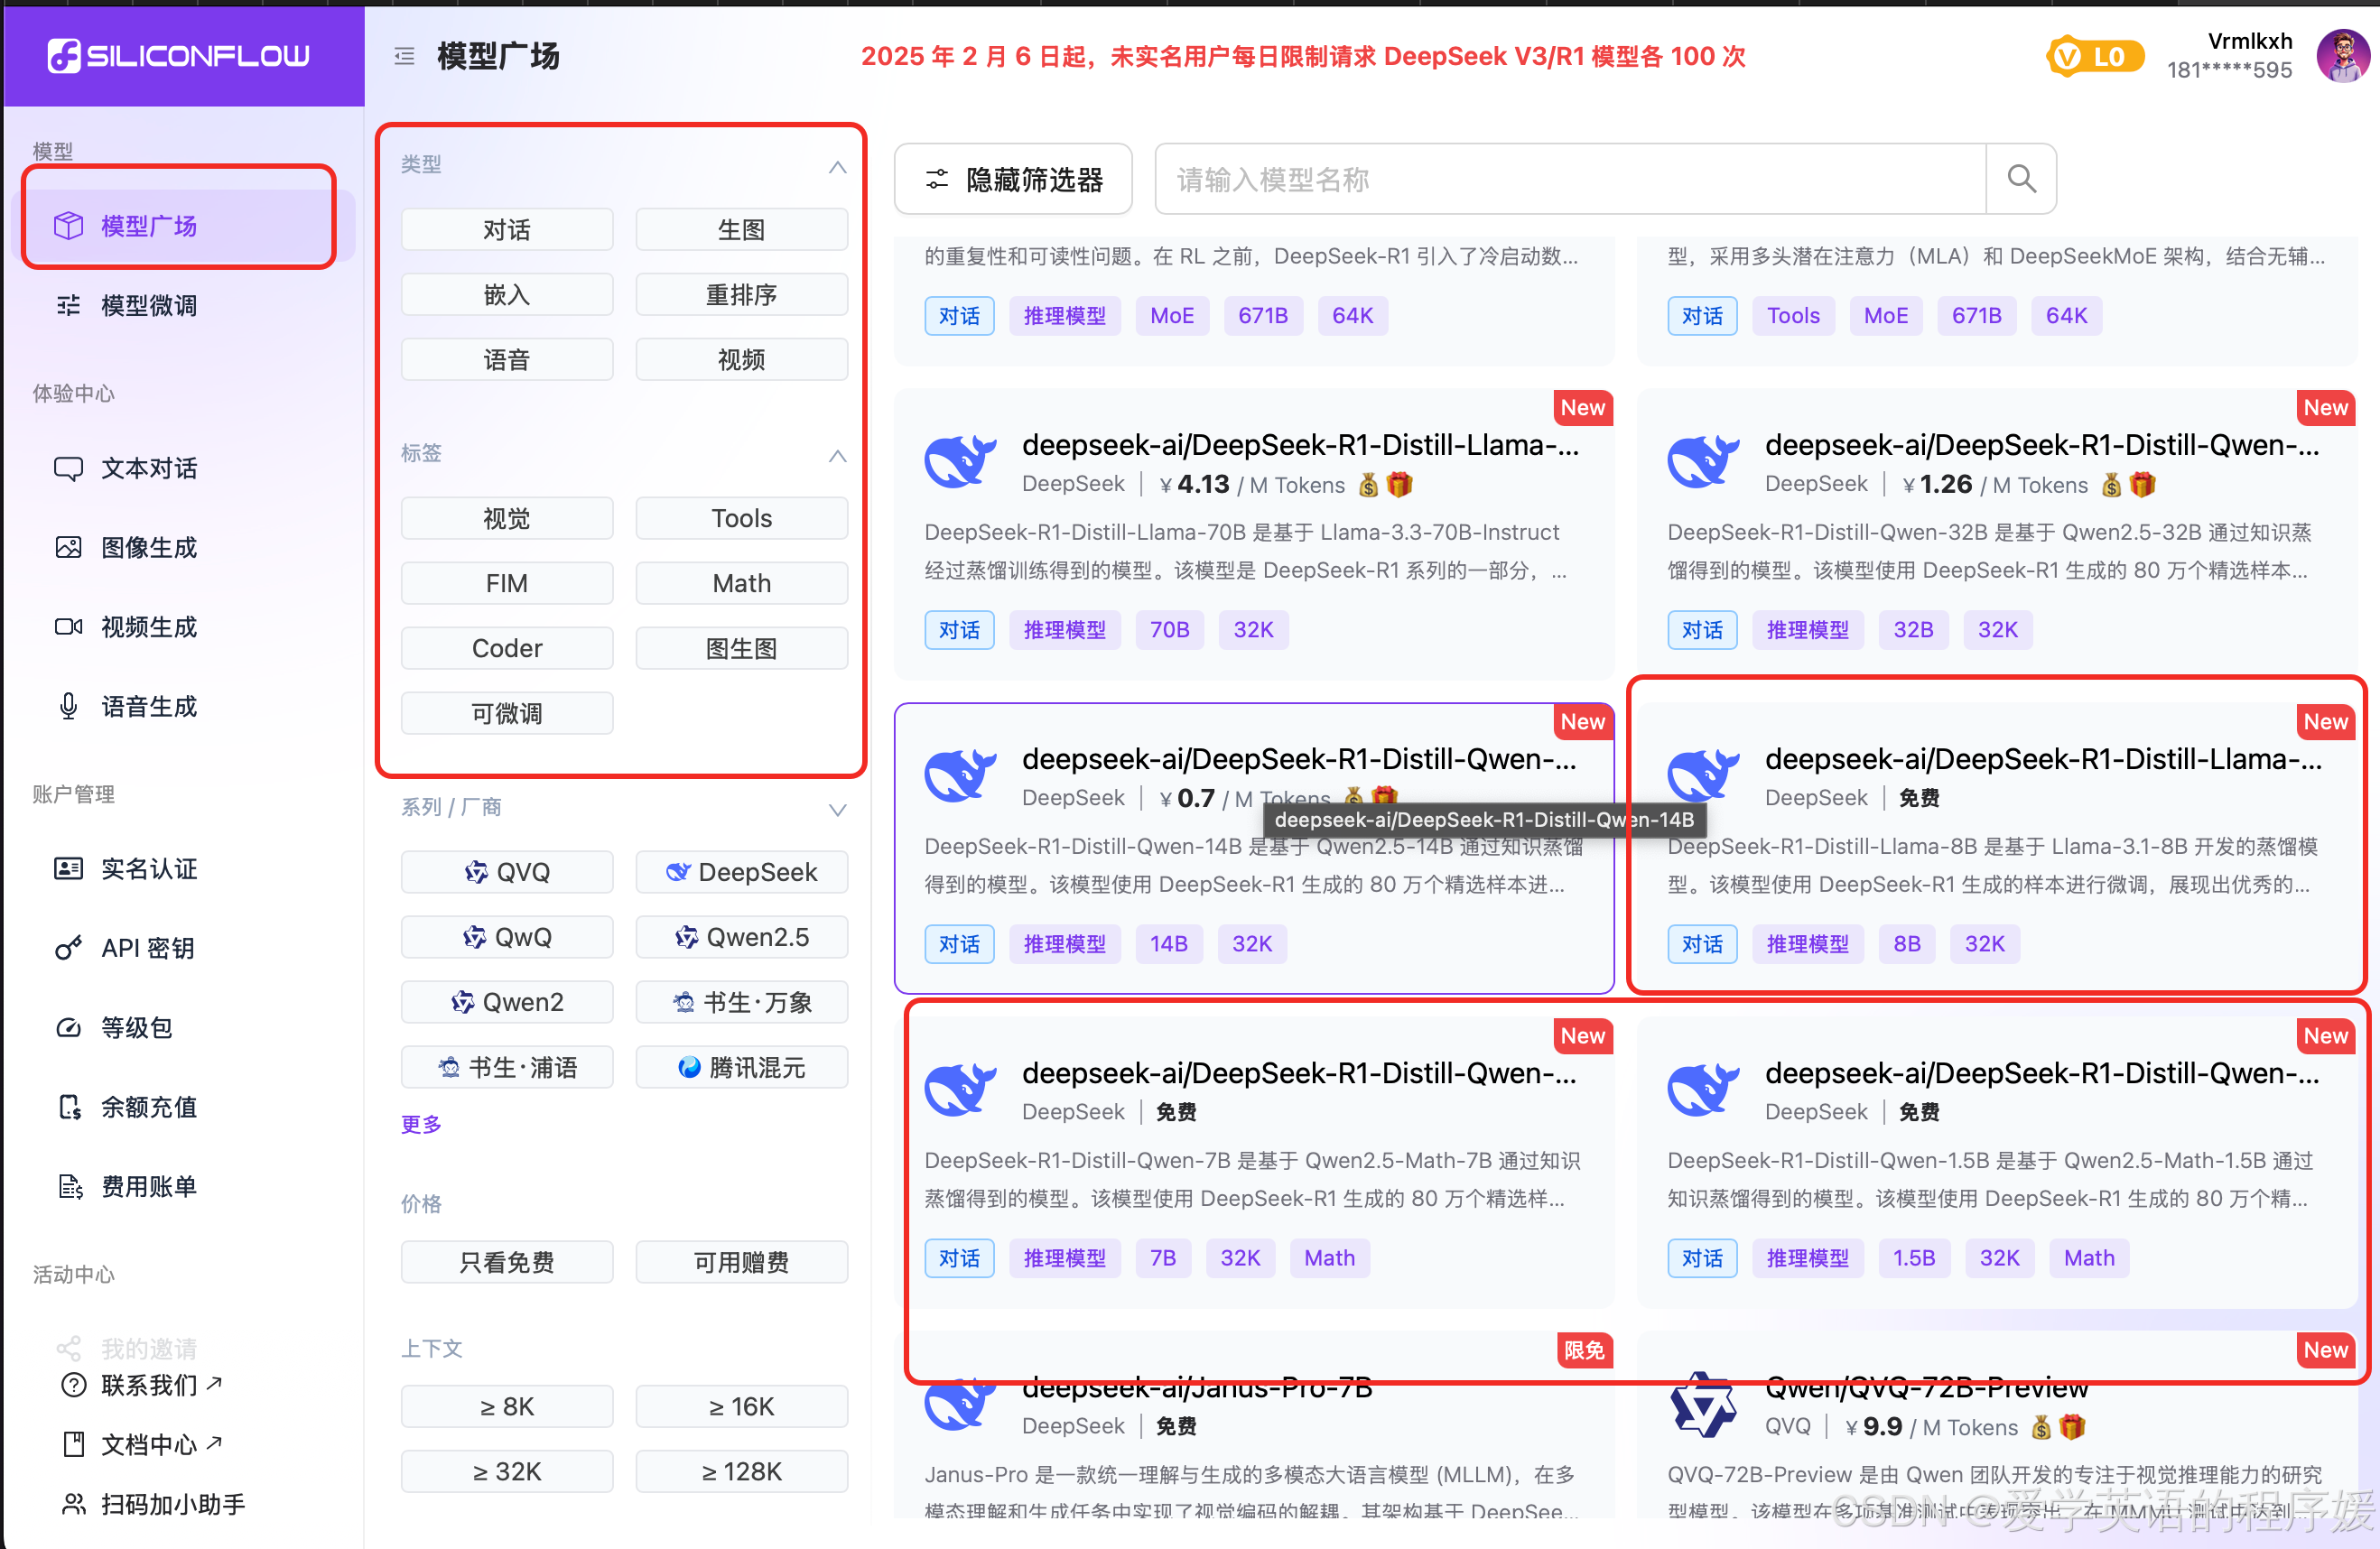
免费和付费的都有,可以根据自己的需求选择
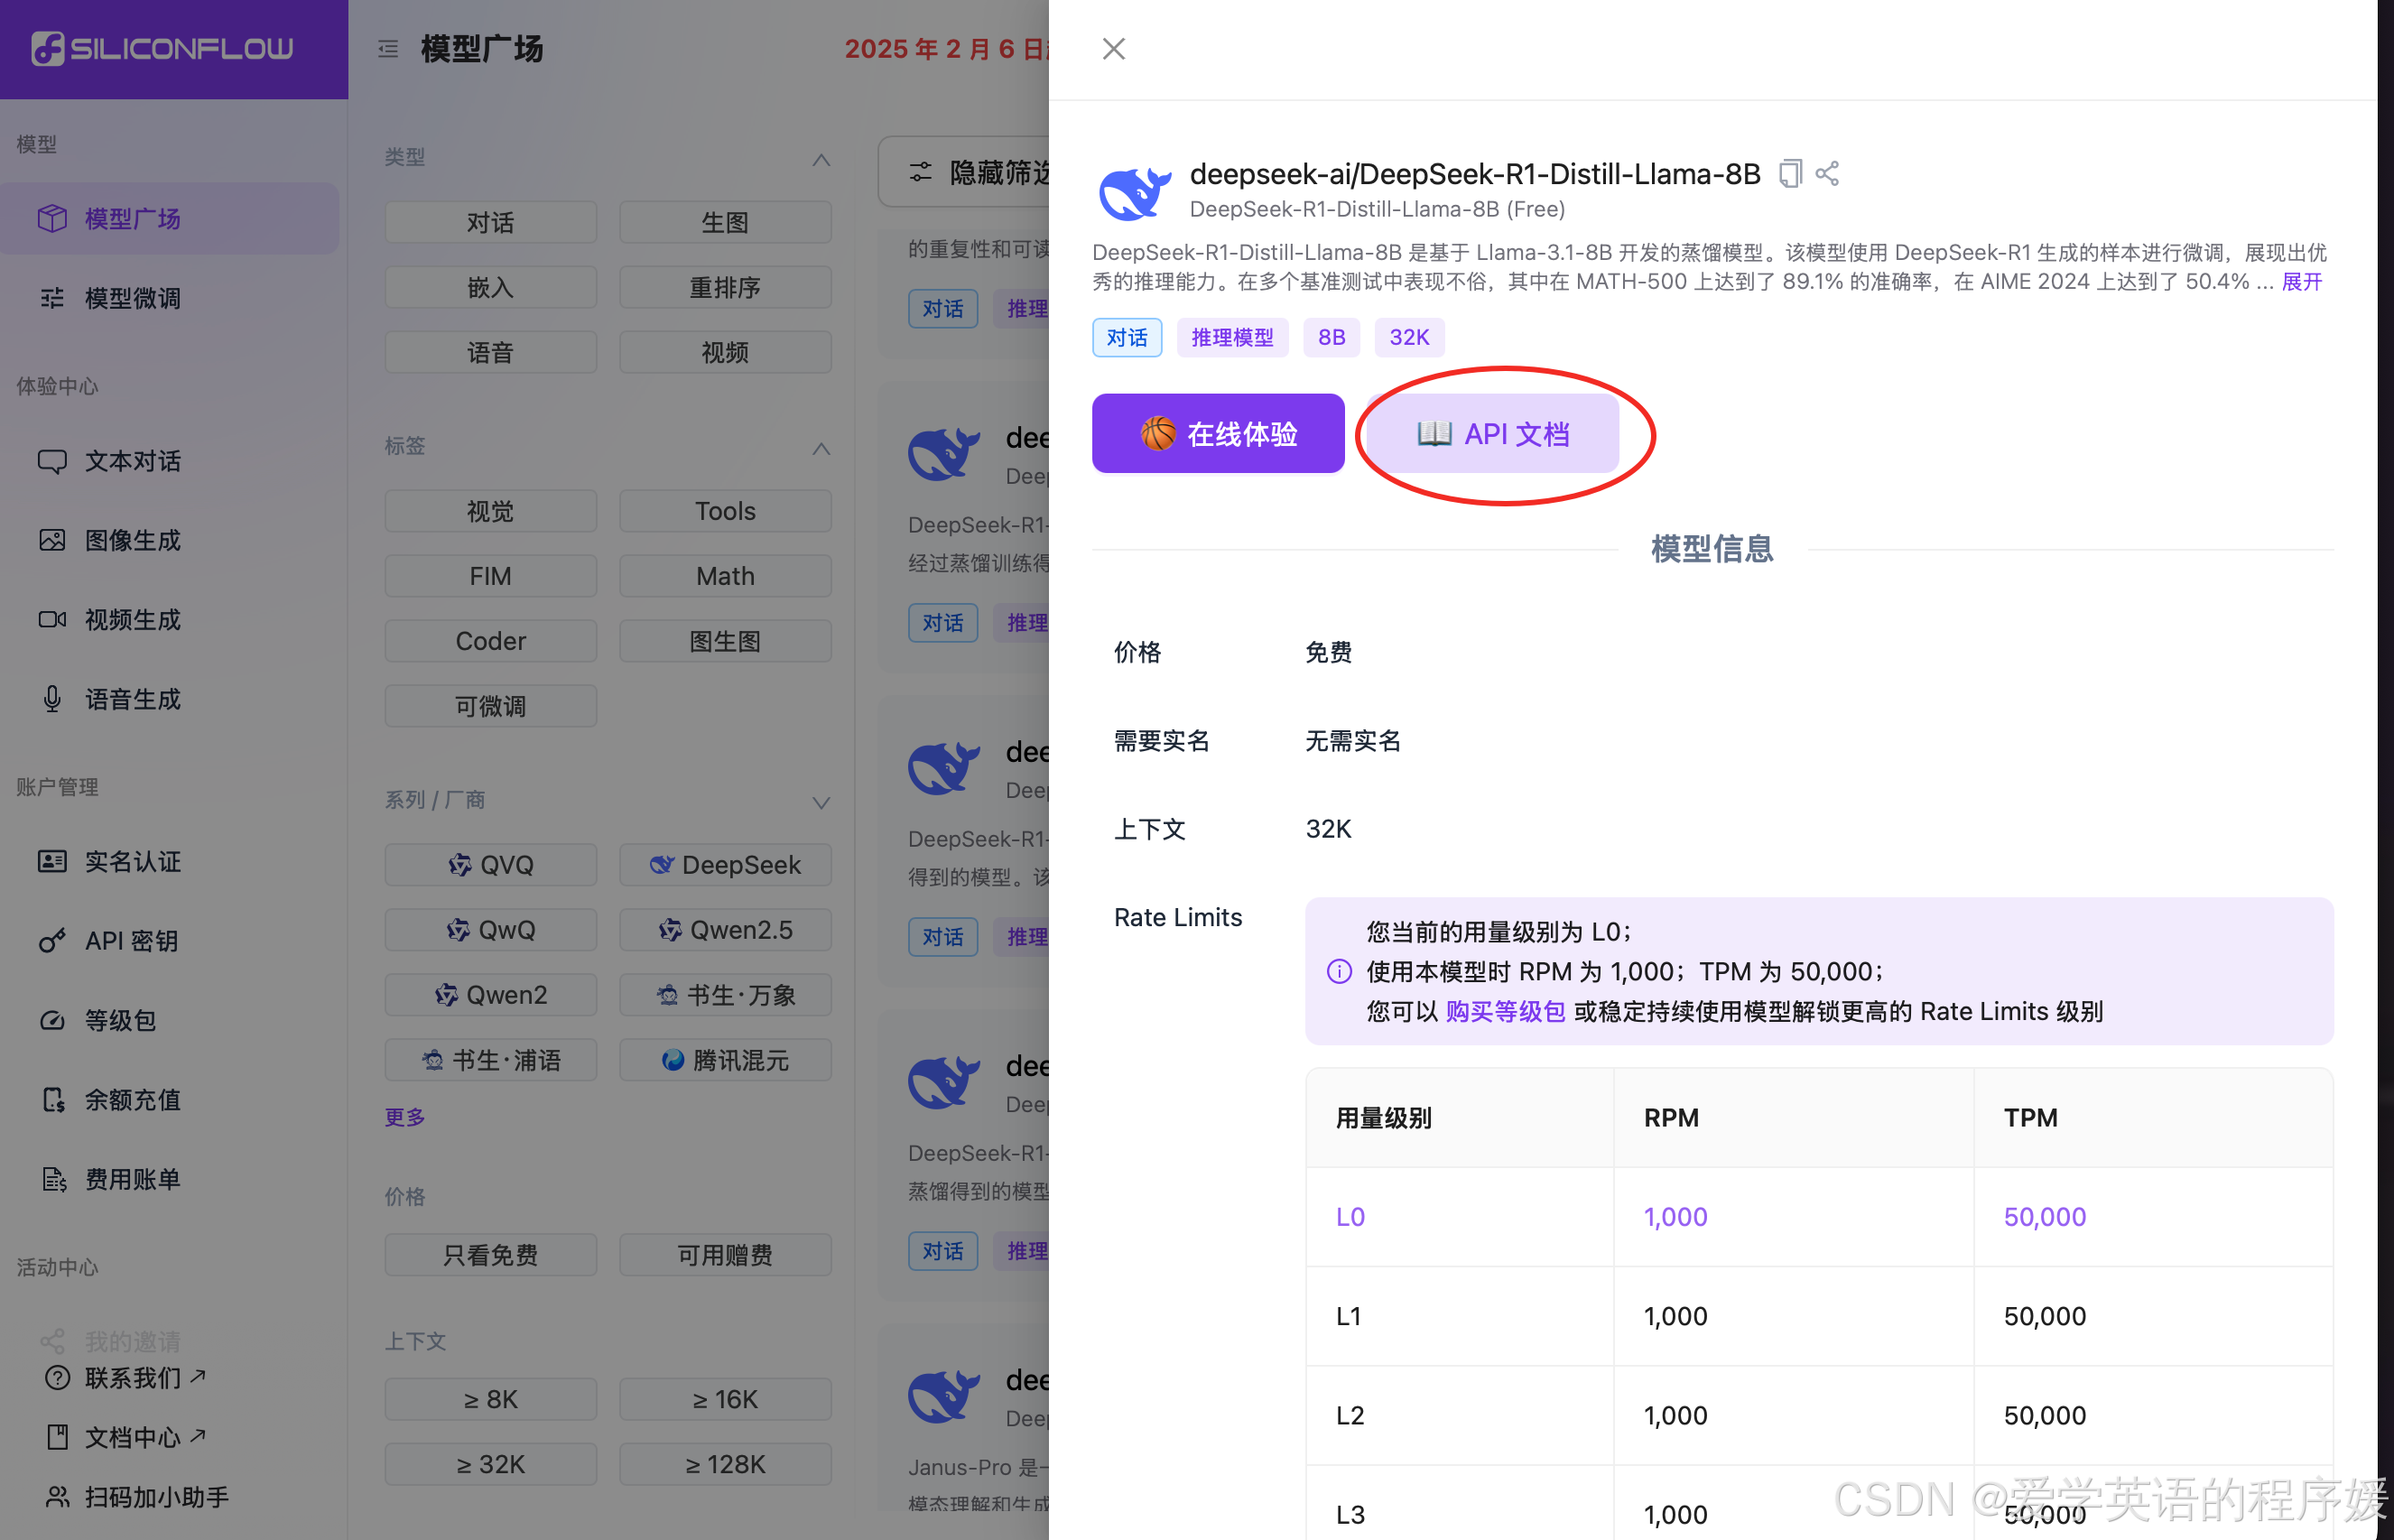
随便选择一个,点击进入api文档

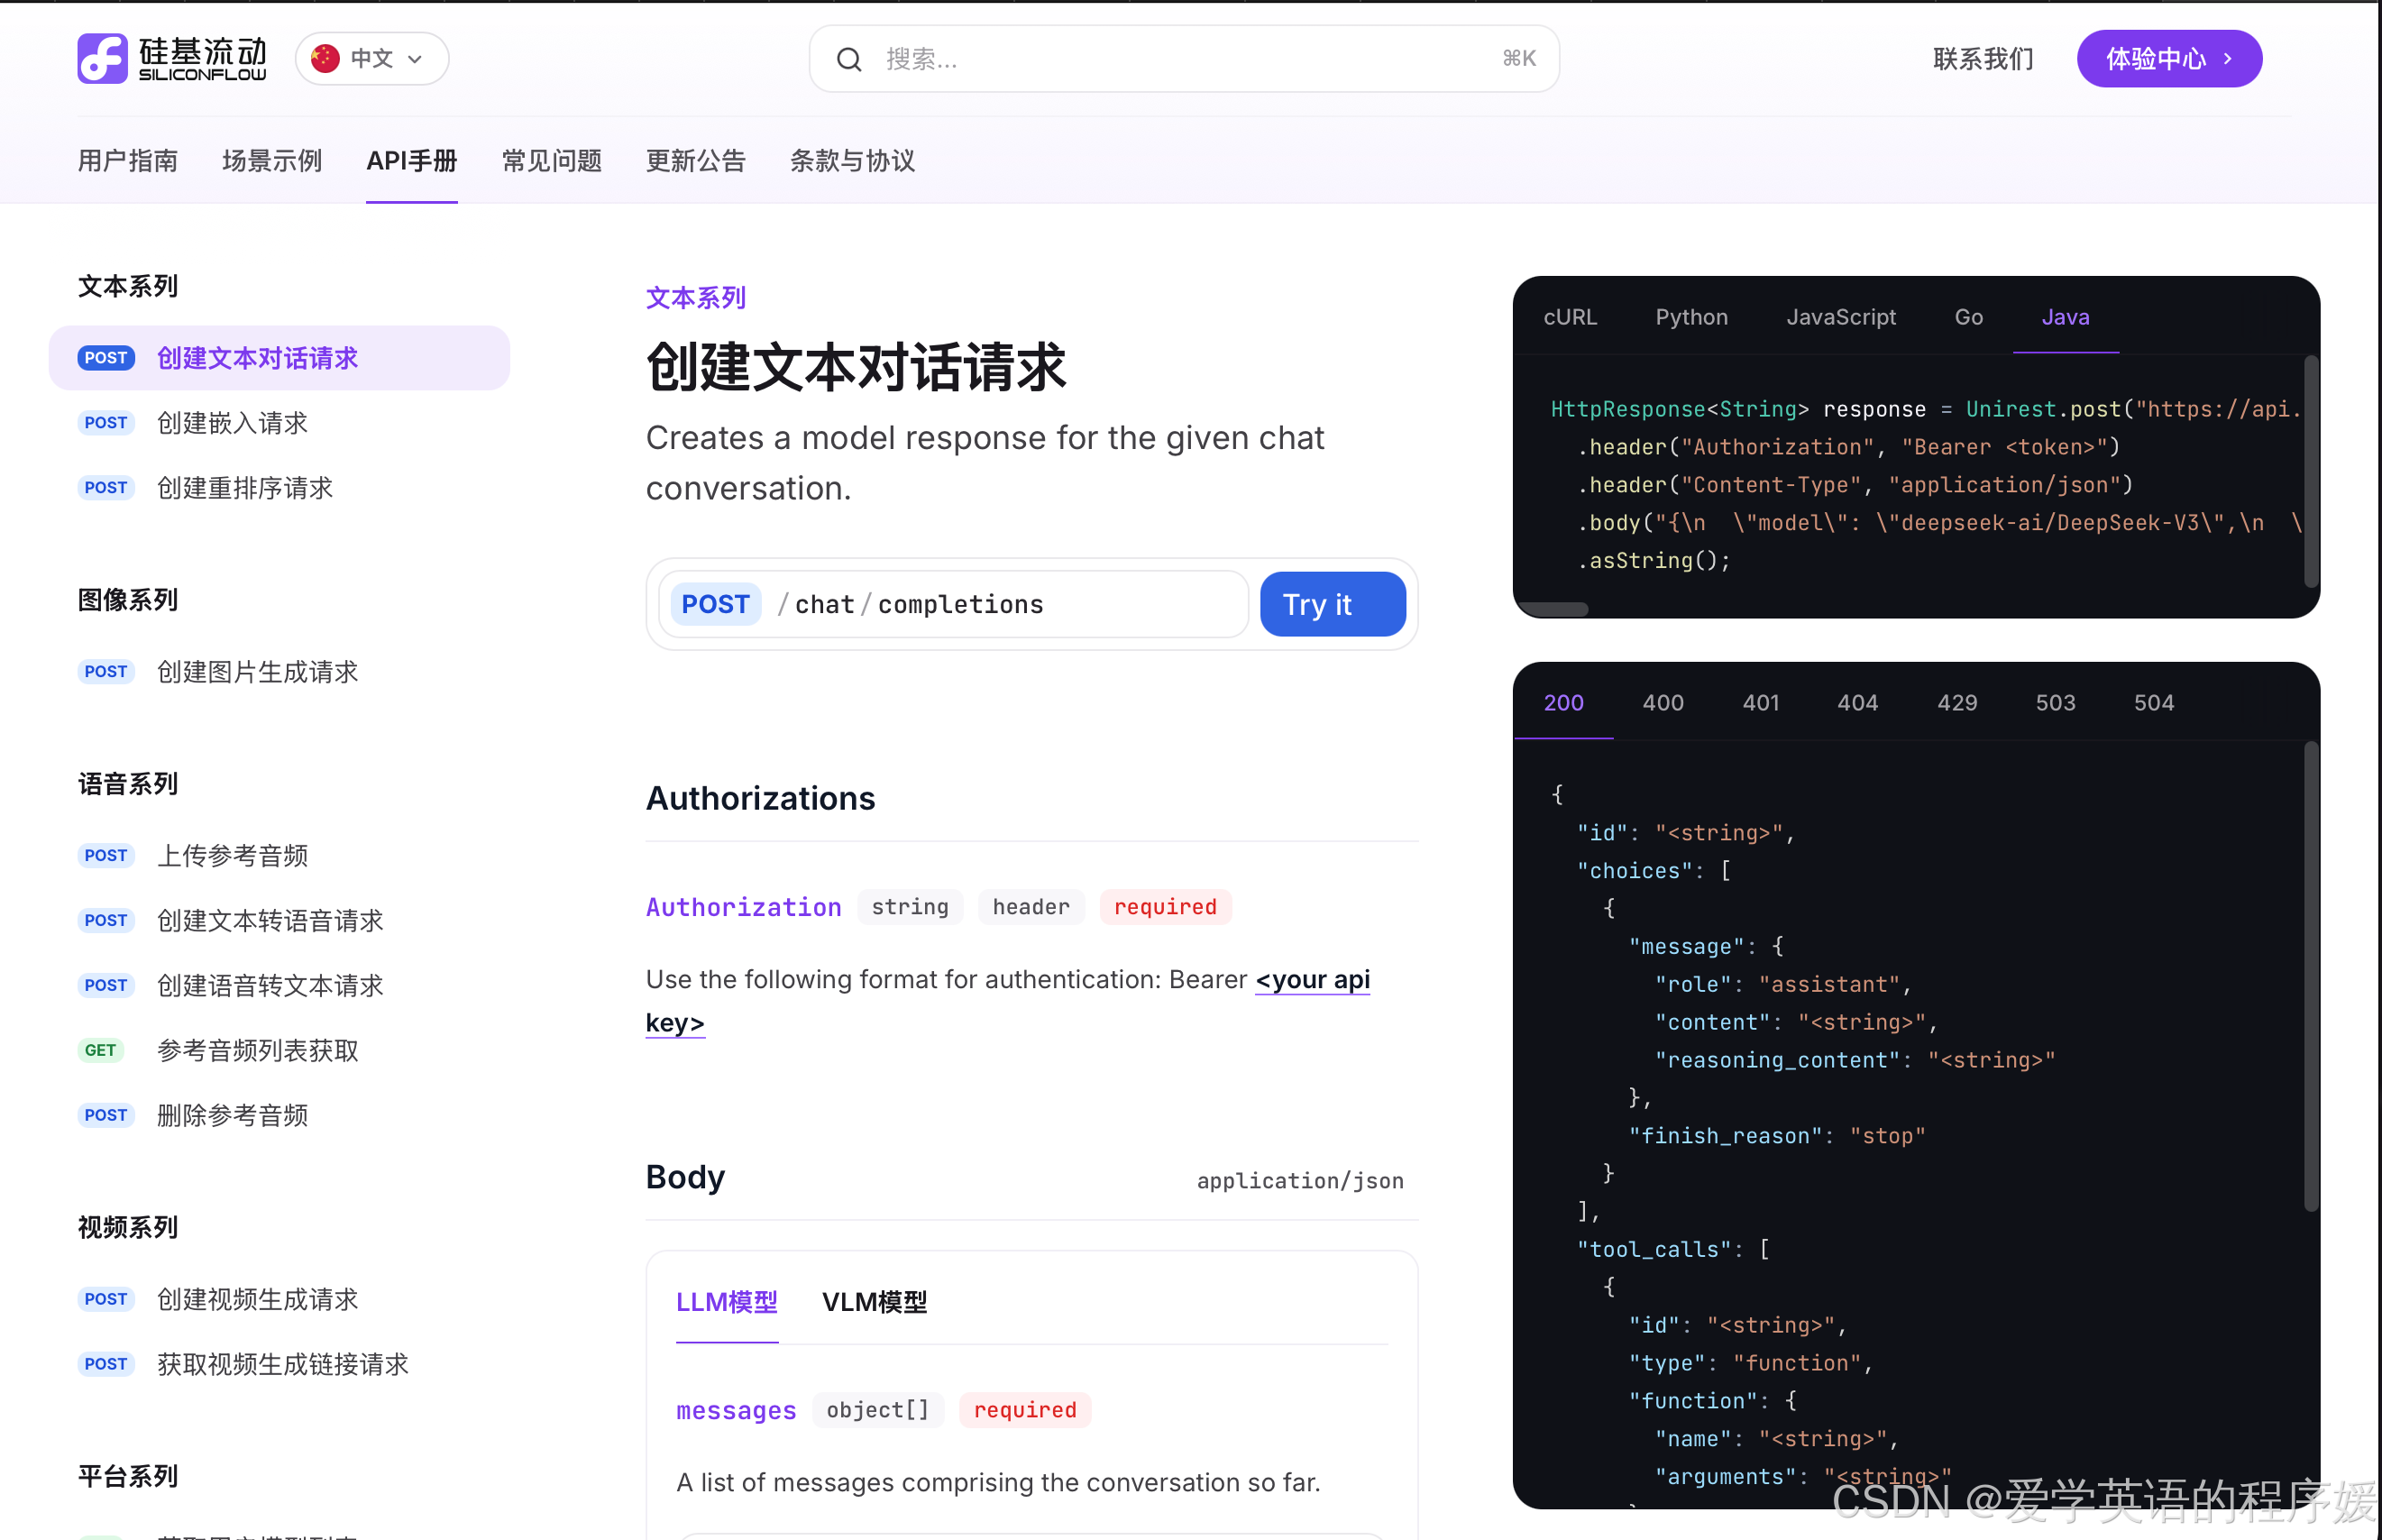
来到api手册,文本系列,仔细阅读一下官方文档,看看调用模型需要哪些参数和依赖,然后根据自己本地的环境复制对应的代码即可。

在本地可以新建一个demo,先把大模型调起来,后面再接入具体的业务场景。

大模型返回

这里输出的content就是我们需要的内容

好啦,本期的内容就到这里,是不是很简单哈哈哈哈哈,希望本期分享对大家有帮助,我是小李,我们下期见!

### Spring Boot 和 Vue 集成 DeepSeek 的实现方案 #### 后端部分 (Spring Boot) 创建一个标准的 Spring Boot 项目并配置好基础环境后,可以通过 RESTful API 接口调用 DeepSeek 模型的服务。以下是具体的实现方式: 1. **引入依赖** 在 `pom.xml` 中添加必要的依赖项以支持 HTTP 请求和其他功能[^1]。 ```xml <dependencies> <!-- Spring Web --> <dependency> <groupId>org.springframework.boot</groupId> <artifactId>spring-boot-starter-web</artifactId> </dependency> <!-- JSON处理工具 --> <dependency> <groupId>com.fasterxml.jackson.core</groupId> <artifactId>jackson-databind</artifactId> </dependency> <!-- HttpClient用于外部API请求 --> <dependency> <groupId>org.apache.httpcomponents.client5</groupId> <artifactId>httpclient5</artifactId> </dependency> </dependencies> ``` 2. **编写 Controller 层** 定义接口供前端调用,并通过该接口向 DeepSeek 发起请求。 ```java @RestController @RequestMapping("/api/deepseek") public class DeepSeekController { private final DeepSeekService deepSeekService; public DeepSeekController(DeepSeekService deepSeekService) { this.deepSeekService = deepSeekService; } @PostMapping("/chat") public ResponseEntity<String> getChatResponse(@RequestBody Map<String, String> request) { String userMessage = request.get("message"); try { String response = deepSeekService.generateResponse(userMessage); return ResponseEntity.ok(response); } catch (Exception e) { return ResponseEntity.status(HttpStatus.INTERNAL_SERVER_ERROR).body(e.getMessage()); } } } ``` 3. **定义 Service 层逻辑** 实现与 DeepSeek 模型交互的具体业务逻辑。 ```java @Service public class DeepSeekService { private static final String DEEPSEEK_API_URL = "http://localhost:7860/generate"; // 假设本地部署了DeepSeek服务 public String generateResponse(String message) throws IOException { CloseableHttpClient httpClient = HttpClients.createDefault(); HttpPost postRequest = new HttpPost(DEEPSEEK_API_URL); StringEntity input = new StringEntity("{\"prompt\":\"" + message + "\", \"max_new_tokens\": 50}"); input.setContentType("application/json"); postRequest.setEntity(input); HttpResponse response = httpClient.execute(postRequest); BufferedReader rd = new BufferedReader(new InputStreamReader(response.getEntity().getContent())); StringBuilder result = new StringBuilder(); String line; while ((line = rd.readLine()) != null) { result.append(line); } httpClient.close(); JSONObject jsonResponse = new JSONObject(result.toString()); return jsonResponse.getString("generated_text"); } } ``` --- #### 前端部分 (Vue.js) 在 Vue.js 应用程序中,可以构建一个简单的聊天界面并与后端通信获取 AI 对话响应。 1. **安装 Axios** 使用 Axios 进行 HTTP 请求操作。 ```bash npm install axios ``` 2. **创建 Chat 组件** 下面是一个基本的 Vue 组件结构,允许用户输入消息并通过 API 获取回复。 ```vue <template> <div id="app"> <h1>DeepSeek 聊天机器人</h1> <ul> <li v-for="(msg, index) in messages" :key="index">{{ msg }}</li> </ul> <input type="text" v-model="userInput" placeholder="请输入您的问题..." /> <button @click="sendMessage">发送</button> </div> </template> <script> import axios from 'axios'; export default { data() { return { userInput: '', messages: [] }; }, methods: { async sendMessage() { if (!this.userInput.trim()) return; const userMsg = `User: ${this.userInput}`; this.messages.push(userMsg); try { const response = await axios.post('/api/deepseek/chat', { message: this.userInput }); const aiReply = `AI: ${response.data}`; this.messages.push(aiReply); } catch (error) { console.error('Error fetching chat response:', error.message); this.messages.push('AI: 抱歉,服务器暂时不可用!'); } this.userInput = ''; } } }; </script> <style scoped> ul { list-style-type: none; padding-left: 0; } li { margin-bottom: 10px; } button { margin-top: 10px; } </style> ``` --- #### 测试运行流程 完成上述开发工作之后,启动 Spring Boot 服务以及 Vue 开发服务器即可测试整个系统的连通性和功能性。如果需要进一步优化体验,则可以在现有基础上增加更多特性,比如对话历史记录保存、错误提示改进等[^2]。 --- #### 注意事项 由于当前阶段 DeepSeek 可能存在资源限制的情况,建议开发者优先考虑将其大模型部署到本地环境中进行调试和学习用途[^3]。 ---
评论
添加红包

请填写红包祝福语或标题

红包个数最小为10个

红包金额最低5元

当前余额3.43前往充值 >
需支付:10.00
成就一亿技术人!
领取后你会自动成为博主和红包主的粉丝 规则
hope_wisdom
发出的红包

打赏作者

爱学英语的程序媛

你的鼓励将是我创作的最大动力

¥1 ¥2 ¥4 ¥6 ¥10 ¥20
扫码支付:¥1
获取中
扫码支付

您的余额不足,请更换扫码支付或充值

打赏作者

实付
使用余额支付
点击重新获取
扫码支付
钱包余额 0

抵扣说明:

1.余额是钱包充值的虚拟货币,按照1:1的比例进行支付金额的抵扣。
2.余额无法直接购买下载,可以购买VIP、付费专栏及课程。

余额充值