


目录
一、注册邮件开启授权码
163邮箱的授权码
需要开通
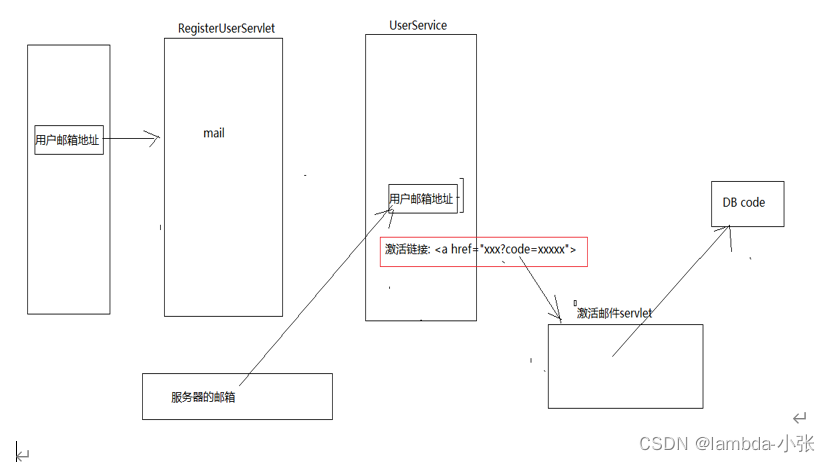
二、用户激活邮箱实现
邮箱激活流程:
三、邮箱激活-后端功能实现
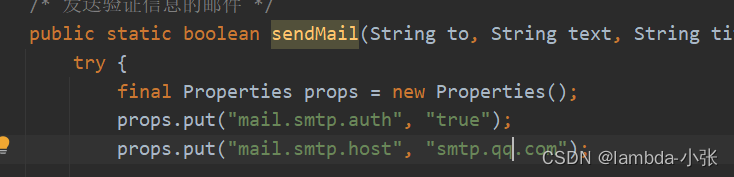
修改MailUtils
需要修改三处地方,
邮箱地址,邮箱密码或者授权码,测试信息邮箱,
163邮箱是smtp.163.com QQ邮箱是smtp.qq.com
package com.hotdas.travel.util;
import javax.mail.*;
import javax.mail.internet.InternetAddress;
import javax.mail.internet.MimeMessage;
import java.util.Properties;
/**
* 发邮件工具类
*/
public final class MailUtils {
private static final String USER = ""; // 发件人称号,同邮箱地址
private static final String PASSWORD = ""; // 如果是qq邮箱可以使户端授权码,或者登录密码
/**
*
* @param to 收件人邮箱
* @param text 邮件正文
* @param title 标题
*/
/* 发送验证信息的邮件 */
public static boolean sendMail(String to, String text, String title){
try {
final Properties props = new Properties();
props.put("mail.smtp.auth", "true");
props.put("mail.smtp.host", "smtp.163.com");
// 发件人的账号
props.put("mail.user", USER);
//发件人的密码
props.put("mail.password", PASSWORD);
// 构建授权信息,用于进行SMTP进行身份验证
Authenticator authenticator = new Authenticator() {
@Override
protected PasswordAuthentication getPasswordAuthentication() {
// 用户名、密码
String userName = props.getProperty("mail.user");
String password = props.getProperty("mail.password");
return new PasswordAuthentication(userName, password);
}
};
// 使用环境属性和授权信息,创建邮件会话
Session mailSession = Session.getInstance(props, authenticator);
// 创建邮件消息
MimeMessage message = new MimeMessage(mailSession);
// 设置发件人
String username = props.getProperty("mail.user");
InternetAddress form = new InternetAddress(username);
message.setFrom(form);
// 设置收件人
InternetAddress toAddress = new InternetAddress(to);
message.setRecipient(Message.RecipientType.TO, toAddress);
// 设置邮件标题
message.setSubject(title);
// 设置邮件的内容体
message.setContent(text, "text/html;charset=UTF-8");
// 发送邮件
Transport.send(message);
return true;
}catch (Exception e){
e.printStackTrace();
}
return false;
}
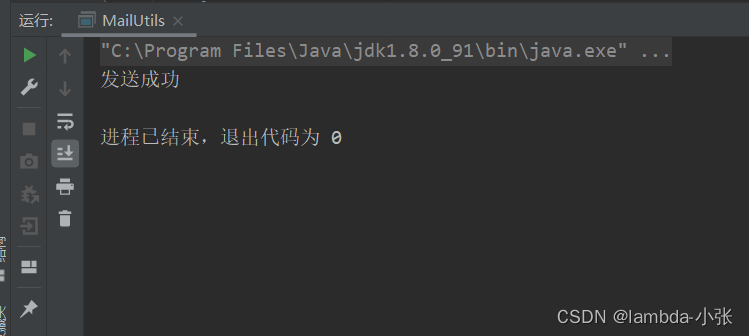
public static void main(String[] args) throws Exception { // 做测试用
MailUtils.sendMail("hotdas@163.com","你好,这是一封测试邮件,无需回复。","测试邮件");
System.out.println("发送成功");
}
}
直接运行这个类
运行结果如下成功
查看邮箱是否有收到

修改UserServiceImpl
package com.hotdas.travel.service.impl;

import com.hotdas.travel.dao.UserDao;
import com.hotdas.travel.dao.impl.UserDaoImpl;
import com.hotdas.travel.domain.User;
import com.hotdas.travel.service.UserService;
import com.hotdas.travel.util.MailUtils;
import com.hotdas.travel.util.UuidUtil;

public class UserServiceImpl implements UserService {
    private UserDao userDao = new UserDaoImpl();

    @Override
    public Boolean activeUser(String code) {
        //根据激活码查询用户
        User user = userDao.findByCode(code);
        if(user!=null){
            //激活该用户  status="Y"
            userDao.activeUser(user);
            return true;
        }else{
            return false;
        }
    }

    @Override
    public Boolean regirst(User user) {
        //从数据库中查询用户
        User u =   userDao.findByUsername(user.getUsername());

        //判断用户是否存在
        if (u!=null){
            //用户存在,返回false
            return false;
        }
        //激活邮箱才可以使用
        user.setCode(UuidUtil.getUuid());
        user.setStatus("N");

        //保存信息到数据库
        userDao.save(user);

        //发送邮箱给用户让用户进激活,后面doing...
        String content = "<a href='http://localhost/travel/activeUserServlet?code="+user.getCode()+"'>点击激活卓越旅游网</a> ";
        MailUtils.sendMail(user.getEmail(),content,"请激活你的卓越旅游网用户");


        return true;
    }
}
修改UserDao
package com.hotdas.travel.dao;

import com.hotdas.travel.domain.User;

public interface UserDao {
    //根据用户名查询用户信息
    User findByUsername(String username);

    //保存用户信息
    void save(User user);

    //权限用户激活码用户
    User findByCode(String code);

    //激活
    void activeUser(User user);
}
修改UserService
package com.hotdas.travel.service;

import com.hotdas.travel.domain.User;

public interface UserService {
    Boolean regirst(User user);
    Boolean activeUser(String code);
}
UserDaoImpl
package com.hotdas.travel.dao.impl;

import com.hotdas.travel.dao.UserDao;
import com.hotdas.travel.domain.User;
import com.hotdas.travel.util.JDBCUtils;
import org.springframework.dao.DataAccessException;
import org.springframework.jdbc.core.BeanPropertyRowMapper;
import org.springframework.jdbc.core.JdbcTemplate;

public class UserDaoImpl implements UserDao {

    private JdbcTemplate template = new JdbcTemplate(JDBCUtils.getDataSource());

    @Override
    public User findByUsername(String username) {
        User user =null;
        try {
            //1.定义sql
            String sql ="select * from tab_user where username=?";
            user = template.queryForObject(sql,new BeanPropertyRowMapper<User>(User.class),username);
        } catch (DataAccessException e) {
            e.printStackTrace();
        }
        return user;
    }

    @Override
    public void save(User user) {
        //1.定义sql
        String sql = "insert into tab_user(username,password,name,birthday,sex,telephone,email,status,code) values(?,?,?,?,?,?,?,?,?)";

        template.update(sql,
                user.getUsername(),
                user.getPassword(),
                user.getName(),
                user.getBirthday(),
                user.getSex(),
                user.getTelephone(),
                user.getEmail(),
                user.getStatus(),
                user.getCode());


    }

    //根据code查询用户
    @Override
    public User findByCode(String code) {
        User user = null;
        try {
            String sql = "select * from tab_user where code = ?";
            user = template.queryForObject(sql, new BeanPropertyRowMapper<User>(User.class), code);
        } catch (DataAccessException e) {
            e.printStackTrace();
        }
        return user;
    }

    @Override
    public void activeUser(User user) {
        String sql = "update tab_user set status='Y' where uid=? ";
        template.update(sql,user.getUid());
    }
}
ActiveUserServlet
package com.hotdas.travel.web.servlet;
import com.hotdas.travel.service.UserService;
import com.hotdas.travel.service.impl.UserServiceImpl;
import javax.servlet.ServletException;
import javax.servlet.annotation.WebServlet;
import javax.servlet.http.HttpServlet;
import javax.servlet.http.HttpServletRequest;
import javax.servlet.http.HttpServletResponse;
import java.io.IOException;
@WebServlet("/activeUserServlet")
public class ActiveUserServlet extends HttpServlet {
protected void doPost(HttpServletRequest request, HttpServletResponse response) throws ServletException, IOException {
//进行邮箱激活
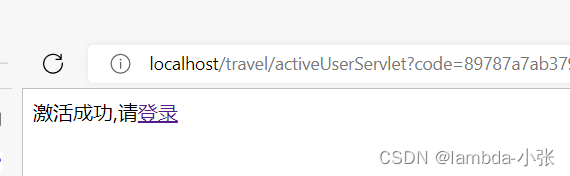
String code = request.getParameter("code");
if (code!=null){
UserService userService = new UserServiceImpl();
Boolean flag = userService.activeUser(code);
//提示信息
String msg = "";
if (flag){
//激活
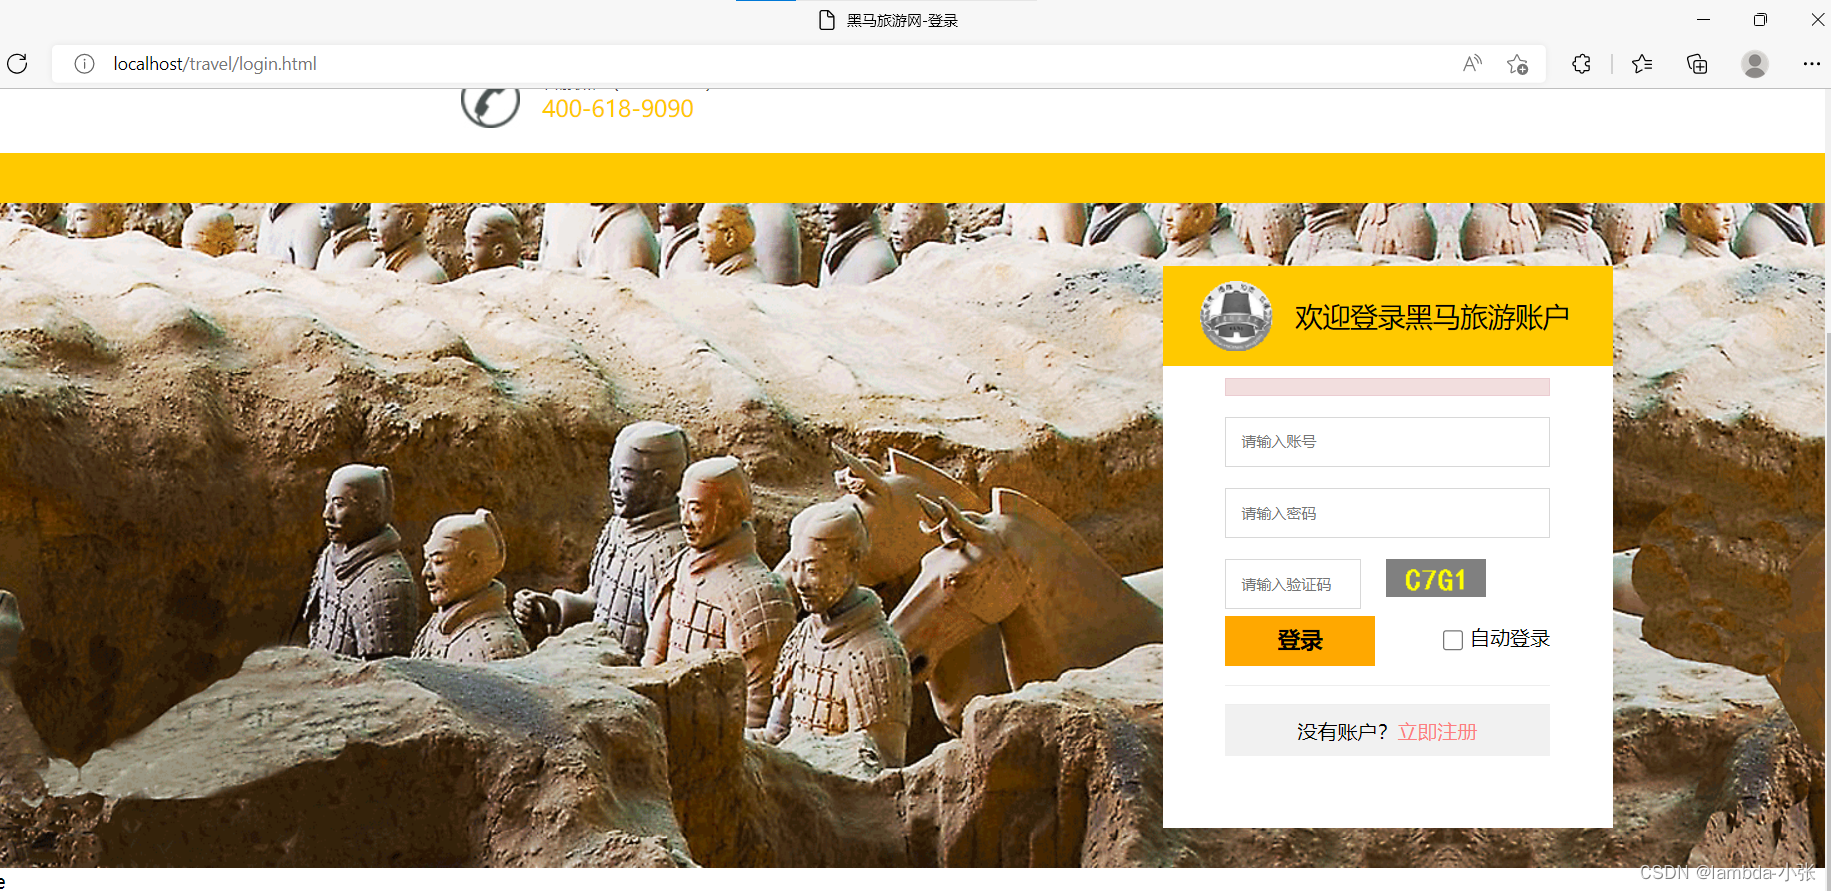
msg="激活成功,请<a href='login.html'>登录</a>";
}else{
//激活夫败
msg="激活失败,请联系管理员!";
}
response.setCharacterEncoding("utf-8");
response.setContentType("text/html;charset=utf-8");
response.getWriter().write(msg);
}
}
protected void doGet(HttpServletRequest request, HttpServletResponse response) throws ServletException, IOException {
this.doPost(request,response);
}
}
四、测试
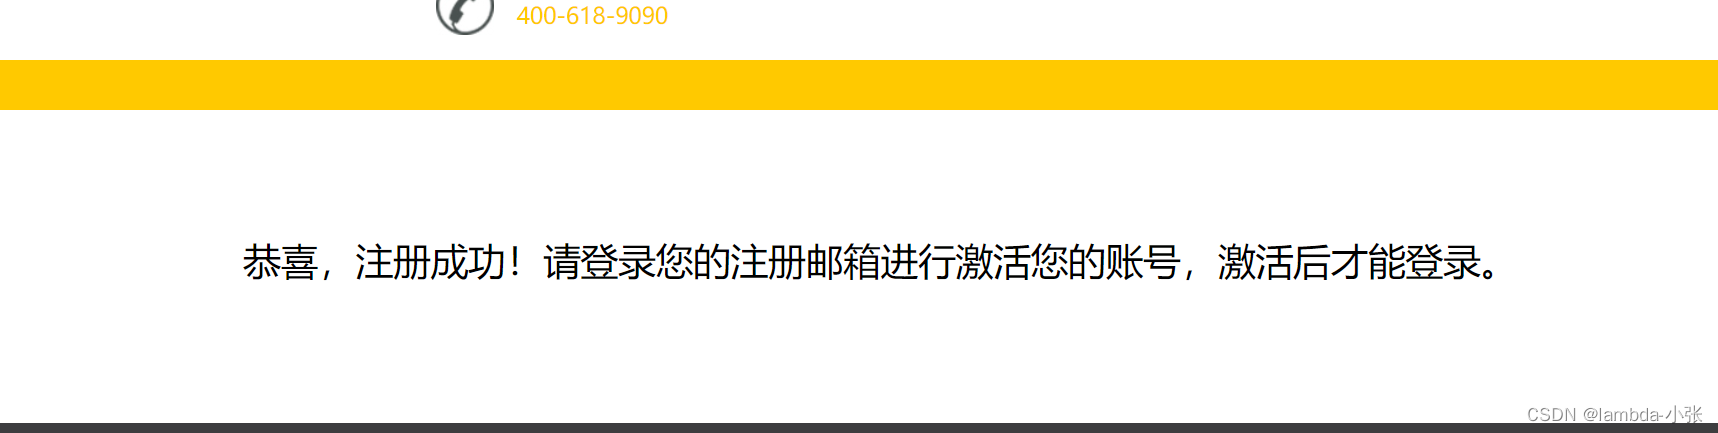
1.启动并运行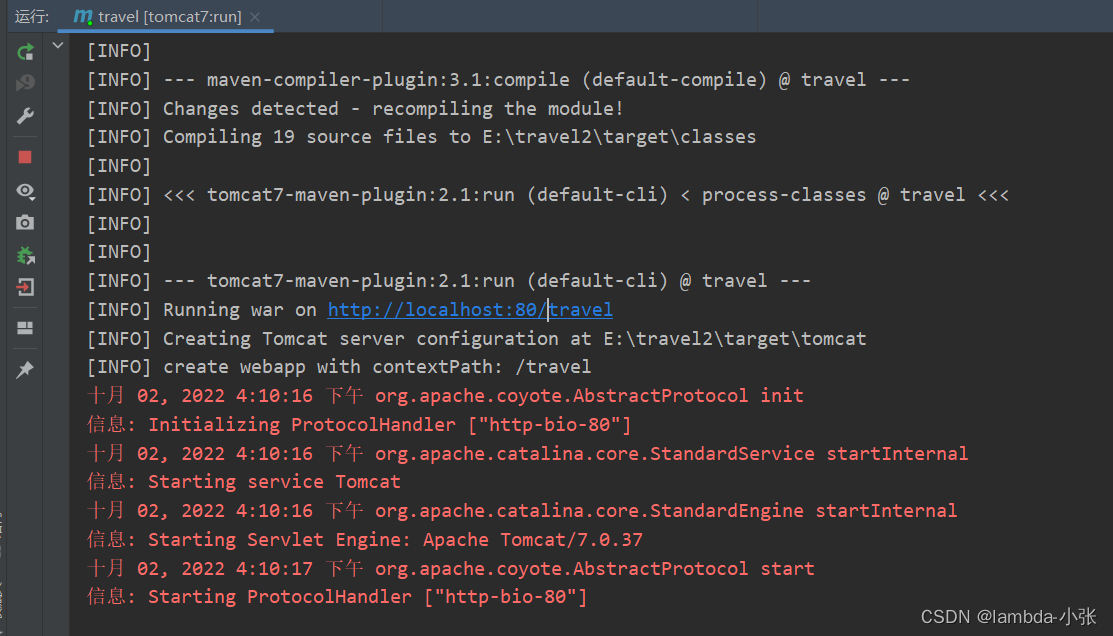
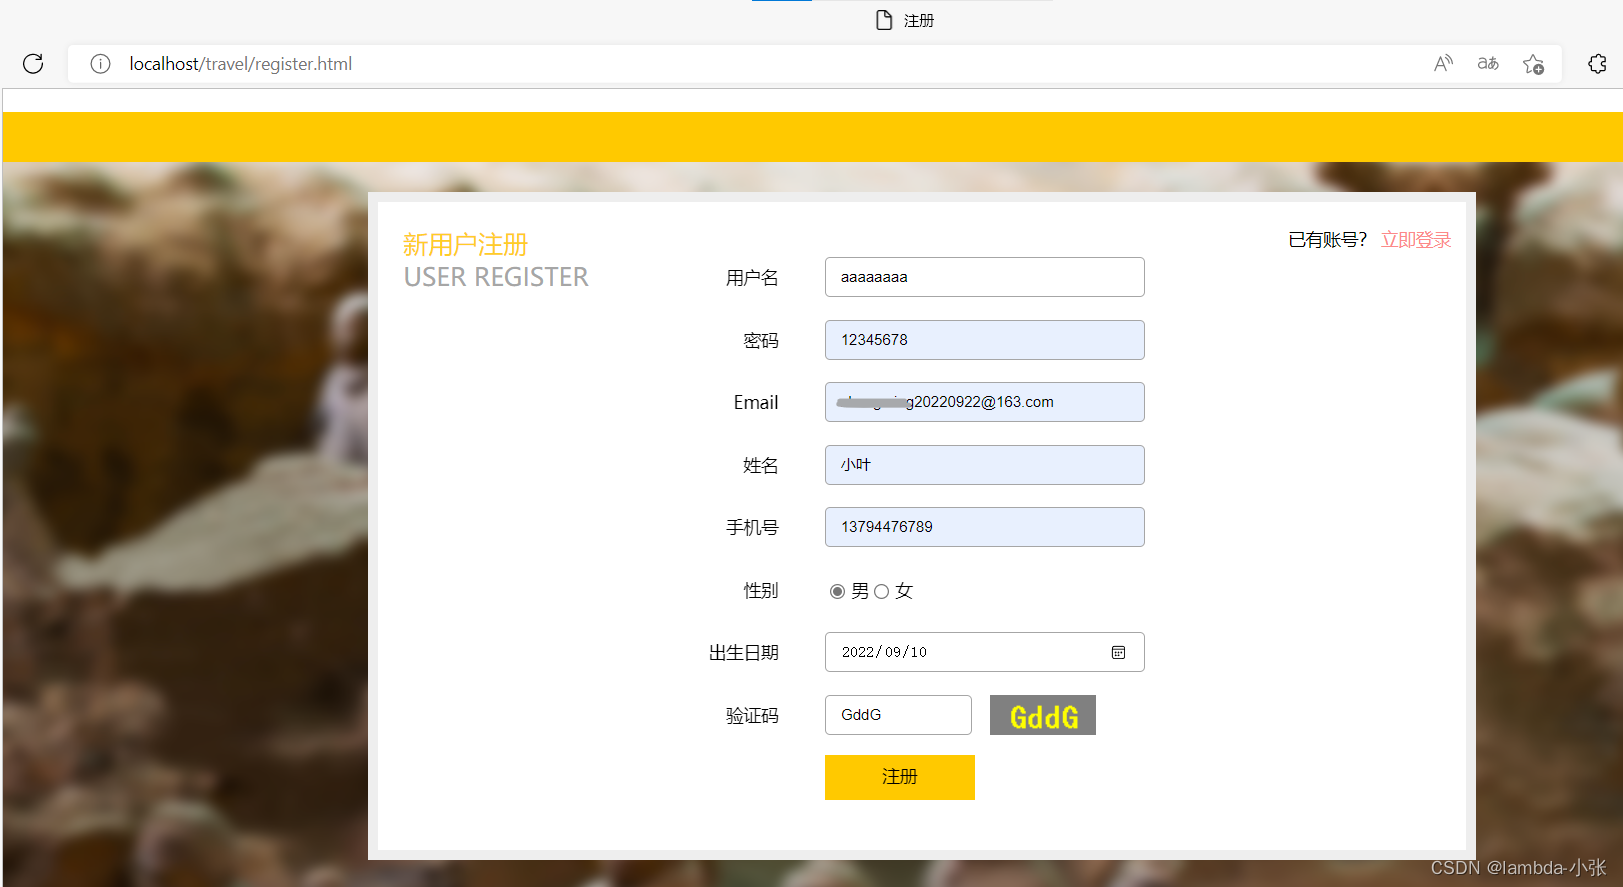
2.注册一个用户,邮箱需要写对,不然收不到激活信息
3.跳转到这个页面成功
4.在邮箱里面查看
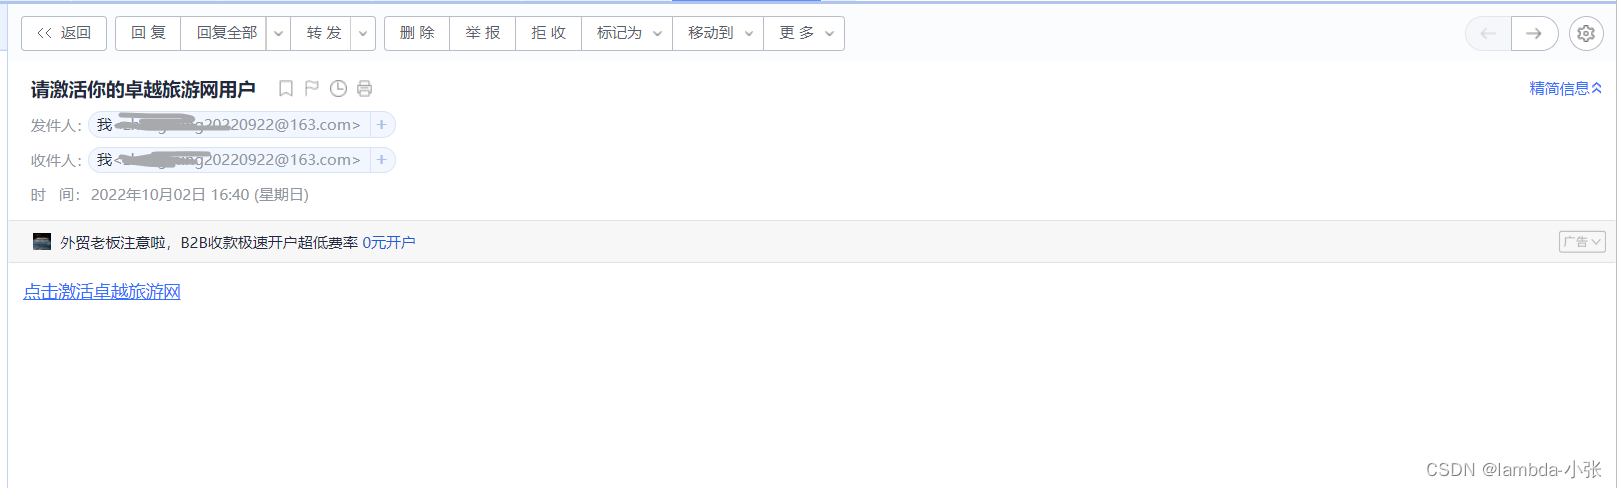
5.点击邮箱里面的链接
6.点击登录,跳转到登录首页
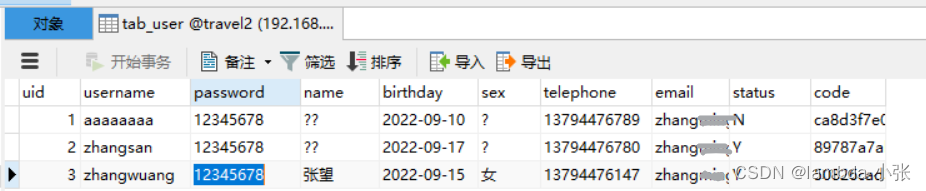
7.在数据库中查看数据,status为Y为激活成功

五、注册失败,遇到的bug
1.in context with path [/travel] threw exception
十月 02, 2022 4:32:23 下午 org.apache.catalina.core.StandardWrapperValve invoke
严重: Servlet.service() for servlet [com.hotdas.travel.web.servlet.RegisterUserServlet] in context with path [/travel] threw exception
java.lang.IllegalArgumentException: Property 'dataSource' is required
	at org.springframework.jdbc.support.JdbcAccessor.afterPropertiesSet(JdbcAccessor.java:135)
	at org.springframework.jdbc.core.JdbcTemplate.<init>(JdbcTemplate.java:169)
	at com.hotdas.travel.dao.impl.UserDaoImpl.<init>(UserDaoImpl.java:12)
	at com.hotdas.travel.service.impl.UserServiceImpl.<init>(UserServiceImpl.java:11)
	at com.hotdas.travel.web.servlet.RegisterUserServlet.doPost(RegisterUserServlet.java:61)
	at javax.servlet.http.HttpServlet.service(HttpServlet.java:647)
	at javax.servlet.http.HttpServlet.service(HttpServlet.java:728)
	at org.apache.catalina.core.ApplicationFilterChain.internalDoFilter(ApplicationFilterChain.java:305)
	at org.apache.catalina.core.ApplicationFilterChain.doFilter(ApplicationFilterChain.java:210)
	at org.apache.catalina.core.StandardWrapperValve.invoke(StandardWrapperValve.java:222)
	at org.apache.catalina.core.StandardContextValve.invoke(StandardContextValve.java:123)
	at org.apache.catalina.authenticator.AuthenticatorBase.invoke(AuthenticatorBase.java:472)
	at org.apache.catalina.core.StandardHostValve.invoke(StandardHostValve.java:171)
	at org.apache.catalina.valves.ErrorReportValve.invoke(ErrorReportValve.java:99)
	at org.apache.catalina.valves.AccessLogValve.invoke(AccessLogValve.java:936)
	at org.apache.catalina.core.StandardEngineValve.invoke(StandardEngineValve.java:118)
	at org.apache.catalina.connector.CoyoteAdapter.service(CoyoteAdapter.java:407)
	at org.apache.coyote.http11.AbstractHttp11Processor.process(AbstractHttp11Processor.java:1004)
	at org.apache.coyote.AbstractProtocol$AbstractConnectionHandler.process(AbstractProtocol.java:589)
	at org.apache.tomcat.util.net.JIoEndpoint$SocketProcessor.run(JIoEndpoint.java:310)
	at java.util.concurrent.ThreadPoolExecutor.runWorker(ThreadPoolExecutor.java:1142)
	at java.util.concurrent.ThreadPoolExecutor$Worker.run(ThreadPoolExecutor.java:617)
	at java.lang.Thread.run(Thread.java:745)
解决方法,在JDBCUtils的/druid.properties,去掉/

2.邮箱后缀错误报错
javax.mail.AuthenticationFailedException: 535 Login Fail. Please enter your authorization code to login. More information in http://service.mail.qq.com/cgi-bin/help?subtype=1&&id=28&&no=1001256

	at com.sun.mail.smtp.SMTPTransport$Authenticator.authenticate(SMTPTransport.java:892)
	at com.sun.mail.smtp.SMTPTransport.authenticate(SMTPTransport.java:814)
	at com.sun.mail.smtp.SMTPTransport.protocolConnect(SMTPTransport.java:728)
	at javax.mail.Service.connect(Service.java:388)
	at javax.mail.Service.connect(Service.java:246)
	at javax.mail.Service.connect(Service.java:195)
	at javax.mail.Transport.send0(Transport.java:254)
	at javax.mail.Transport.send(Transport.java:124)
	at com.hotdas.travel.util.MailUtils.sendMail(MailUtils.java:62)
	at com.hotdas.travel.util.MailUtils.main(MailUtils.java:71)
解决方法,如下图中qq.com 修改成163.com,就可以解决了
3. 输入中文到数据库变成?
解决方法,在druid.properies,连接数据库上防止乱码代码
driverClassName=com.mysql.jdbc.Driver
url=jdbc:mysql://127.0.0.1:3306/travel2?useSSL=false&characterEncoding=utf-8
username=root
password=123456
initialSize=5
maxActive=10
maxWait=13000


 被折叠的 条评论
为什么被折叠?
被折叠的 条评论
为什么被折叠?
 到【灌水乐园】发言


