1、使用mysql:5.6和 owncloud 镜像,构建一个个人网盘。
2、安装搭建私有仓库 Harbor
3、编写Dockerfile制作Web应用系统nginx镜像,生成镜像nginx:v1.1,并推送其到私有仓库。
4、Dockerfile快速搭建自己专属的LAMP环境,生成镜像lamp:v1.1,并推送到私有仓库。
1、使用mysql:5.6和 owncloud 镜像,构建一个个人网盘。
在centos 7.9中输入以下命令
[root@localhost]# systemctl stop firewalld
[root@localhost]# setenforce 0
[root@localhost]# docker pull mysql:5.6
[root@localhost]# docker pull owncloud
[root@localhost]# docker run -d --name db --env MYSQL_ROOT_PASSWORD=123456 mysql:5.6
[root@localhost]# docker run -d --name owncloud -p 80:80 --link db:db owncloud
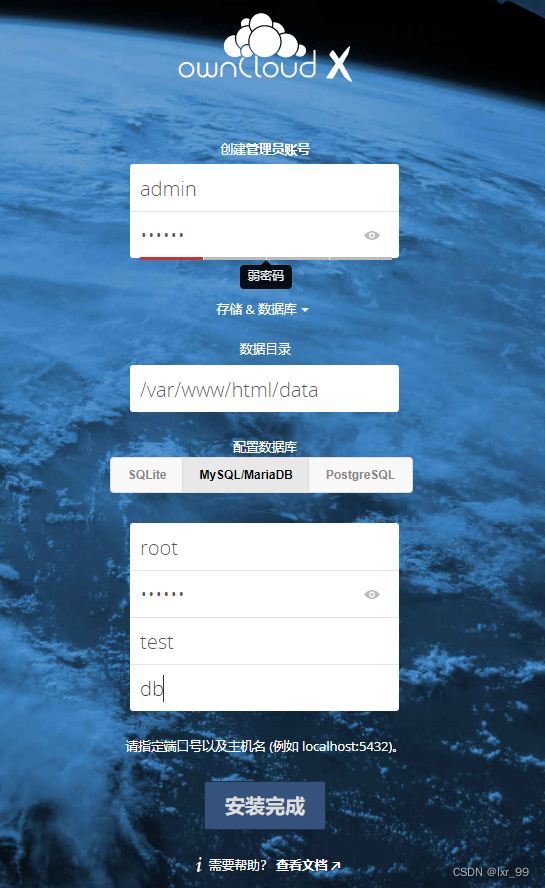
在浏览器中输入IP地址,访问owncloud

点击安装完成后,登陆管理员账户,网盘就创建完毕了。

2、安装搭建私有仓库 Harbor
#安装docker编排工具docker-compose
[root@localhost ~]# curl -L https://get.daocloud.io/docker/compose/releases/download/1.25.1/docker-compose-`uname -s`-`uname -m` -o /usr/local/bin/docker-compose
#对二进制文件应用可执行权限:
chmod +x /usr/local/bin/docker-compose
# 测试是否安装成功
[root@k8s-harbor ~]# docker-compose --version
docker-compose version 1.25.1, build a82fef07

#安装Harbor,传入离线安装包,并解压
[root@localhost ~]# ll
-rw-------. 1 root root      1423 Jul 31 07:32 anaconda-ks.cfg
-rw-r--r--. 1 root root 612698835 Aug  9 01:40 harbor-offline-installer-v2.4.1.tgz
[root@localhost ~]# ls
anaconda-ks.cfg  harbor  harbor-offline-installer-v2.4.1.tgz
#配置harbor
[root@localhost ~]# cd harbor
[root@localhost harbor]# ls
common.sh  harbor.v2.4.1.tar.gz  harbor.yml.tmpl  install.sh  LICENSE  prepare
[root@localhost harbor]# cp harbor.yml.tmpl harbor.yml
[root@localhost harbor]# vi harbor.yml
#修改3个地方:hostname,http端口,注释掉https(没有配置证书启动会报错)
hostname: node1.mydomain.com

# http related config
http:
  # port for http, default is 80. If https enabled, this port will redirect to https port
  port: 8000

# https related config
#https:
  # https port for harbor, default is 443
  #port: 443
  # The path of cert and key files for nginx
  #certificate: /your/certificate/path
  #private_key: /your/private/key/path
# 运行安装脚本
[root@localhost harbor]# ./install.sh
Creating network "harbor_harbor" with the default driver
Creating harbor-log ... done
Creating registry      ... done
Creating harbor-portal ... done
Creating redis         ... done
Creating registryctl   ... done
Creating harbor-db     ... done
Creating harbor-core   ... done
Creating nginx             ... done
Creating harbor-jobservice ... done
✔ ----Harbor has been installed and started successfully.----
# 验证安装
[root@localhost harbor]# ss -nutlp | grep docker
tcp    LISTEN     0      128       *:8000                  *:*                   users:(("docker-proxy",pid=4546,fd=4))
tcp    LISTEN     0      128    127.0.0.1:1514                  *:*                   users:(("docker-proxy",pid=3889,fd=4))
tcp    LISTEN     0      128       *:80                    *:*                   users:(("docker-proxy",pid=2329,fd=4))
tcp    LISTEN     0      128    [::]:8000               [::]:*                   users:(("docker-proxy",pid=4553,fd=4))
tcp    LISTEN     0      128    [::]:80                 [::]:*                   users:(("docker-proxy",pid=2337,fd=4))
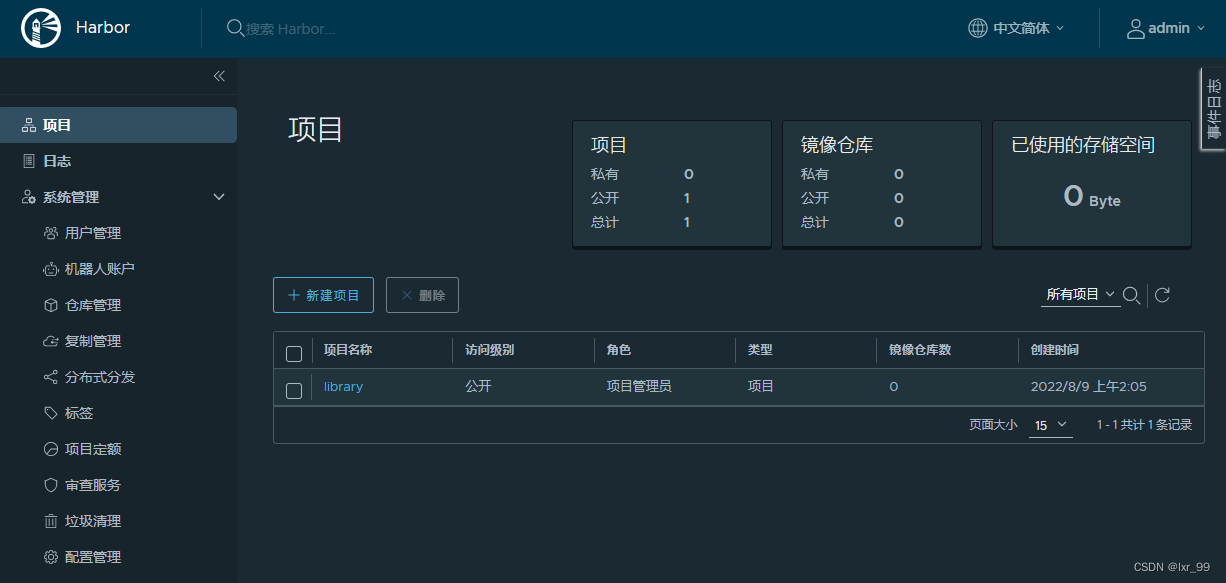
网页中输入本机的IP地址加上:8000,默认用户密码: admin/Harbor12345

登录harbor 后一些简单的操作
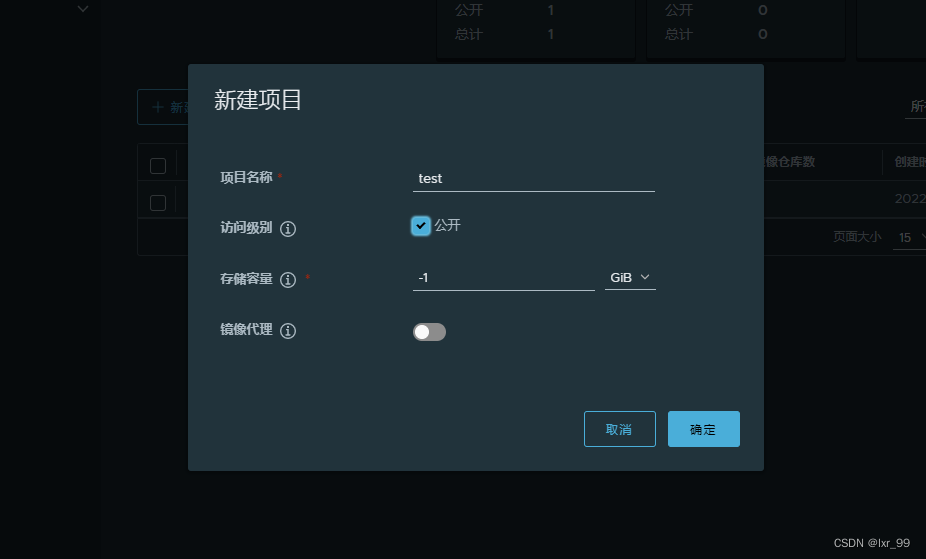
1.创建项目

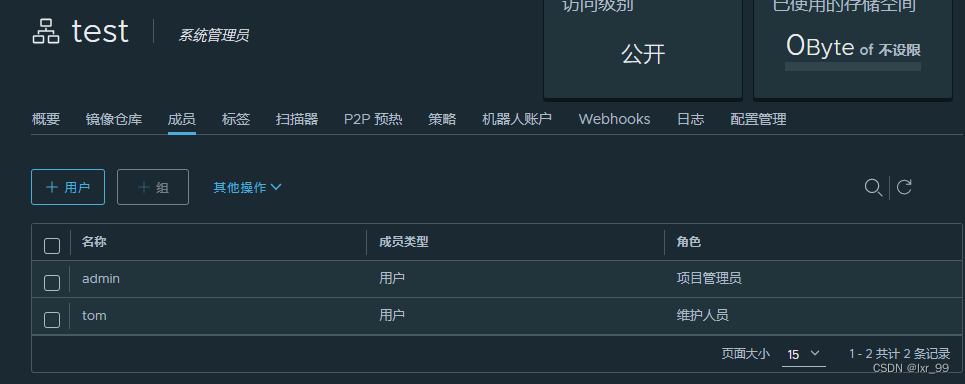
2.在test项目中创建用户,首先需创建用户

# 修改daemon.json文件
[root@localhost harbor]# cat /etc/docker/daemon.json
{
"registry-mirrors": ["https://nicr6rwi.mirror.aliyuncs.com"],
"insecure-registries":["192.168.171.156"]
}
# 修改hosts文件
[root@localhost harbor]# cat /etc/hosts
127.0.0.1   localhost localhost.localdomain localhost4 localhost4.localdomain4
::1         localhost localhost.localdomain localhost6 localhost6.localdomain6
192.168.171.156 node1.mydomain.com
# 重启服务并登录
[root@localhost harbor]# systemctl restart docker
[root@localhost harbor]# docker-compose up -d
[root@localhost harbor]# docker login -u tom -p Harbor12345 192.168.171.156
3、编写Dockerfile制作Web应用系统nginx镜像,生成镜像nginx:v1.1,并推送其到私有仓库。具体要求如下:
(1)基于centos基础镜像;
(2)指定作者信息;
(3)安装nginx服务,将提供的dest目录(提供默认主页index.html)传到镜像内,并将dest目录内的前端文件复制到nginx的工作目录;
[root@localhost ~]# mkdir nginx
[root@localhost ~]# cd nginx
[root@localhost nginx]# vi Dockerfile
[root@localhost nginx]# cat Dockerfile
FROM centos:7
MAINTAINER "lxr <lxr@domain.com>"
ADD http://nginx.org/download/nginx-1.15.8.tar.gz /usr/local/src/
COPY index.html /usr/share/nginx/html/
COPY yum.repos.d /etc/yum.repos.d/
EXPOSE 80
CMD ["/usr/sbin/nginx","-g","daemon off;"]
# 制作镜像nginx:v1.1
[root@localhost nginx]# docker build -t nginx:v1.1 ./
# 验证镜像
[root@localhost nginx]# docker run --name web1 --rm  nginx:v1.1 cat /usr/share/nginx/html/index.html
<h1>Busybox httpd server</h1>

[root@localhost nginx]# docker tag nginx:v1.1 node1.mydomain.com/test/nginx:v1.1
[root@localhost nginx]# docker push node1.mydomain.com/test/nginx:v1.1
4、Dockerfile快速搭建自己专属的LAMP环境,生成镜像lamp:v1.1,并推送到私有仓库。具体要求如下:
(1)基于centos:6基础镜像;
(2)指定作者信息;
(3)安装httpd、mysql、mysql-server、php、php-mysql、php-gd;
(4)暴露80和3306端口;
(5)设置服务自启动。
(6)验证镜像。
[root@localhost test]# cat Dockerfile
FROM centos:7
MAINTAINER "lxr <lxr@domain.com>"
run yum install -y httpd mariadb-server php php-mysql php-gd
run echo "welcome to" > /var/ww/html/index.html
EXPOSE 80
EXPOSE 3306
CMD ["httpd","-DEOREGROUND;"]


 698
698

 被折叠的 条评论
为什么被折叠?


