


Vue
1.简介
- Vue (读音 /vjuː/,类似于 view) 是一套用于构建用户界面的渐进式框架。
- Vue 的核心库只关注视图层。
CSS预处理器
-
在实际开发中,不会直接使用CSS进行页面渲染。而是使用CSS预处理器。它是一种编程语言,专门进行Web页面样式设计,再通过编译器转换为正常的css文件。
-
常用的CSS预处理器
- SASS
- LESS
后端需要的话,建议使用LESS。
MVVM模式
-
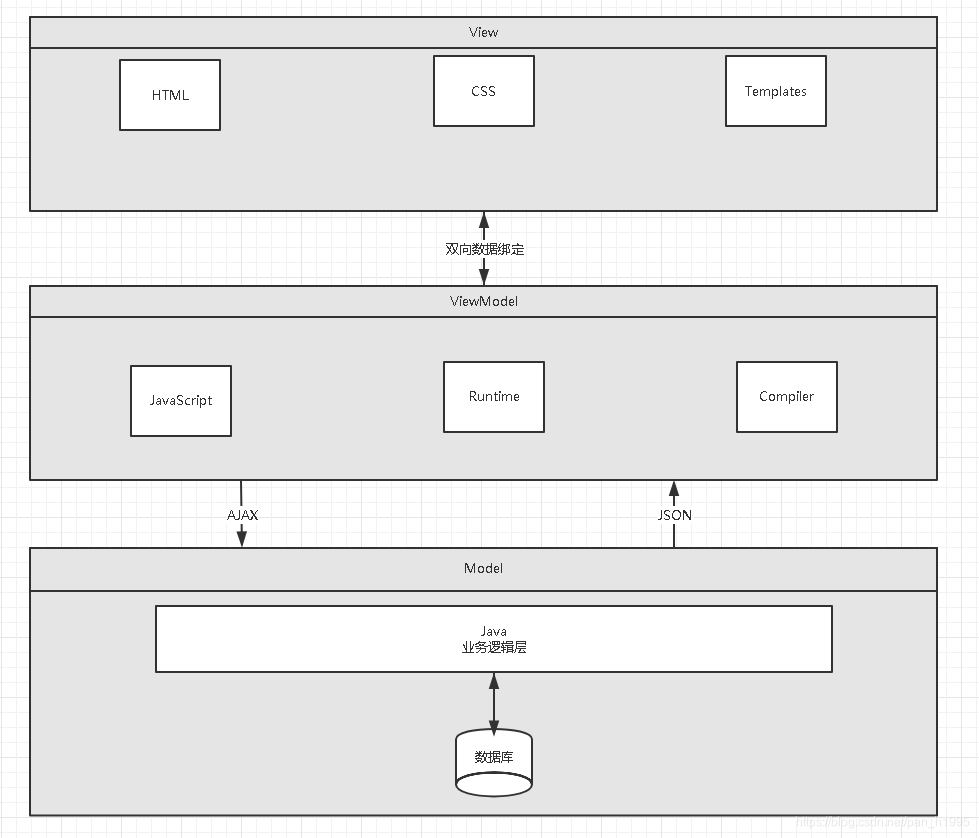
MVVM(Model-View-ViewModel)是一种软件设计模式。
-
MVVM源自于经典的MVC(Model-View-Controller)模式。MVVM的核心是ViewModel层,负责转换Model中的数据对象来让数据变得更容易管理和使用。其作用如下:
- 该层向上与视图层进行双向数据绑定
- 向下与Model层通过接口请求进行数据交互
-
优点:
- 低耦合:视图(View)可以独立于Model变化和修改,一个ViewModel可以绑定到不同的View上,当View变化的时候Model可以不变,当Model变化的时候View也可以不变。
- 可复用:你可以把一些视图逻辑放在一个ViewModel里面,让很多View重用这段视图逻辑。
- 独立开发:开发人员可以专注于业务逻辑和数据的开发(ViewMode),设计人员可以专注于页面设计。
- 可测试:界面素来是比较难以测试的,而现在测试可以针对ViewModel来写。
2.Axios异步通信
- 它是一个异步通信框架
- 主要作用是实现AJAX异步通信。
1.实现Axios
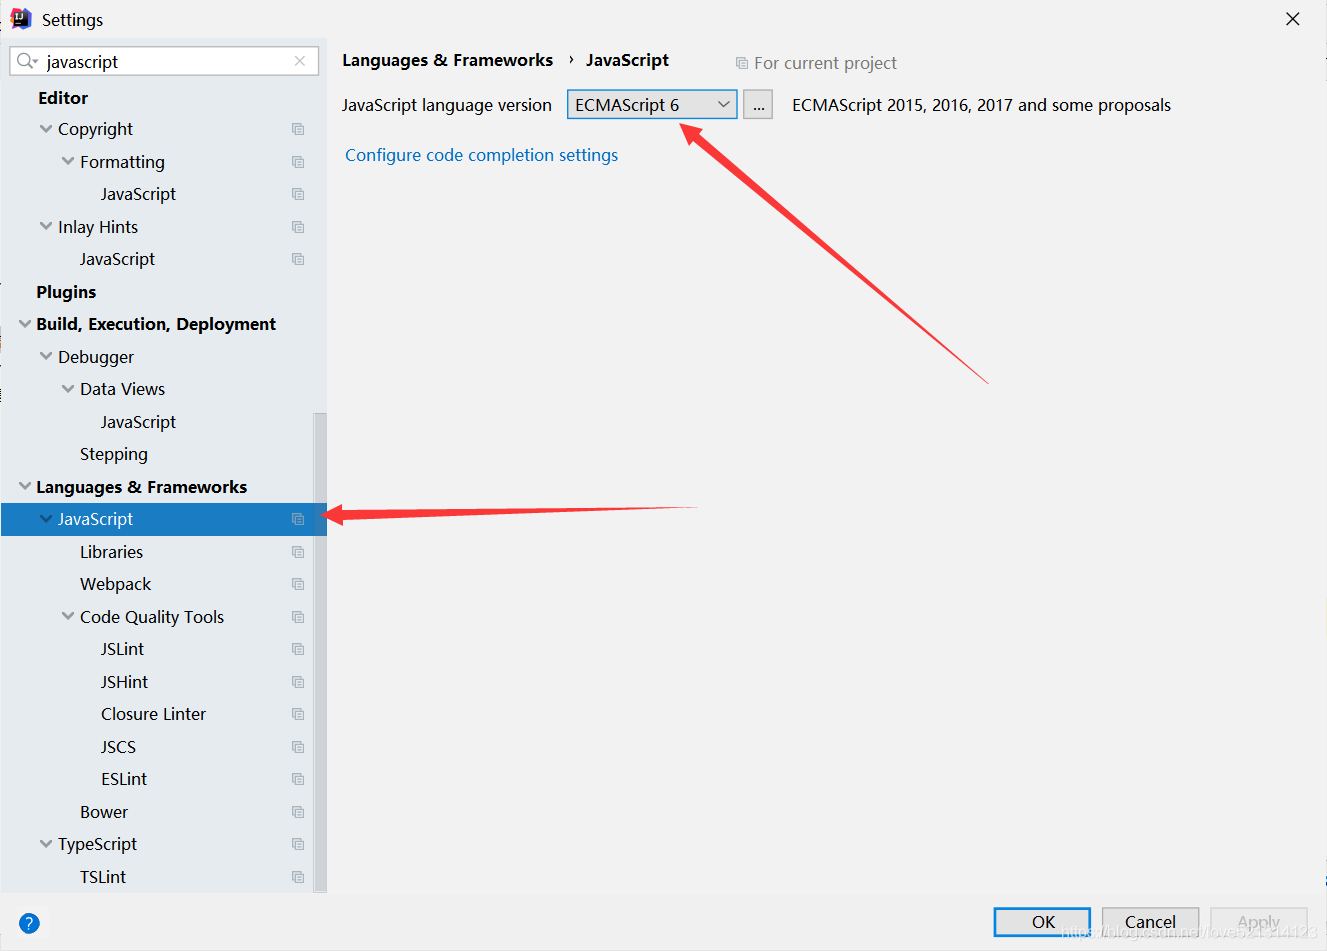
1.将javaScript设置为ES6特性
2.新建一个存放json数据的文件
{
  "name": "dz",
  "age": "18",
  "sex": "男",
  "url":"https://www.baidu.com",
  "address": {
    "street": "画家村",
    "city": "南阳",
    "country": "中国"
  },
  "links": [
    {
      "name": "bilibili",
      "url": "https://www.bilibili.com"
    },
    {
      "name": "baidu",
      "url": "https://www.baidu.com"
    },
    {
      "name": "cqh video",
      "url": "https://www.4399.com"
    }
  ]
}
3.使用Axios
<!DOCTYPE html>
<html lang="en" xmlns:v-blid="http://www.w3.org/1999/xhtml" xmlns:v-bind="http://www.w3.org/1999/xhtml">
<head>
    <meta charset="UTF-8">
    <title>Title</title>
</head>
<body>
<div id="app">
  {{info.name}}   //获取data()方法中的数据
    <a v-bind:href="info.url">click me</a>
</div>


<script src="https://cdn.jsdelivr.net/npm/vue@2.5.21/dist/vue.js"></script>
<!--导入axios-->
<script src="https://cdn.bootcdn.net/ajax/libs/axios/0.19.2/axios.min.js"></script>
<script>
    var vm=new Vue({
        el:"#app",
        //data: 属性  下边的是一个方法
        data(){
            return {
                info:null
            }
        },
        mounted() {  //钩子函数,axios一般在这个函数里边写
            axios.get('../data.json').then(response => (this.info = response.data))
        }
    });
</script>

</body>
</html>
3.第一个vue-cli项目
- vue-cli是官方提供的一个脚手架,用于快速生成一个vue的项目模板。
- 去Node.js官网http://nodejs.cn/download/ 下载node.js
- 安装完成后,查看是否安装成功。
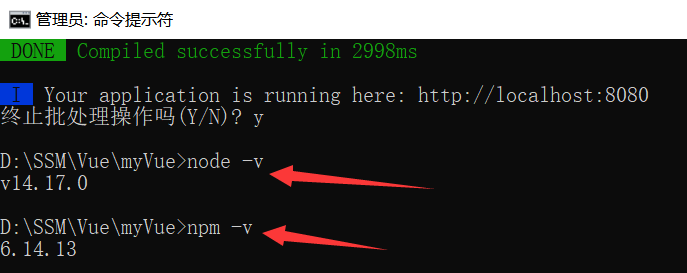
- 在命令行输入 下面命令。注意:这里容易出错,自己上网找解决方案。
npm install cnpm -g    #cnpm是阿里镜像云,能加快下载速度

cnpm install vue-cli -g  #安装脚手架

# 这里的 myvue 是项目名称,可以根据自己的需求起名。一直点 no 就行
vue init webpack myvue
- 初始化并运行
#进入项目目录
cd myvue
#下载依赖
npm install
#运行项目
npm run dev
- 出现这个界面说明项目运行成功。在浏览器输入http://localhost:8080/ 即可进入页面。

4.webpack
1.简介
- webpack是javascript应用程序的静态模块打包器。
- 它会递归的构建一个依赖关系图,其中包含应用程序的每一个模块。
- 然后将所有的模块打包成一个或多个bundle。
- 类似于maven。
2.下载
npm install webpack -g
npm install webpack-cli -g

//检查是否安装成功
webpack -v
3.实践
- 创建一个项目(即新建一个文件夹)
- 使用idea打开后,新建一个modules文件夹。存放 js文件。
- 新建一个js文件(随便取名)
//暴露一个方法
exports.sayHi=function () {
     document.write("hello,world");
}
- 新建一个main.js文件,作为打包时的 entry属性。
var hello=require("./hello");  //一个js文件相当于一个对象
hello.sayHi();
- 在项目目录下新建webpack.config.js文件,用来打包。
//将module 导出去
module.exports = {
//    程序入口
    entry: './modules/main.js',
    //打包后输出位置
    output:{
        filename: "./js/bundle.js"
    }
};
- 在idea控制台输入 webpack,进行打包。
- 在项目目录下新建一个html文件,导入js模块。
<!DOCTYPE html>
<html lang="en">
<head>
    <meta charset="UTF-8">
    <title>Title</title>
</head>
<body>

<script src="dist/js/bundle.js"></script>

</body>
</html>
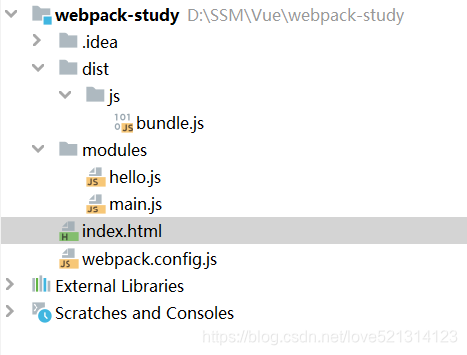
- 项目目录
5.router
1.简介
- 作用:实现页面跳转
- 相当于SpringMVC中的RequestMapping。
2.实现步骤
- 下载vue-router
- save的意思是保存在当前项目
npm install vue-router --save-dev
- 在components中新建两个 vue 文件。
- Content.vue
<template>
  <h1>hello,world</h1>
</template>
<script>
    export default {
        name: "Content"
    }
</script>
<style scoped>
</style>
- Main.vue
<template>
    <h1>首页</h1>
</template>

<script>
    export default {
        name: "Main"
    }
</script>

<style scoped>
</style>
- 配置路由
- 在router(新建)文件夹下新建index.js文件
import Vue from'vue'
//导入路由插件
import Router from 'vue-router'
//导入上面定义的组件
import Content from '../components/Content'
import Main from '../components/Main'
//安装路由
Vue.use(Router) ;
//配置路由
export default new Router({
  routes:[
    {
      //路由路径
      path:'/content',
      //路由名称
      name:'content',
      //跳转到组件
      component:Content
    },{
      //路由路径
      path:'/main',
      //路由名称
      name:'main',
      //跳转到组件
      component:Main
    }
  ]
});
- 在App.vue中显示路由
<template>
  <div id="app">
    <!--
      router-link:默认会被渲染成一个<a>标签,to属性为指定链接
      router-view:用于渲染路由匹配到的组件
    -->
    <router-link to="/main">首页</router-link>
    <router-link to="/content">内容</router-link>
    <router-view></router-view>
  </div>
</template>

<script>
  export default{
    name:'App'
  }
</script>
<style></style>
- 在main.js 配置路由
import Vue from 'vue'   //从组件中拿到
import App from './App'  //自定义
import router from './router'  //会自动找到里边的index文件
Vue.config.productionTip = false

new Vue({
  el: '#app',
  //配置路由
  router,
  components: { App },
  template: '<App/>'
})
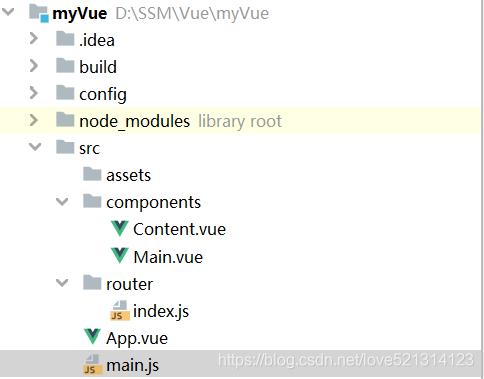
- 项目结构
3.路由模式
- 路由模式有两种。
- hash 路径带#号
- history 不带#号
export default new Router({
  mode:'history',
  routes:[]
})
6.vue+elementUI
1.创建一个项目
vue init webpack hello-vue

cd hello-vue

npm i element-ui -S
#安装依赖
npm install
#写css的
cnpm install sass-loader node-sass --save-dev
#安装axios
npm install axios
npm install --save vue-axios

npm run dev
2.使用axios和elementUI
// The Vue build version to load with the `import` command
// (runtime-only or standalone) has been set in webpack.base.conf with an alias.
import Vue from 'vue'
import App from './App'
import router from './router'

import axios from 'axios';
Vue.prototype.$axios = axios;

//导入elementUI
import ElementUI from 'element-ui';
import 'element-ui/lib/theme-chalk/index.css';
Vue.config.productionTip = false

Vue.use(ElementUI);

new Vue({
  el: '#app',
  router,
  render: h => h(App)
})
3.使用axios获取后端传递的参数
- 注意:这里使用的是 this.$axios.
 this.$axios.get('http://localhost:8181/book/findByPage/1').then(function (resp) {
        console.log(resp.data)
      })
7.和url相关的问题
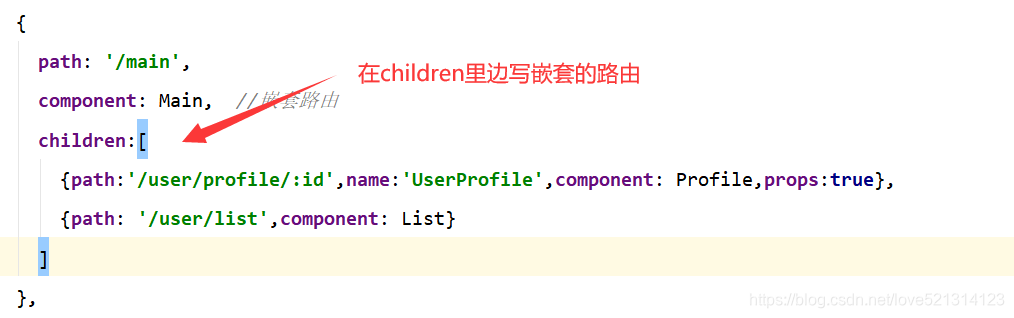
1.路由嵌套
- 配置完成后,到时候直接引用即可。
2.参数传递(两种方式)
- 推荐使用第二种方式
- 前端传递参数
- 这里的name对应路由设置的name。
- to变为 :to,进行数据绑定
<router-link :to="{name:'UserProfile',params:{id:1}}">个人信息</router-link>
- 路由接收参数
{path:'/user/profile/:id',name:'UserProfile',component: Profile}
- 在vue中显示出来
- 取值不能直接放在根节点下。即{{$route.params.id}} 需要由div标签包裹起来。
<div>
    <h1>个人信息</h1>
    {{$route.params.id}}
</div>
第二种方式
- 第一个步骤不变
- 接受参数时添加将 props 设置为 true。
{path:'/user/profile/:id',name:'UserProfile',component: Profile,props:true}
- 取值
- 在script里边添加了 props 属性。 取值时直接取下边的id。
<template>
<!--  取值不能直接放在根节点下-->
  <div>
    <h1>个人信息</h1>
    {{id}}
  </div>

</template>
<script>
  export default {
    props:['id'],
    name: "UserProfile"
  }
</script>
3.重定向
- 在index.js里边进行配置
{
    path:'/goHome',
    redirect: '/main'
}


 18万+
18万+

 被折叠的 条评论
为什么被折叠?
被折叠的 条评论
为什么被折叠?
 到【灌水乐园】发言


