


 本文详细介绍如何在NetCore项目中集成Swagger接口文档和JWT身份验证。从项目搭建到Swagger和JWT的配置步骤,包括XML文档注释的设置、Swagger生成器的注册及Swagger中间件的启用。
本章讲解下Swagger接口文档的实现
项目的基础搭建参见:https://blog.youkuaiyun.com/liwan09/article/details/100733455
Autofac的注册实现参见:https://blog.youkuaiyun.com/liwan09/article/details/100734233
JWT的实现参见:https://blog.youkuaiyun.com/liwan09/article/details/100734755
Swagger接口文档实现
NetCore.WebApi项目中从Nuget添加Swashbuckle.AspNetCore的引用
NetCore.WebApi 项目属性——生成 中勾选XML文档文件,禁止显示代码中添加1591
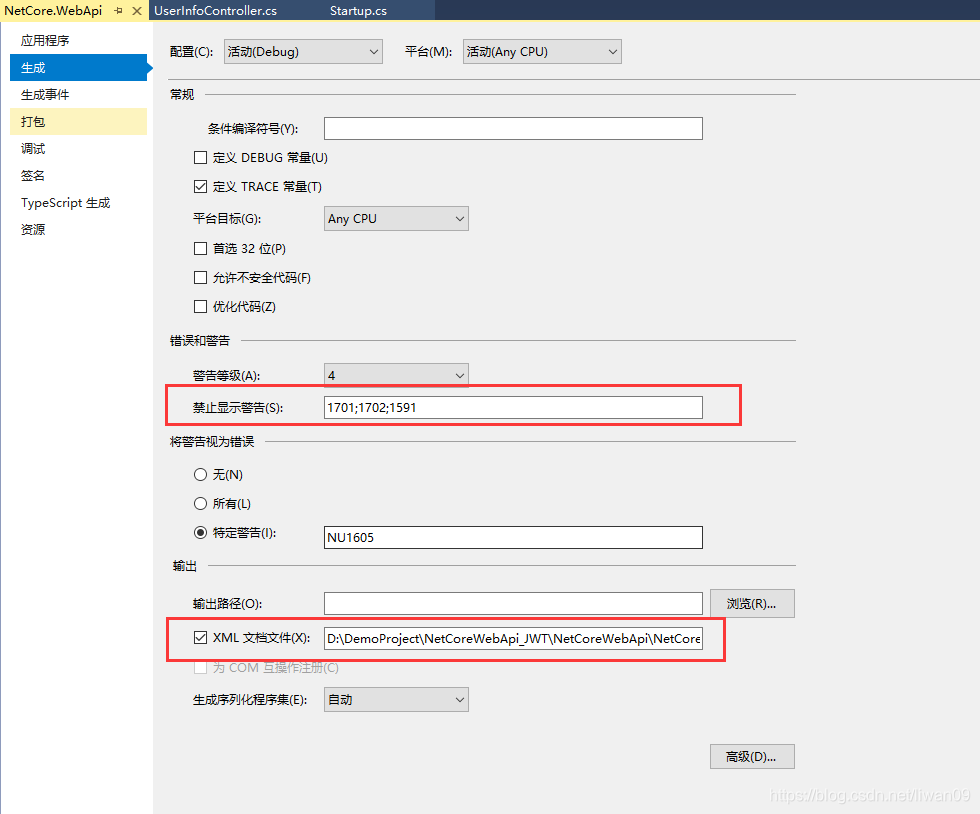
NetCore.Repository项目属性也需要设置XML
NetCore.WebApi Startup.cs中的ConfigureServices注册Swagger生成器
public IServiceProvider ConfigureServices(IServiceCollection services)
        {
            services.Configure<CookiePolicyOptions>(options =>
            {
                // This lambda determines whether user consent for non-essential cookies is needed for a given request.
                options.CheckConsentNeeded = context => true;
                options.MinimumSameSitePolicy = SameSiteMode.None;
            });
            services.AddMvc().SetCompatibilityVersion(CompatibilityVersion.Version_2_1);
            #region "JWT身份验证"
            //从appsettings.json获取JWT验证配置信息
            services.Configure<JWTSettings>(Configuration.GetSection("JWTSettings"));
            //  assign JwtSettings model
            var jwtSettings = new JWTSettings();
            Configuration.Bind("JWTSettings", jwtSettings);
            //添加授权信息
            services.AddAuthentication(options => {
                options.DefaultAuthenticateScheme = JwtBearerDefaults.AuthenticationScheme;
                options.DefaultChallengeScheme = JwtBearerDefaults.AuthenticationScheme;
            })
            .AddJwtBearer(o => {
                // set jwt token parameters
                o.TokenValidationParameters = new TokenValidationParameters
                {
                    ValidIssuer = jwtSettings.Issuer,//Issuer
                    ValidAudience = jwtSettings.Audience,//Audience
                    //Encryption secret key
                    IssuerSigningKey = new SymmetricSecurityKey(Encoding.UTF8.GetBytes(jwtSettings.SecretKey)),
                    ValidateIssuer = true, //whether or not valid Issuer
                    ValidateAudience = true, //whether or not valid Audience
                    ValidateLifetime = true, //whether or not valid out-of-service time
                    ValidateIssuerSigningKey = true, //whether or not valid SecurityKey
                    ClockSkew = TimeSpan.Zero//Allowed server time offset
                };
            });
            #endregion
            services.AddDbContext<NetCoreDbContext>(options => options.UseSqlServer(Configuration.GetConnectionString("NetCoreDBContext")));//获取数据库连接
            //注册Swagger生成器,定义一个和多个Swagger 文档
            var basePath = Path.GetDirectoryName(typeof(Program).Assembly.Location);//获取应用程序所在目录(绝对,不受工作目录影响,建议采用此方法获取路径)
            services.AddSwaggerGen(c =>
            {
                c.SwaggerDoc("v1", new Info { Title = "NetCore WebAPI", Version = "v1" });
                // 为 Swagger JSON and UI设置xml文档注释路径
                c.IncludeXmlComments(Path.Combine(basePath, "NetCore.WebApi.xml"));
                c.IncludeXmlComments(Path.Combine(basePath, "NetCore.Repository.xml"));
            });
            return new AutofacServiceProvider(AutoFacApp.InitAutoFac(services));
        }
NetCore.WebApi Startup.cs中的Configure启用Swagger中间件服务
public void Configure(IApplicationBuilder app, IHostingEnvironment env)
        {
            if (env.IsDevelopment())
            {
                app.UseDeveloperExceptionPage();
            }
            else
            {
                app.UseHsts();
            }
            app.UseAuthentication();//启用身份验证
            //启用中间件服务生成Swagger作为JSON终结点
            app.UseSwagger();
            //启用中间件服务对swagger-ui,指定Swagger JSON终结点
            app.UseSwaggerUI(c =>
            {
                c.SwaggerEndpoint("/swagger/v1/swagger.json", "NetCore WebAPI V1");
            });
            app.UseHttpsRedirection();
            app.UseMvc();
        }
在NetCore.WebApi 项目中的Properties找到 launchSettings.json文件,修改launchUrl,将启动页面改成Swagger
{
"$schema": "http://json.schemastore.org/launchsettings.json",
"iisSettings": {
"windowsAuthentication": false,
"anonymousAuthentication": true,
"iisExpress": {
"applicationUrl": "http://localhost:64679",
"sslPort": 0 // 44341
},
"iis": {
"applicationUrl": "http://localhost:64679",
"sslPort": 0 // 44341
}
},
"profiles": {
"IIS Express": {
"commandName": "IISExpress",
"launchBrowser": true,
"launchUrl": "swagger/index.html",
"environmentVariables": {
"ASPNETCORE_ENVIRONMENT": "Development"
}
},
"NetCore.WebApi": {
"commandName": "Project",
"launchBrowser": true,
"launchUrl": "swagger/index.html",
"applicationUrl": "https://localhost:5001;http://localhost:5000",
"environmentVariables": {
"ASPNETCORE_ENVIRONMENT": "Development"
}
}
}
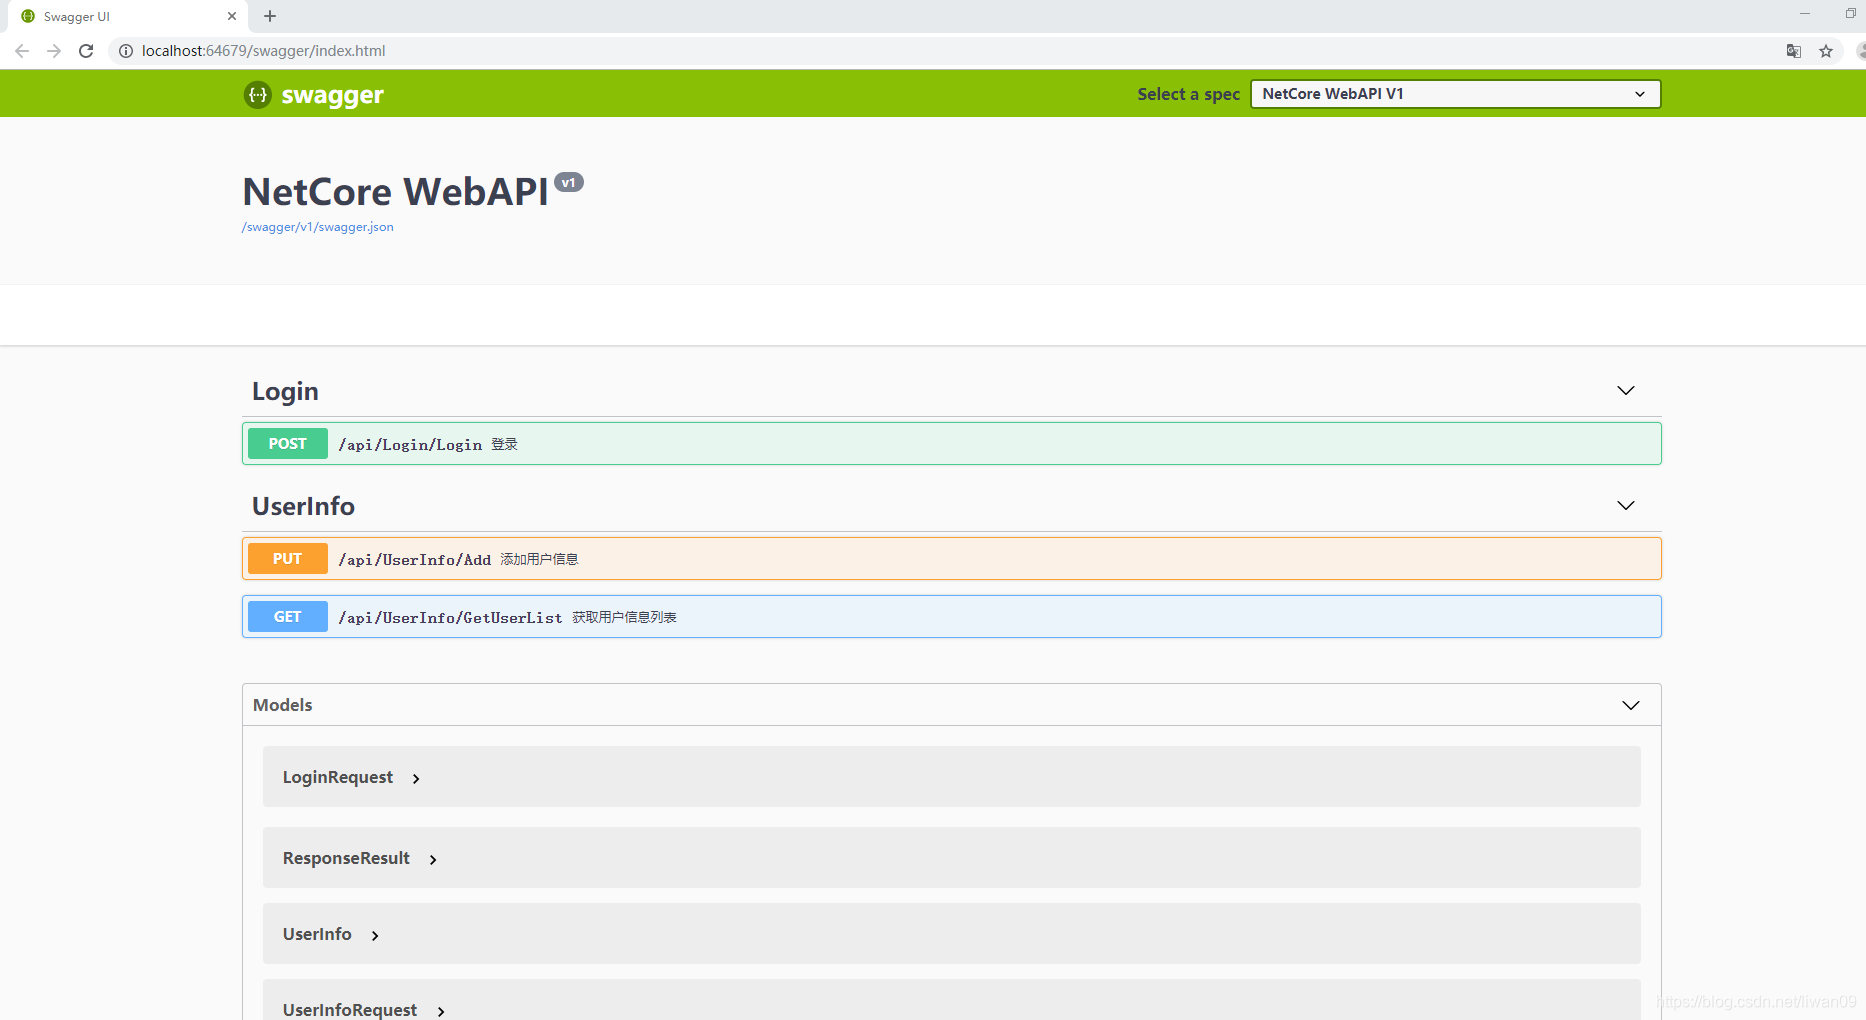
}项目启动后的效果
完整代码下载地址:https://download.youkuaiyun.com/download/liwan09/11717224


 1351
1351

 被折叠的 条评论
为什么被折叠?
被折叠的 条评论
为什么被折叠?
 到【灌水乐园】发言


