避坑指南(七):Spring Cloud Oauth2配置JwtTokenStore后不生效,依然生成普通token


问题

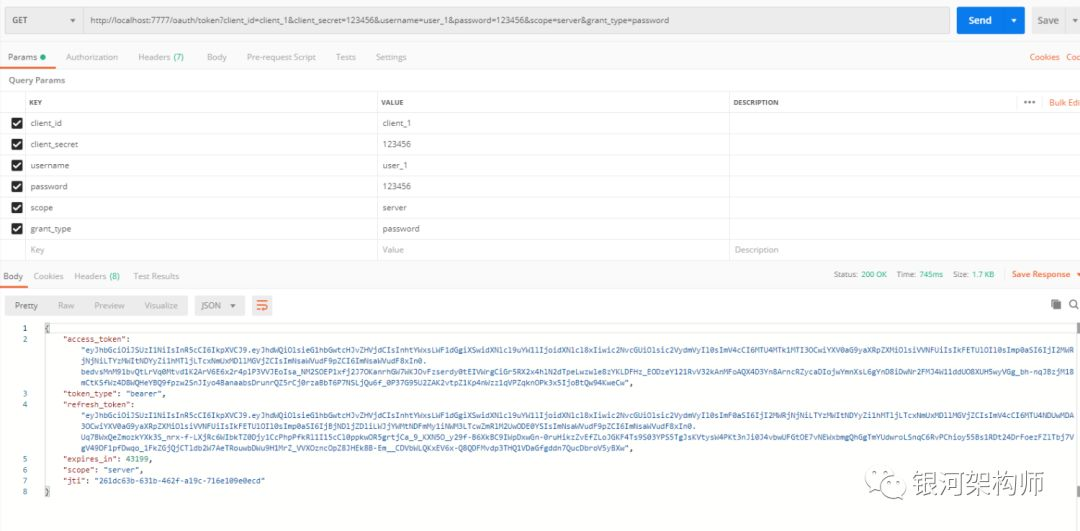
授权服务器基于Spring Cloud Oauth2创建后,配置TokenStore为JwtTokenStore,访问/oauth/token接口,依然返回普通token,如下如所示。

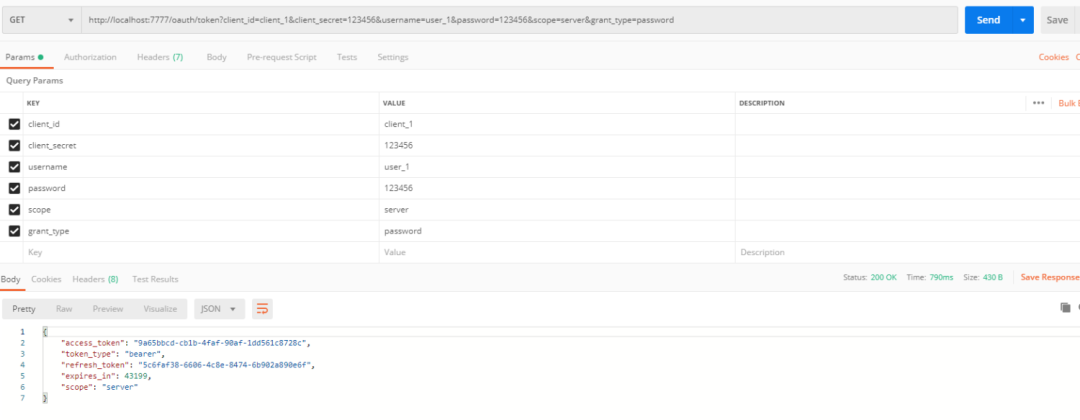
如图所示,生成的2个token,均不是jwt。

授权服务器Endpoints配置项内,配置TokenStore为JwtTokenStore,代码如下。

@Override
public void configure(AuthorizationServerEndpointsConfigurer endpoints) throws Exception {
    endpoints.authenticationManager(authenticationManager)
        .userDetailsService(userDetailsService)
        .allowedTokenEndpointRequestMethods(HttpMethod.GET, HttpMethod.POST)
        .tokenStore(new JwtTokenStore(jwtAccessTokenConverter()));
    ;
}


分析

查看TokenEndPoint中/oauth/token申请逻辑。

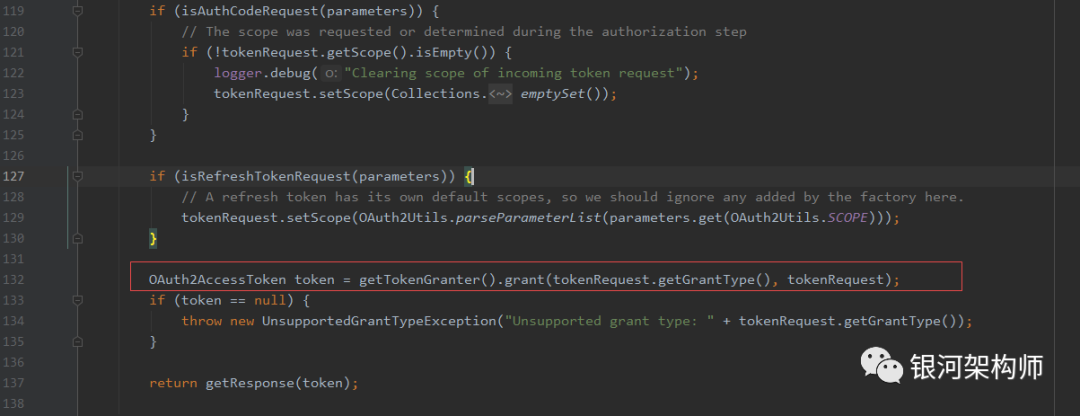
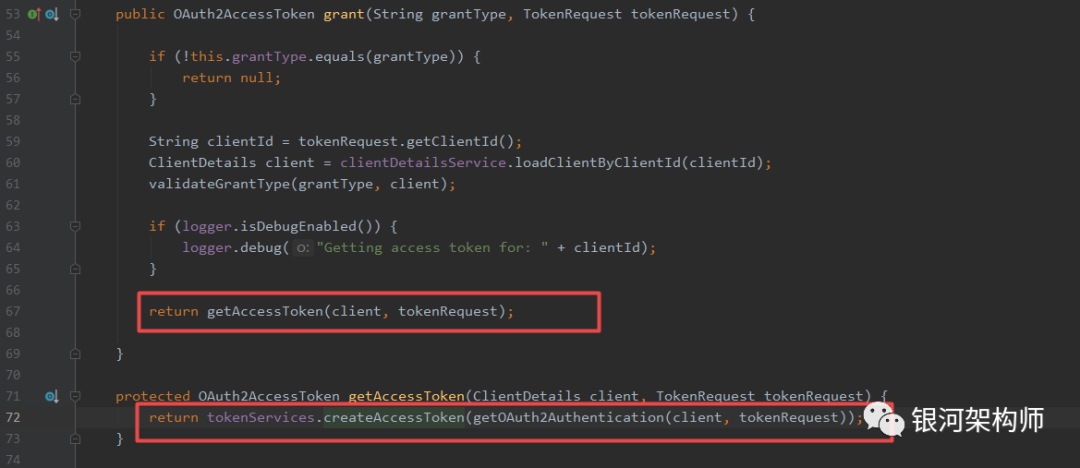
由TokenGranter授权Token。而grant方法调用tokenServices创建Token。

DefaultTokenServices创建token逻辑如下。

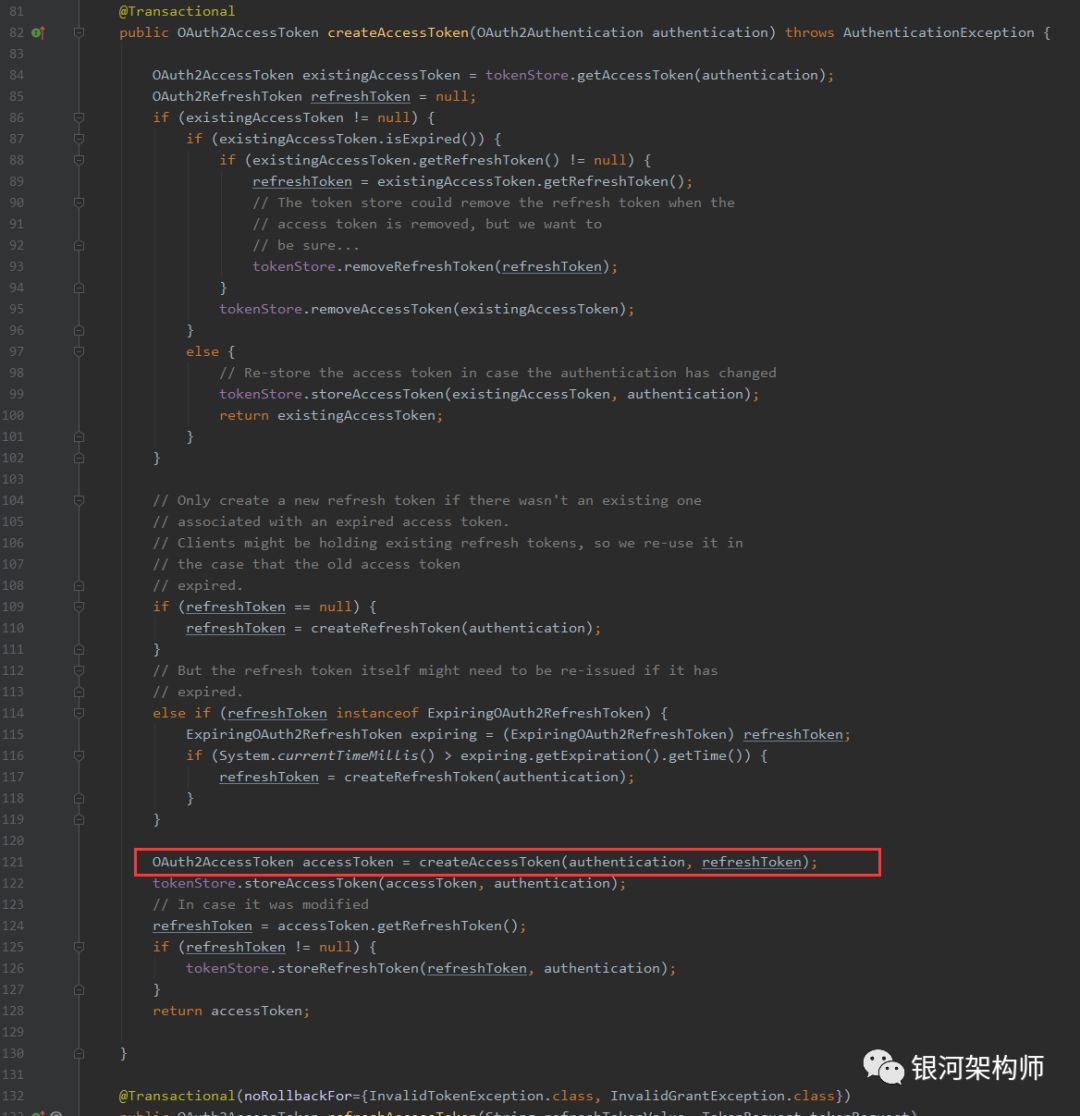
如果accessTokenEnhancer存在,则做token增强,如果不存在,则返回普通token。回到问题之初,正是返回了普通token,所以,最大的可能便是此处的accessTokenEnhancer为空。

接下来,查看一下框架配置,重点探寻accessTokenEnhancer是如何初始化的,怎么能导致为空。

由于创建token逻辑是在DefaultTokenServices中,所以先查看一下DefaultTokenServices是如何创建的。

其中,tokenEnhancer方法逻辑如下。

逻辑比较明显,如果tokenEnhancer为空,同时,此时的accessTokenConverter为JwtAccessTokenConverter时,tokenEnhancer便赋值为accessTokenConverter,即JwtAccessTokenConverter。但是此时,我们并没有配置accessTokenConverter。所以tokenEnhancer便为空。从而造成DefaultTokenServices中的token返回便会直接普通token。


解决

如上述分析,解决问题之关键在于,配置accessTokenConverter。配置如下:

@Override
public void configure(AuthorizationServerEndpointsConfigurer endpoints) throws Exception {
    endpoints.authenticationManager(authenticationManager)
        .userDetailsService(userDetailsService)
        .allowedTokenEndpointRequestMethods(HttpMethod.GET, HttpMethod.POST)
        .accessTokenConverter(jwtAccessTokenConverter())
        .tokenStore(new JwtTokenStore(jwtAccessTokenConverter()));
    ;
}

重启系统,再次访问授权接口,此时,已正常返回jwt类型的token。


本文系【银河架构师】原创,如需转载请在文章明显处注明作者及出处。

微信搜索【银河架构师】,发现更多精彩内容。

技术资料领取方法:关注公众号,回复微服务,领取微服务相关电子书;回复MK精讲,领取MK精讲系列电子书;回复JAVA 进阶,领取JAVA进阶知识相关电子书;回复JAVA面试,领取JAVA面试相关电子书,回复JAVA WEB领取JAVA WEB相关电子书。


### 整合Spring Authorization Server与Spring Cloud实现OAuth2认证授权 #### 配置依赖项 为了使项目能够支持 OAuth2 认证,需要引入必要的依赖库。对于 Spring Boot 3.x 版本的应用程序来说,应该在 `pom.xml` 文件中加入以下 Maven 依赖来启用对 Spring Security 及其扩展的支持[^1]。 ```xml <dependency> <groupId>org.springframework.boot</groupId> <artifactId>spring-boot-starter-oauth2-client</artifactId> </dependency> <dependency> <groupId>org.springframework.security</groupId> <artifactId>spring-security-config</artifactId> </artifactId> <dependency> <groupId>org.springframework.cloud</groupId> <artifactId>spring-cloud-starter-gateway</artifactId> </dependency> ``` #### 创建授权服务器 创建一个新的应用程序实例充当授权服务器角色。此应用需配置为提供令牌签发功能并管理客户端注册信息。通过继承 `AuthorizationServerConfigurerAdapter` 类来自定义安全策略设置,并重写相应的方法完成初始化工作。 ```java @Configuration(proxyBeanMethods = false) public class AuthorizationServerConfig { @Autowired private RegisteredClientRepository registeredClientRepository; @Bean public AuthorizationService authorizationService() { DefaultRegisteredClient defaultRegisteredClient = new DefaultRegisteredClient(); // 设置client_id, client_secret等参数... return new InMemoryAuthorizationService( Collections.singletonList(defaultRegisteredClient)); } } ``` #### 构建资源服务器 接下来要做的就是在另一个微服务里边声明自己是一个受保护的 API 资源端点。这可以通过简单的注解方式快速达成目的。只需确保该模块已加载了 spring security 的自动配置类即可生效。 ```java @RestController @RequestMapping("/api/resource") @RequiredArgsConstructor(onConstructor_ = {@Autowired}) @Slf4j class ResourceController { @GetMapping("") String getResource(@AuthenticationPrincipal Jwt principal){ log.info("Accessing protected resource with token: {}",principal.getTokenValue()); return "This is a secured message"; } } ``` #### 客户端配置 最后一步是在网关处做适当调整以便于它能正常参与到整个 OAUTH 流程当中去。具体表现为修改 application.yml 或 properties 来指明所使用的身份验证模式以及指向哪个地址获取 access_token 等细节。 ```yaml spring: security: oauth2: resourceserver: jwt: issuer-uri: http://localhost:9000/issuer client: registration: gateway-client: provider: custom scope: openid redirect-uri: "{baseUrl}/login/oauth2/code/{registrationId}" client-id: my_client_id client-secret: secret_password ```
评论
添加红包

请填写红包祝福语或标题

红包个数最小为10个

红包金额最低5元

当前余额3.43前往充值 >
需支付:10.00
成就一亿技术人!
领取后你会自动成为博主和红包主的粉丝 规则
hope_wisdom
发出的红包
实付
使用余额支付
点击重新获取
扫码支付
钱包余额 0

抵扣说明:

1.余额是钱包充值的虚拟货币,按照1:1的比例进行支付金额的抵扣。
2.余额无法直接购买下载,可以购买VIP、付费专栏及课程。

余额充值