SpringBoot——SpringBoot集成Redis

本文介绍了如何在SpringBoot项目中集成Redis,包括在pom.xml添加依赖,配置Redis连接信息,创建StudentService及其实现类,使用RedisTemplate进行存取操作,并通过StudentController进行接口测试。简单易懂,适合初学者参考。

摘要生成于 C知道 ,由 DeepSeek-R1 满血版支持, 前往体验 >

简单模拟一下SpringBoot集成Redis

在pom.xml文件中添加依赖 (都有的就不写了)

<!-- SpringBoot集成Redis的起步依赖 -->
<dependency>
    <groupId>org.springframework.boot</groupId>
    <artifactId>spring-boot-starter-data-redis</artifactId>
</dependency>

核心配置文件

#设置redis配置信息
spring.redis.host=localhost  #要是Redis在虚拟机上的话,就是虚拟机的ip地址
spring.redis.port=6379

创建一个StudentService和它的实现类

package com.liuhaiyang.springboot.service;

public interface StudentService {
    void put(String key, String value);

    String get(String key);
}
package com.liuhaiyang.springboot.service.Impl;

import com.liuhaiyang.springboot.service.StudentService;
import org.springframework.beans.factory.annotation.Autowired;
import org.springframework.data.redis.core.RedisTemplate;
import org.springframework.stereotype.Service;

@Service
public class StudentServiceImpl implements StudentService {

    @Autowired
    private RedisTemplate<Object,Object> redisTemplate;
    @Override
    public void put(String key, String value) {
        redisTemplate.opsForValue().set(key,value);
    }

    @Override
    public String get(String key) {
        String count= (String) redisTemplate.opsForValue().get(key);
        return count;
    }
}

创建一个StudentController

package com.liuhaiyang.springboot.controller;

import com.liuhaiyang.springboot.service.StudentService;
import org.springframework.beans.factory.annotation.Autowired;
import org.springframework.stereotype.Controller;
import org.springframework.web.bind.annotation.RequestMapping;
import org.springframework.web.bind.annotation.ResponseBody;
import org.springframework.web.bind.annotation.RestController;

@Controller
public class StudentController {
    @Autowired(required = false)
    private StudentService service;

    @RequestMapping("/put")
    public @ResponseBody Object put(String key, String value){
        service.put(key,value);
        return "值以及放入redis";

    }

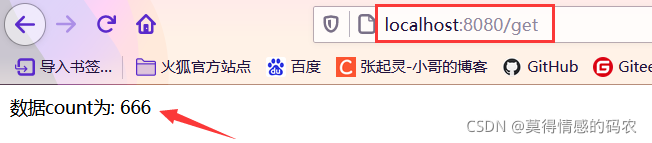
    @RequestMapping("/get")
    public @ResponseBody String get(){
        String count=service.get("count");
        return "数据count为:"+count;
    }
}

启动测试(虚拟机需要关闭防火墙)


### 如何在Spring Boot项目中集成Redis 为了实现Spring Boot应用程序中的Redis缓存功能,可以按照以下方法操作。以下是详细的说明以及示例代码。 #### 添加依赖项 首先,在`pom.xml`文件中添加必要的Maven依赖项来支持Spring Data Redis和Jedis客户端库: ```xml <dependency> <groupId>org.springframework.boot</groupId> <artifactId>spring-boot-starter-data-redis</artifactId> </dependency> <dependency> <groupId>redis.clients</groupId> <artifactId>jedis</artifactId> </dependency> ``` 这些依赖项提供了访问Redis所需的核心组件和支持[^1]。 #### 配置Redis连接 接下来,在`application.properties`或`application.yml`配置文件中设置Redis服务器的相关参数。例如: ```properties # Redis Configuration spring.redis.host=localhost spring.redis.port=6379 spring.redis.password= spring.redis.database=0 ``` 如果需要更复杂的配置(如超时时间),也可以通过Java类的方式完成配置。创建一个名为`RedisConfig.java`的配置类如下所示: ```java import org.springframework.context.annotation.Bean; import org.springframework.context.annotation.Configuration; import org.springframework.data.redis.connection.RedisStandaloneConfiguration; import org.springframework.data.redis.connection.jedis.JedisConnectionFactory; import org.springframework.data.redis.core.RedisTemplate; @Configuration public class RedisConfig { @Bean JedisConnectionFactory jedisConnectionFactory() { RedisStandaloneConfiguration config = new RedisStandaloneConfiguration(); config.setHostName("localhost"); config.setPort(6379); return new JedisConnectionFactory(config); } @Bean public RedisTemplate<String, Object> redisTemplate() { RedisTemplate<String, Object> template = new RedisTemplate<>(); template.setConnectionFactory(jedisConnectionFactory()); return template; } } ``` 此部分定义了一个用于管理Redis连接的工厂bean,并设置了默认模板以便于后续数据交互。 #### 编写服务层逻辑 最后一步是在业务逻辑层面利用Redis存储和检索数据。下面是一个简单的例子展示如何保存字符串到Redis并读取它: ```java import org.springframework.beans.factory.annotation.Autowired; import org.springframework.data.redis.core.StringRedisTemplate; import org.springframework.stereotype.Service; @Service public class CacheService { private final StringRedisTemplate stringRedisTemplate; @Autowired public CacheService(StringRedisTemplate stringRedisTemplate) { this.stringRedisTemplate = stringRedisTemplate; } public void setValue(String key, String value){ stringRedisTemplate.opsForValue().set(key,value); } public String getValue(String key){ return stringRedisTemplate.opsForValue().get(key); } } ``` 这段代码展示了基本的操作模式——向指定键赋值以及获取对应键下的值[^1]。 #### 测试安全性和其他扩展选项 对于安全性测试方面,可以通过启用HTTP Basic Authentication来进行验证。这通常涉及修改`application.properties`文件以包含预设用户名密码信息: ```properties # Spring Security Default user name and password spring.security.user.name=actuator spring.security.user.password=actuator spring.security.user.roles=ACTUATOR_ADMIN ``` 这样做的目的是保护某些敏感端点免受未经授权访问的影响[^4]。 ---
评论
添加红包

请填写红包祝福语或标题

红包个数最小为10个

红包金额最低5元

当前余额3.43前往充值 >
需支付:10.00
成就一亿技术人!
领取后你会自动成为博主和红包主的粉丝 规则
hope_wisdom
发出的红包
实付
使用余额支付
点击重新获取
扫码支付
钱包余额 0

抵扣说明:

1.余额是钱包充值的虚拟货币,按照1:1的比例进行支付金额的抵扣。
2.余额无法直接购买下载,可以购买VIP、付费专栏及课程。

余额充值