


本篇引导:分层开发对应的程序!学过其它后端开发,一定知道控制层controller、服务层service、数据访问层dao,那么在go中如何编写呢?
一、需求讨论
开发一个客户信息管理软件,进行维护客户信息!客户信息有姓名、年龄、性别、电话、邮箱,获取这些信息并进行维护到客户信息库中!
维护信息的过程包含以下功能:
- 提供与用户交互的菜单界面
- 添加用户
- 删除用户
- 修改用户
- 退出程序
1. 提取菜单需求
菜单UI如下

进行展示软件功能,进行用户交互,需要循环执行
2. 提取添加用户需求
添加用户需求如下

获取客户姓名、年龄、性别、电话、邮箱信息
3.提取删除用户需求

输入要删除的用户id,进行删除用户
4. 提取修改用户需求
输入要修改的用户id,并获取用户要修改的属性
5. 提取退出程序需求
退出程序,需要做出二次确认
二、分层讨论
1. 实体层
本次需求是对客户信息的维护,客户信息包含姓名、年龄、性别、电话、邮箱
根据这些信息,进行构建结构体,并通过工厂模式返回一个全参的构建结构体对象。
2. 逻辑层
根据需求可以看到客户信息管理软件主要有添加客户、修改客户、删除客户、退出软件功能,
由于是模拟,没有数据进行维护新增的数据,所以在逻辑层需要添加俩个属性:1. 客户信息列表,2:客户id,并通过工厂模式返回一个结构体对象(属性没有初始化)。
3. 控制层
进行接收用户信息并进行转发到逻辑层!
本次需求为菜单,进行在控制层维护一个菜单交互,并根据用户选项,进行正确转发处理。
三、代码完善
1. 实体层
构建客户Customer结构体,并进行返回创建的实体对象
package model

import "fmt"

// Customer 客户信息结构体
type Customer struct {
	Id    int
	Name  string
	Age   int
	Sex   string
	Tel   string
	Email string
}

// NewCustomer 工厂模式返回一个指针的 Customer(可以理解为有参构造函数 带了个返回实体的方法)
func NewCustomer(id int, name string, age int, sex string, tel string, email string) *Customer {
	return &Customer{
		Id:    id,
		Name:  name,
		Age:   age,
		Sex:   sex,
		Tel:   tel,
		Email: email,
	}
}

// NewCustomer2 工厂模式返回一个指针的 Customer(可以理解为有参构造函数 带了个返回实体的方法)
func NewCustomer2(name string, age int, sex string, tel string, email string) Customer {
	return Customer{
		Name:  name,
		Age:   age,
		Sex:   sex,
		Tel:   tel,
		Email: email,
	}
}

// GetInfo 获取客户信息
func (this *Customer) GetInfo() string {
	return fmt.Sprintf("%d\t%s\t%d\t%s\t%s\t%s", this.Id, this.Name, this.Age, this.Sex, this.Tel, this.Email)
}
2. 逻辑层
添加客户信息的增删改查功能
package service
import (
"fmt"
"learn_golang_project/src/go_code/grade110/model"
)
type CustomerService struct {
// 客户数组
customers []model.Customer
// 客户id
customerNum int
}
func NewCustomerService() *CustomerService {
return &CustomerService{}
}
func (this *CustomerService) List() {
if len(this.customers) == 0 {
fmt.Println("没有客户信息")
} else {
for _, customer := range this.customers {
fmt.Println(customer.GetInfo())
}
}
}
// Add 添加客户
func (this *CustomerService) Add(customer model.Customer) bool {
// 算出id
this.customerNum++
// id赋值
customer.Id = this.customerNum
// 追加列表
this.customers = append(this.customers, customer)
return true
}
// Delete 删除用户
func (this *CustomerService) Delete(id int) bool {
if id > len(this.customers) {
// 切片没内容直接返回处理成功
return true
} else {
// 切片remove是 掐头去尾 然后拼接
// 这里先进行获取id对应的下标
removeIdx := -1
for index, customer := range this.customers {
if customer.Id == id {
removeIdx = index
}
}
if removeIdx == -1 {
return false
}
this.customers = append(this.customers[:removeIdx], this.customers[removeIdx+1:]...)
return true
}
}
// Get 获取用户
func (this *CustomerService) Get(update int) *model.Customer {
for _, customer := range this.customers {
if customer.Id == update {
return &customer
}
}
return model.NewCustomer(0, "", 0, "", "", "")
}
// Update 修改用户
func (this *CustomerService) Update(modelCustomer *model.Customer) bool {
for index := range this.customers {
if this.customers[index].Id == modelCustomer.Id {
this.customers[index] = *modelCustomer
return true
}
}
return false
}
// Exit 退出
func (this *CustomerService) Exit() bool {
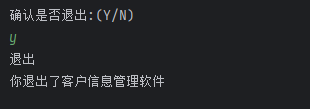
fmt.Println("确认是否退出:(Y/N)")
flag := ""
for {
fmt.Scanln(&flag)
if flag == "Y" || flag == "N" || flag == "y" || flag == "n" {
break
}
fmt.Println("请输入正确的选项")
}
if flag == "Y" || flag == "y" {
fmt.Println("退出")
return true
}
return false
}
3. 控制层
完善用户交互逻辑和转发处理
package main
import (
"fmt"
"learn_golang_project/src/go_code/grade110/model"
"learn_golang_project/src/go_code/grade110/service"
)
// 通过service对数据层进行操作:添加、删除、修改、查询
type CustomerView struct {
// 用户输入值
key string
// 是否循环
loop bool
// 添加处理层声明
service *service.CustomerService
}
// NewCustomerView 实例化业务处理对象 并初始化属性
func NewCustomerView() *CustomerView {
return &CustomerView{
key: "",
loop: false,
service: service.NewCustomerService(),
}
}
// MainMenu 菜单
func (this *CustomerView) MainMenu() {
for {
fmt.Println("-------------客户信息管理软件-------------")
fmt.Println(" 1 添加客户")
fmt.Println(" 2 修改客户")
fmt.Println(" 3 删除客户")
fmt.Println(" 4 客户列表")
fmt.Println(" 5 退出软件")
fmt.Println("请选择(1-5):")
fmt.Scanln(&this.key)
switch this.key {
case "1":
// 添加客户信息
// 1. 收集信息
// 2. 添加信息到存储地
// 2.1 分析存储地是哪里?:本次练习为切片容器
// 2.2 分析切片接收什么类型的数据?:Customer
// 2.3 如何创建一个Customer对象?
// 2.4 Customer对象和用户的信息怎么映射?
// 3. 处理结果是否成功
fmt.Println("------------添加客户------------")
// 1. 收集信息
name := ""
fmt.Println("姓名:")
fmt.Scanln(&name)
age := 0
fmt.Println("年龄:")
fmt.Scanln(&age)
sex := ""
fmt.Println("性别:")
fmt.Scanln(&sex)
tel := ""
fmt.Println("手机:")
fmt.Scanln(&tel)
email := ""
fmt.Println("邮箱:")
fmt.Scanln(&email)
// 2. 添加信息到存储地
// 2.2 分析切片接收什么类型的数据?:Customer
// 2.3 如何创建一个Customer对象?
// 2.4 Customer对象和用户的信息怎么映射?
customer2 := model.NewCustomer2(name, age, sex, tel, email)
// 2.1 分析存储地是哪里?:本次练习为切片容器
addResult := this.service.Add(customer2)
// 3. 处理结果是否成功
if addResult {
fmt.Println("添加成功")
} else {
fmt.Println("添加失败")
}
fmt.Println("------------添加客户完成------------")
case "2":
// 1. 获取要修改的用户id
// 2. 查询对应的用户信息
// 3. 获取用户信息
// 4. 从切片中找到对应的id
// 5. 修改信息
// 6. 处理结果是否成功
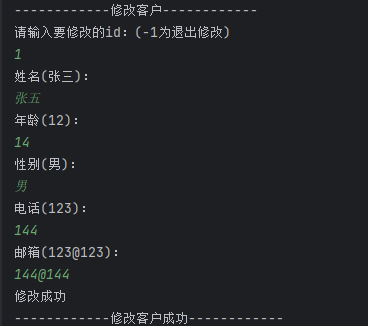
fmt.Println("------------修改客户------------")
// 1. 获取要修改的用户id
idUpdate := -1
fmt.Println("请输入要修改的id:(-1为退出修改)")
fmt.Scanln(&idUpdate)
if idUpdate == -1 {
continue
}
// 2. 查询对应的用户信息
customer := this.service.Get(idUpdate)
if customer.Id == 0 {
fmt.Println("没有此用户")
continue
}
// 3. 获取用户信息
fmt.Printf("姓名(%s):\n", customer.Name)
fmt.Scanln(&customer.Name)
fmt.Printf("年龄(%d):\n", customer.Age)
fmt.Scanln(&customer.Age)
fmt.Printf("性别(%s):\n", customer.Sex)
fmt.Scanln(&customer.Sex)
fmt.Printf("电话(%s):\n", customer.Tel)
fmt.Scanln(&customer.Tel)
fmt.Printf("邮箱(%s):\n", customer.Email)
fmt.Scanln(&customer.Email)
// 4. 从切片中找到对应的id
// 5. 修改信息
updateResult := this.service.Update(customer)
// 6. 处理结果是否成功
if updateResult {
fmt.Println("修改成功")
} else {
fmt.Println("修改失败")
}
fmt.Println("------------修改客户成功------------")
case "3":
// 1. 获取用户要删除的id
// 2. 操作从存储地删除:切片容器中,删除对应的id
// 3. 处理结果是否成功
fmt.Println("------------删除客户------------")
// 1. 获取用户要删除的id
id := -1
fmt.Println("请输入要删除的id:")
fmt.Scanln(&id)
if id < 0 {
fmt.Println("请输入正确的id")
continue
}
// 2. 操作从存储地删除:切片容器中,删除对应的id
deleteResult := this.service.Delete(id)
// 3. 处理结果是否成功
if deleteResult {
fmt.Println("删除成功")
} else {
fmt.Println("删除失败")
}
fmt.Println("------------删除客户完成------------")
case "4":
fmt.Println("------------客户列表------------")
this.service.List()
fmt.Println("-------------客户列表完成-------------")
case "5":
this.loop = this.service.Exit()
}
if this.loop {
break
}
}
fmt.Println("你退出了客户信息管理软件")
}
func main() {
customerView := NewCustomerView()
customerView.MainMenu()
}
附
本次项目为三层结构,比较常见的后台分层处理,现在好像前端框架也开始了分层处理思想!
分层与不分层有什么区别呢?从功能上没有什么区别!但是从开发和维护角度,需要进行分层处理!这样做的目的,是使代码结构更清晰,维护成本更小!


 1万+
1万+

 被折叠的 条评论
为什么被折叠?
被折叠的 条评论
为什么被折叠?
 到【灌水乐园】发言


