 RHEL7系统中添加与重命名网卡接口教程


 本文档详细介绍了如何在Red Hat Enterprise Linux Server 7.3环境下,通过VMware Workstation Pro添加一张自定义网卡,并进行网卡接口的重命名。步骤包括查看当前网卡信息,添加新网卡,创建配置文件,禁用和启用接口,以及最终的网络配置。此教程对于需要管理RHEL网络设置的系统管理员具有指导意义。
| 本文档详细介绍给RHEL7添加一张自定义网卡并更改网卡接口的方法 |
环境
VMware Workstation Pro
Red Hat Enterprise Linux Server release 7.3
查看当前网卡信息
[root@Jaking ~]# cat /etc/redhat-release
Red Hat Enterprise Linux Server release 7.3 (Maipo)
[root@Jaking ~]# ifconfig
ens33: flags=4163<UP,BROADCAST,RUNNING,MULTICAST>  mtu 1500
        inet 192.168.10.11  netmask 255.255.255.0  broadcast 192.168.10.255
        inet6 fe80::250:56ff:fe2b:88bf  prefixlen 64  scopeid 0x20
        ether 00:50:56:2b:88:bf  txqueuelen 1000  (Ethernet)
        RX packets 454  bytes 44638 (43.5 KiB)
        RX errors 0  dropped 0  overruns 0  frame 0
        TX packets 339  bytes 33150 (32.3 KiB)
        TX errors 0  dropped 0 overruns 0  carrier 0  collisions 0

lo: flags=73<UP,LOOPBACK,RUNNING>  mtu 65536
        inet 127.0.0.1  netmask 255.0.0.0
        inet6 ::1  prefixlen 128  scopeid 0x10
        loop  txqueuelen 1  (Local Loopback)
        RX packets 112  bytes 9492 (9.2 KiB)
        RX errors 0  dropped 0  overruns 0  frame 0
        TX packets 112  bytes 9492 (9.2 KiB)
        TX errors 0  dropped 0 overruns 0  carrier 0  collisions 0
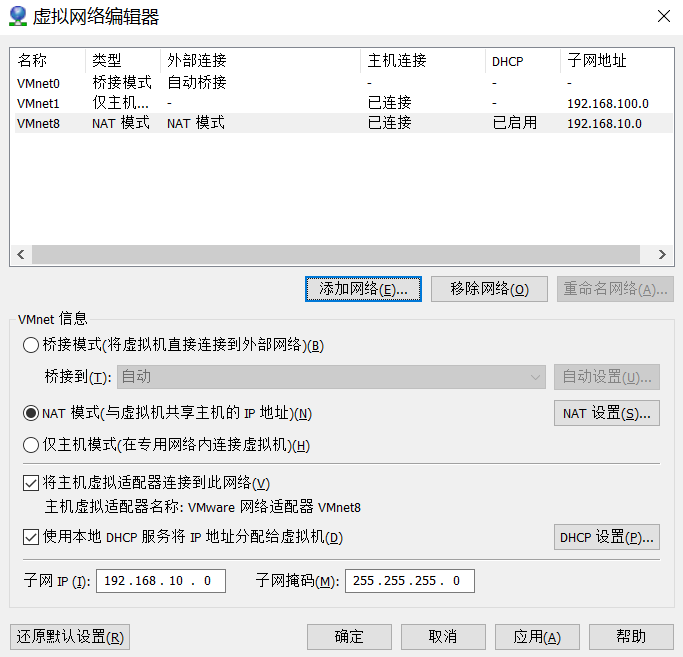
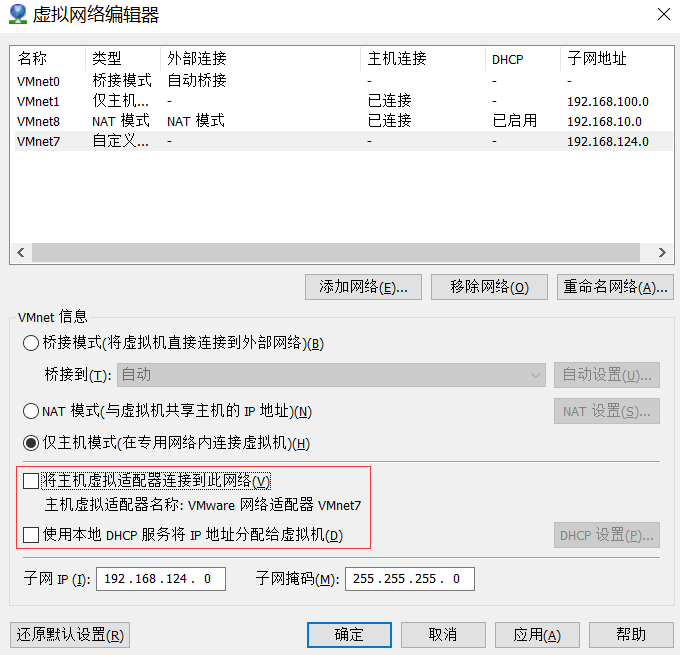
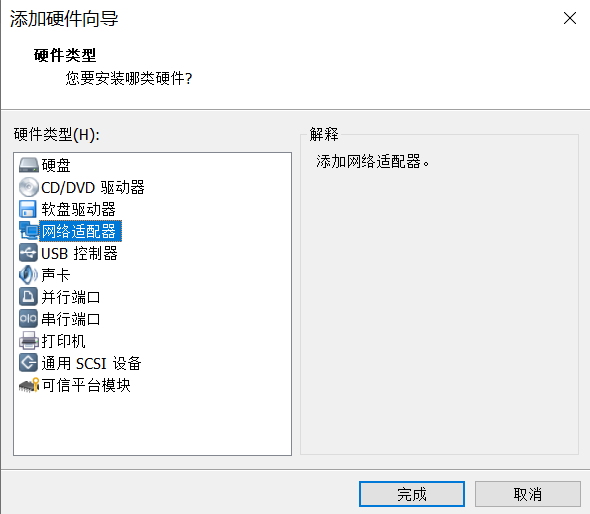
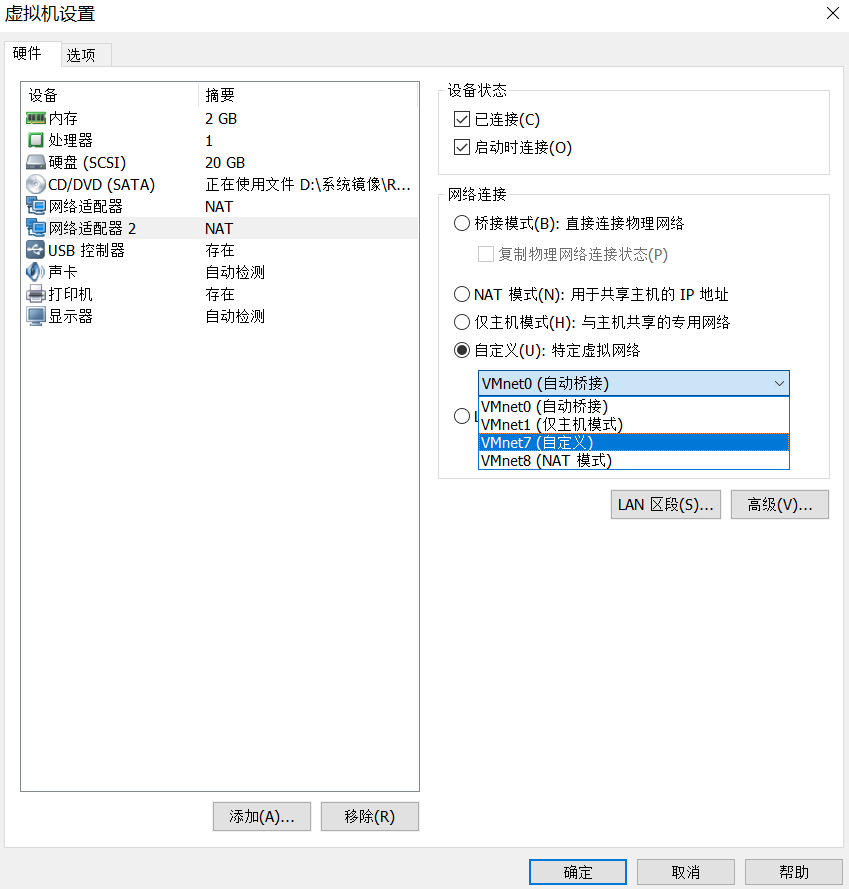
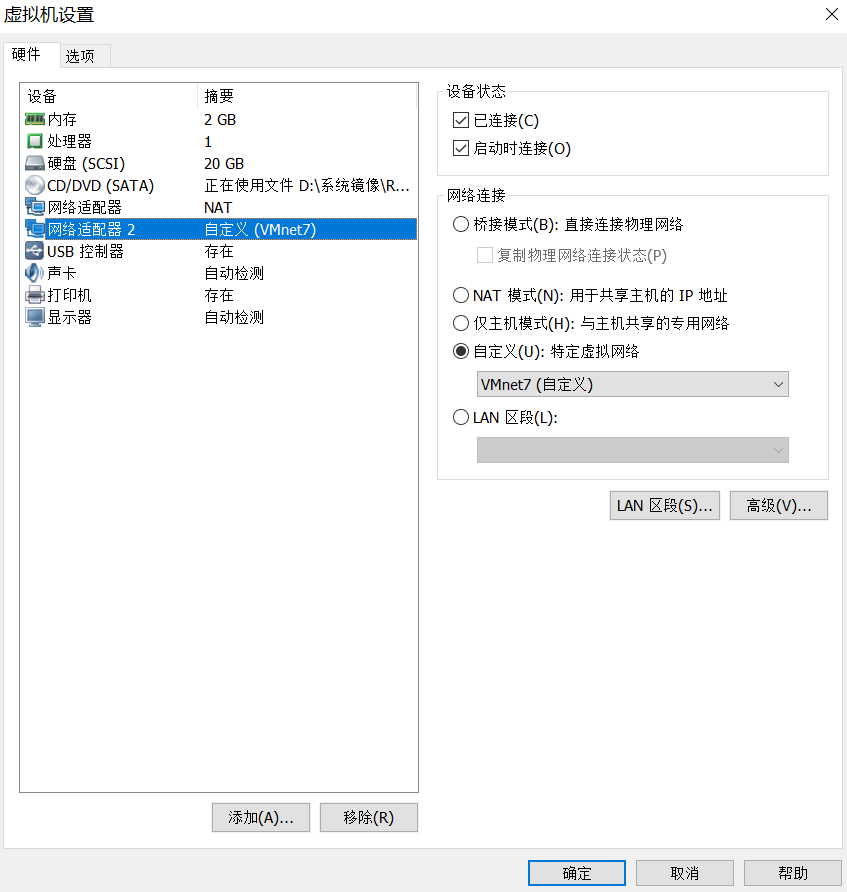
添加网卡


取消红框内的钩

查看网卡信息
[root@Jaking ~]# ifconfig
ens33: flags=4163<UP,BROADCAST,RUNNING,MULTICAST>  mtu 1500
        inet 192.168.10.11  netmask 255.255.255.0  broadcast 192.168.10.255
        inet6 fe80::250:56ff:fe2b:88bf  prefixlen 64  scopeid 0x20
        ether 00:50:56:2b:88:bf  txqueuelen 1000  (Ethernet)
        RX packets 488  bytes 47935 (46.8 KiB)
        RX errors 0  dropped 0  overruns 0  frame 0
        TX packets 356  bytes 35698 (34.8 KiB)
        TX errors 0  dropped 0 overruns 0  carrier 0  collisions 0

ens38: flags=4163<UP,BROADCAST,RUNNING,MULTICAST>  mtu 1500
        ether 00:0c:29:46:f9:b8  txqueuelen 1000  (Ethernet)
        RX packets 5  bytes 594 (594.0 B)
        RX errors 0  dropped 0  overruns 0  frame 0
        TX packets 0  bytes 0 (0.0 B)
        TX errors 0  dropped 0 overruns 0  carrier 0  collisions 0

lo: flags=73<UP,LOOPBACK,RUNNING>  mtu 65536
        inet 127.0.0.1  netmask 255.0.0.0
        inet6 ::1  prefixlen 128  scopeid 0x10
        loop  txqueuelen 1  (Local Loopback)
        RX packets 112  bytes 9492 (9.2 KiB)
        RX errors 0  dropped 0  overruns 0  frame 0
        TX packets 112  bytes 9492 (9.2 KiB)
        TX errors 0  dropped 0 overruns 0  carrier 0  collisions 0
配置网卡并更改网卡接口
[root@Jaking ~]# cd /etc/sysconfig/network-scripts/
[root@Jaking network-scripts]# ls
ifcfg-ens33  ifdown-ipv6    ifdown-TeamPort  ifup-ippp   ifup-routes       network-functions
ifcfg-lo     ifdown-isdn    ifdown-tunnel    ifup-ipv6   ifup-sit          network-functions-ipv6
ifdown       ifdown-post    ifup             ifup-isdn   ifup-Team
ifdown-bnep  ifdown-ppp     ifup-aliases     ifup-plip   ifup-TeamPort
ifdown-eth   ifdown-routes  ifup-bnep        ifup-plusb  ifup-tunnel
ifdown-ib    ifdown-sit     ifup-eth         ifup-post   ifup-wireless
ifdown-ippp  ifdown-Team    ifup-ib          ifup-ppp    init.ipv6-global
添加网卡后,需要创建对应的网卡配置文件
[root@Jaking network-scripts]# cp ifcfg-ens33 ifcfg-ens34
[root@Jaking network-scripts]# vim ifcfg-ens34
TYPE=Ethernet
BOOTPROTO=static
DEFROUTE=yes
PEERDNS=yes
PEERROUTES=yes
IPV4_FAILURE_FATAL=no
NAME=ens34
DEVICE=ens34
ONBOOT=yes
IPADDR=172.16.100.100
NETMASK=255.255.255.0
禁用ens38接口
[root@Jaking network-scripts]# ip link set ens38 down
[root@Jaking network-scripts]# ifconfig
ens33: flags=4163<UP,BROADCAST,RUNNING,MULTICAST>  mtu 1500
        inet 192.168.10.11  netmask 255.255.255.0  broadcast 192.168.10.255
        inet6 fe80::250:56ff:fe2b:88bf  prefixlen 64  scopeid 0x20
        ether 00:50:56:2b:88:bf  txqueuelen 1000  (Ethernet)
        RX packets 812  bytes 74791 (73.0 KiB)
        RX errors 0  dropped 0  overruns 0  frame 0
        TX packets 537  bytes 61780 (60.3 KiB)
        TX errors 0  dropped 0 overruns 0  carrier 0  collisions 0

lo: flags=73<UP,LOOPBACK,RUNNING>  mtu 65536
        inet 127.0.0.1  netmask 255.0.0.0
        inet6 ::1  prefixlen 128  scopeid 0x10
        loop  txqueuelen 1  (Local Loopback)
        RX packets 112  bytes 9492 (9.2 KiB)
        RX errors 0  dropped 0  overruns 0  frame 0
        TX packets 112  bytes 9492 (9.2 KiB)
        TX errors 0  dropped 0 overruns 0  carrier 0  collisions 0
重命名ens38接口为ens34
[root@Jaking network-scripts]# ip link set ens38 name ens34
启用修改完成的ens34接口
[root@Jaking network-scripts]# ip link set ens34 up

[root@Jaking network-scripts]# systemctl restart network
[root@Jaking network-scripts]# ifconfig
ens33: flags=4163<UP,BROADCAST,RUNNING,MULTICAST>  mtu 1500
        inet 192.168.10.11  netmask 255.255.255.0  broadcast 192.168.10.255
        inet6 fe80::250:56ff:fe2b:88bf  prefixlen 64  scopeid 0x20
        ether 00:50:56:2b:88:bf  txqueuelen 1000  (Ethernet)
        RX packets 1389  bytes 123239 (120.3 KiB)
        RX errors 0  dropped 0  overruns 0  frame 0
        TX packets 913  bytes 117924 (115.1 KiB)
        TX errors 0  dropped 0 overruns 0  carrier 0  collisions 0

ens34: flags=4163<UP,BROADCAST,RUNNING,MULTICAST>  mtu 1500
        inet 172.16.100.100  netmask 255.255.255.0  broadcast 192.168.100.255
        ether 00:0c:29:46:f9:b8  txqueuelen 1000  (Ethernet)
        RX packets 5  bytes 594 (594.0 B)
        RX errors 0  dropped 0  overruns 0  frame 0
        TX packets 2  bytes 120 (120.0 B)
        TX errors 0  dropped 0 overruns 0  carrier 0  collisions 0

lo: flags=73<UP,LOOPBACK,RUNNING>  mtu 65536
        inet 127.0.0.1  netmask 255.0.0.0
        inet6 ::1  prefixlen 128  scopeid 0x10
        loop  txqueuelen 1  (Local Loopback)
        RX packets 148  bytes 12552 (12.2 KiB)
        RX errors 0  dropped 0  overruns 0  frame 0
        TX packets 148  bytes 12552 (12.2 KiB)
        TX errors 0  dropped 0 overruns 0  carrier 0  collisions 0
总结
以上就是给RHEL7添加一张自定义网卡并更改网卡接口的方法,希望能帮助到大家!


 369
369

 被折叠的 条评论
为什么被折叠?
被折叠的 条评论
为什么被折叠?
 到【灌水乐园】发言


