swift:Notification Service Extension 扩展动态修改推送通知

众所周知,苹果的apns推送,在我们不点击通知时,app是不会执行任何代码的,且apns推送的保活时间是30s左右,如果我们想对推送内容进行修改,可以通过Notification Service Extension进行动态修改

一、Notification Service Extension

1、点击 file->new->target

2、选择 iOS->Notification Service Extension

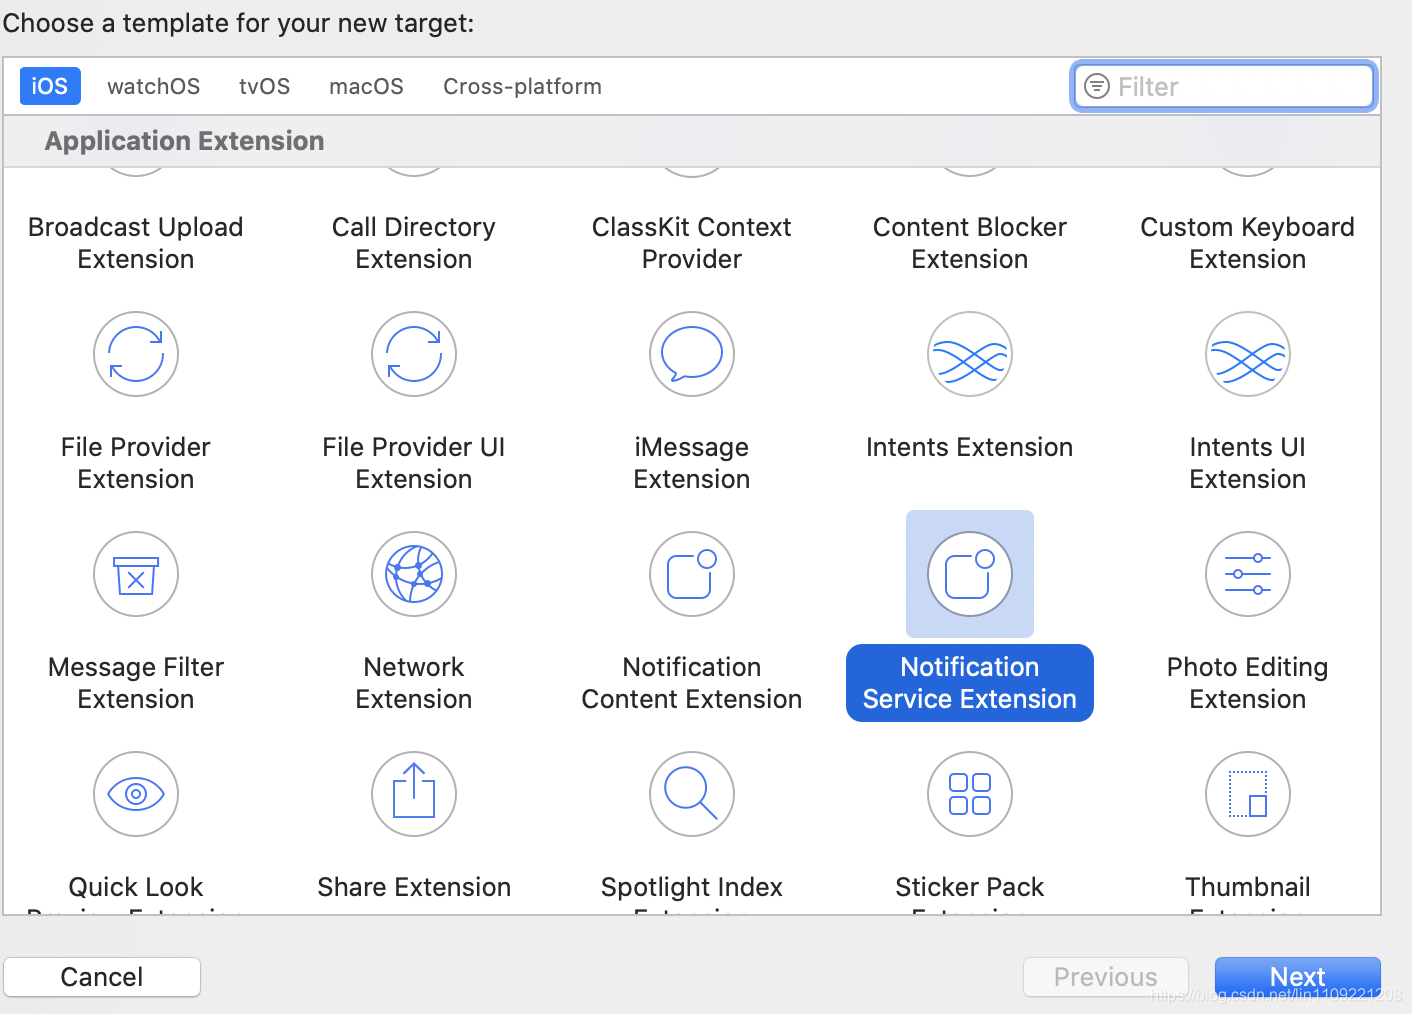
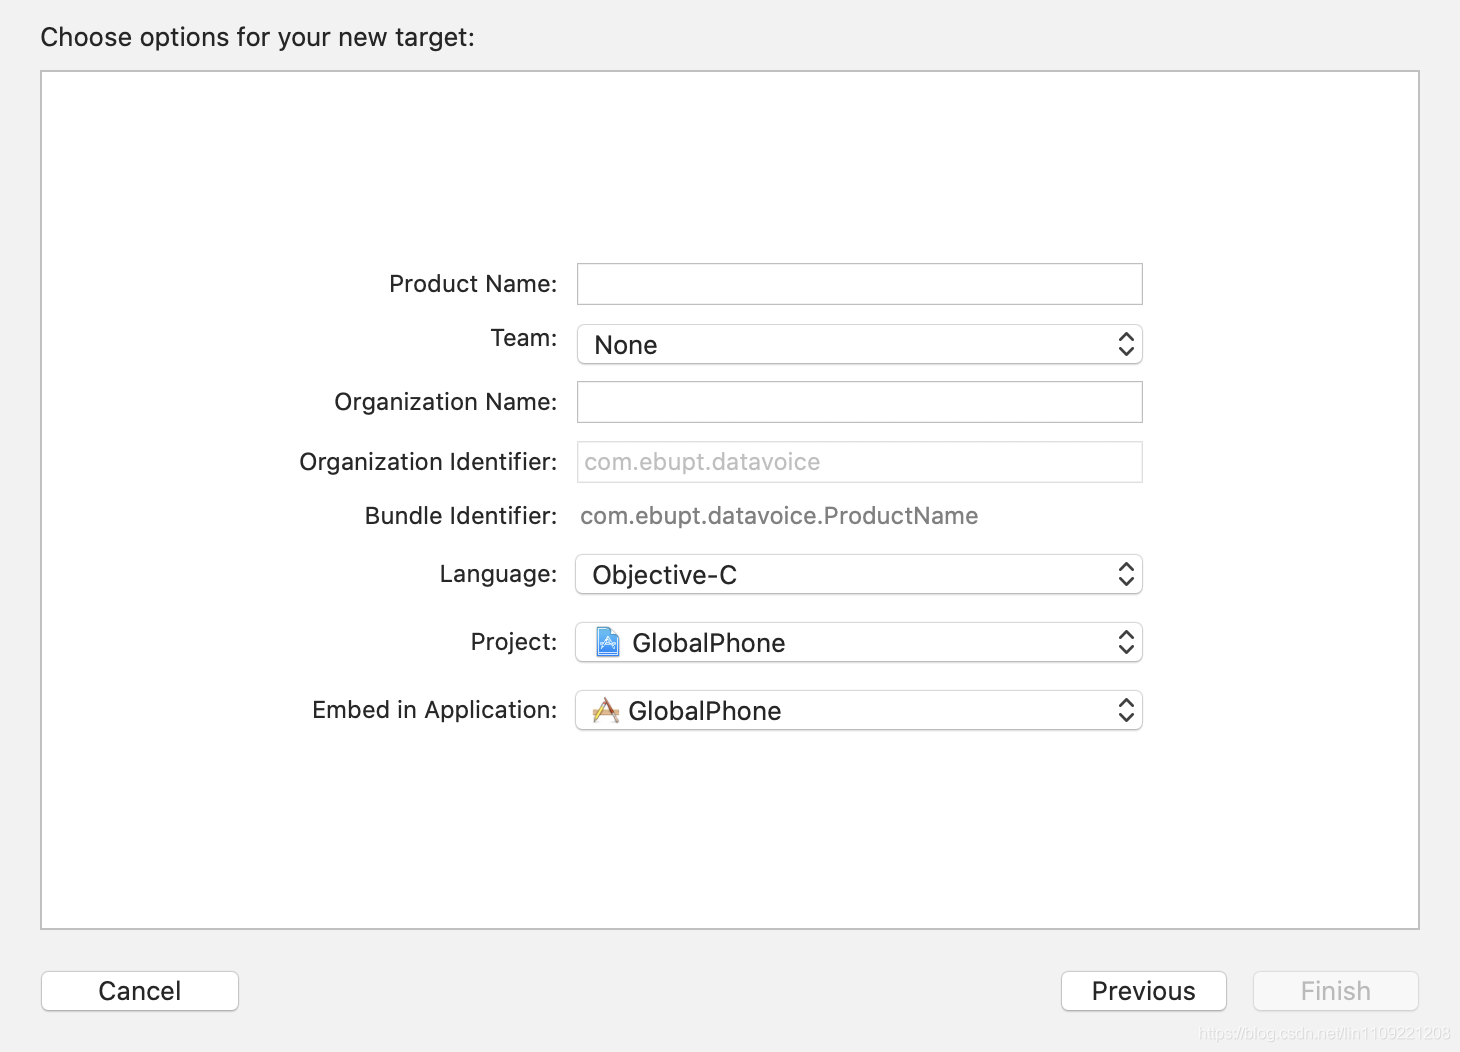
3、选择创建extension的项目target,输入扩展名称,点击finish,即创建扩展完成

二、配置Extension

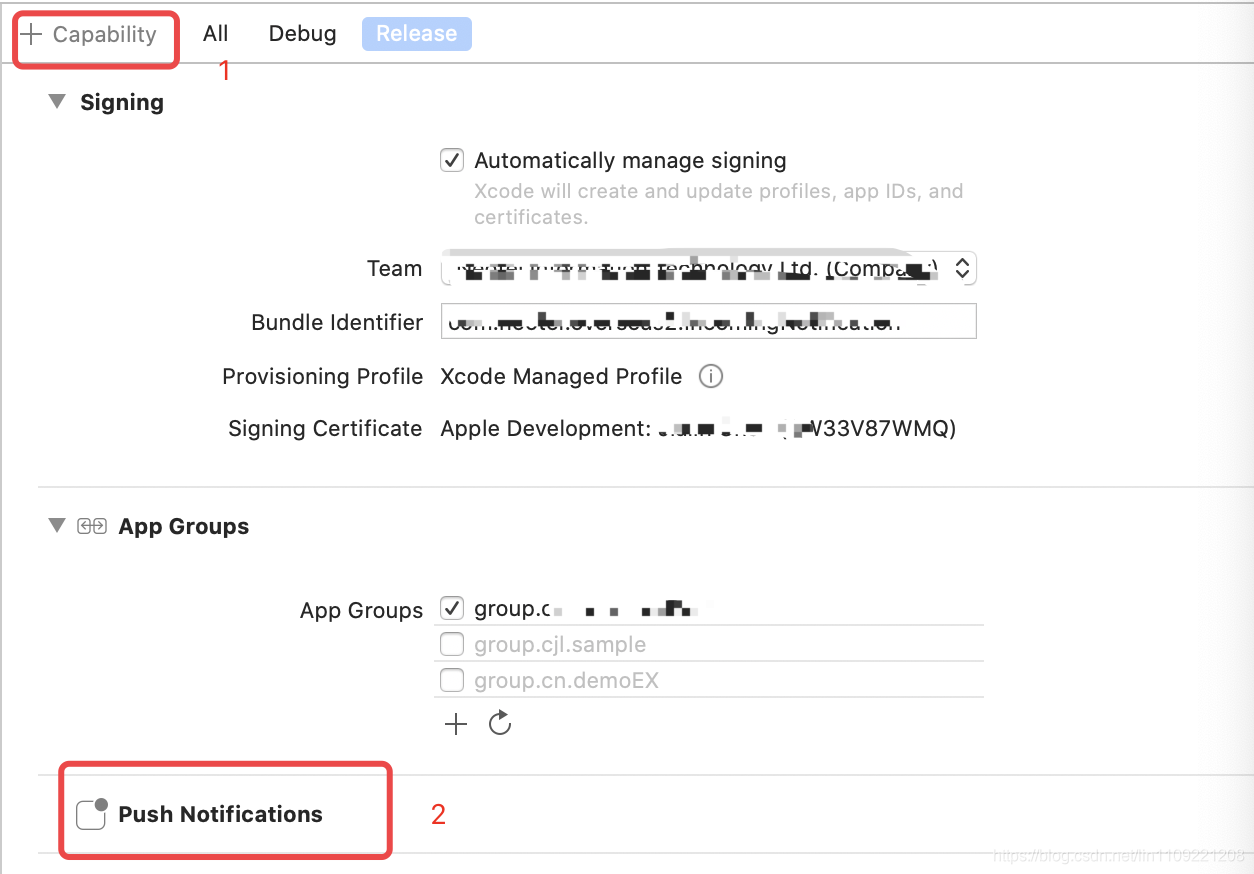
创建完成后,主要有两个文件NotificationService.swift 和 info.plist

1、首先,需要在扩展对应的target->Signing&Capabilities,点击+Capability,添加push notification

在iOS中,当应用程序处于前台时,如果收到了推送通知,系统不会弹出通知弹框,而是会调用应用程序的代理方法 `application(_:didReceiveRemoteNotification:fetchCompletionHandler:)`。因此,如果你想要实现推送弹窗效果,你需要手动创建自定义弹窗来显示推送通知内容。 以下是一个实现推送弹窗效果的示例代码: ```swift import UIKit class ViewController: UIViewController { override func viewDidLoad() { super.viewDidLoad() // 注册推送通知 let center = UNUserNotificationCenter.current() center.requestAuthorization(options: [.alert, .badge, .sound]) { (granted, error) in if granted { DispatchQueue.main.async { UIApplication.shared.registerForRemoteNotifications() } } } } } extension ViewController: UNUserNotificationCenterDelegate { // 接收到推送通知时调用 func userNotificationCenter(_ center: UNUserNotificationCenter, willPresent notification: UNNotification, withCompletionHandler completionHandler: @escaping (UNNotificationPresentationOptions) -> Void) { // 弹出自定义弹窗 let alertController = UIAlertController(title: notification.request.content.title, message: notification.request.content.body, preferredStyle: .alert) let okAction = UIAlertAction(title: "OK", style: .default, handler: nil) alertController.addAction(okAction) present(alertController, animated: true, completion: nil) // 显示推送通知弹窗 completionHandler([.alert, .sound, .badge]) } } extension AppDelegate: UNUserNotificationCenterDelegate { // 注册远程推送成功时调用 func application(_ application: UIApplication, didRegisterForRemoteNotificationsWithDeviceToken deviceToken: Data) { // 注册成功 } // 注册远程推送失败时调用 func application(_ application: UIApplication, didFailToRegisterForRemoteNotificationsWithError error: Error) { // 注册失败 } // 接收到推送通知时调用 func userNotificationCenter(_ center: UNUserNotificationCenter, didReceive response: UNNotificationResponse, withCompletionHandler completionHandler: @escaping () -> Void) { // 处理推送通知 print("Received push notification: \(response.notification.request.content.userInfo)") // 处理完毕 completionHandler() } } ``` 在这个示例中,我们首先在 `viewDidLoad()` 方法中注册了推送通知。然后,我们实现了 `UNUserNotificationCenterDelegate` 协议中的 `userNotificationCenter(_:willPresent:withCompletionHandler:)` 方法来接收推送通知,并弹出自定义的弹窗。最后,我们实现了 `UNUserNotificationCenterDelegate` 协议中的 `userNotificationCenter(_:didReceive:withCompletionHandler:)` 方法来处理推送通知。 需要注意的是,要想接收到推送通知,你需要在 `AppDelegate` 中实现 `UNUserNotificationCenterDelegate` 协议中的相关方法,并且在 `application(_:didFinishLaunchingWithOptions:)` 方法中设置 `UNUserNotificationCenter.current().delegate = self`,以便将推送通知的回调委托给 `AppDelegate`。
评论
添加红包

请填写红包祝福语或标题

红包个数最小为10个

红包金额最低5元

当前余额3.43前往充值 >
需支付:10.00
成就一亿技术人!
领取后你会自动成为博主和红包主的粉丝 规则
hope_wisdom
发出的红包
实付
使用余额支付
点击重新获取
扫码支付
钱包余额 0

抵扣说明:

1.余额是钱包充值的虚拟货币,按照1:1的比例进行支付金额的抵扣。
2.余额无法直接购买下载,可以购买VIP、付费专栏及课程。

余额充值