 Nginx配置实战


CentOS7安装nginx及nginx配置
Windows安装nginx教程
一、普通服务器
找到目录下conf/nginx.conf文件,复制一份备份为nginx.conf.bak
然后修改nginx.conf中的server配置对应自己的项目
1.常规配置
server {
    listen       80; #端口
    server_name  localhost; #主机

    location / {
	    root    E:/projects/www/test; # 静态项目根目录
	    #root   "E:/projects/www/test a"; # 目录名称中如果有空格,需要用双引号包起来(推荐使用)
	    #root   E:/projects/www/test\ a; # 目录名称中如果有空格,Linux可以在空格前加反斜杠转义(未亲测,谨慎使用)
	    index   index.html index.htm; # 默认打开的页面
	}
}
2.别名及显示目录的配置
server {
	listen       80;
	server_name  localhost;

	location / {
		root E:/projects/www/test;
		index index.html index.htm;
	}

	location /img/ {
		alias  E:/projects/www/img; #别名

		# 如果图片不存在,替换成默认的图片
        if ( !-e $request_filename ){
            rewrite ^/(.*)$ /default.png break;
        }

		autoindex on;  #显示目录
        autoindex_exact_size off;  #显示文件大小,默认单位是bytes,设置off后为KB/MB/GB
        autoindex_localtime on;   #显示文件时间,默认为GMT时间。设置on后为服务器时间
	}
	error_page   500 502 503 504  /50x.html;
}
3.rewrite地址重写
server {
    listen 80;
    server_name localhost;
    if ( $host != 'www.abc.com'  ) {
        rewrite ^/(.*)$ http://www.abc.com/$1 permanent;
    }

    location /bbs/ {
        rewrite ^/(bbs) http://www.abc.com/$1 permanent;
    }
}
4.不允许嵌套
server {
    listen 80;
    server_name localhost;
    location / {
		root E:/projects/www/test;
		index index.html index.htm;

		add_header X-Frame-Options SAMEORIGIN; # 不允许嵌套
	}
}
二、代理服务器
修改nginx.conf中的server配置项,例如把80端口代理到http://172.6.0.5:8888
1.代理http
server {
    listen       80;
    server_name  localhost;

    location / {
	    proxy_pass http://172.6.0.5:8888;
	}


    error_page   500 502 503 504  /50x.html;
    location = /50x.html {
        root   html;
    }
}
2.代理websoket
server {
    listen       18000;
    server_name  localhost;

    location / {
     	proxy_pass   http://172.6.0.5:18888;
        proxy_http_version 1.1;
        proxy_set_header Upgrade $http_upgrade;
        proxy_set_header Connection "upgrade";
    }
}
三、服务器多开
修改nginx.conf中的配置项,新增一个server
server {
    listen       80;
    server_name  localhost;

    location / {
        root     html;
	    index  index.html index.htm;
	}

    error_page   500 502 503 504  /50x.html;
    location = /50x.html {
        root   html;
    }
}

server {
    listen       8080;
    server_name  localhost;

    location / {
        root     html;
	    index  index.html index.htm;
	}

    error_page   500 502 503 504  /50x.html;
    location = /50x.html {
        root   html;
    }
}
四、服务器跨域处理
方法一:修改nginx.conf中的server配置项,配置前端页面服务器地址及后端接口服务器地址
server {
    listen       80;
    server_name  localhost;

    location / {
	    proxy_pass http://172.6.0.5:8888;  # 前端页面服务器地址
	}
	location /api/ {
	    proxy_pass http://172.6.0.5:9999;  # 后端接口服务器地址
	}

    error_page   500 502 503 504  /50x.html;
    location = /50x.html {
        root   html;
    }
}
方法二:修改nginx.conf中的配置项,给api添加允许跨域请求头信息,“欺骗”浏览器服务端是允许跨域
server {
    listen       80;
    server_name  localhost;

	location /api {
	    # add_header 'Access-Control-Allow-Origin' '*'; (不推荐)
	    add_header 'Access-Control-Allow-Origin' '$http_origin'; #(推荐)
	    add_header 'Access-Control-Allow-Methods' '*';
	    add_header 'Access-Control-Allow-Headers' '*';
	    add_header 'Access-Control-Allow-Credentials' true;

	    if ($request_method = 'OPTIONS') {
	        add_header 'Access-Control-Max-Age' 1728000;
	        add_header 'Content-Type' 'text/plain charset=UTF-8';
	        add_header 'Content-Length' 0;
	        return 204;
	    }

		proxy_pass http://172.6.0.5:8888;
    }

    error_page   500 502 503 504  /50x.html;
    location = /50x.html {
        root   html;
    }
3.图片跨域处理
server {
    listen       80;
    server_name  localhost;

	location / {
	    add_header 'Access-Control-Allow-Origin' '$http_origin'; #(推荐)
	    add_header 'Access-Control-Allow-Methods' '*';
	    add_header 'Access-Control-Allow-Headers' '*';
	    add_header 'Access-Control-Allow-Credentials' true;

	    if ($request_method = 'OPTIONS') {
	        add_header 'Access-Control-Max-Age' 1728000;
	        add_header 'Content-Type' 'text/plain charset=UTF-8';
	        add_header 'Content-Length' 0;
	        return 204;
	    }

	    root    E:/projects/www/test/images;
        index   index.html;

        # 如果图片不存在,替换成默认图片
        if ( !-e $request_filename ){
            rewrite ^/(.*)$ /default.png break;
        }

        autoindex on;  #显示目录
        autoindex_exact_size off;  #显示文件大小,默认单位是bytes,设置off后为KB/MB/GB
        autoindex_localtime on;   #显示文件时间,默认为GMT时间。设置on后为服务器时间
    }

    error_page   500 502 503 504  /50x.html;
    location = /50x.html {
        root   html;
    }
或
server {
    listen       80;
    server_name  localhost;

	location ~* \.(gif|jpg|jpeg|png|bmp|svg|ico)$ {
	    add_header Access-Control-Allow-Origin '*';
        add_header Access-Control-Allow-Headers X-Requested-With;
        add_header Access-Control-Allow-Methods GET,POST,OPTIONS;

        root    E:/projects/www/test/images;
        index   index.html;

        # 如果图片不存在,替换成默认图片
        if ( !-e $request_filename ){
            rewrite ^/(.*)$ /default.png break;
        }
    }

    error_page   500 502 503 504  /50x.html;
    location = /50x.html {
        root   html;
    }
或
server {
    listen       80;
    server_name  localhost;

    location ~* \.(gif|jpg|jpeg|png|bmp|swf)$ {
        add_header Access-Control-Allow-Origin *;
        add_header Access-Control-Allow-Methods 'GET, POST, OPTIONS';
        add_header Access-Control-Allow-Headers 'DNT,X-Mx-ReqToken,Keep-Alive,User-Agent,X-Requested-With,If-Modified-Since,Cache-Control,Content-Type,Authorization';

        proxy_set_header   Host             $host;
        proxy_set_header   X-Real-IP        $remote_addr;
        proxy_set_header   X-Forwarded-For  $proxy_add_x_forwarded_for;

        root    E:/projects/www/test/images;
        index   index.html;

        # 如果图片不存在,替换成默认图片
        if ( !-e $request_filename ){
            rewrite ^/(.*)$ /default.png break;
        }
    }
}
4.字体图标跨域配置
server {
    listen       80;
    server_name  localhost;
    location ~* \.(eot|otf|ttf|woff|woff2)$ {
        add_header Access-Control-Allow-Origin *;
    }
}
五、配置https/wss(SSL)
1.常规https配置
server {
    listen       443 ssl;
    server_name  localhost;

    ssl_certificate      cert/server.pem; # 证书文件,放在conf/cert目录下
    ssl_certificate_key  cert/private.key; # 证书私钥,放在conf/cert目录下

    ssl_session_cache    shared:SSL:1m;
    ssl_session_timeout  5m;

    ssl_ciphers  HIGH:!aNULL:!MD5;
    ssl_prefer_server_ciphers  on;

    location / {
        root     html;
	    index  index.html index.htm;
	}
}
2.配置http和https共存
server {
    listen 80 default backlog=2048;
    listen 443 ssl;
    server_name  localhost;

    root html;

    ssl_certificate      cert/server.pem;
    ssl_certificate_key  cert/private.key;
}
3.配置http跳转https
server {
    listen 80;
    server_name localhost;
#old   rewrite ^(.*) https://$server_name$1 permanent;
    rewrite ^(.*)$  https://$host$1 permanent;
}

server {
    listen 443 ssl;
    server_name localhost;

    ssl_certificate      cert/server.pem;
    ssl_certificate_key  cert/private.key;

    location / {
        root   html;
	    index  index.html index.htm;
	}
}
4.常规wss配置
server {
    listen       18008 ssl;
    server_name  localhost;

    ssl_certificate      cert/server.pem; # 证书文件,放在conf/cert目录下
    ssl_certificate_key  cert/private.key; # 证书私钥,放在conf/cert目录下

    ssl_session_cache    shared:SSL:1m;
    ssl_session_timeout  5m;

    ssl_ciphers  HIGH:!aNULL:!MD5;
    ssl_prefer_server_ciphers  on;

    location /wss {
        proxy_pass http://127.0.0.1:8008;
	    proxy_http_version 1.1;
        proxy_set_header Upgrade $http_upgrade;
        proxy_set_header Connection "Upgrade";
	}
}
5.配置同时支持http/https/ws/wss
方式1:
worker_processes  1;

events {
    worker_connections  1024;
	accept_mutex on; #设置网路连接序列化,防止惊群现象发生,默认为on
	multi_accept on; #设置一个进程是否同时接受多个网络连接,默认为off
}

http {
    include       mime.types;
    default_type  application/octet-stream;
    sendfile        on;
    keepalive_timeout  65;

	# http/ws
	server {
	    listen       80;
	    server_name  localhost;
		location / {
			proxy_pass http://127.0.0.1:8000;
			proxy_connect_timeout 15s;
			proxy_send_timeout 15s;
			proxy_read_timeout 30m;
			proxy_set_header Host $host;
			proxy_set_header X-Real-IP $remote_addr;
			proxy_set_header X-Forwarded-For $proxy_add_x_forwarded_for;
			proxy_set_header Connection "";
			proxy_set_header Upgrade $http_upgrade;
			proxy_set_header Connection "upgrade";
			client_max_body_size 1024m;
		}
	}

	# https/wss
	server {
		listen       443 ssl;
		server_name  localhost;

		ssl_certificate      cert/server.pem; # 证书文件,放在conf/cert目录下
		ssl_certificate_key  cert/private.key; # 证书私钥,放在conf/cert目录下

		ssl_session_cache    shared:SSL:1m;
		ssl_session_timeout  5m;

		ssl_ciphers  HIGH:!aNULL:!MD5;
		ssl_prefer_server_ciphers  on;

		location / {
			proxy_pass http://127.0.0.1:8008;
			proxy_connect_timeout 15s;
			proxy_send_timeout 15s;
			proxy_read_timeout 30m;
			proxy_set_header Host $host;
			proxy_set_header X-Real-IP $remote_addr;
			proxy_set_header X-Forwarded-For $proxy_add_x_forwarded_for;
			proxy_set_header Connection "";
			proxy_set_header Upgrade $http_upgrade;
			proxy_set_header Connection "upgrade";
			client_max_body_size 1024m;
		}
	}
}
方式二:
worker_processes  1;

events {
    worker_connections  1024;
}


http {
    include       mime.types;
    default_type  application/octet-stream;
    sendfile        on;
    keepalive_timeout  65;
    access_log off;
    server_names_hash_bucket_size 64;
    proxy_connect_timeout 300;
    proxy_send_timeout 300;
    proxy_read_timeout 300;
    proxy_buffer_size 16k;
    proxy_buffers 4 64k;
    proxy_busy_buffers_size 128k;
    proxy_temp_file_write_size 128k;
    client_max_body_size 100m;

    map $http_upgrade $connection_upgrade {
        default upgrade;
        '' close;
    }

    server {
        listen       80;
        server_name  localhost;

        location / {
            proxy_pass   http://127.0.0.1:8080;
        }

        error_page   500 502 503 504  /50x.html;
        location = /50x.html {
            root   html;
        }
    }

	server{
		listen   443  ssl;
		ssl_certificate      cert/server.pem;
		ssl_certificate_key  cert/private.key;
		ssl_session_cache   		shared:SSL:1m;
		ssl_session_timeout  		5m;
		ssl_ciphers  				HIGH:!aNULL:!MD5;
		ssl_prefer_server_ciphers  on;
		underscores_in_headers on;

		location / {
			proxy_pass   http://127.0.0.1:80;
			proxy_set_header Host $host;
	        proxy_set_header X-real-ip $remote_addr;
	        proxy_set_header X-Forwarded-For $proxy_add_x_forwarded_for;
		}
	}
}
六、开启gzip压缩
提示:比较小的文件不必压缩,图片/mp3这样的二进制文件不必压缩,因为压缩率比较小, 比如100->80字节,而且压缩也是耗费CPU资源的.
加在http配置中
http {
    include       mime.types;
    default_type  application/octet-stream;
    sendfile        on;
    keepalive_timeout  65;

    gzip on;
    gzip_buffers 32 4K;
    gzip_comp_level 6;
    gzip_min_length 100;
    gzip_types text/plain application/javascript application/x-javascript text/css application/xml text/xml text/javascript application/json image/png image/gif image/jpeg application/octet-stream; #application/octet-stream 是开启b3dm文件压缩
    gzip_disable "MSIE [1-6]\.";
    gzip_vary on;

    server {
        listen       80;
        server_name  localhost;
        location / {
            root   html;
            index  index.html index.htm;
        }
        error_page   500 502 503 504  /50x.html;
        location = /50x.html {
            root   html;
        }
    }
}
或加在server配置中
server{
	listen       80;
     server_name  localhost;
     location / {
         root   html;
         index  index.html index.htm;
     }
     error_page   500 502 503 504  /50x.html;
     location = /50x.html {
         root   html;
     }

    gzip on;
    gzip_buffers 32 4K;
    gzip_comp_level 6;
    gzip_min_length 100;
    gzip_types text/plain application/javascript application/x-javascript text/css application/xml text/xml text/javascript application/json image/png image/gif image/jpeg application/octet-stream; #application/octet-stream 是开启b3dm文件压缩
    gzip_disable "MSIE [1-6]\.";
    gzip_vary on;
}
gzip配置的常用参数说明
gzip on|off; #是否开启gzip

gzip_buffers 32 4K| 16 8K #缓冲(压缩在内存中缓冲几块? 每块多大?)

gzip_comp_level [1-9] #推荐6 压缩级别(级别越高,压的越小,越浪费CPU计算资源)

gzip_disable #正则匹配UA 什么样的Uri不进行gzip
#gzip_disable "MSIE [1-6]\."; #配置禁用gzip条件,支持正则。此处表示ie6及以下不启用gzip(因为ie低版本不支持)

gzip_min_length 200 # 开始压缩的最小长度(再小就不要压缩了,意义不在)

gzip_http_version 1.0|1.1 # 开始压缩的http协议版本(可以不设置,目前几乎全是1.1协议)

gzip_proxied # 设置请求者代理服务器,该如何缓存内容

gzip_types text/plain application/xml # 对哪些类型的文件用压缩 如txt,xml,html ,css

gzip_vary on|off # 是否传输gzip压缩标志
七、代理多台服务器负载均衡
upstream servers {
    server 127.0.0.1:8081;
    server 127.0.0.1:8082;
}
添加backendIP、backendCode,在浏览器响应头中可以查看真实转发地址
server {
    listen       80;
    server_name  localhost;

    location / {
        add_header backendIP $upstream_addr;
        add_header backendCode $upstream_status;
        proxy_pass http://servers;
    }
}
八、代理一组服务器
upstream test {
  server test1.lihefei.com       weight=5;
  server test2.lihefei.com:8080  max_fails=3 fail_timeout=30s;
  server 127.0.0.1:8090;

  server backup.lihefei.com:8080 backup;
}

server {
  location / {
    proxy_pass http://test;
  }
}
| 参数 | 默认值 | 说明 |
|---|---|---|
| weight | 1 | 设定服务器的权重 |
| max_fails | 1 | 设定Nginx与服务器通信的尝试失败的次数,在fail_timeout参数定义的时间段内,如果失败的次数达到此值,Nginx就认为服务器不可用。在下一个fail_timeout时间段,服务器不会再被尝试。 失败的尝试次数默认是1。设为0就会停止统计尝试次数,认为服务器是一直可用的。 |
| fail_timeout | 10秒 | 统计失败尝试次数的时间段。在这段时间中,服务器失败次数达到指定的尝试次数,服务器就被认为不可用。 服务器被认为不可用的时间段。 |
| backup | 标记为备用服务器。当主服务器不可用以后,请求会被传给这些服务器。down标记服务器永久不可用,可以跟ip_hash指令一起使用 |
九、模块化配置conf文件
如果nginx.conf配置文件中的server越来越多就会特别臃肿,需要对nginx.conf进行解耦拆分,让每个端口都有自己独立的配置文件。
1.在nginx.conf文件目录下创建 conf.d文件夹
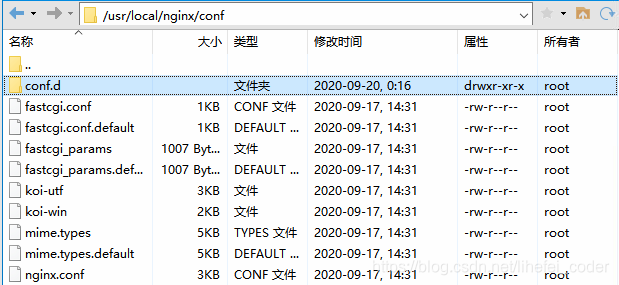
2.把nginx.conf里所有server都拆分为单个的xxx.conf文件,放在conf.d文件夹下
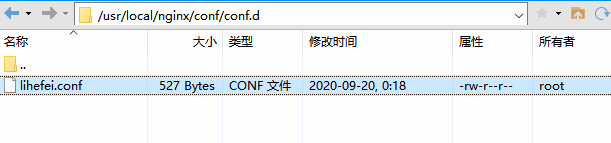
3.然后只需在nginx.conf的http配置末尾加上 include conf.d/*.conf;
nginx.conf
worker_processes  1;
events {
    worker_connections  1024;
}


http {
    include       mime.types;
    default_type  application/octet-stream;
    sendfile        on;
    keepalive_timeout  65;

    server {
        listen       80;
        server_name  localhost;

        location / {
            root   html;
            index  index.html index.htm;
        }

        error_page   500 502 503 504  /50x.html;
        location = /50x.html {
            root   html;
        }
    }

    # 载入所有拆分的单个server的conf文件
    include conf.d/*.conf;
}
lifefei.conf
server {
   listen       8000;
    server_name  lifefei;
    location / {
        root   html;
        index  index.html index.htm;
    }
}
十、多域名通过80端口代理转发到不同端口服务方法
server {
    listen       80;
    server_name  localhost;

    location / {

        proxy_set_header X-Real-IP $remote_addr;
        proxy_set_header X-Forwarded-For $remote_addr;
        proxy_set_header Host $http_host;

        proxy_connect_timeout      360;
        proxy_send_timeout         360;
        proxy_read_timeout         360;

        if ($http_host = "www.lihefei.com") {
            proxy_pass http://127.0.0.1:8080;
        }

        if ($http_host = "blog.lihefei.com") {
            proxy_pass http://127.0.0.1:9001;
        }

    }

    error_page   500 502 503 504  /50x.html;
    location = /50x.html {
        root   html;
    }
}
十一、主域名与子域名访问80端口转发到不同端口服务
index.conf
访问http://lihefei.com转发到http://www.lihefei.com
server {
    listen       80;
    server_name  lihefei.com;

    location / {
         proxy_pass http://www.lihefei.com;
    }

    error_page   500 502 503 504  /50x.html;
    location = /50x.html {
        root   html;
    }
}
home.conf
访问http://www.lihefei.com转发到http://127.0.0.0:8000
server {
    listen       80;
    server_name  www.lihefei.com;

    location / {
         proxy_pass http://127.0.0.0:8000;
    }

    error_page   500 502 503 504  /50x.html;
    location = /50x.html {
        root   html;
    }
}
blog.conf
访问http://blog.lihefei.com转发到http://127.0.0.0:8080
server {
    listen       80;
    server_name  blog.lihefei.com;

    location / {
         proxy_pass http://127.0.0.0:8080;
    }

    error_page   500 502 503 504  /50x.html;
    location = /50x.html {
        root   html;
    }
}
chat.web.conf
访问http://chat.lihefei.com转发到目录/var/www/chat
server {
    listen       80;
    server_name  chat.lihefei.com;

    location / {
        root   /var/www/chat;
        index  index.html index.htm;
    }

    error_page   500 502 503 504  /50x.html;
    location = /50x.html {
        root   html;
    }
}
十二、开机自启
Ubuntu 15.04+、CentOS7+设置Nginx开机自启动的方法:
1.先停用Nginx服务
nginx -s stop
2.再启动Nginx服务:
sudo systemctl start nginx
3.检查Nginx服务的状态
sudo systemctl status nginx
3.设置Nginx开机自启动:
sudo systemctl enable nginx
4.检查Nginx服务是否已经配置为开机启动
sudo systemctl is-enabled nginx
如果返回enabled,则表示Nginx已经设置为开机启动;
常用命令
| 命令 | 说明 |
|---|---|
| start nginx | 启动nginx |
| nginx -s reload | 修改配置后重新加载生效 |
| nginx -s stop | 快速停止nginx |
| nginx -s quit | 完整有序的停止nginx |
| nginx -s reopen | 重新打开日志文件 |
| nginx -t -c /path/to/nginx.conf | 测试nginx配置文件是否正确 |
| nginx -t | 查nginx配置文件所在路径 |
常见问题
如果启动未成功,可以在nginx安装目录找到logs文件夹下的error.log文件,用记事本打开滚动条拖到最底部
最后一条日志记录的是最新的错误,可以复制它在百度搜索相关错误的解决方法
1.站点名称过长错误提示:
could not build server_names_hash, you should increase server_names_hash_bucket_size: 32
解决方法:在nginx.conf文件的http配置内部新增这句server_names_hash_bucket_size 64,例:
http {
	server_names_hash_bucket_size 64;
 	...
}
2.部署web网站后图片无法访问
server{
	listen 80;
	location / {
		proxy_pass http://127.0.0.1:8080;
	}

	# 配置这段解决
	location ~ .* {
		proxy_pass http://127.0.0.1:8080;
		proxy_set_header Host $http_host;
		proxy_set_header X−Real−IP $remote_addr;
		proxy_set_header X-Forwarded-For $proxy_add_x_forwarded_for;
	}
}
3.Linux默认80端口被占用,导致nginx启动失败
1.打开/etc/nginx/sites-available/default文件,找到server
server {
    listen 80 default_server;
    listen [::]:80 default_server;
2.将server中的默认端口修改成可用的端口
server {
    listen 8080 default_server;
    listen [::]:8080 default_server;
3.修改完成后启动Nginx服务
sudo systemctl start nginx
属性参数说明
| 属性语法 | 示例 | 说明 |
|---|---|---|
| 全局配置: | ||
| user [用户名] [组名] | user nginx1 nginx | |
| worker_processes [工作进程数] | worker_processes 1; | 工作进程数 通常为cpu数量的1倍或2倍,可以设置成auto自动检测 |
| error_log [存放路径] [存放类型] | error_log logs/error.log info | 日志存放设置 |
| pid [存放路径] | pid logs/nginx.pid | pid存放设置 |
| include [文件路径] | include conf/nginx2.conf | 嵌入配置 |
| events事件模块 | ||
| use [I/O模型] | use epoll | 模型包括epoll(linux常用),select,poll,kqueue(windows常用)等 |
| worker_connections | worker_connections 1024 | 单个工作进程可以允许同时建立外部连接的数量 |
更多属性参数说明:https://www.cnblogs.com/kwblog/p/13656461.html
参考文章:
https://www.jianshu.com/p/05415981e5e5
https://github.com/wmui/web-deploy/blob/master/nginx-an-zhuang-pei-zhi.md
https://www.cnblogs.com/xbblogs/p/8515529.html
https://blog.youkuaiyun.com/Eternal_Blue/article/details/106923995


 509
509

 被折叠的 条评论
为什么被折叠?
被折叠的 条评论
为什么被折叠?
 到【灌水乐园】发言


