 SpringBoot内嵌Tomcat启动原理详解


 本文深入探讨了SpringBoot如何启动内置的Tomcat容器。在SpringBoot项目中,当引入`spring-boot-starter-web`模块时,默认使用Tomcat。启动过程涉及自动配置类加载、ServletWebServerFactory的获取以及TomcatServletWebServerFactory的getWebServer()方法调用,最终通过调用tomcat.start()启动服务。通过源码分析,揭示了SpringBoot启动Tomcat的详细步骤。
Spring Boot默认支持Tomcat,Jetty,和Undertow作为底层容器。而Spring Boot默认使用Tomcat,一旦引入spring-boot-starter-web模块,就默认使用Tomcat容器。
<dependency>
   <groupId>org.springframework.boot</groupId>
   <artifactId>spring-boot-starter-web</artifactId>
</dependency>
在启动springboot的时候可谓是相当简单,只需要执行以下代码:
@SpringBootApplication
public class SpringBootMyTestApplication {
   public static void main(String[] args) {
      SpringApplication.run(SpringBootMyTestApplication.class, args);
   }
}
那些看似简单的事物,其实并不简单。我们之所以觉得他简单,是因为复杂性都被隐藏了。通过上诉代码,大概率可以提出以下几个疑问
- SpringBoot是如何启动内置tomcat的 - 文章的重点
- SpringBoot为什么可以响应请求,他是如何配置的SpringMVC
这次的重点是先分享SpringBoot是如何启动内置的Tomcat的
1.内嵌Tomcat自动配置原理
1.1 Tomcat服务自动配置类
在SpringBoot的启动过程中会自动加载各个模块下的META-INF/spring.factories文件中定义的自动配置类,Tomcat的服务的加载也是如此,所以首先要找到加载的自动配置,如下图所示:
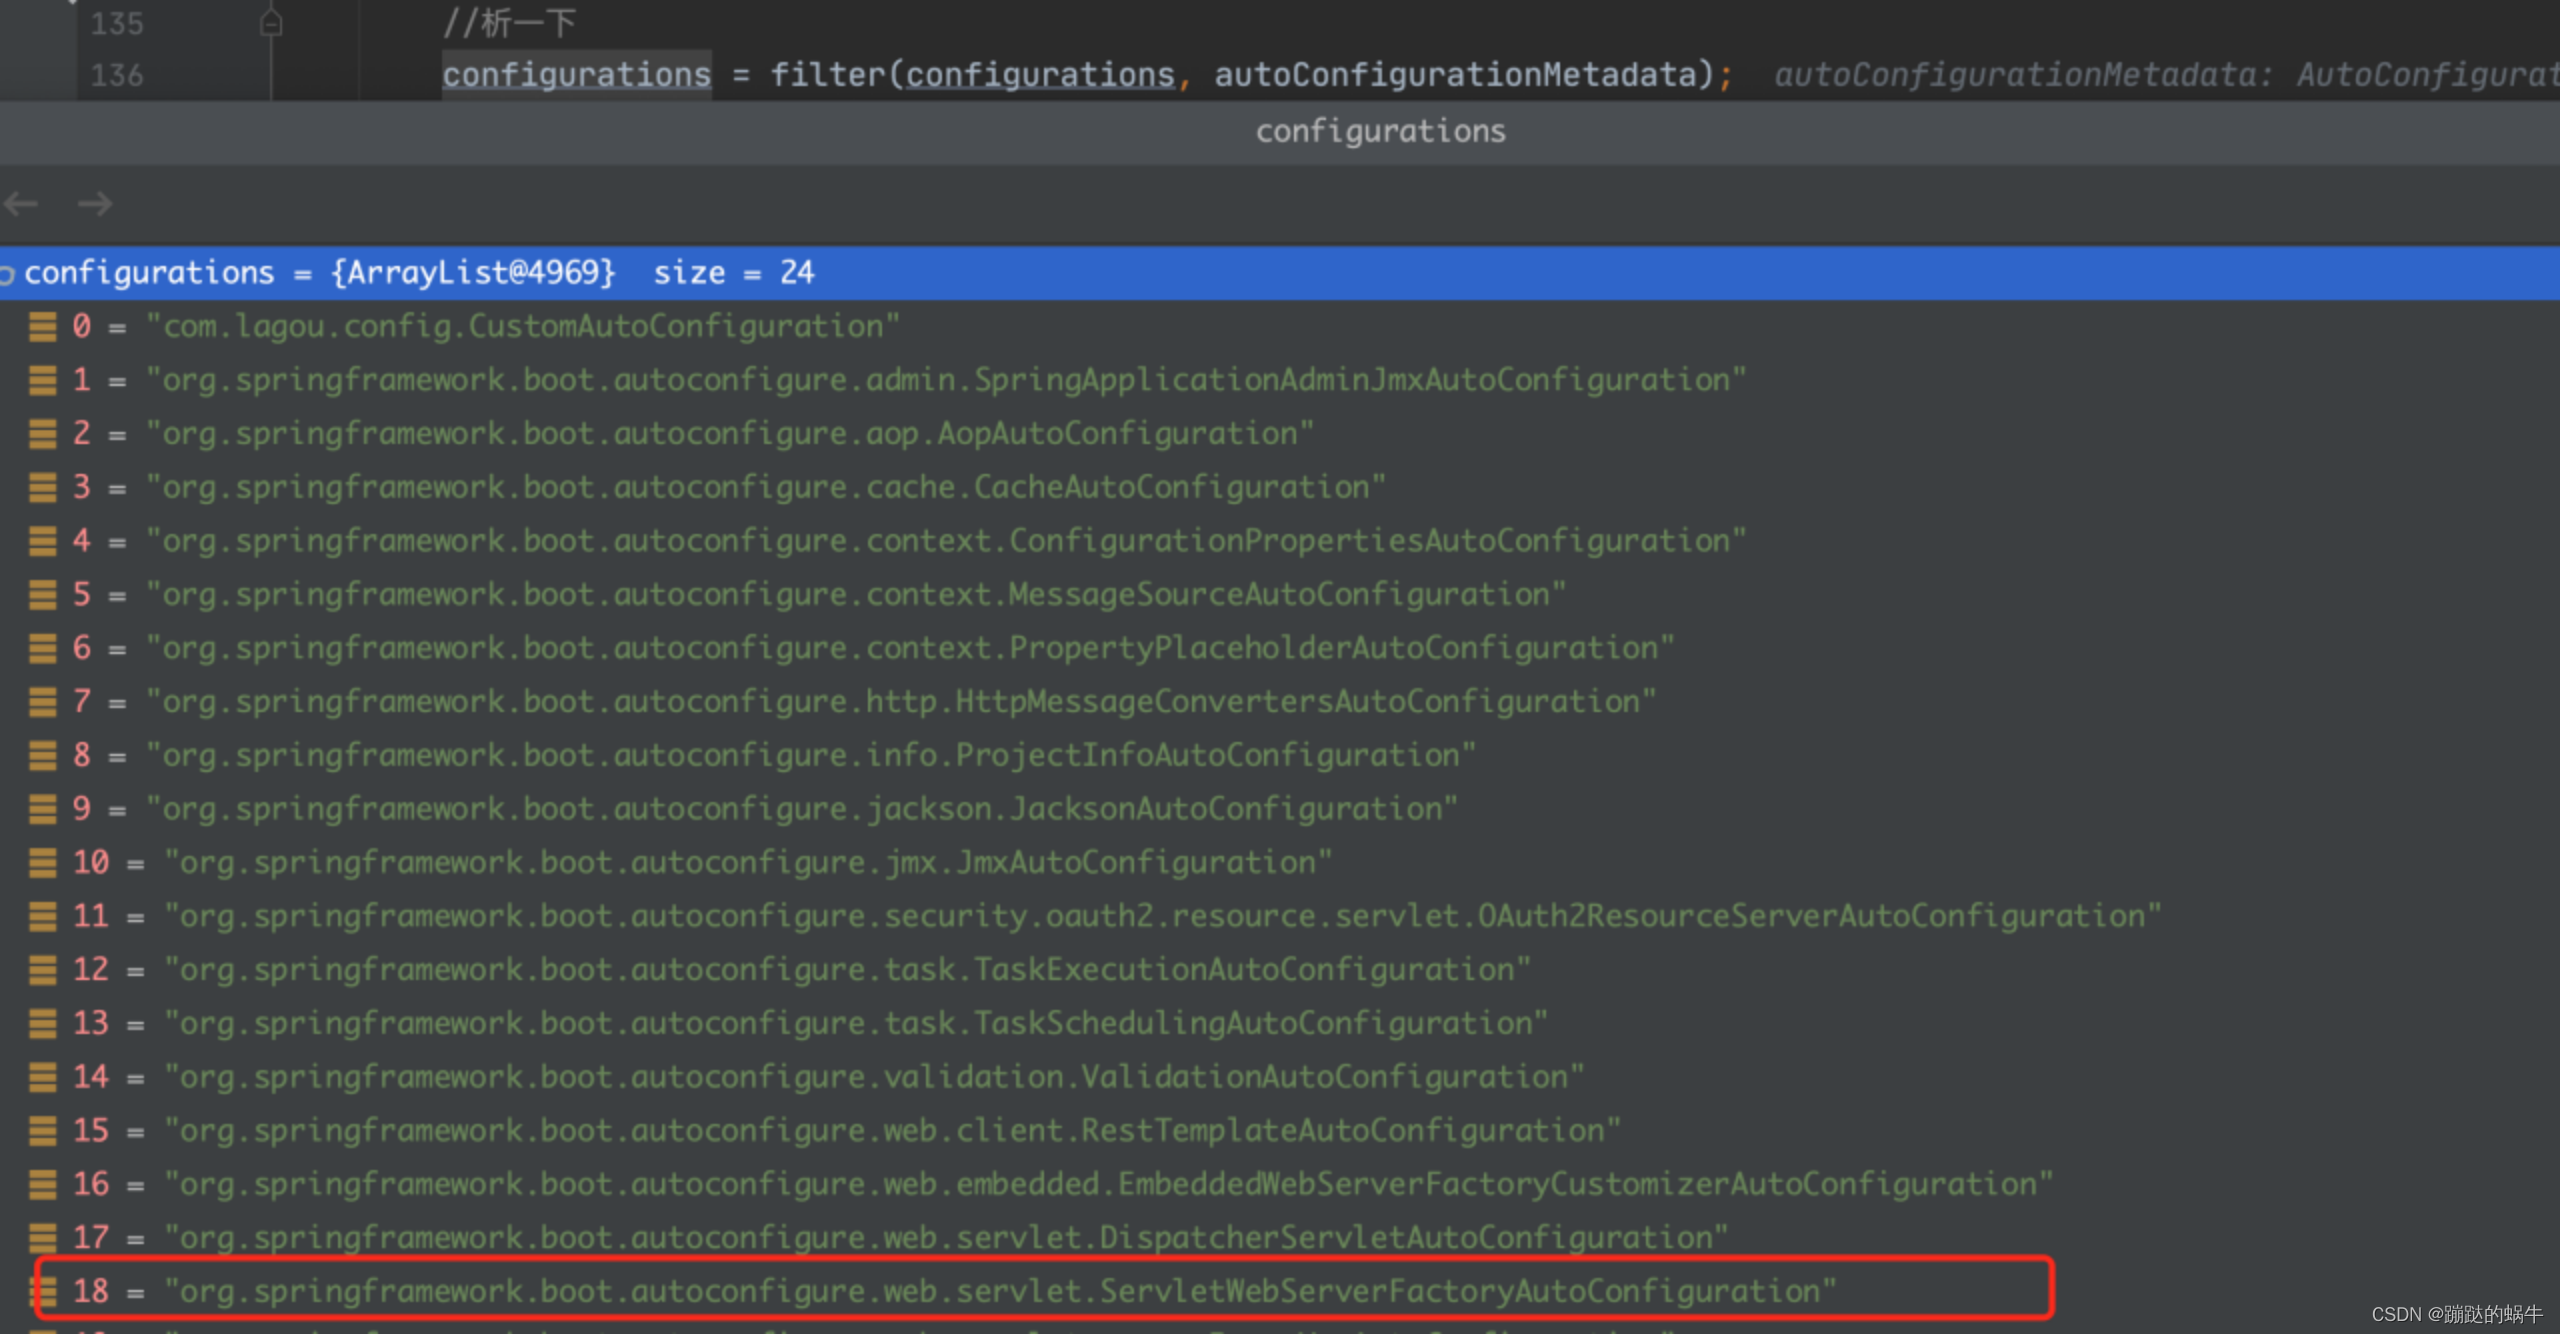
找到这个配置类进去看一下实现的内容:
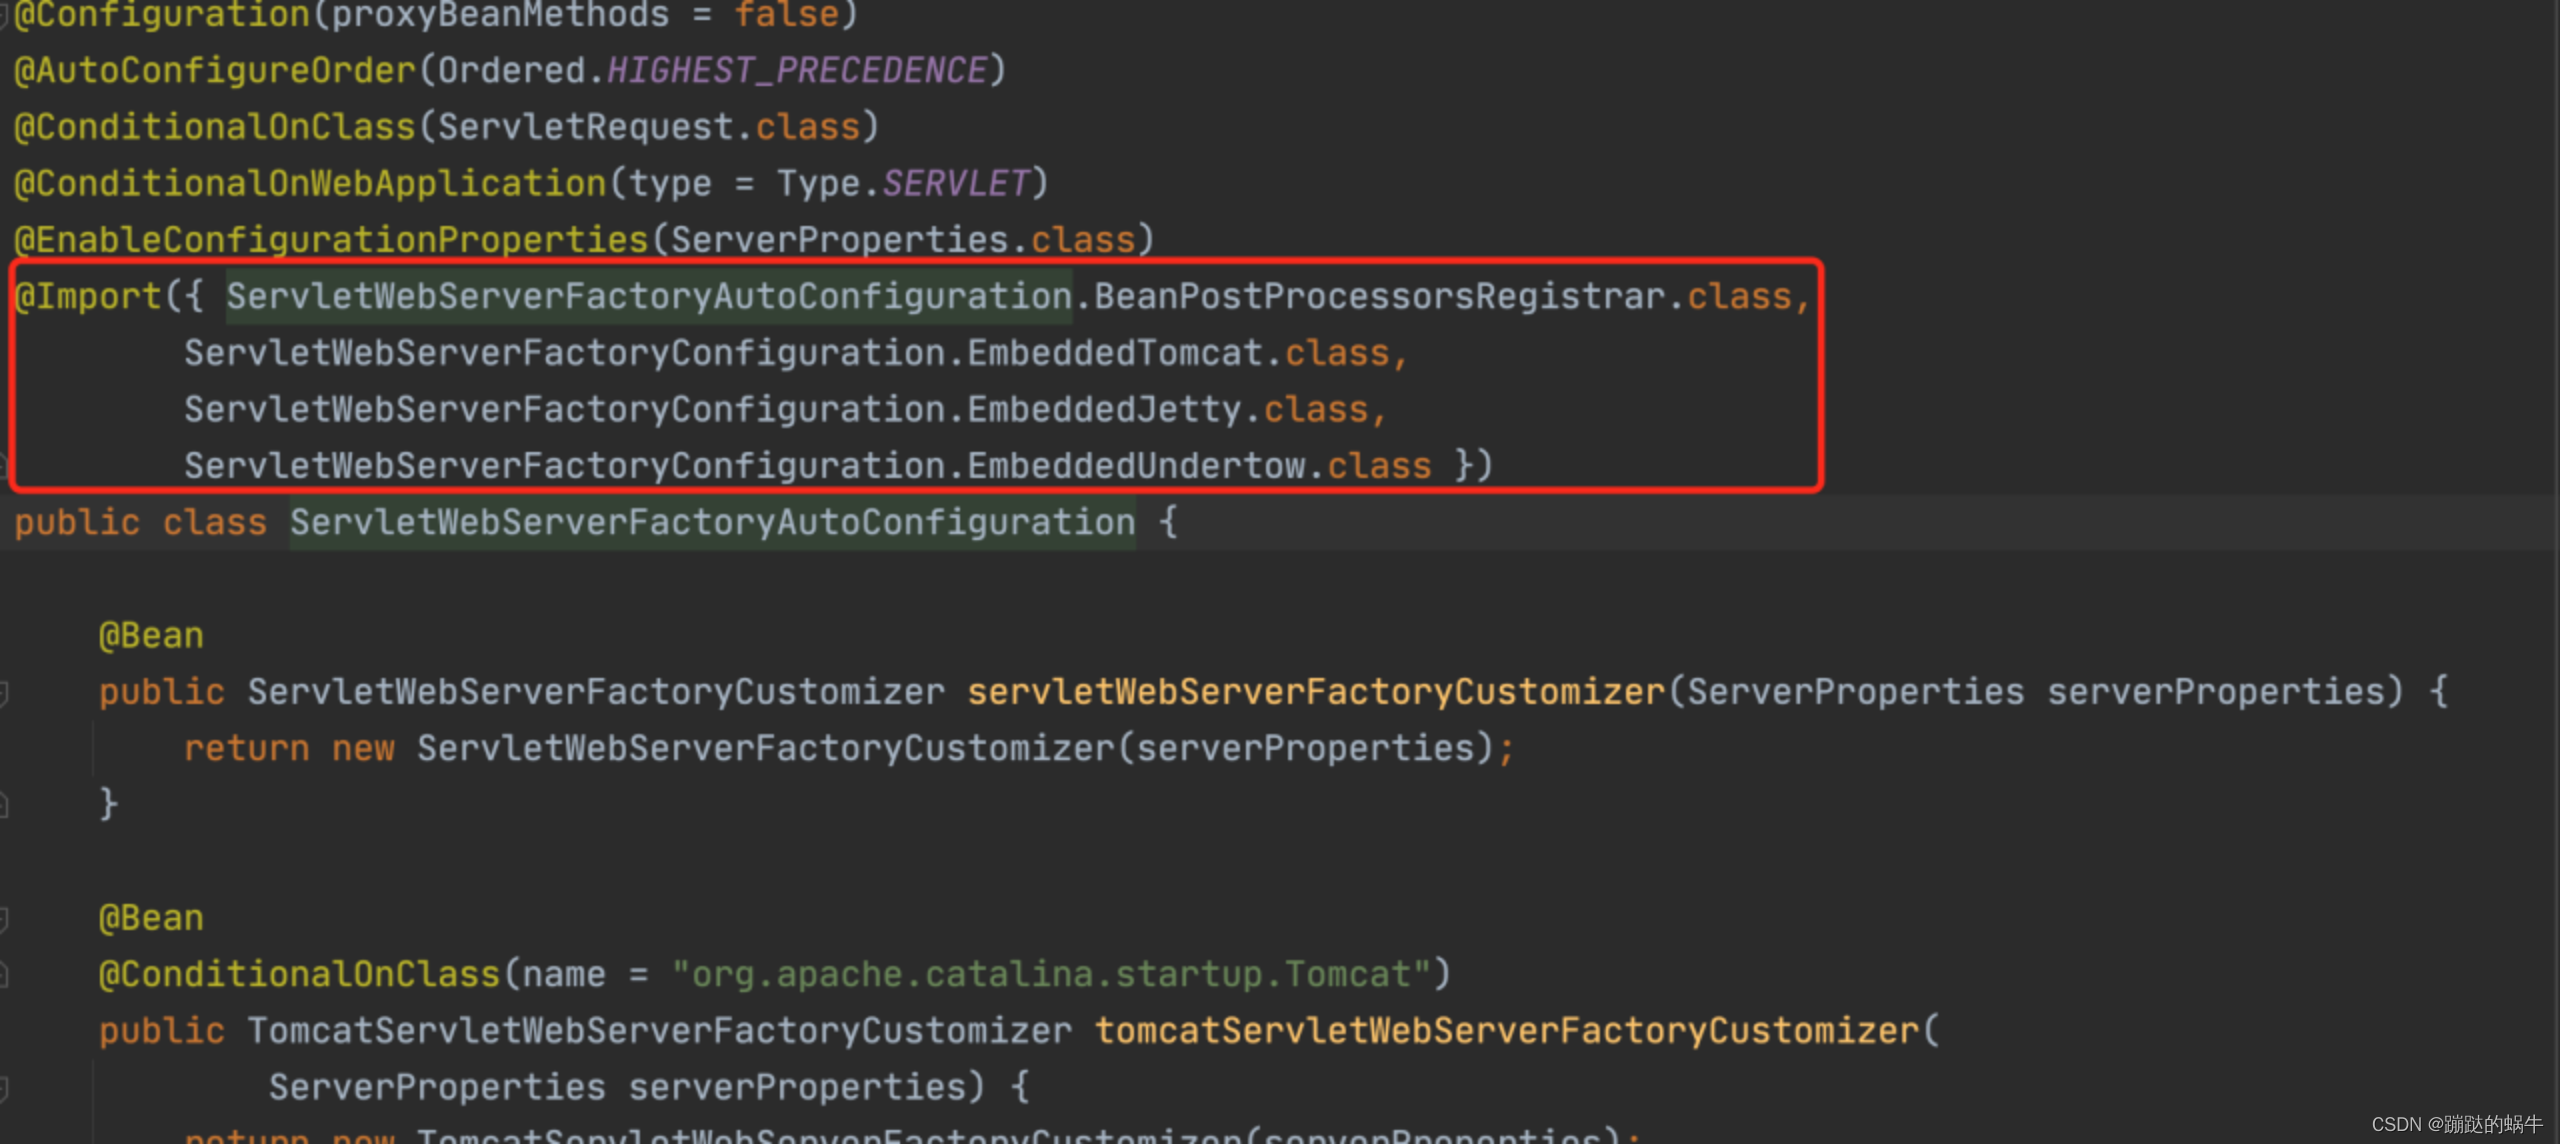
可以看到里面也通过@Import注解将EmbeddedTomcat、EmbeddedJetty、EmbeddedUndertow等嵌入式容器类加载进来了,springboot默认是启动嵌入式tomcat容器,如果要改变启动jetty或者undertow容器,需在pom文件中去设置。
这里默认实现的是Tomcat容器,那么看一下EmbeddedTomcat:
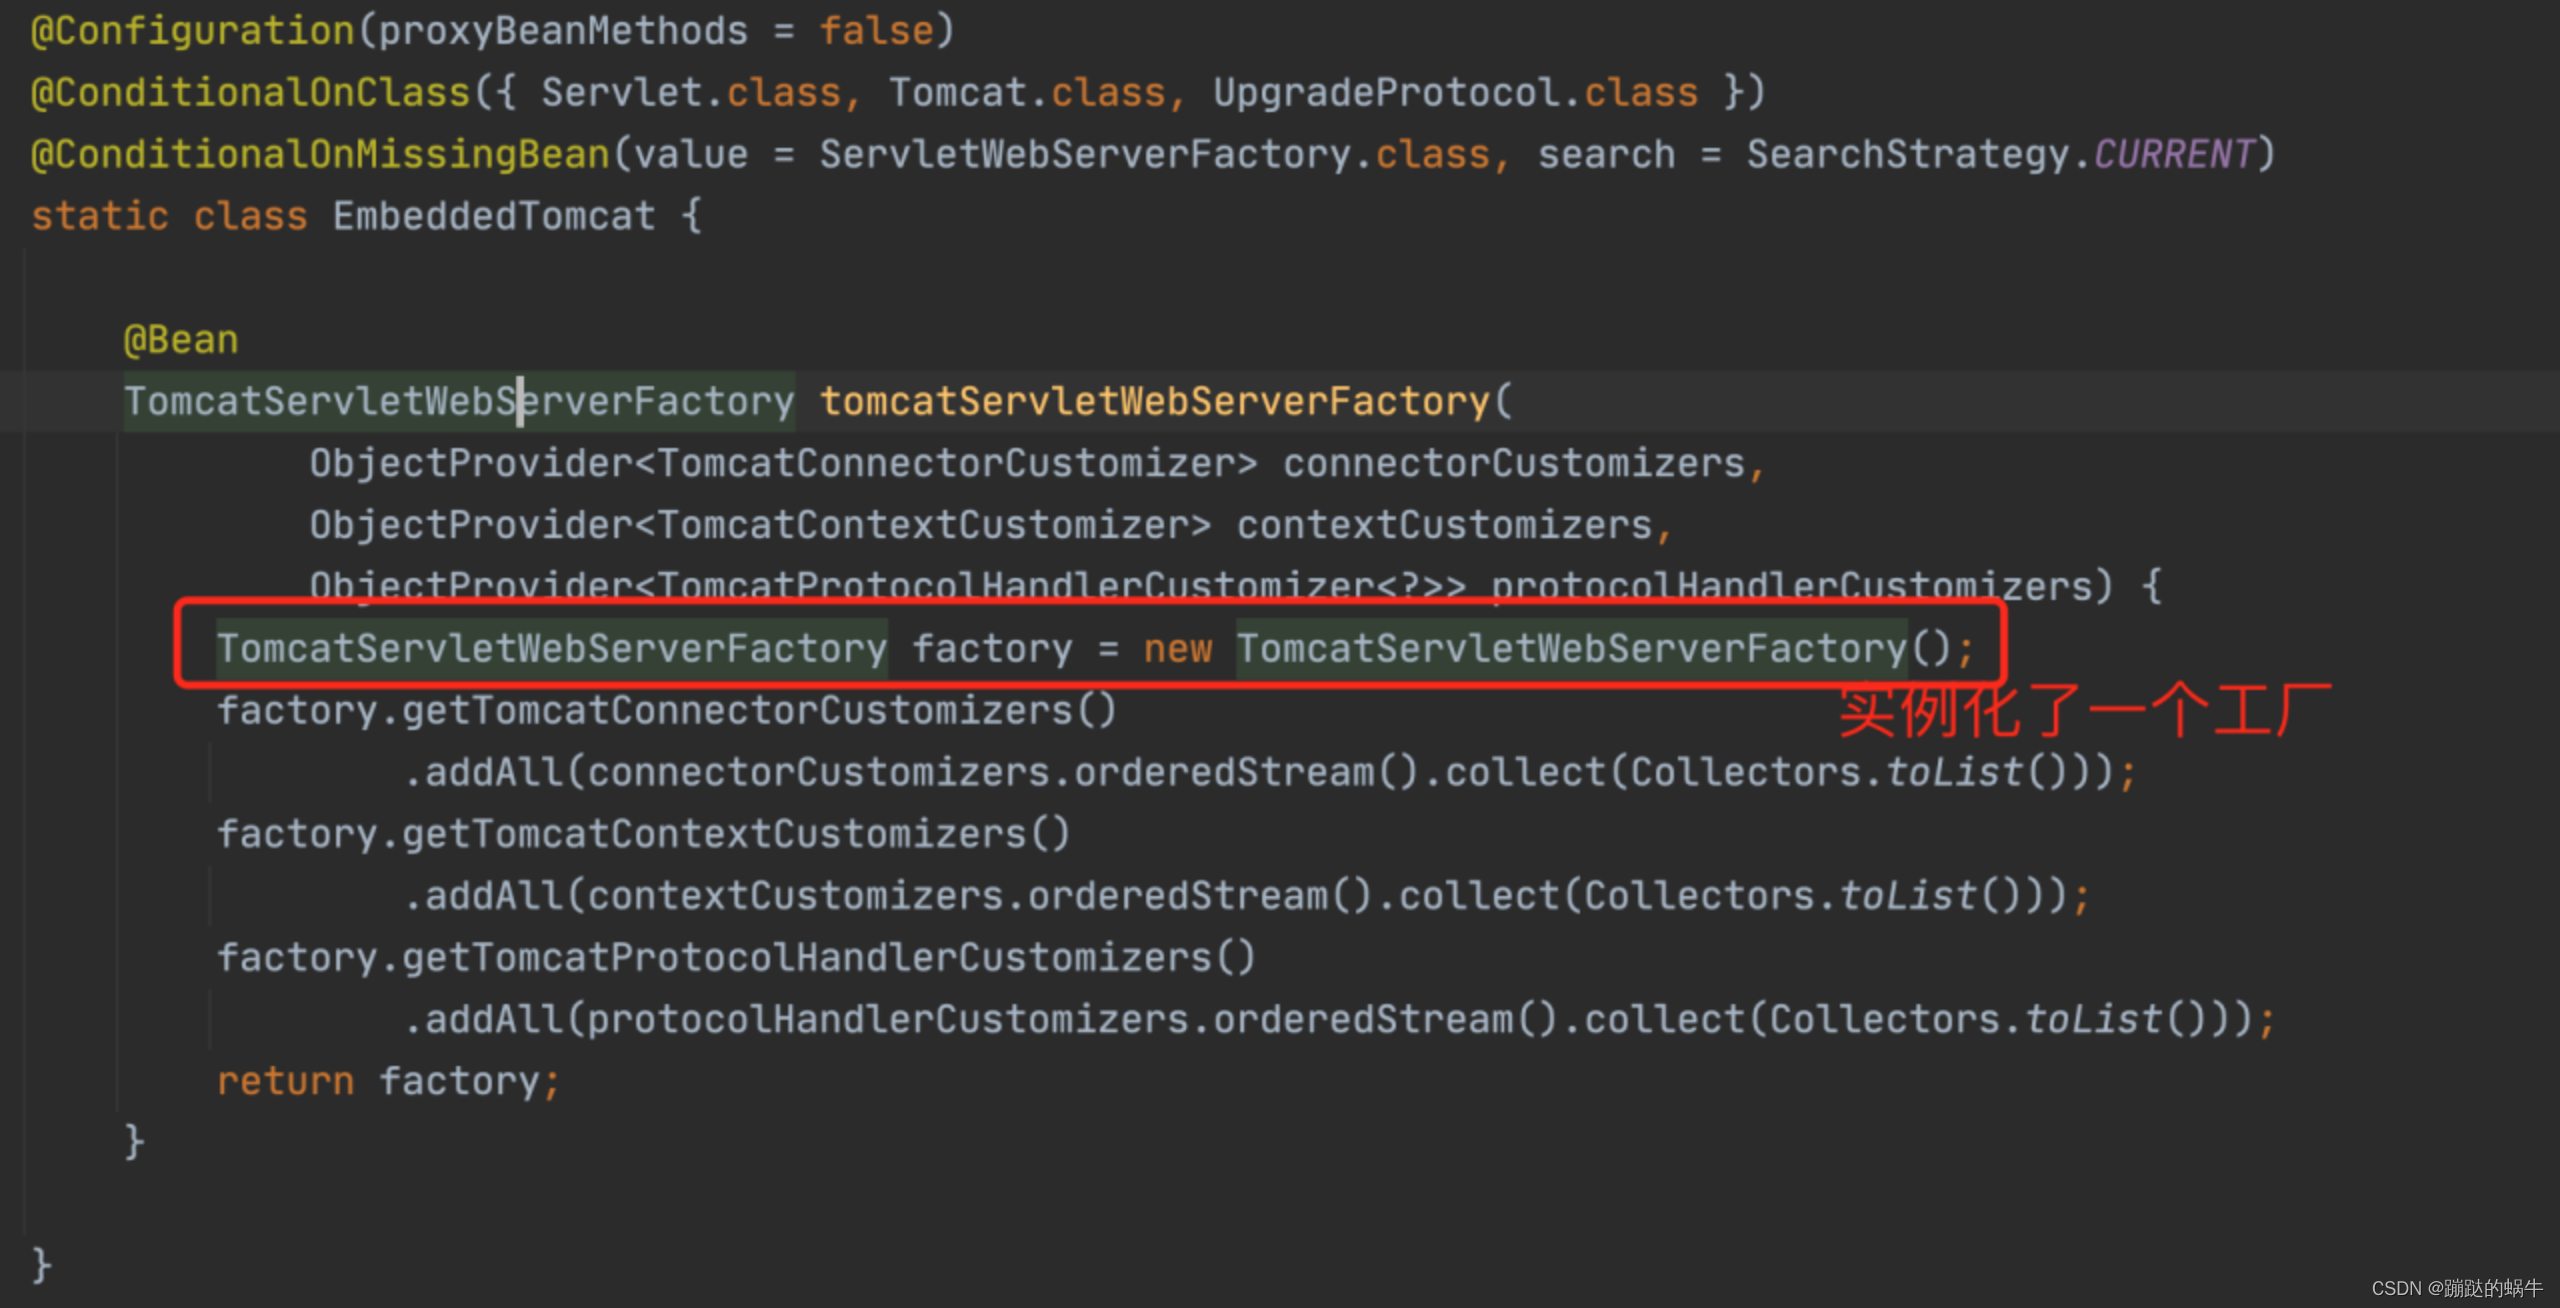
进入TomcatServletWebServerFactory类,里面的getWebServer()是关键方法,如图:
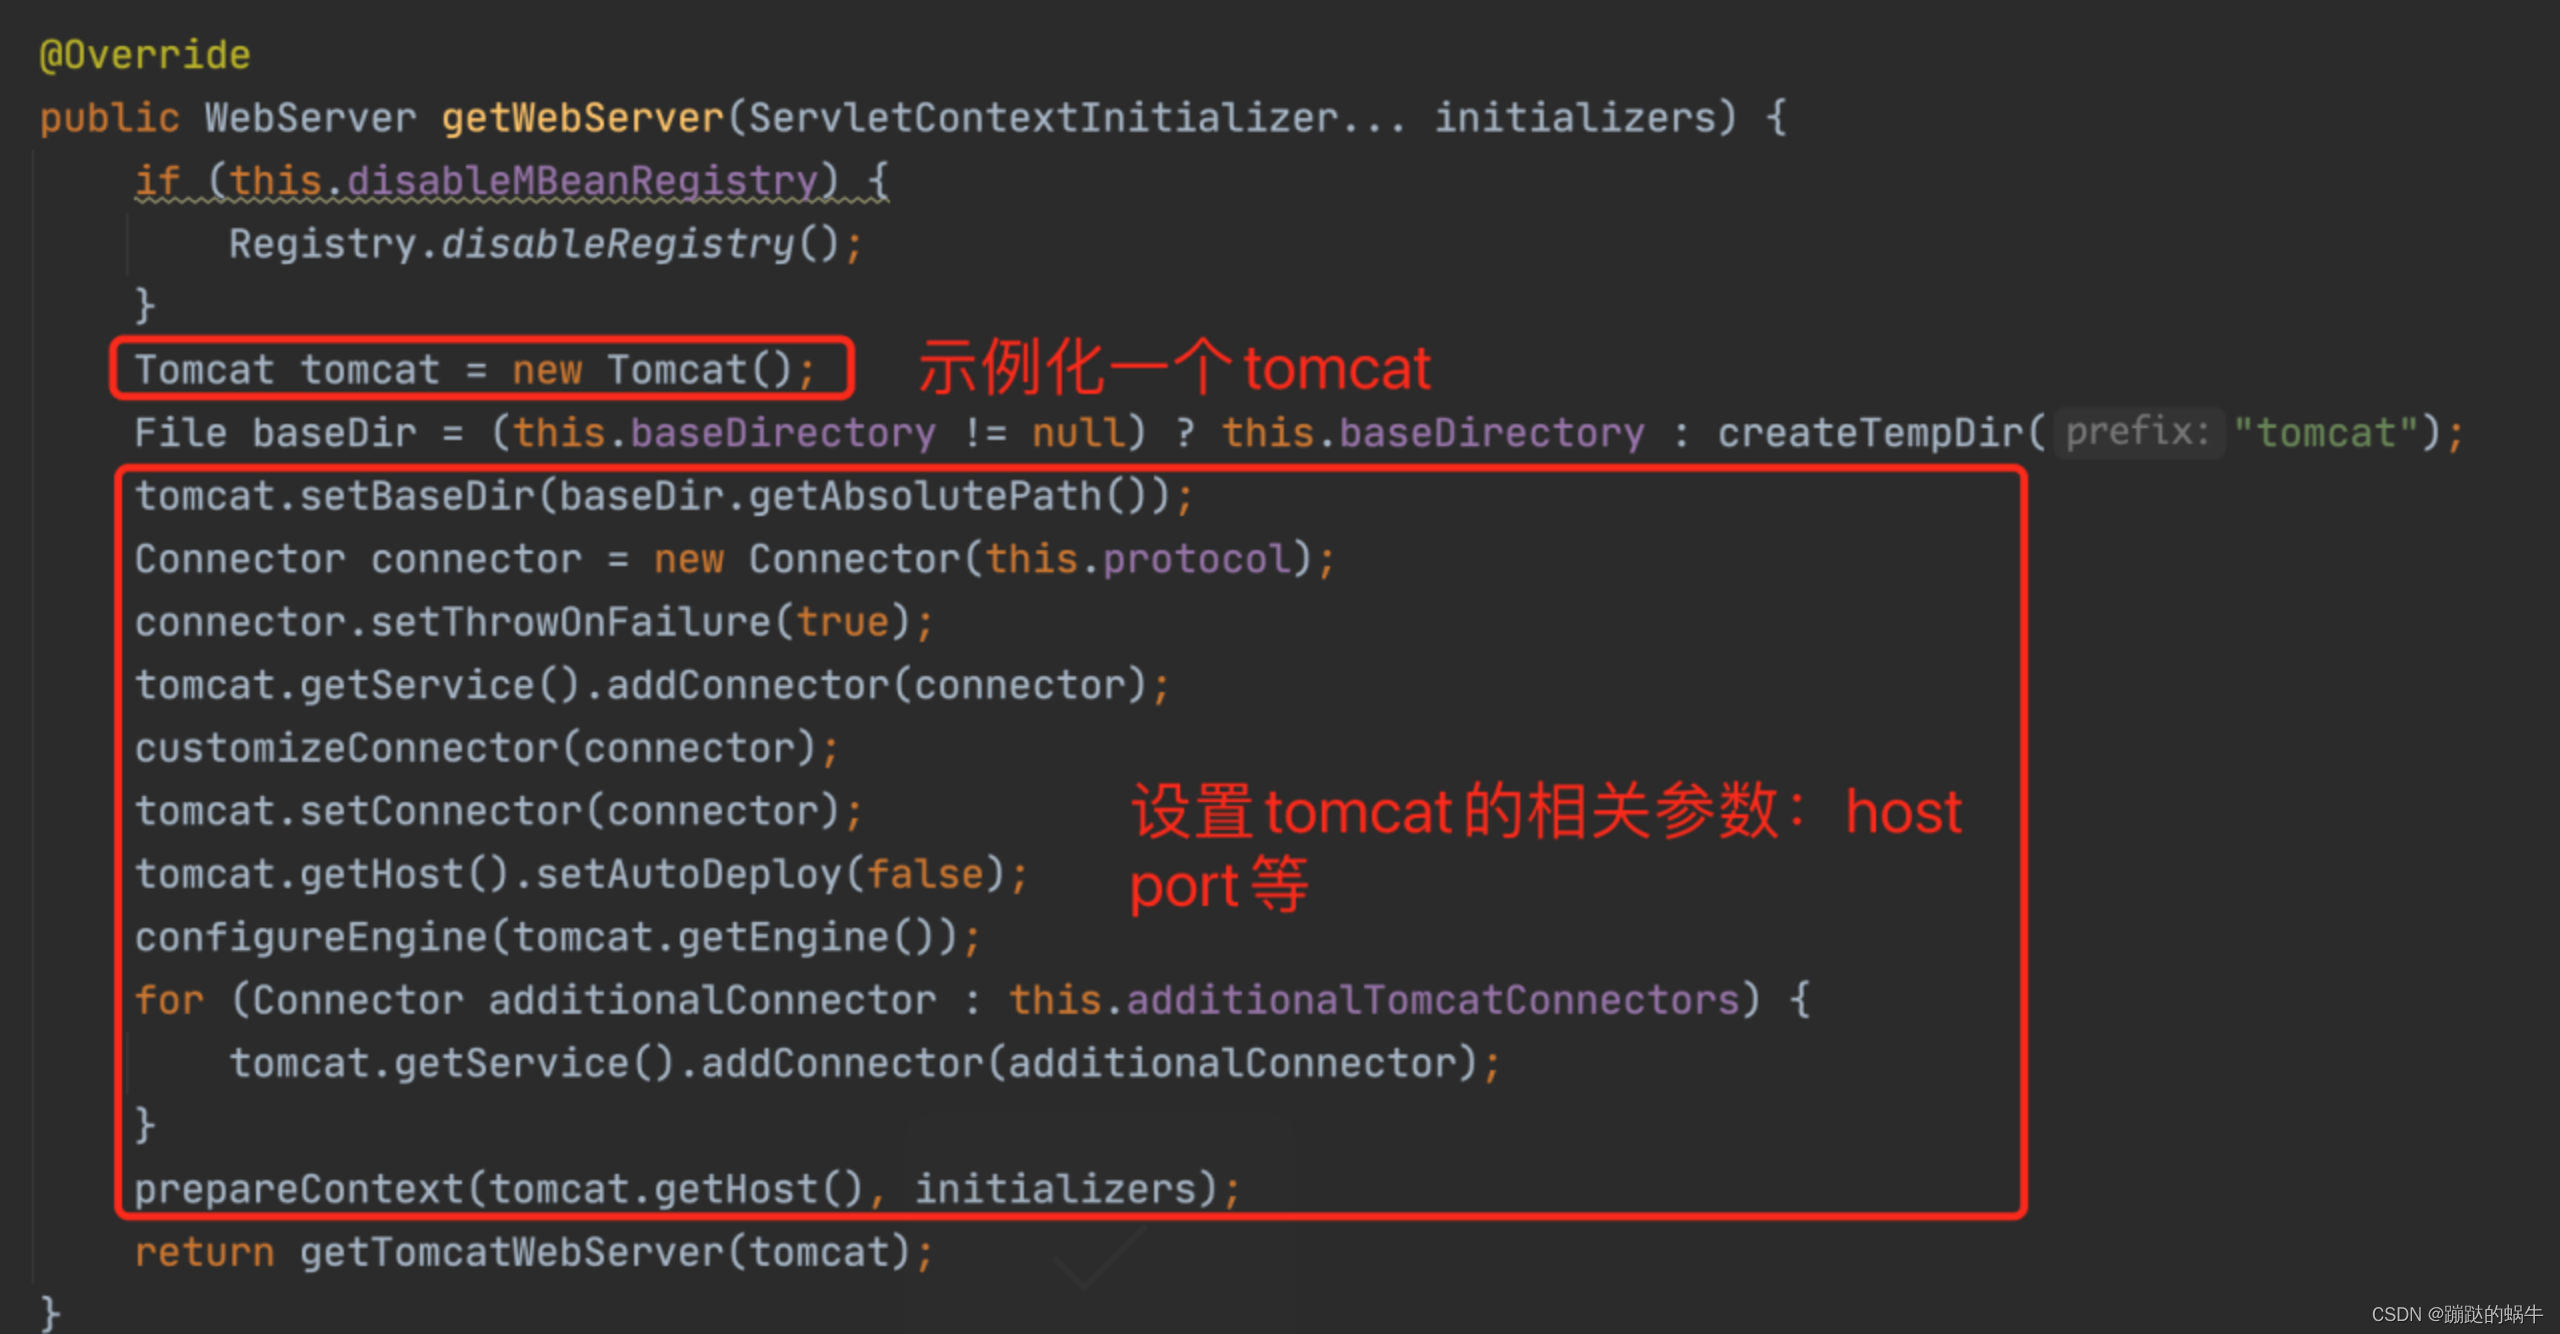
继续进入getTomcatWebServer()等方法,一直往下跟到tomcat初始化方法,调用tomcat.start()方法,tomcat就正式开启运行,见图:

走到这里tomcat在springboot中的配置以及最终启动的流程就走完了。
1.2 SpringBoot启动Tomcat
在SpringBoot启动过程中有一个很重要的步骤:
// 刷新应用上下文
refreshContext(context);
内置tomcat的启动就是在这个方法中进行调用的,点击实现的逻辑,最终进到了Spring的源码中:
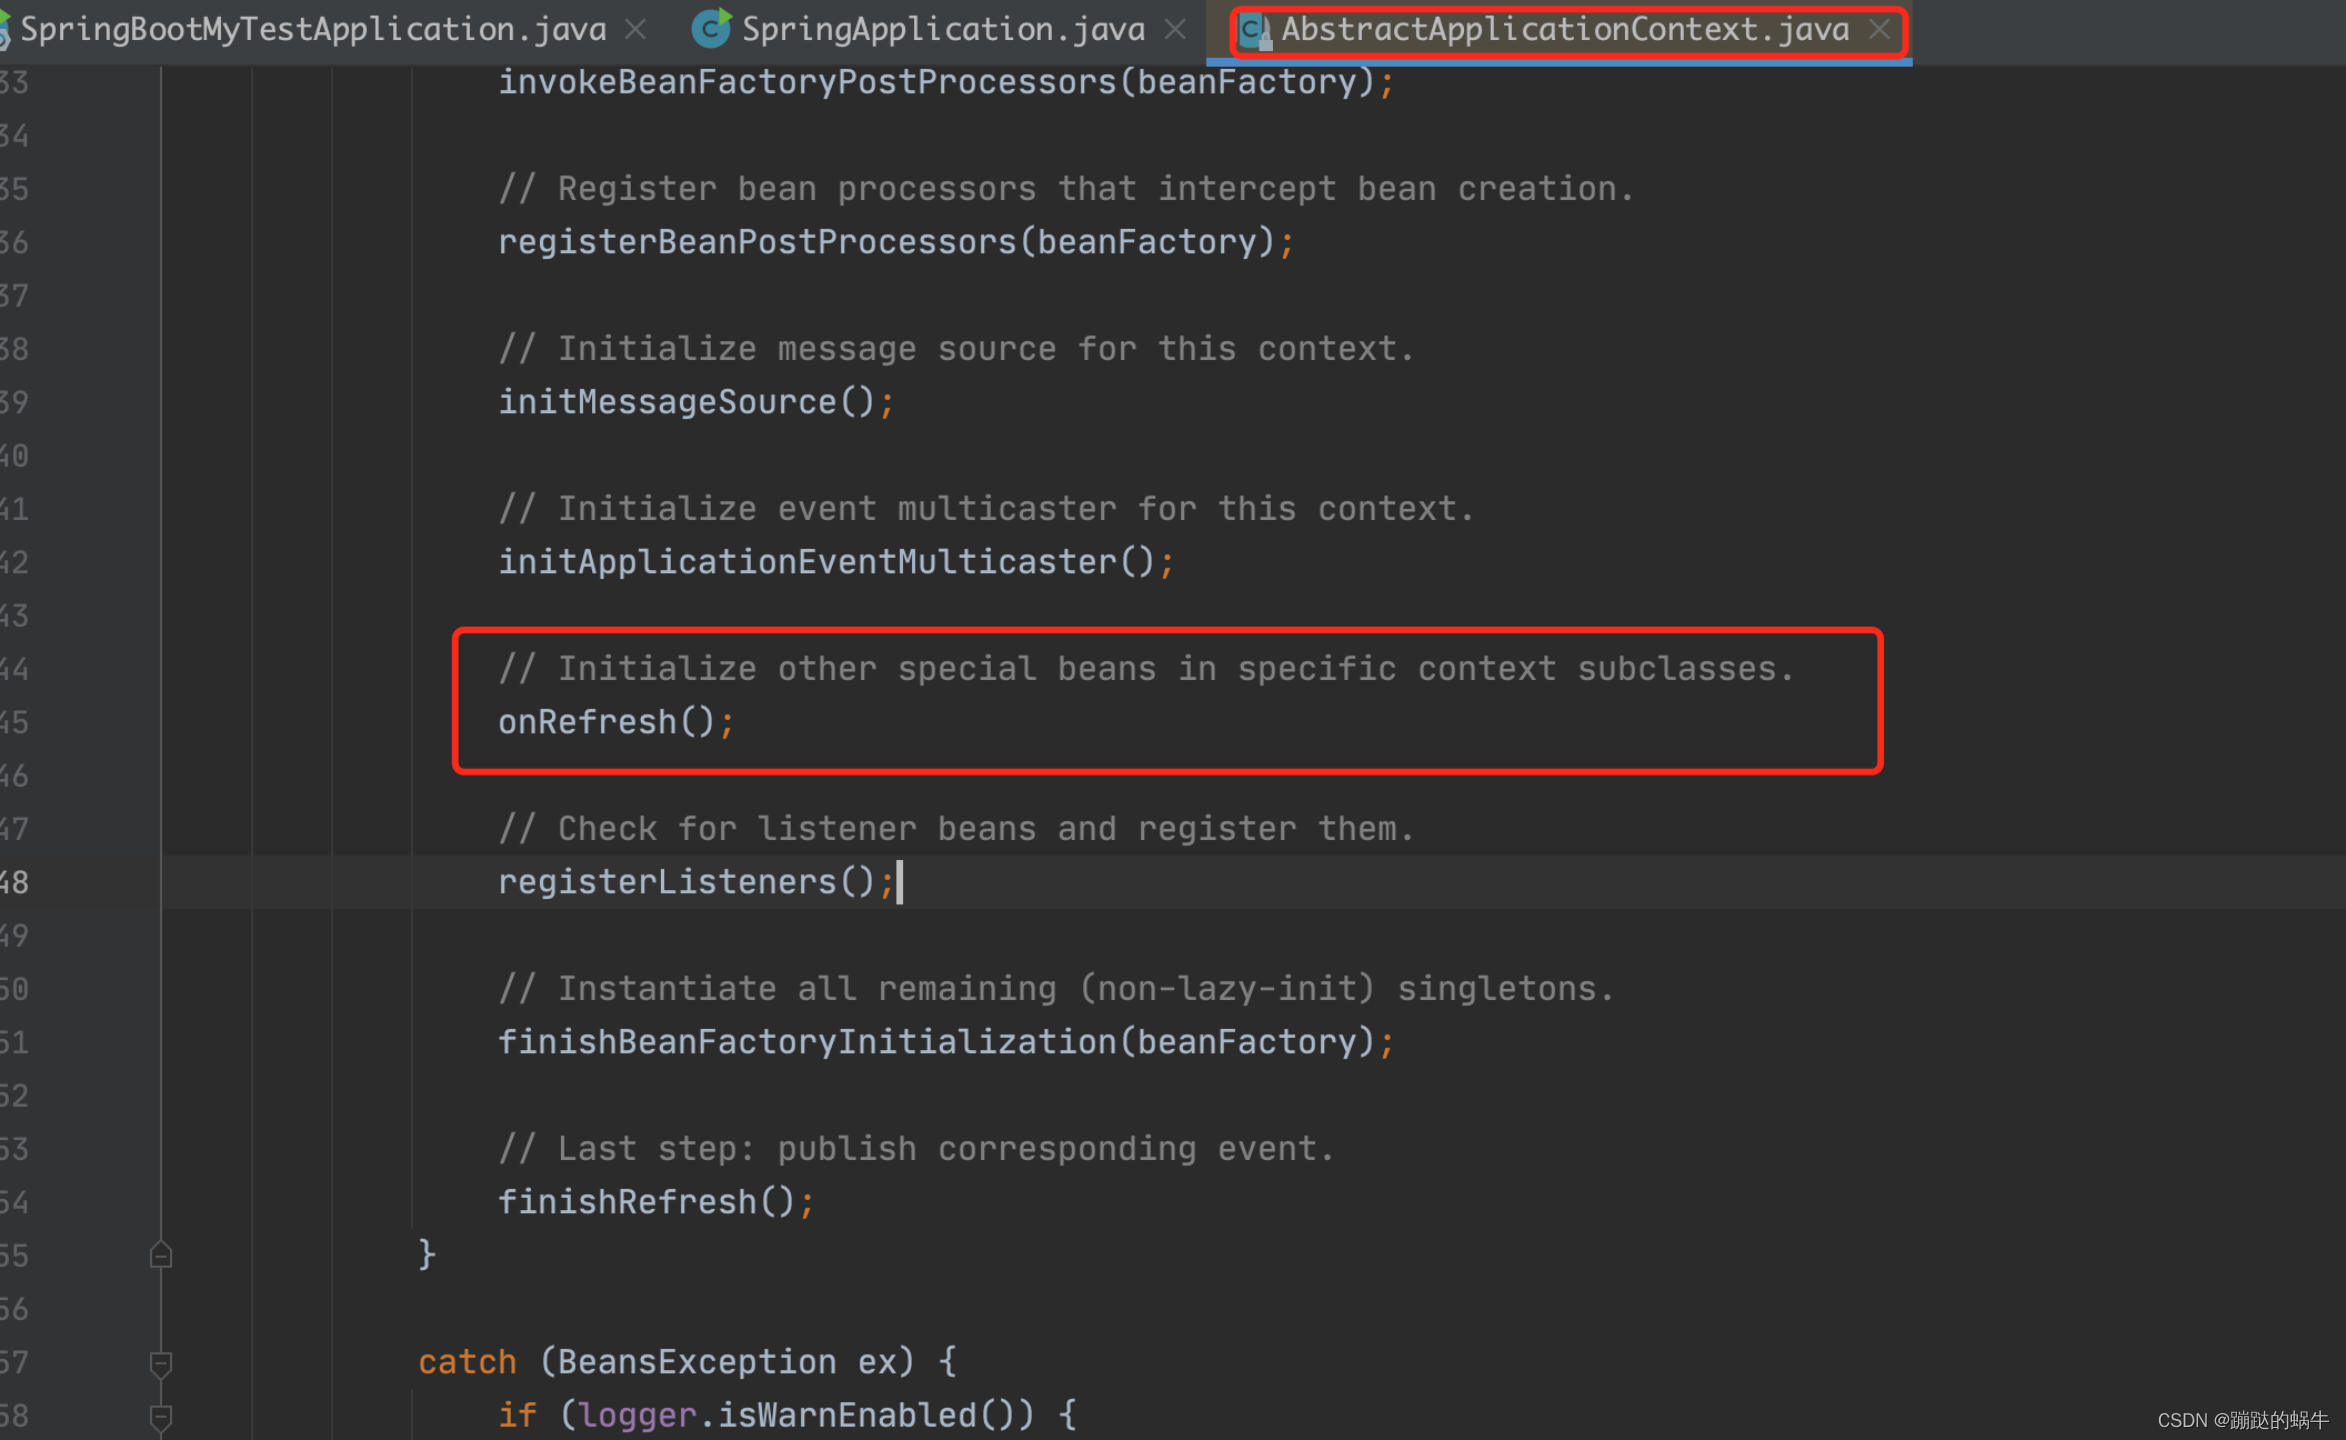
上面的这个onRefresh()方法就是关键点,点击进行查看源码,onRefresh()会调用到ServletWebServerApplicationContext中的createWebServer(),
private void createWebServer() {
   WebServer webServer = this.webServer;
   ServletContext servletContext = getServletContext();
   if (webServer == null && servletContext == null) {
      ServletWebServerFactory factory = getWebServerFactory();
      this.webServer = factory.getWebServer(getSelfInitializer());
   }
   else if (servletContext != null) {
      try {
         getSelfInitializer().onStartup(servletContext);
      }
      catch (ServletException ex) {
         throw new ApplicationContextException("Cannot initialize servlet context", ex);
      }
   }
   initPropertySources();
}
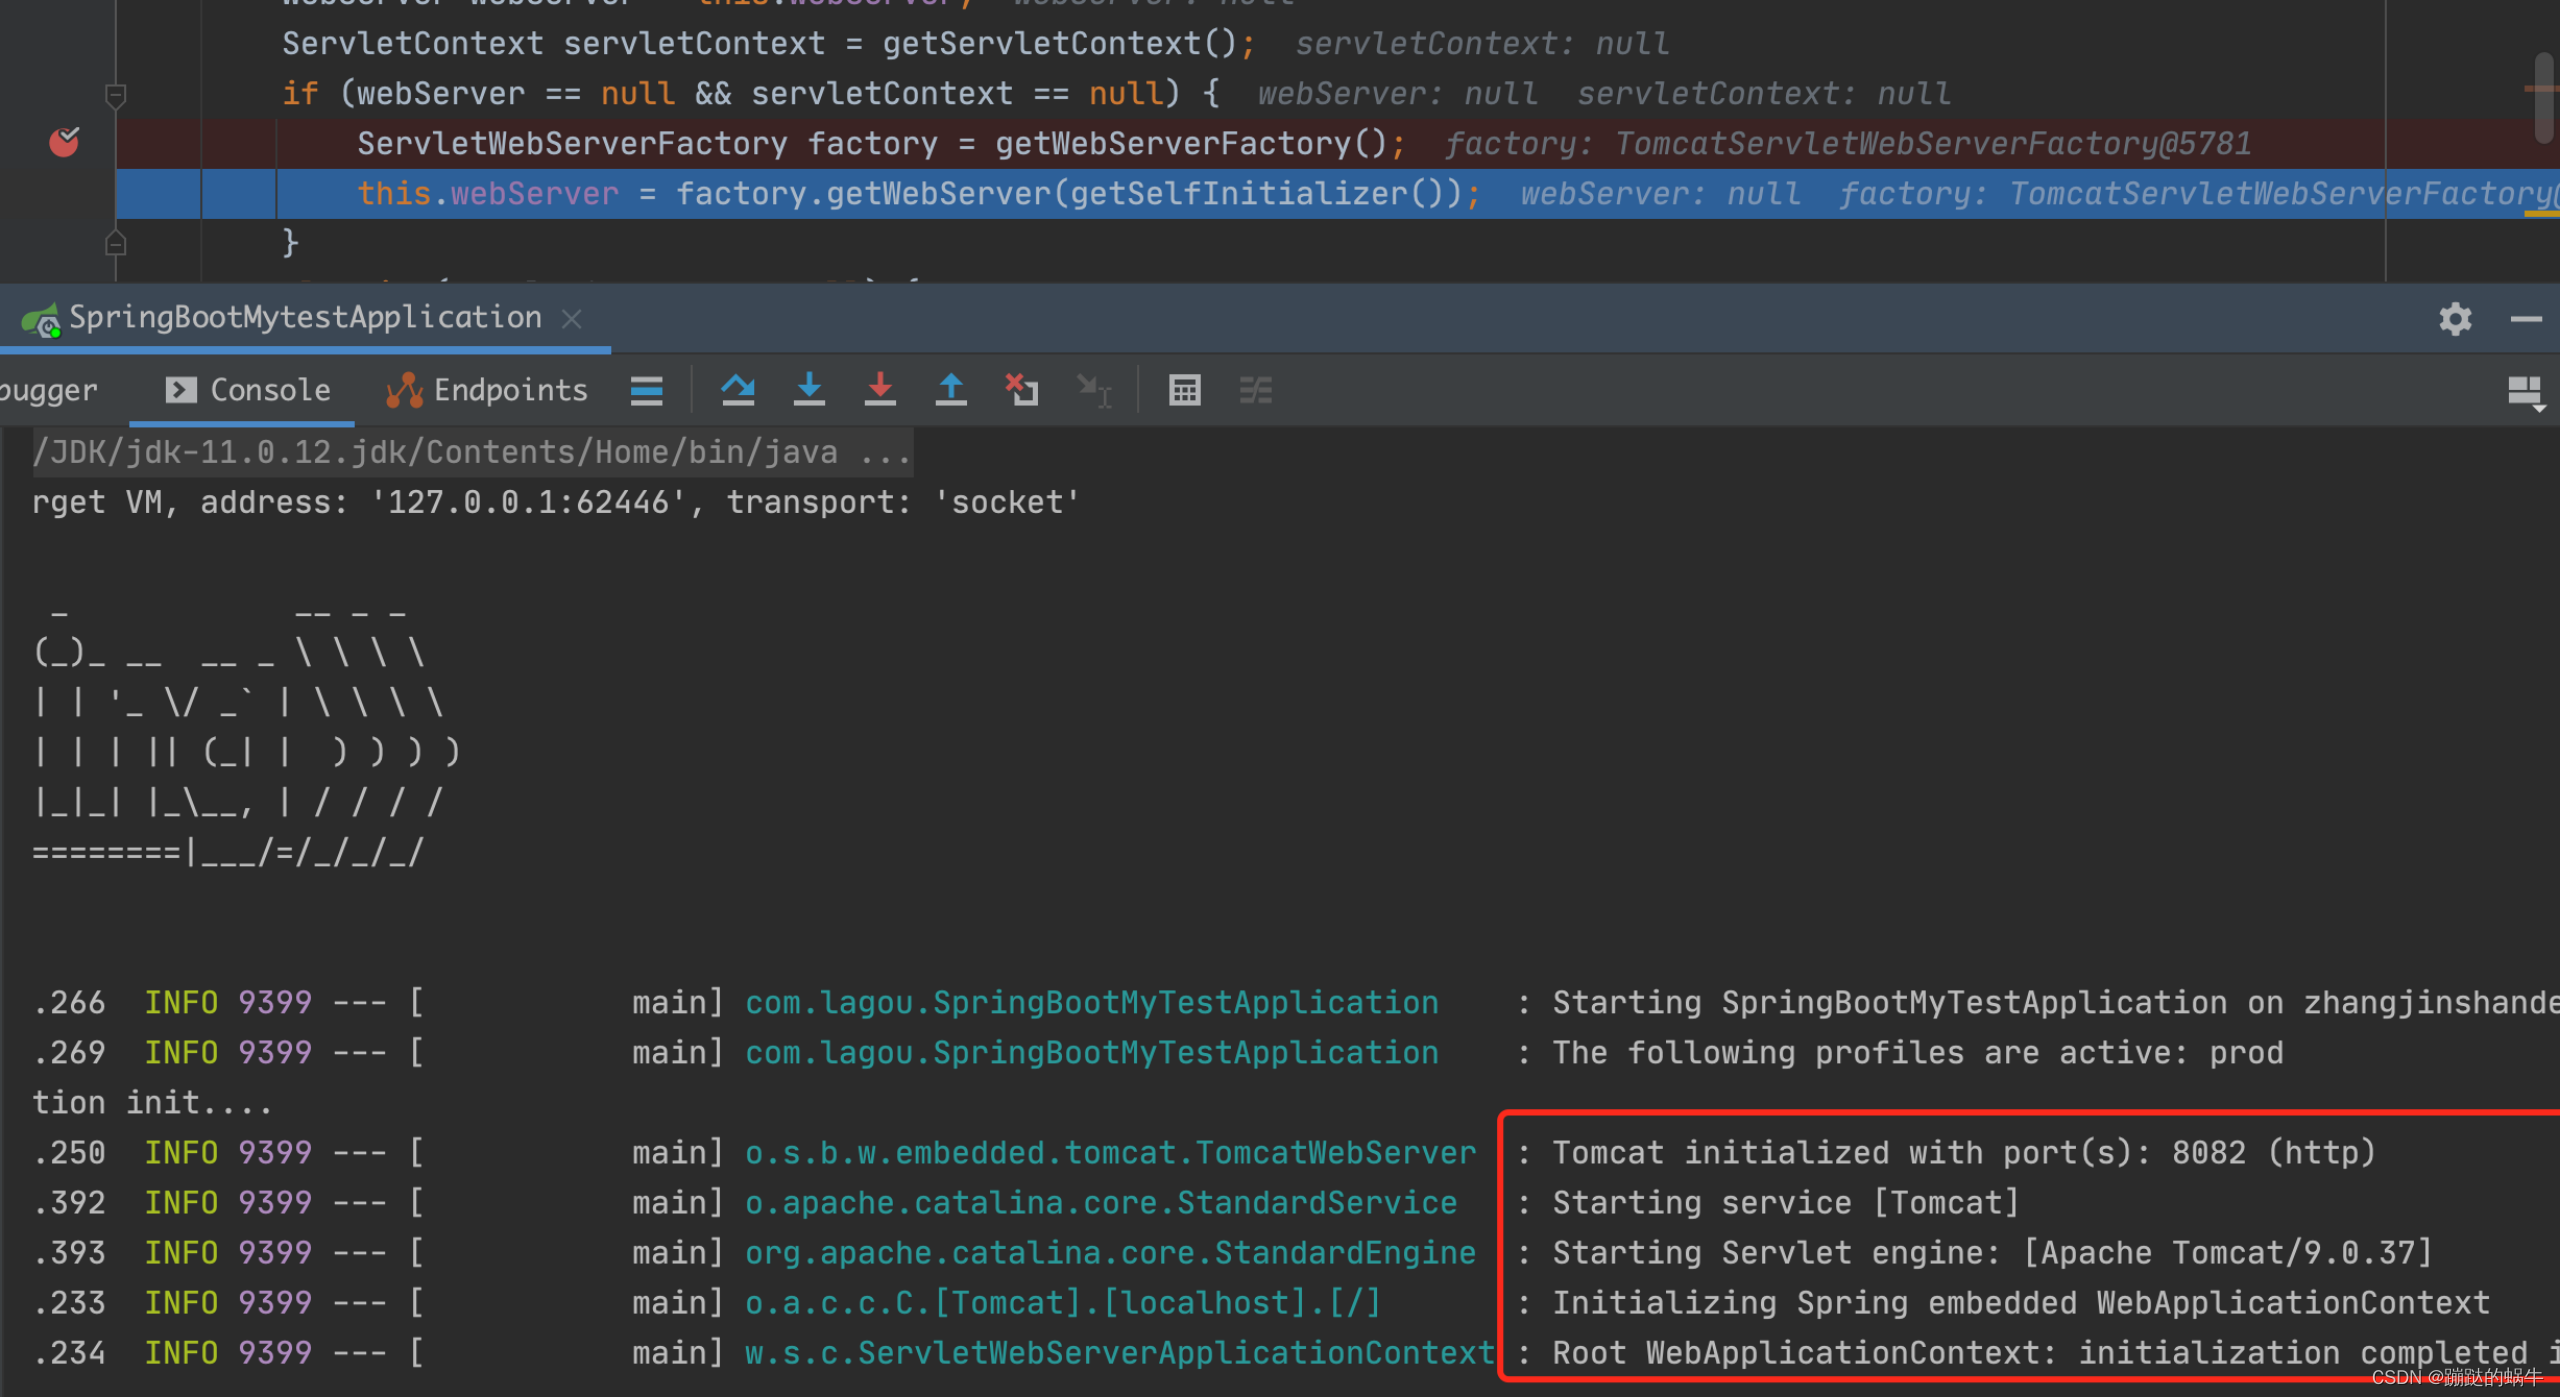
createWebServer()就是启动web服务,但是还没有真正启动Tomcat,既然webServer是通过ServletWebServerFactory来获取的,先来看一下getWebServerFactory()方法的实现:
protected ServletWebServerFactory getWebServerFactory() {
   // Use bean names so that we don't consider the hierarchy
   String[] beanNames = getBeanFactory().getBeanNamesForType(ServletWebServerFactory.class);
   if (beanNames.length == 0) {
      throw new ApplicationContextException("Unable to start ServletWebServerApplicationContext due to missing "
            + "ServletWebServerFactory bean.");
   }
   if (beanNames.length > 1) {
      throw new ApplicationContextException("Unable to start ServletWebServerApplicationContext due to multiple "
            + "ServletWebServerFactory beans : " + StringUtils.arrayToCommaDelimitedString(beanNames));
   }
   return getBeanFactory().getBean(beanNames[0], ServletWebServerFactory.class);
}
看最后一步的返回,因为这里使用的是tomcat容器,所以最终返回的就是一个TomcatServletWebServerFactory实例,最终就调用了TomcatServletWebServerFactory类的getWebServer()方法,那么也就实现了tomcat服务的启动。
debug验证一下上述的流程:
2.小结
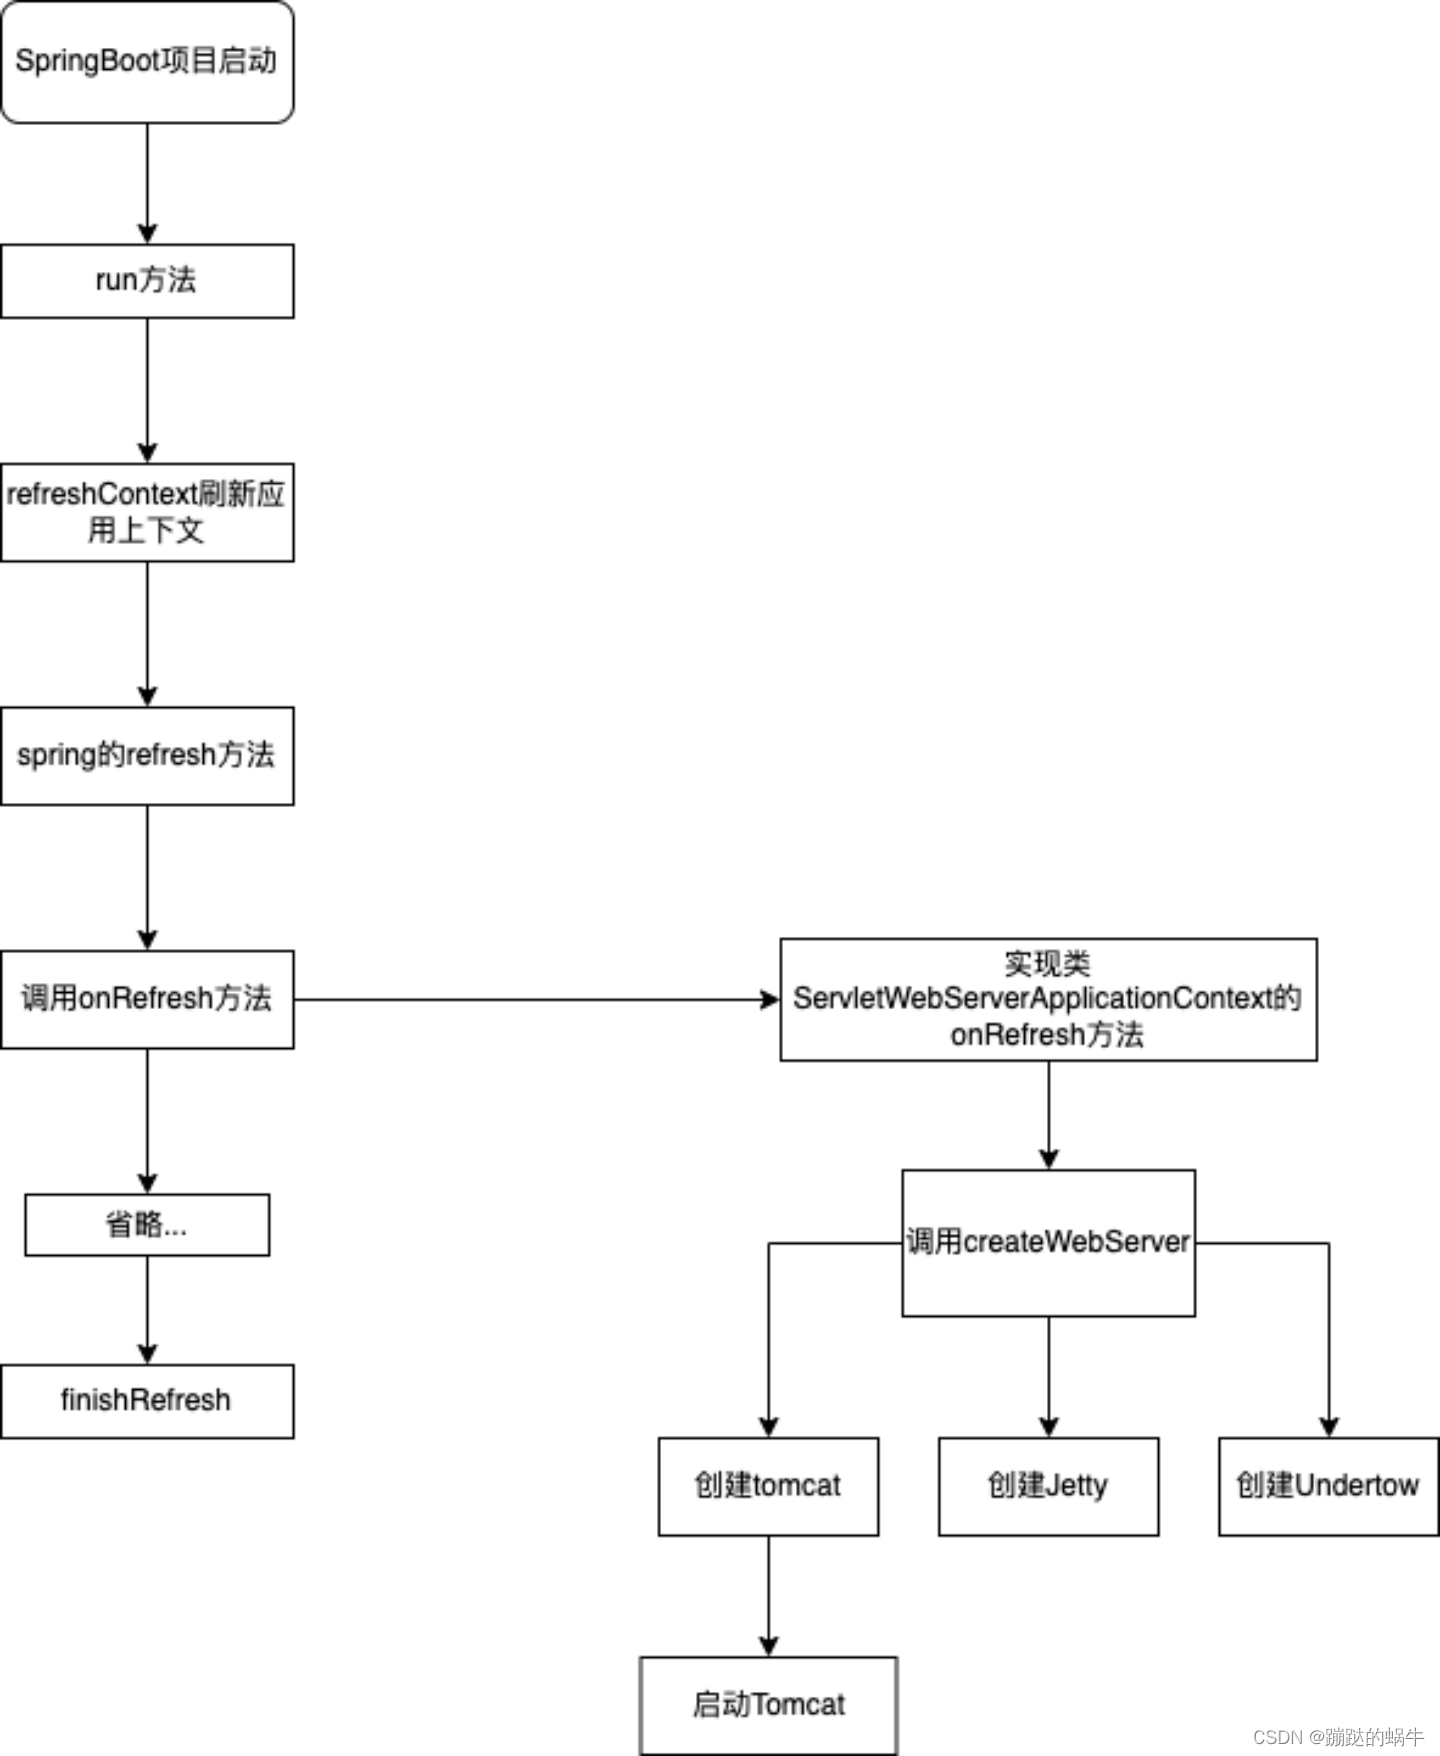
附上源码流程图:


 588
588

 被折叠的 条评论
为什么被折叠?
被折叠的 条评论
为什么被折叠?
 到【灌水乐园】发言


