


 本文介绍了Spring Security这一安全框架在Spring Boot和Spring Cloud项目中的应用,强调其在简化配置和降低使用门槛方面的改进。文章详细阐述了Spring Security的认证(如HTTP BASIC、DIGEST、X.509、LDAP、表单、运行时身份切换、OpenID等)和授权机制,并通过一个Spring Boot实例展示了如何配置和使用。在默认情况下,Spring Security提供了表单登录,可以通过配置类设置用户名和密码,实现基于内存的认证。此外,还展示了如何配置登录成功的回调处理,支持前后端分离的登录响应。
security作为安全框架,随着springboot、springcloud的火热,也逐渐回到主跑道上,逐渐占住优势,一扫之前配置繁琐、门槛较高的问题。
应用security安全框架,主要是引入认证和授权两个机制,通俗点讲,认证就是我们常说的登录、授权就是权限鉴别,验证请求是否具备相应的权限。
spring security支持多种不同的认证方式,包括如下:
HTTP BASIC authentication headers:基于IETF RFC 标准。
HTTP Digest authentication headers:基于IETF RFC 标准。
HTTP X.509 client certificate exchange:基于IETF RFC 标准。
LDAP:跨平台身份验证。
Form-based authentication:基于表单的身份验证。
Run-as authentication:用户用户临时以某一个身份登录。
OpenID authentication:去中心化认证。
Jasig Central Authentication Service:单点登录。
Automatic "remember-me" authentication:记住我登录(允许一些非敏感操作)。
Anonymous authentication:匿名登录。
spring security支持基于URL的请求授权,支持方法访问授权和对象访问授权。
实例:
新建一个springboot工程,引入spring security依赖
		<dependency>
            <groupId>org.springframework.boot</groupId>
            <artifactId>spring-boot-starter-security</artifactId>
        </dependency>
        <dependency>
            <groupId>org.springframework.boot</groupId>
            <artifactId>spring-boot-starter-web</artifactId>
        </dependency>
接口测试
@RestController
public class HelloController {

    @GetMapping("/hello")
    public String hello() {
        return "hello";
    }
}
直接启动项目,在启动过程中,会看到如下一行日志:
Using generated security password: 30abfb1f-36e1-446a-a79b-f70024f589ab
这是spring security为默认用户user生成的临时密码,是一个UUID字符串。
访问http://localhost:8080/hello 接口,可以看到自动重定向到登录页面了。
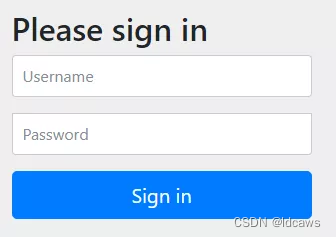
输入账号密码,登录成功后,就可以访问到/hello接口了。可见,一个依赖就保护了所有接口。
在springboot集成security中,默认的就是表单登录,访问地址为http://localhost:8080/login,并且在security中,默认的登录页面和登录接口,都是/login,其中get请求是登录页面,post请求时登录接口。
通过配置类的方式,引入用户名和密码,可以是基于内存或数据库等方式。
配置类:
@Configuration
publicclass SecurityConfig extends WebSecurityConfigurerAdapter {
    @Bean
    PasswordEncoder passwordEncoder() {
        return new BCryptPasswordEncoder();
    }
    @Override
    protected void configure(AuthenticationManagerBuilder auth) throws Exception {
        auth.inMemoryAuthentication()
                .withUser("javaboy.org")
                .password(passwordEncoder().encode("123")).roles("admin");
    }
}
配置完成后,再次启动项目,Java 代码中的配置会覆盖掉默认的账号密码( 或XML 文件中的配置),此时再去访问 /hello 接口,就会发现只有 Java 代码中的用户名/密码才能访问成功。
配置表单登录:
	@Override
    protected void configure(HttpSecurity http) throws Exception {
        http.authorizeRequests()
                .anyRequest()
                .authenticated()
                .and()
                .formLogin()
                .successHandler((req, resp, auth) -> {
                    resp.setContentType("application/json;charset=utf-8");
                    PrintWriter out = resp.getWriter();
                    out.write(new ObjectMapper().writeValueAsString(RespBean.ok("success", auth.getPrincipal())));
                    out.flush();
                    out.close();
                })
                .failureHandler((req, resp, e) -> {
                    resp.setContentType("application/json;charset=utf-8");
                    PrintWriter out = resp.getWriter();
                    out.write(new ObjectMapper().writeValueAsString(RespBean.error(e.getMessage())));
                    out.flush();
                    out.close();
                })
                .permitAll()
                .and()
                .csrf()
                .disable();
    }
登录此时分为前后端分离登录、前后端不分离登录。此处为前后端分离登录的返回方式,传统的方式即为前后端不分离登录,具体的表单登录配置不再扩展,包括登录成功跳转、登录失败跳转、注销跳转。


 9613
9613

 被折叠的 条评论
为什么被折叠?
被折叠的 条评论
为什么被折叠?
 到【灌水乐园】发言


