


 本文介绍了在IntelliJ IDEA中创建Spring MVC项目的正确步骤,包括选择Spring MVC模板,配置Tomcat,使用Maven添加依赖,创建配置文件和控制器,以及避免在web.xml中配置。强调了使用JavaConfig注解配置,@EnableWebMvc的使用细节,以及Spring 5.0中不再推荐使用WebMvcConfigurerAdapter的事实。
前一段时间,创建Spring MVC可能遇到了一些创建失败以及不规范的情况,今天就来系统的总结一下正确的创建姿势。
在IntelliJ IDEA中点击new project,然后选择Spring–>Spring MVC,点击next

出现下载的页面表示顺利进行,等待完毕即可,否则删除重新创建

配置Tomcat,并设置热部署

增加添加其他框架,选择Maven框架,并在Maven添加所需依赖

将Maven中的依赖的包添加到项目中,双击Test下的Lib包,直到他们都被添加进去

在Java源文件夹创建配置文件和一个测试控制器,并在web文件夹下创建相应的jsp

WebInit.java
package FirstMVC.config;

import org.springframework.web.servlet.support.AbstractAnnotationConfigDispatcherServletInitializer;

public class WebInit extends AbstractAnnotationConfigDispatcherServletInitializer {

    //创建ContextLoaderListener应用上下文
    protected Class<?>[] getRootConfigClasses() {
        return new Class<?>[] {RootConfig.class};
    }

    //创建DispatcherServlet应用上下文
    protected Class<?>[] getServletConfigClasses() {
        return new Class<?>[] {WebConfig.class};
    }

    //将DispatcherServlet映射到/
    protected String[] getServletMappings() {
        return new String[] {"/"};
    }
}
RootConfig.java
package FirstMVC.config;


import org.springframework.context.annotation.ComponentScan;
import org.springframework.context.annotation.Configuration;
import org.springframework.context.annotation.FilterType;
import org.springframework.web.servlet.config.annotation.EnableWebMvc;

//配置加载非Web组件的Bean的ContextLoaderListener应用上下文的JavaConfig
@Configuration
@ComponentScan(basePackages = {"FirstMVC"},
        excludeFilters = {@ComponentScan.Filter(type = FilterType.ANNOTATION, value = EnableWebMvc.class)})
public class RootConfig {
}
WebConfig.java
package FirstMVC.config;

import org.springframework.context.annotation.Bean;
import org.springframework.context.annotation.ComponentScan;
import org.springframework.context.annotation.Configuration;
import org.springframework.web.servlet.ViewResolver;
import org.springframework.web.servlet.config.annotation.DefaultServletHandlerConfigurer;
import org.springframework.web.servlet.config.annotation.EnableWebMvc;
import org.springframework.web.servlet.config.annotation.WebMvcConfigurationSupport;
import org.springframework.web.servlet.config.annotation.WebMvcConfigurerAdapter;
import org.springframework.web.servlet.view.InternalResourceViewResolver;

//配置DispatcherServlet应用上下文的JavaConfig
//@EnableWebMvc注解开启Spring MVC
@Configuration
//@EnableWebMvc
@ComponentScan("FirstMVC.Controller") //启用组件扫描, 组件扫描只会扫描到这里设置的包及其子包
public class WebConfig extends WebMvcConfigurationSupport {
    //配置ViewResolver视图解析器具体解析view名字的规则
    @Bean
    public ViewResolver viewResolver() {
        InternalResourceViewResolver resolver = new InternalResourceViewResolver();
        resolver.setPrefix("/WEB-INF/views/");
        resolver.setSuffix(".jsp");
        resolver.setExposeContextBeansAsAttributes(true);
        return resolver;
    }

    //配置对静态资源的处理
    //通过调用DefaultServletHandlerConfigurer的enable()方法,
    //要求DispatcherServlet将对静态资源的请求转发到Servlet容器中默认的Servlet上,
    //而不是DispatcherServelt本身来处理这类请求.
    @Override
    public void configureDefaultServletHandling(DefaultServletHandlerConfigurer configurer) {
        configurer.enable();
    }
}
Test.java
package FirstMVC.Controller;

import org.springframework.stereotype.Controller;
import org.springframework.web.bind.annotation.RequestMapping;
import org.springframework.web.bind.annotation.RequestMethod;

@Controller
@RequestMapping(value = "/main")
public class Test {
    @RequestMapping(method = RequestMethod.GET)
    public String welcome(){
        return "home";
    }
}- 关于web的设置,在web/WEB-INF/中,xml文件不要有任何配置,我们使用注解来配置Spring,而不是通过xml文件。并新建views文件夹,将jsp文件放到其中。
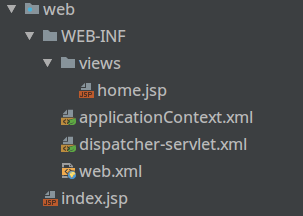
home.jsp
<%@ page contentType="text/html;charset=UTF-8" language="java" %>
<html>
<head>
<title>home</title>
</head>
<body>
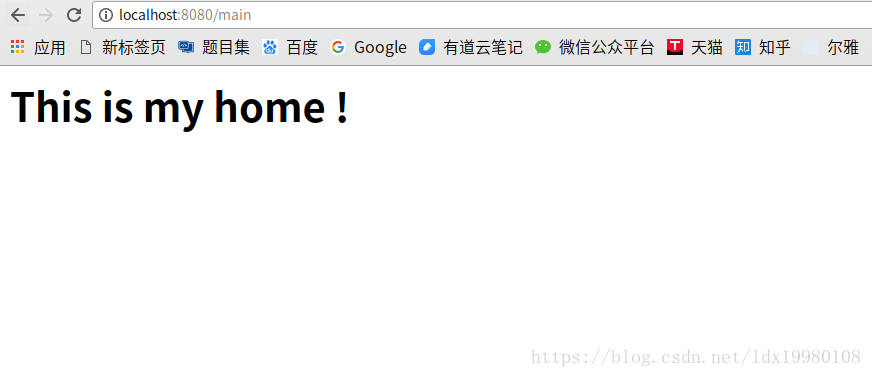
<h1>This is my home !</h1>
</body>
</html>测试运行
一些要注意的点
- 采用JavaConfig注解的方式进行配置,那么xml文件不需要有任何的配置。
- RootConfig和WebConfig要注意组件扫描的包不要填错。
- @EnableWebMvc注解的一些问题:
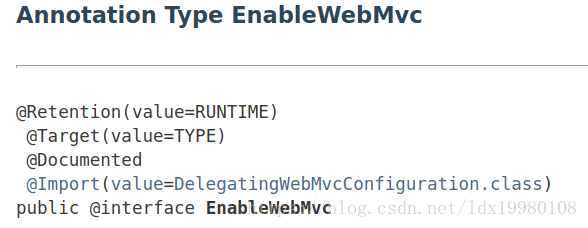
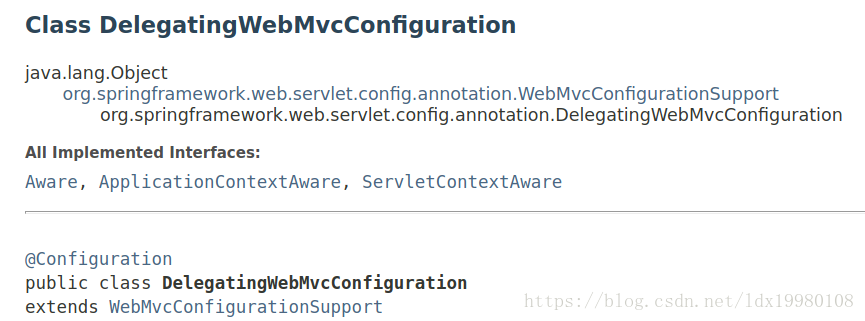
@EnableWebMvc注解引入了DelegatingWebMvcConfiguration类,而该类继承了WebMvcConfigurationSupport,如果只是用该注解,那么表示用的是默认设置。并且只有一个配置类可以有该注解,如果要自定义一些配置,可以采用如下配置:
- 利用@EnableWebMvc注解,并实现WebMvcConfigurer
 @Configuration
 @EnableWebMvc
 @ComponentScan(basePackageClasses = MyConfiguration.class)
 public class MyConfiguration implements WebMvcConfigurer {
        //to do
}- 如果想用一些高级设置,那么可以移除@EnableWebMvc注解,直接继承WebMvcConfigurationSupport
 @Configuration
 @ComponentScan(basePackageClasses = { MyConfiguration.class })
 public class MyConfiguration extends WebMvcConfigurationSupport {
        //to do
}注意:书上继承WebMvcConfigurerAdapter(WebMvcConfigurer的实现类)来实现,但在Spring 5.0中WebMvcConfigurerAdapter已被废弃,不建议再使用了。
参考:Spring官方文档


 1160
1160

 被折叠的 条评论
为什么被折叠?
被折叠的 条评论
为什么被折叠?
 到【灌水乐园】发言


