


随着 LLaMA v1 的发布,我们看到了精细调整模型的爆发式增长,其中包括Alpaca、Vicuna、WizardLM等。这种趋势鼓励不同的企业推出自己的基础模型,这些模型具有适合商业使用的许可证,例如OpenLLaMA、Falcon、XGen等。Llama 2 的发布现在结合了双方的最佳元素:它提供了一个高效的基础模型以及更宽松的许可证。
2023 年上半年,软件领域因广泛使用 API(如 OpenAI API)来创建基于大型语言模型 (LLM) 的基础设施而发生了重大变化。LangChain和LlamaIndex等库在这一趋势中发挥了关键作用。进入下半年,对这些模型进行微调(或指令调整)的过程将成为LLMOps 工作流程中的标准程序。这一趋势由多种因素推动:节省成本的潜力、处理机密数据的能力,甚至开发出在某些特定任务中超越 ChatGPT 和 GPT-4 等知名模型性能的模型的潜力。
在本文中,我们将了解指令调整为何有效,以及如何在 Google Colab 笔记本中实现它以创建您自己的 Llama 2 模型。与往常一样,代码可在Colab和GitHub上找到。
🔧 微调 LLM 的背景
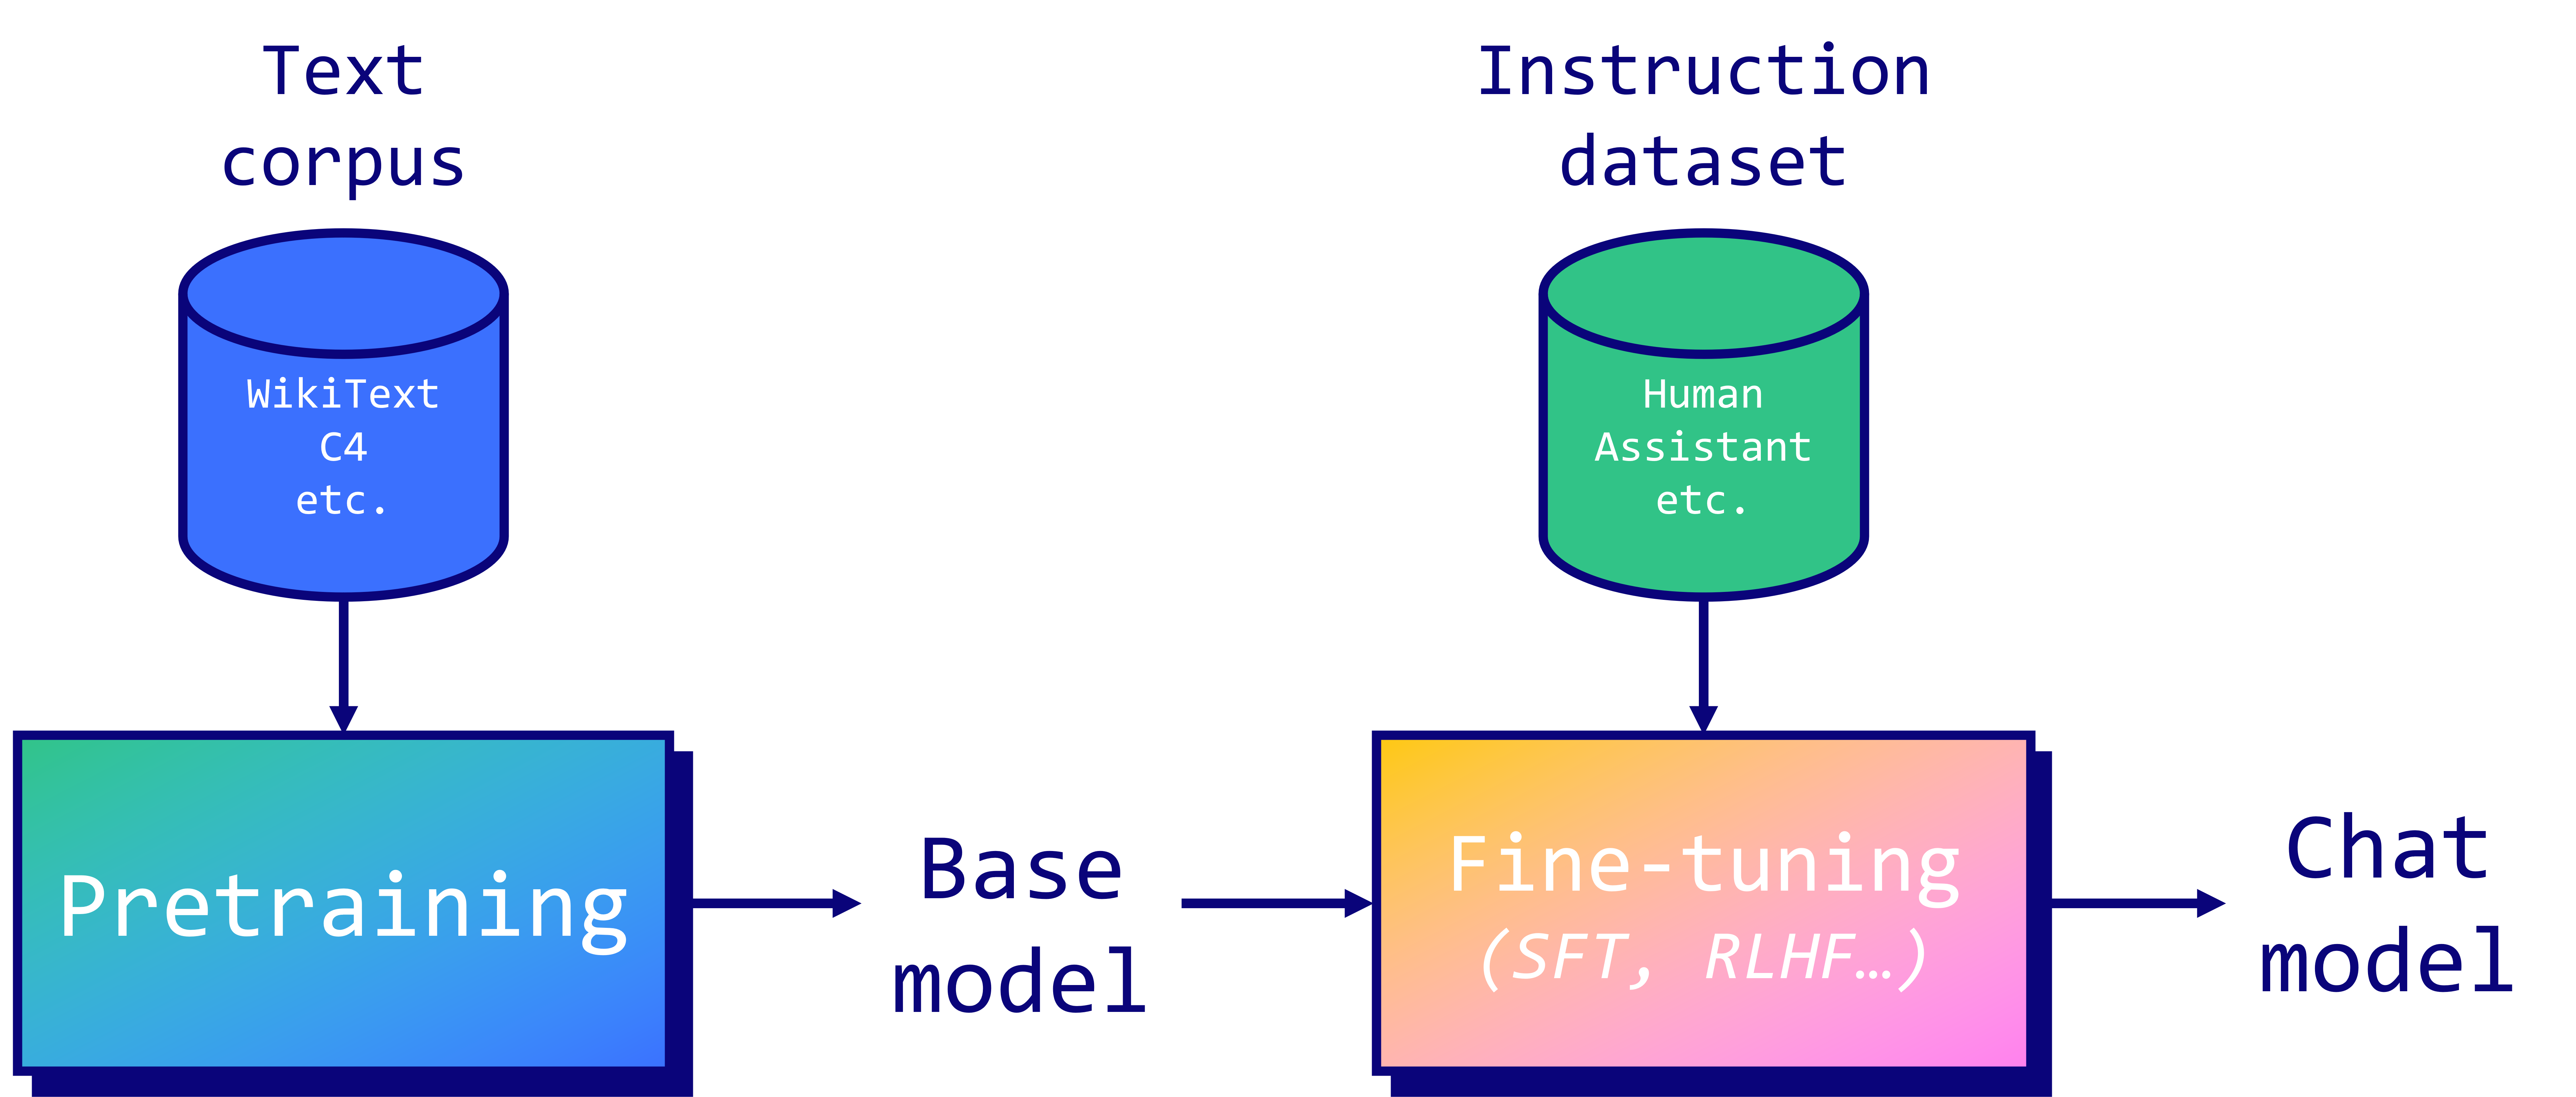
LLM 是在大量文本语料库上进行预训练的。在Llama 2的案例中,除了它的长度为 2 万亿个 token 之外,我们对训练集的组成知之甚少。相比之下,BERT (2018)“仅”在 BookCorpus(8 亿个单词)和英文维基百科(25 亿个单词)上进行过训练。从经验来看,这是一个非常昂贵且漫长的过程,并且存在很多硬件问题。如果你想了解更多信息,我建议阅读Meta关于 OPT-175B 模型预训练的日志。
预训练完成后,像 Llama 2 这样的自回归模型可以预测序列中的下一个标记。然而,这并不能使它们成为特别有用的助手,因为它们不会回复指令。这就是为什么我们采用指令调整来使它们的答案与人类的期望保持一致。有两种主要的微调技术:
- 监督微调(SFT):模型在指令和响应数据集上进行训练。它调整 LLM 中的权重,以最小化生成的答案和真实响应之间的差异,并充当标签。
- 通过人类反馈进行强化学习(RLHF):模型通过与环境互动并接收反馈进行学习。模型经过训练可以最大化奖励信号(使用PPO),该信号通常来自人类对模型输出的评估。
总体而言,RLHF 可以捕捉更复杂、更细微的人类偏好,但有效实施起来也更具挑战性。事实上,它需要精心设计奖励系统,并且对人类反馈的质量和一致性非常敏感。未来的一种可能替代方案是直接偏好优化(DPO) 算法,它直接在 SFT 模型上运行偏好学习。
在我们的案例中,我们将执行 SFT,但这引发了一个问题:微调为什么会起作用?正如Orca 论文中所强调的那样,我们的理解是微调利用了在预训练过程中学到的知识。换句话说,如果模型从未见过您感兴趣的数据类型,微调将无济于事。但是,如果是这样的话,SFT 的性能会非常出色。
例如,LIMA 论文展示了如何通过仅对 1,000 个高质量样本微调具有 650 亿个参数的 LLaMA (v1) 模型来超越 GPT-3 (DaVinci003)。指令数据集的质量对于达到这一性能水平至关重要,这就是为什么很多工作都集中在这个问题上(例如evol-instruct、Orca 或phi-1)。请注意,LLM 的大小(65b,而不是 13b 或 7b)对于有效利用现有知识也至关重要。
与数据质量相关的另一个重要点是提示模板。提示由类似的元素组成:系统提示(可选)用于指导模型,用户提示(必需)用于给出指令,其他输入(可选)需要考虑,以及模型的答案(必需)。在 Llama 2 的案例中,作者对聊天模型使用了以下模板:
<s>
[INST]
<<SYS>>
System prompt
<</SYS>>
User prompt
[/INST]
Model answer
</s>
还有其他模板,例如来自 Alpaca 和 Vicuna 的模板,它们的影响并不十分明显。在此示例中,我们将重新格式化我们的指令数据集以遵循 Llama 2 的模板。出于本教程的目的,我已经使用出色的timdettmers/openassistant-guanaco数据集完成了此操作。您可以在 Hugging Face 上找到它,名称为mlabonne/guanaco-llama2-1k。在下文中,我们将使用基础模型而不是聊天模型,因此此步骤是可选的。请注意,如果您使用的是基础 Llama 2 模型而不是聊天版本,则无需遵循特定的提示模板。
🦙 如何微调 Llama 2
在本节中,我们将使用 Google Colab(2.21 个积分/小时)在具有高 RAM 的 T4 GPU 上对具有 70 亿个参数的 Llama 2 模型进行微调。请注意,T4 仅有 16 GB 的 VRAM,这勉强足以**存储 Llama 2-7b 的权重**(7b × 2 字节 = FP16 中的 14 GB)。此外,我们还需要考虑优化器状态、梯度和前向激活带来的开销(有关更多信息,请参阅[这篇出色的文章](https://huggingface.co/docs/transformers/perf_train_gpu_one#anatomy-of-models-memory))。这意味着这里无法进行完全微调:我们需要像[LoRA](https://arxiv.org/abs/2106.09685)或[QLoRA](https://arxiv.org/abs/2305.14314)这样的参数高效微调 (PEFT) 技术。为了大幅减少 VRAM 的使用,我们必须以 4 位精度对模型进行微调,这就是我们在这里使用 QLoRA 的原因。好处是我们可以利用 Hugging Face 生态系统中的transformers、accelerate、peft、trl和bitsandbytes库。这就是我们将在以下代码中执行的操作,基于 Younes Belkada 的GitHub Gist。首先,我们安装并加载这些库。
!pip install -q accelerate0.21.0 peft0.4.0 bitsandbytes0.40.2 transformers4.31.0 trl==0.4.7
import os
import torch
from datasets import load_dataset
from transformers import (
AutoModelForCausalLM,
AutoTokenizer,
BitsAndBytesConfig,
HfArgumentParser,
TrainingArguments,
pipeline,
logging,
)
from peft import LoraConfig, PeftModel
from trl import SFTTrainer
让我们来谈谈我们可以在这里调整的参数。首先,我们要加载一个llama-2-7b-chat-hf模型并在mlabonne/guanaco-llama2-1k(1,000 个样本)上对其进行训练,这将产生我们的微调模型llama-2-7b-miniguanaco。如果你对这个数据集是如何创建的感兴趣,你可以查看这个笔记本。随意更改它:Hugging Face Hub上有很多很好的数据集,比如databricks/databricks-dolly-15k。
QLoRA 将使用等级 64 和缩放参数 16(有关 LoRA 参数的更多信息,请参阅本文)。我们将使用 NF4 类型以 4 位精度直接加载 Llama 2 模型,并对其进行 1 个周期的训练。要获取有关其他参数的更多信息,请查看TrainingArguments、PeftModel和SFTTrainer文档。
# The model that you want to train from the Hugging Face hub
model_name = "NousResearch/llama-2-7b-chat-hf"

# The instruction dataset to use
dataset_name = "mlabonne/guanaco-llama2-1k"

# Fine-tuned model name
new_model = "llama-2-7b-miniguanaco"

################################################################################
# QLoRA parameters
################################################################################

# LoRA attention dimension
lora_r = 64

# Alpha parameter for LoRA scaling
lora_alpha = 16

# Dropout probability for LoRA layers
lora_dropout = 0.1

################################################################################
# bitsandbytes parameters
################################################################################

# Activate 4-bit precision base model loading
use_4bit = True

# Compute dtype for 4-bit base models
bnb_4bit_compute_dtype = "float16"

# Quantization type (fp4 or nf4)
bnb_4bit_quant_type = "nf4"

# Activate nested quantization for 4-bit base models (double quantization)
use_nested_quant = False

################################################################################
# TrainingArguments parameters
################################################################################

# Output directory where the model predictions and checkpoints will be stored
output_dir = "./results"

# Number of training epochs
num_train_epochs = 1

# Enable fp16/bf16 training (set bf16 to True with an A100)
fp16 = False
bf16 = False

# Batch size per GPU for training
per_device_train_batch_size = 4

# Batch size per GPU for evaluation
per_device_eval_batch_size = 4

# Number of update steps to accumulate the gradients for
gradient_accumulation_steps = 1

# Enable gradient checkpointing
gradient_checkpointing = True

# Maximum gradient normal (gradient clipping)
max_grad_norm = 0.3

# Initial learning rate (AdamW optimizer)
learning_rate = 2e-4

# Weight decay to apply to all layers except bias/LayerNorm weights
weight_decay = 0.001

# Optimizer to use
optim = "paged_adamw_32bit"

# Learning rate schedule (constant a bit better than cosine)
lr_scheduler_type = "constant"

# Number of training steps (overrides num_train_epochs)
max_steps = -1

# Ratio of steps for a linear warmup (from 0 to learning rate)
warmup_ratio = 0.03

# Group sequences into batches with same length
# Saves memory and speeds up training considerably
group_by_length = True

# Save checkpoint every X updates steps
save_steps = 25

# Log every X updates steps
logging_steps = 25

################################################################################
# SFT parameters
################################################################################

# Maximum sequence length to use
max_seq_length = None

# Pack multiple short examples in the same input sequence to increase efficiency
packing = False

# Load the entire model on the GPU 0
device_map = {"": 0}
现在我们可以加载所有内容并开始微调过程。我们依赖多个包装器,所以请耐心等待。
● 首先,我们要加载我们定义的数据集。在这里,我们的数据集已经经过预处理,但通常,您会在这里重新格式化提示、过滤掉不良文本、合并多个数据集等。
● 然后,我们配置bitsandbytes4 位量化。
● 接下来,我们使用相应的标记器在 GPU 上以 4 位精度加载 Llama 2 模型。
● 最后,我们加载 QLoRA 的配置、常规训练参数,并将所有内容传递给SFTTrainer。训练终于可以开始了!
# Load dataset (you can process it here)
dataset = load_dataset(dataset_name, split="train")

# Load tokenizer and model with QLoRA configuration
compute_dtype = getattr(torch, bnb_4bit_compute_dtype)

bnb_config = BitsAndBytesConfig(
    load_in_4bit=use_4bit,
    bnb_4bit_quant_type=bnb_4bit_quant_type,
    bnb_4bit_compute_dtype=compute_dtype,
    bnb_4bit_use_double_quant=use_nested_quant,
)

# Check GPU compatibility with bfloat16
if compute_dtype == torch.float16 and use_4bit:
    major, _ = torch.cuda.get_device_capability()
    if major >= 8:
        print("=" * 80)
        print("Your GPU supports bfloat16: accelerate training with bf16=True")
        print("=" * 80)

# Load base model
model = AutoModelForCausalLM.from_pretrained(
    model_name,
    quantization_config=bnb_config,
    device_map=device_map
)
model.config.use_cache = False
model.config.pretraining_tp = 1

# Load LLaMA tokenizer
tokenizer = AutoTokenizer.from_pretrained(model_name, trust_remote_code=True)
tokenizer.pad_token = tokenizer.eos_token
tokenizer.padding_side = "right" # Fix weird overflow issue with fp16 training

# Load LoRA configuration
peft_config = LoraConfig(
    lora_alpha=lora_alpha,
    lora_dropout=lora_dropout,
    r=lora_r,
    bias="none",
    task_type="CAUSAL_LM",
)

# Set training parameters
training_arguments = TrainingArguments(
    output_dir=output_dir,
    num_train_epochs=num_train_epochs,
    per_device_train_batch_size=per_device_train_batch_size,
    gradient_accumulation_steps=gradient_accumulation_steps,
    optim=optim,
    save_steps=save_steps,
    logging_steps=logging_steps,
    learning_rate=learning_rate,
    weight_decay=weight_decay,
    fp16=fp16,
    bf16=bf16,
    max_grad_norm=max_grad_norm,
    max_steps=max_steps,
    warmup_ratio=warmup_ratio,
    group_by_length=group_by_length,
    lr_scheduler_type=lr_scheduler_type,
    report_to="tensorboard"
)

# Set supervised fine-tuning parameters
trainer = SFTTrainer(
    model=model,
    train_dataset=dataset,
    peft_config=peft_config,
    dataset_text_field="text",
    max_seq_length=max_seq_length,
    tokenizer=tokenizer,
    args=training_arguments,
    packing=packing,
)

# Train model
trainer.train()

# Save trained model
trainer.model.save_pretrained(new_model)
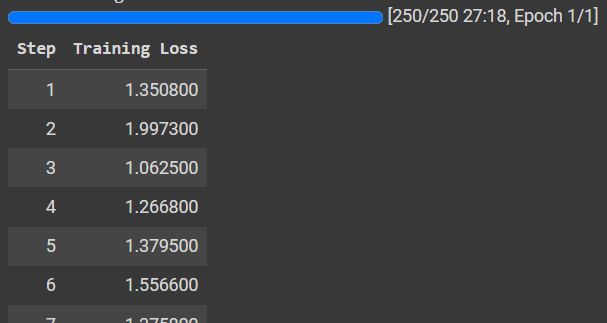
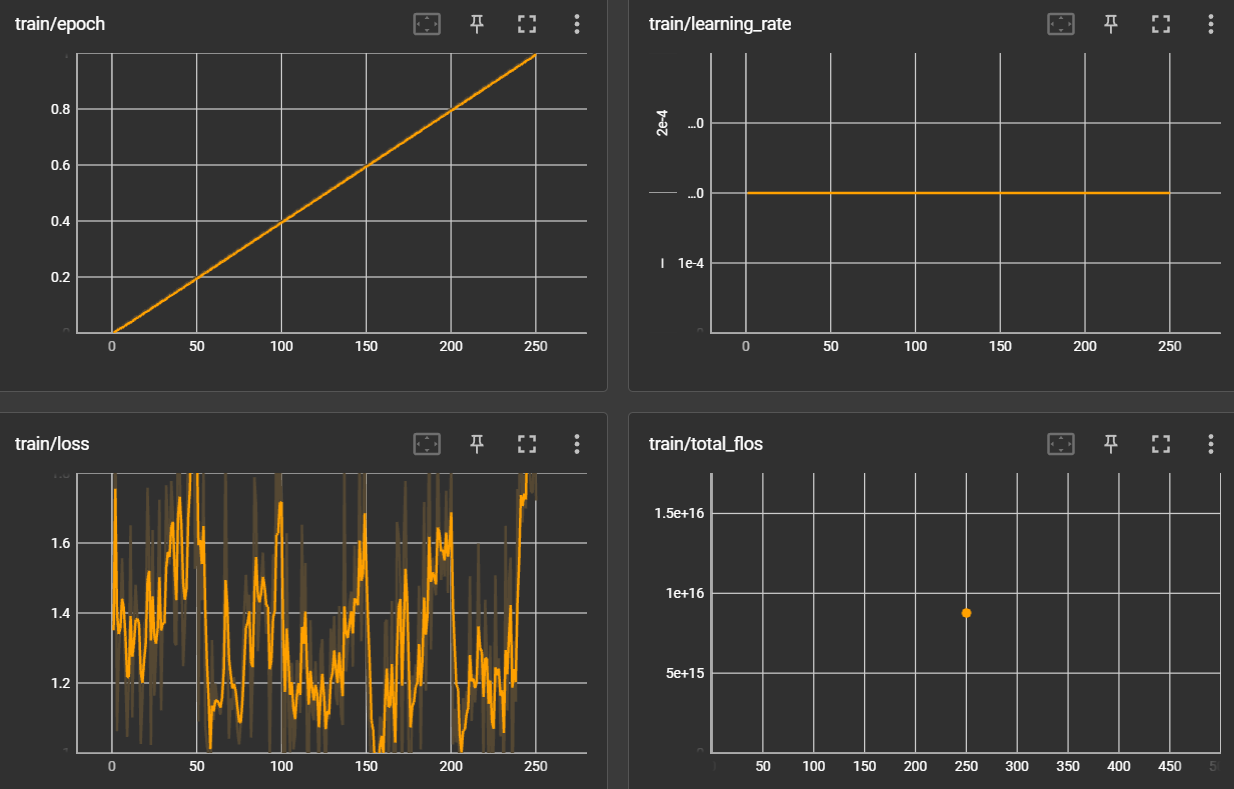
训练可能非常耗时,具体取决于数据集的大小。这里,在 T4 GPU 上花费的时间不到一个小时。我们可以在 tensorboard 上查看图表,如下所示:
%load_ext tensorboard
%tensorboard --logdir results/runs
让我们确保模型运行正常。这需要更详尽的评估,但我们可以使用文本生成管道来提出诸如“什么是大型语言模型?”之类的问题。请注意,我正在格式化输入以匹配 Llama 2 的提示模板。
# Ignore warnings
logging.set_verbosity(logging.CRITICAL)

# Run text generation pipeline with our next model
prompt = "What is a large language model?"
pipe = pipeline(task="text-generation", model=model, tokenizer=tokenizer, max_length=200)
result = pipe(f"<s>[INST] {prompt} [/INST]")
print(result[0]['generated_text'])
/usr/local/lib/python3.10/dist-packages/transformers/generation/utils.py:1270: UserWarning: You have modified the pretrained model configuration to control generation. This is a deprecated strategy to control generation and will be removed soon, in a future version. Please use a generation configuration file (see https://huggingface.co/docs/transformers/main_classes/text_generation )
  warnings.warn(
/usr/local/lib/python3.10/dist-packages/torch/utils/checkpoint.py:31: UserWarning: None of the inputs have requires_grad=True. Gradients will be None
  warnings.warn("None of the inputs have requires_grad=True. Gradients will be None")
<s>[INST] What is a large language model? [/INST] A large language model is a type of artificial intelligence that is trained on a large dataset of text to generate human-like language. It is typically trained on a dataset of text that is much larger than the dataset used for smaller language models. The large dataset allows the model to learn more complex patterns in language, which can result in more accurate and natural-sounding language generation.

Large language models are often used for tasks such as text summarization, language translation, and chatbots. They are also used for more complex tasks such as writing articles, generating creative content, and even composing music.

Large language models are trained using a technique called deep learning, which involves using many layers of artificial neural networks to learn complex patterns in the data. The model is trained on a large dataset of text, and the neural networks are trained to predict the next word in a sequence of text given
该模型输出以下响应:
A large language model is a type of artificial intelligence that is trained on a large dataset of text to generate human-like language. It is typically trained on a dataset of text that is much larger than the dataset used for smaller language models. The large dataset allows the model to learn more complex patterns in language, which can result in more accurate and natural-sounding language generation.

Large language models are often used for tasks such as text summarization, language translation, and chatbots. They are also used for more complex tasks such as writing articles, generating creative content, and even composing music.

Large language models are trained using a technique called deep learning, which involves using many layers of artificial neural networks to learn complex patterns in the data. The model is trained on a large dataset of text, and the neural networks are trained to predict the next word in a sequence of text given
从经验上看,对于一个只有 70 亿个参数的模型来说,它非常连贯。你可以使用它并从BigBench-Hard等评估数据集中提出更难的问题。Guanaco 是一个优秀的数据集,过去曾产生过高质量的模型。你可以使用 在整个数据集上训练 Llama 2 模型mlabonne/guanaco-llama2。
我们现在如何存储新llama-2-7b-miniguanaco模型?我们需要将 LoRA 中的权重与基础模型合并。不幸的是,据我所知,没有直接的方法可以做到这一点:我们需要以 FP16 精度重新加载基础模型,然后使用库peft合并所有内容。唉,它还会给 VRAM 带来问题(尽管清空了它),所以我建议重新启动笔记本,重新执行前三个单元,然后执行下一个单元。
# Reload model in FP16 and merge it with LoRA weights
base_model = AutoModelForCausalLM.from_pretrained(
    model_name,
    low_cpu_mem_usage=True,
    return_dict=True,
    torch_dtype=torch.float16,
    device_map=device_map,
)
model = PeftModel.from_pretrained(base_model, new_model)
model = model.merge_and_unload()

# Reload tokenizer to save it
tokenizer = AutoTokenizer.from_pretrained(model_name, trust_remote_code=True)
tokenizer.pad_token = tokenizer.eos_token
tokenizer.padding_side = "right"
我们的权重已合并,我们重新加载了标记器。现在我们可以将所有内容推送到 Hugging Face Hub 以保存我们的模型。
!huggingface-cli login

model.push_to_hub(new_model, use_temp_dir=False)
tokenizer.push_to_hub(new_model, use_temp_dir=False)
CommitInfo(commit_url='https://huggingface.co/mlabonne/llama-2-7b-guanaco/commit/0f5ed9581b805b659aec68484820edb5e3e6c3f5', commit_message='Upload tokenizer', commit_description='', oid='0f5ed9581b805b659aec68484820edb5e3e6c3f5', pr_url=None, pr_revision=None, pr_num=None)
现在,您可以像从 Hub 加载任何其他 Llama 2 模型一样,使用此模型进行推理。还可以重新加载它以进行更多微调 - 也许使用另一个数据集?
如果您真的想对模型进行微调,建议使用脚本而不是笔记本。您可以在 Lambda Labs、Runpod、Vast.ai 上轻松租用 GPU,价格不到 0.3 美元/小时。连接后,您可以安装库、导入脚本、登录 Hugging Face 和其他工具(如用于记录实验的 Weights & Biases),然后开始微调。
该trl脚本目前非常有限,因此我根据之前的笔记本制作了自己的脚本。您可以在 GitHub Gist 上找到它。如果您正在寻找全面的解决方案,请查看OpenAccess AI Collective 中的Axolotl,它可以原生处理多个数据集、Deepspeed、Flash Attention 等。
结论
在本文中,我们了解了如何使用 Colab 笔记本微调 Llama 2 7b 模型。我们介绍了 LLM 训练和微调的一些必要背景知识,以及与指令数据集相关的重要注意事项。在第二部分中,我们成功地 使用其原生提示模板和自定义参数** 微调了 Llama 2 模型。**然后,这些经过微调的模型可以集成到 LangChain 和其他架构中,作为 OpenAI API 的有利替代方案。请记住,在这个新范式中,指令数据集是新的黄金,模型的质量在很大程度上取决于对其进行微调的数据。所以,祝你好运,构建高质量的数据集!


 9710
9710

 被折叠的 条评论
为什么被折叠?
被折叠的 条评论
为什么被折叠?
 到【灌水乐园】发言


