


 本文介绍了在小程序中如何进行表单组件的封装和使用,包括文本表单、slider、复选框/单选框、评分表单和picker等,并详细阐述了表单的事件绑定、取值、赋值以及设置提示信息的方法,提供了丰富的API和示例代码。
表单示例
表单一直是类web项目中开发的难点,表单涉及UI,交互,校验,接口,回填等各种坑点,设计表单模块时需要有一个统一的设计思想,在queryUI项目中,我们统一了表单的结构,丰富了表单的API,赋予了各种表单的联动支持
- 配置化表单
- 统一的表单结构
- 丰富的API,简化出错,提示等操作
- 支持任一表单元素之间的联动
- 原生微信所有表单组件支持
如何使用表单组件
首先需要引入queryUI的核心库,请参考GITHUB
示例代码
https://github.com/webkixi/aotoo-xquery
=> pages/form
表单组件的使用
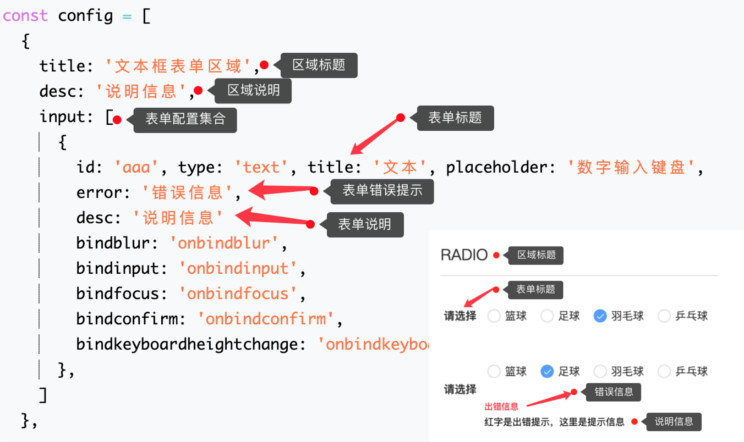
queryUI表单由配置文件生成,表单属性构成大致如下图
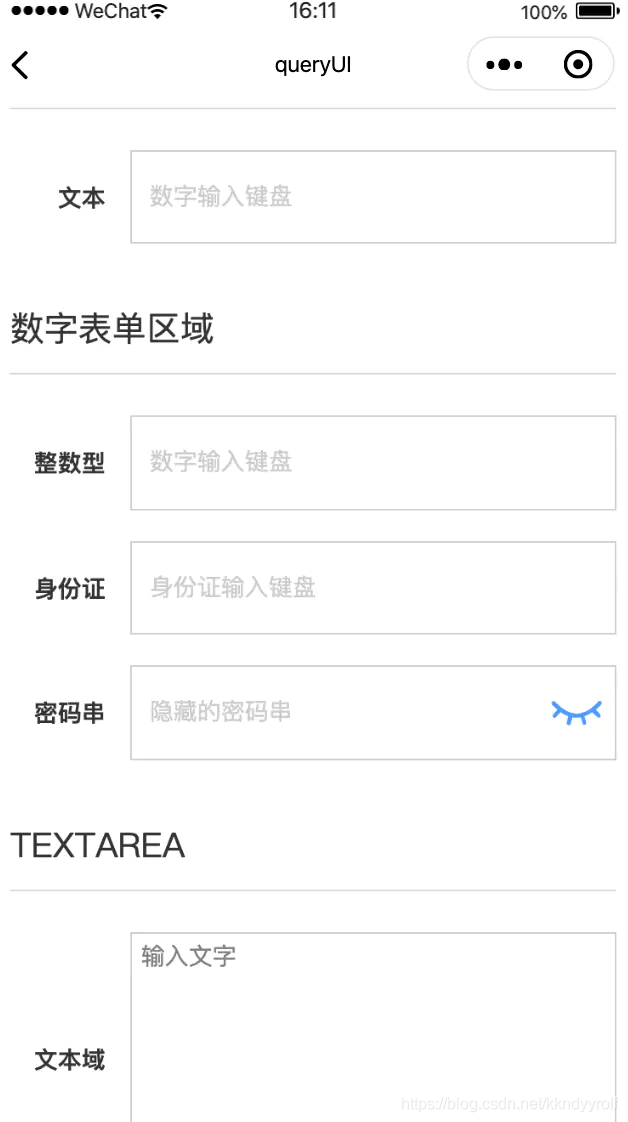
文本表单使用
wxml
<ui-form wx:if="{

    {formConfig}}" dataSource="{

    {formConfig}}" />
js
const Pager = require('../../components/aotoo/core/index')
const config = [
  {


    title: '文本框表单区域',
    desc: '说明信息',
    input: [
      {


        id: 'aaa', type: 'text', title: '文本', placeholder: '数字输入键盘',
        error: '错误信息',
        desc: '说明信息'
        bindblur: 'onbindblur',
        bindinput: 'onbindinput',
        bindfocus: 'onbindfocus',
        bindconfirm: 'onbindconfirm',
        bindkeyboardheightchange: 'onbindkeyboardheightchange',
      },
    ]
  },

  {


    title: '数字表单区域',
    input: [
      {

   id: 'ccc', type: 'number', title: '整数型', placeholder: '数字输入键盘', bindblur: 'onBlur'},
      {

   id: 'ddd', type: 'idcard', title: '身份证', placeholder: '身份证输入键盘', bindblur: 'onBlur'},
      {

   id: 'eee', type: 'password', title: '密码串', maxlength: 30, placeholder: '隐藏的密码串', bindblur: 'onBlur'}
    ]
  },

  {


    title: 'TEXTAREA',
    input: [
      {

   id: 'aaa', type: 'textarea', title: '文本域', placeholder: '输入文字', bindblur: 'onBlur'},
    ]
  },
]

const mthSet = {


  onbindblur(e) {


    console.log('=====text', e.detail.value);
  },
  onbindinput(e) {


    console.log('=====text', e);
  },
  onbindfocus(e) {


    console.log('=====text', e);
  },
  onbindconfirm(e) {


    console.log('=====text', e);
  },
  onbindkeyboardheightchange(e) {


    console.log('=====text', e);
  },
}
最低0.47元/天 解锁文章


 768
768

 被折叠的 条评论
为什么被折叠?
被折叠的 条评论
为什么被折叠?
 到【灌水乐园】发言


