


前言
高可用 (High Availability, HA) 是保障服务稳定的关键手段。本文将详细讲解如何在两台 Linux 服务器上搭建 Nginx + Keepalived 高可用环境,实现 VIP 漂移和服务不中断。
一、环境与前提
| 项目 | 配置 |
|---|---|
| 服务器 | 2 台 CentOS 7/8 |
| IP 地址 | Server1: 172.16.0.110, Server2: 172.16.0.115 |
| 虚拟 IP (VIP) | 172.16.0.250 |
| 网络接口 | ens33 |
| 用户 | root |
| 软件 | Nginx, Keepalived |
说明:客户端只访问 VIP,VIP 会在 Master/Backup 服务器间漂移,实现高可用。
二、安装 Nginx
这里我们用脚本安装,用于快速搭建,脚本链接请查看
https://blog.youkuaiyun.com/kirito0000/article/details/151292984
检查 Nginx 是否正常:
curl -I http://127.0.0.1
应返回 HTTP/1.1 200 OK。
三、安装 Keepalived
安装步骤请查看
https://blog.youkuaiyun.com/kirito0000/article/details/152409410
四、配置 Keepalived
4.1 健康检查脚本
创建 /etc/keepalived/check_nginx.sh:
#!/bin/bash
curl -s --head http://127.0.0.1 | head -n 1 | grep "200 OK" >/dev/null
if [ $? -eq 0 ]; then
    exit 0
else
    exit 1
fi
赋予执行权限:
chmod +x /etc/keepalived/check_nginx.sh
说明:这个脚本会检查 Nginx 是否正常响应 HTTP 请求,比仅检测进程更可靠。
4.2 Master 配置(Server1)
vim /usr/local/etc/keepalived/keepalived.conf
global_defs {
router_id LVS_MASTER #名称标记为master,名字随便取
vrrp_gna_interval 0
}
vrrp_script check_nginx {
script "/etc/keepalived/check_nginx.sh"
interval 2 # 每 2 秒检测一次
rise 1 # 连续 1 次成功才认为 UP
fall 2 # 连续 2 次失败才认为 DOWN,避免短暂波动
weight -50
}
vrrp_instance VI_1 {
state MASTER
interface ens33
virtual_router_id 99
priority 200 # MASTER 节点优先级
advert_int 1
virtual_ipaddress {
172.16.0.250
}
track_script {
check_nginx
}
}
4.3 Backup 配置(Server2)
vim /usr/local/etc/keepalived/keepalived.conf
global_defs {
router_id LVS_SLAVE #名称标记为master,名字随便取
vrrp_gna_interval 0
}
vrrp_script check_nginx {
script "/etc/keepalived/check_nginx.sh"
interval 2 # 每 2 秒检测一次
rise 1 # 连续 1 次成功才认为 UP
fall 2 # 连续 2 次失败才认为 DOWN,避免短暂波动
}
vrrp_instance VI_1 {
state BACKUP
interface ens33
virtual_router_id 99
priority 199 # MASTER 节点优先级
advert_int 1
virtual_ipaddress {
172.16.0.250
}
track_script {
check_nginx
}
}
配置说明:
-
priority:Master 优先级高于 Backup。 -
track_script:执行健康检查,失败时 VIP 漂移。 -
virtual_router_id:两台服务器必须一致,范围 1-255。 -
auth_pass:Keepalived 认证密码。
五、启动 Keepalived
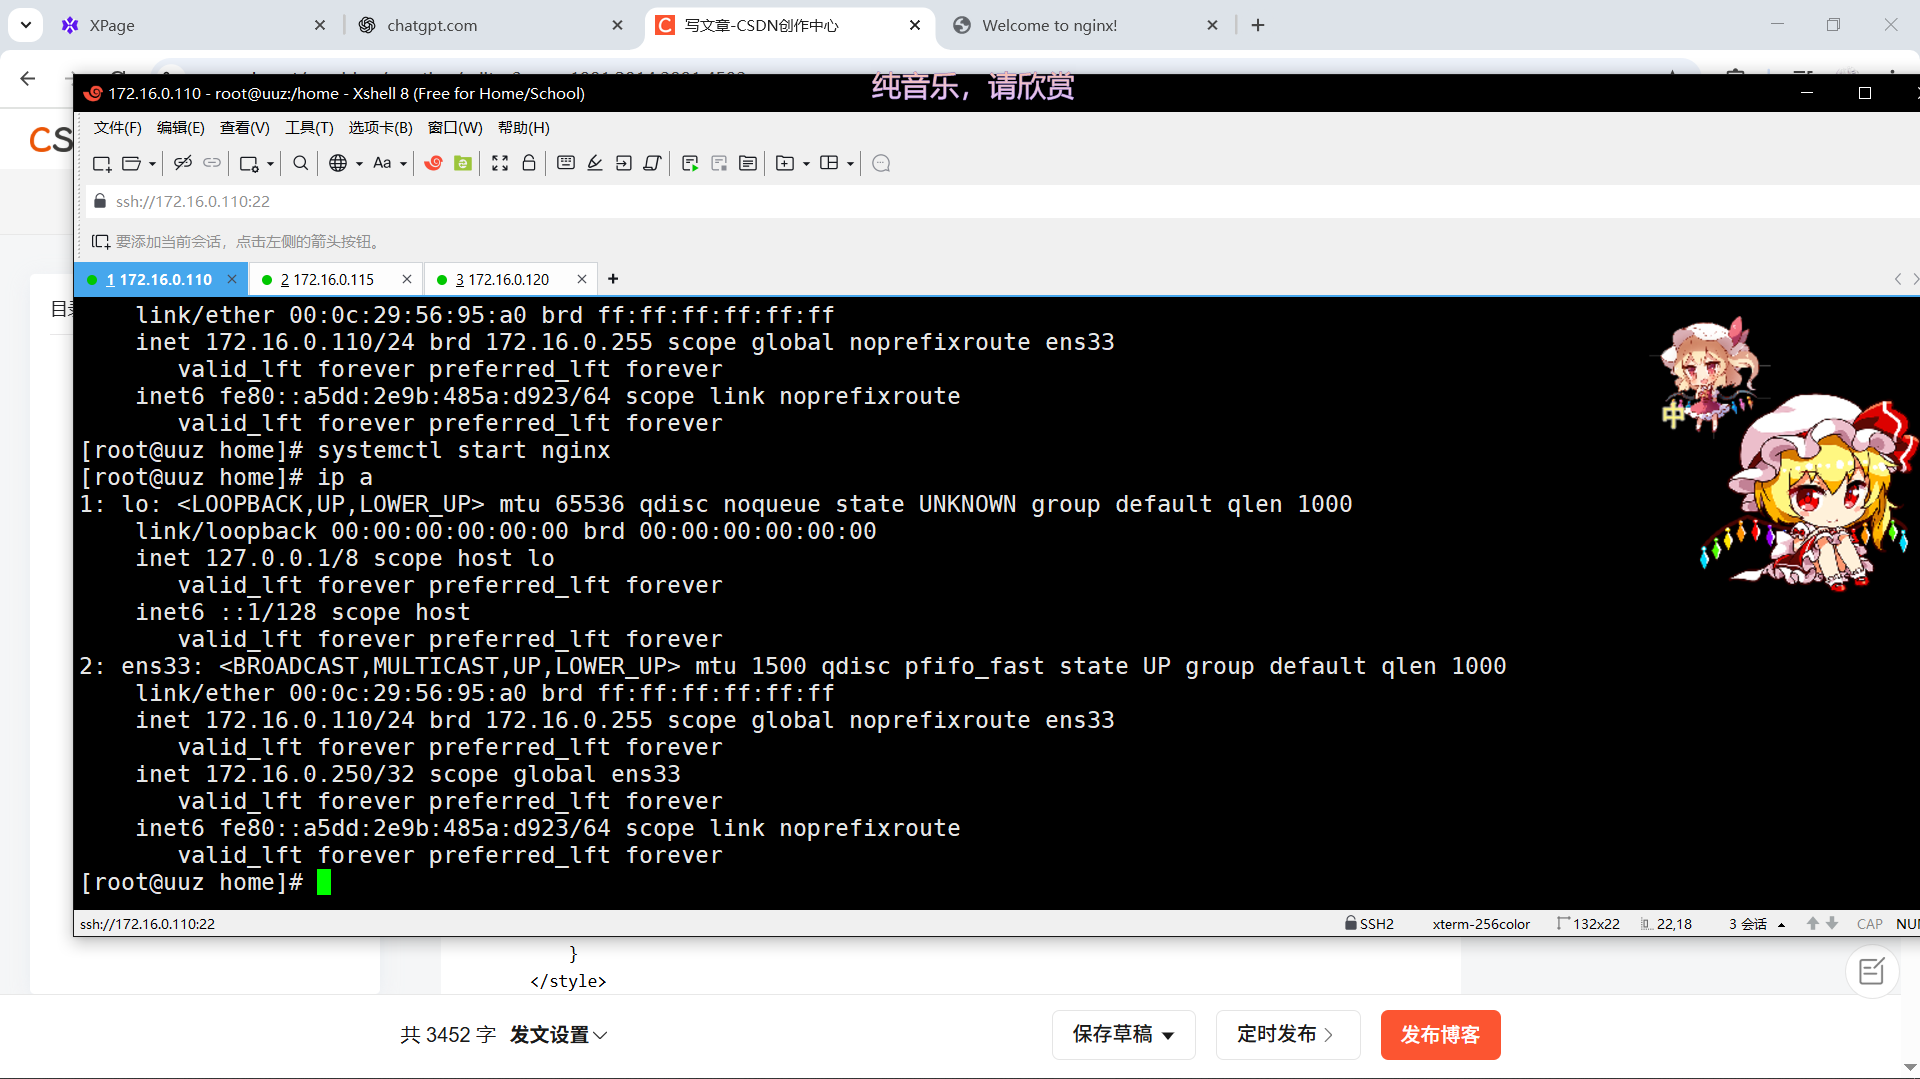
systemctl start keepalived
systemctl enable keepalived
5.1 验证 VIP
ip a
-
Master 应显示 VIP
172.16.0.250。
六、高可用测试
首先更改一下nginx的index页面以便于区分
#nginx1
vim /usr/local/nginx/html/index.html
<!DOCTYPE html>
<html>
<head>
<title>Welcome to nginx!</title>
<style>
body {
width: 35em;
margin: 0 auto;
font-family: Tahoma, Verdana, Arial, sans-serif;
}
</style>
</head>
<body>
<h1>This is web1 nginx!</h1>
<p>If you see this page, the nginx web server is successfully installed and
working. Further configuration is required.</p>
<p>For online documentation and support please refer to
<a href="http://nginx.org/">nginx.org</a>.<br/>
Commercial support is available at
<a href="http://nginx.com/">nginx.com</a>.</p>
<p><em>Thank you for using nginx.</em></p>
</body>
</html>
systemctl restart nginx
#nginx2
vim /usr/local/nginx/html/index/html
<!DOCTYPE html>
<html>
<head>
<title>Welcome to nginx!</title>
<style>
body {
width: 35em;
margin: 0 auto;
font-family: Tahoma, Verdana, Arial, sans-serif;
}
</style>
</head>
<body>
<h1>This is web2 nginx!</h1>
<p>If you see this page, the nginx web server is successfully installed and
working. Further configuration is required.</p>
<p>For online documentation and support please refer to
<a href="http://nginx.org/">nginx.org</a>.<br/>
Commercial support is available at
<a href="http://nginx.com/">nginx.com</a>.</p>
<p><em>Thank you for using nginx.</em></p>
</body>
</html>
systemctl restart nginx
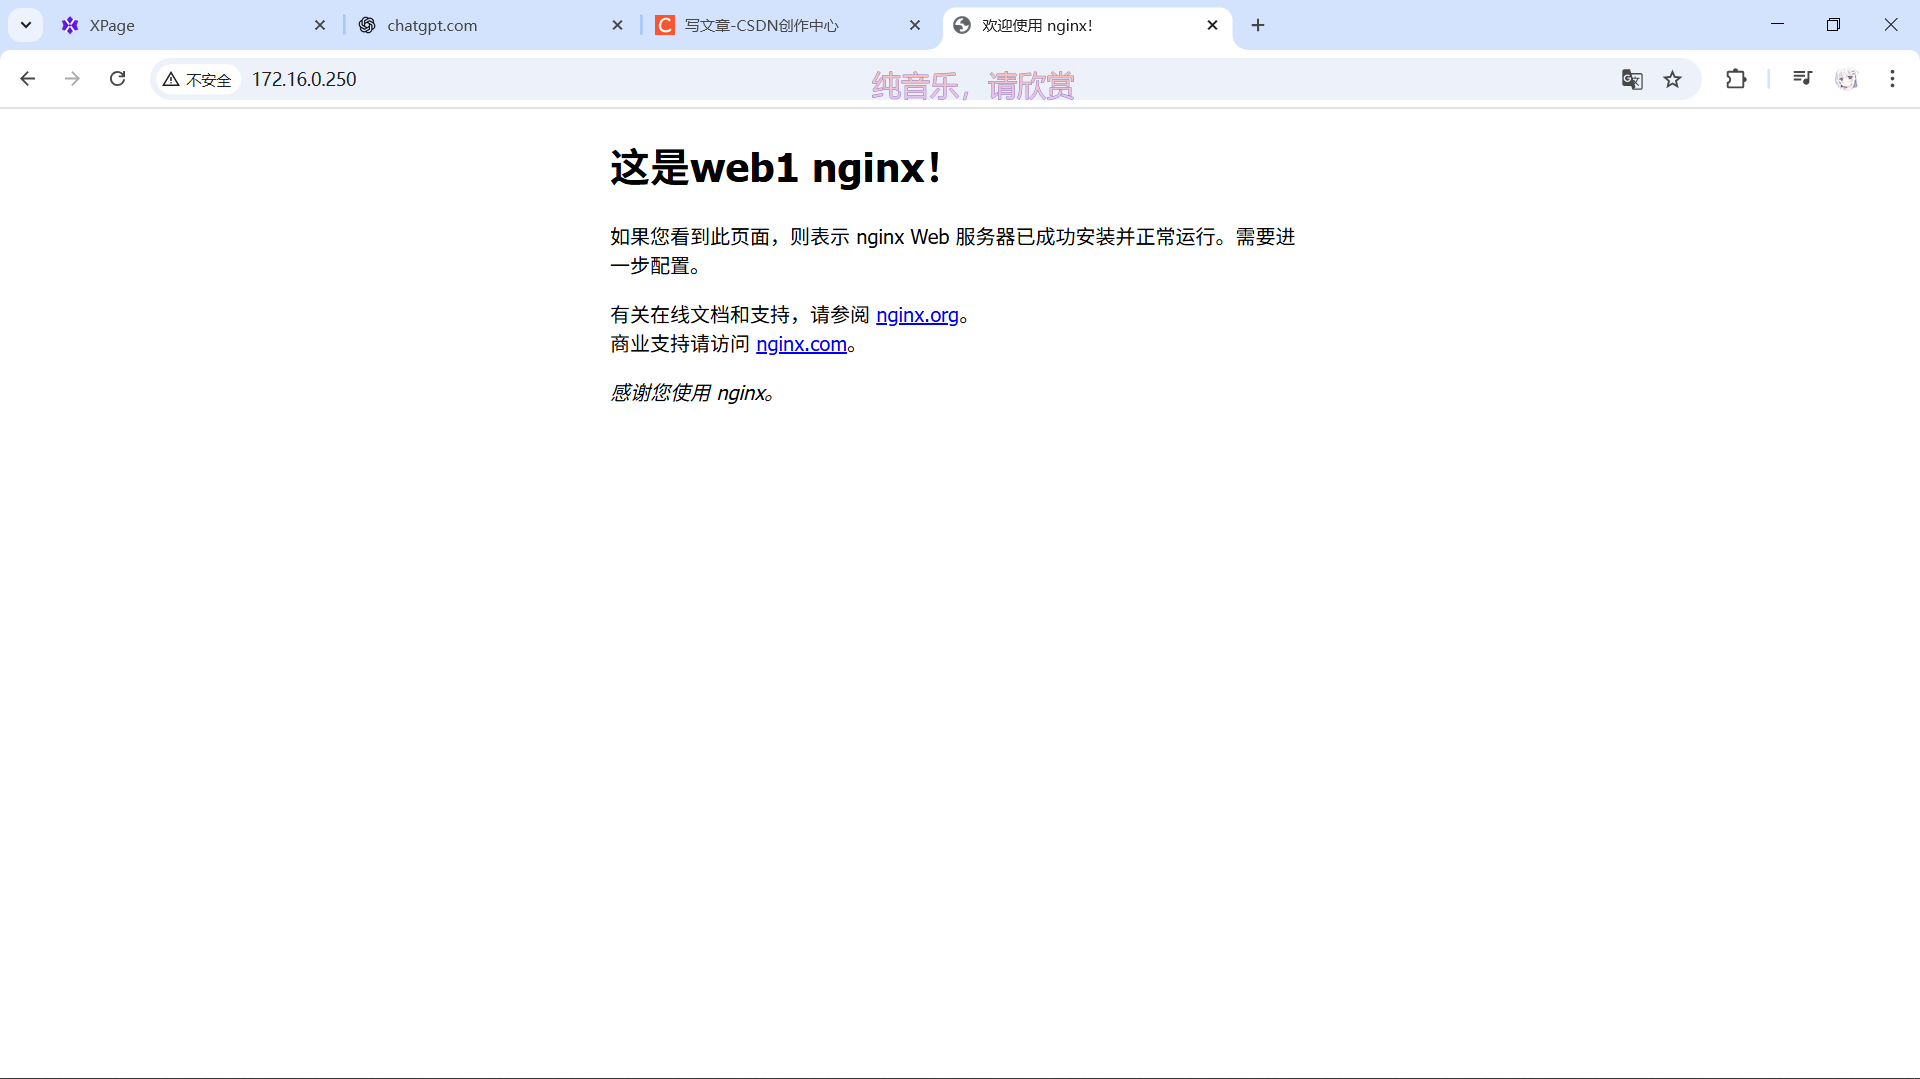
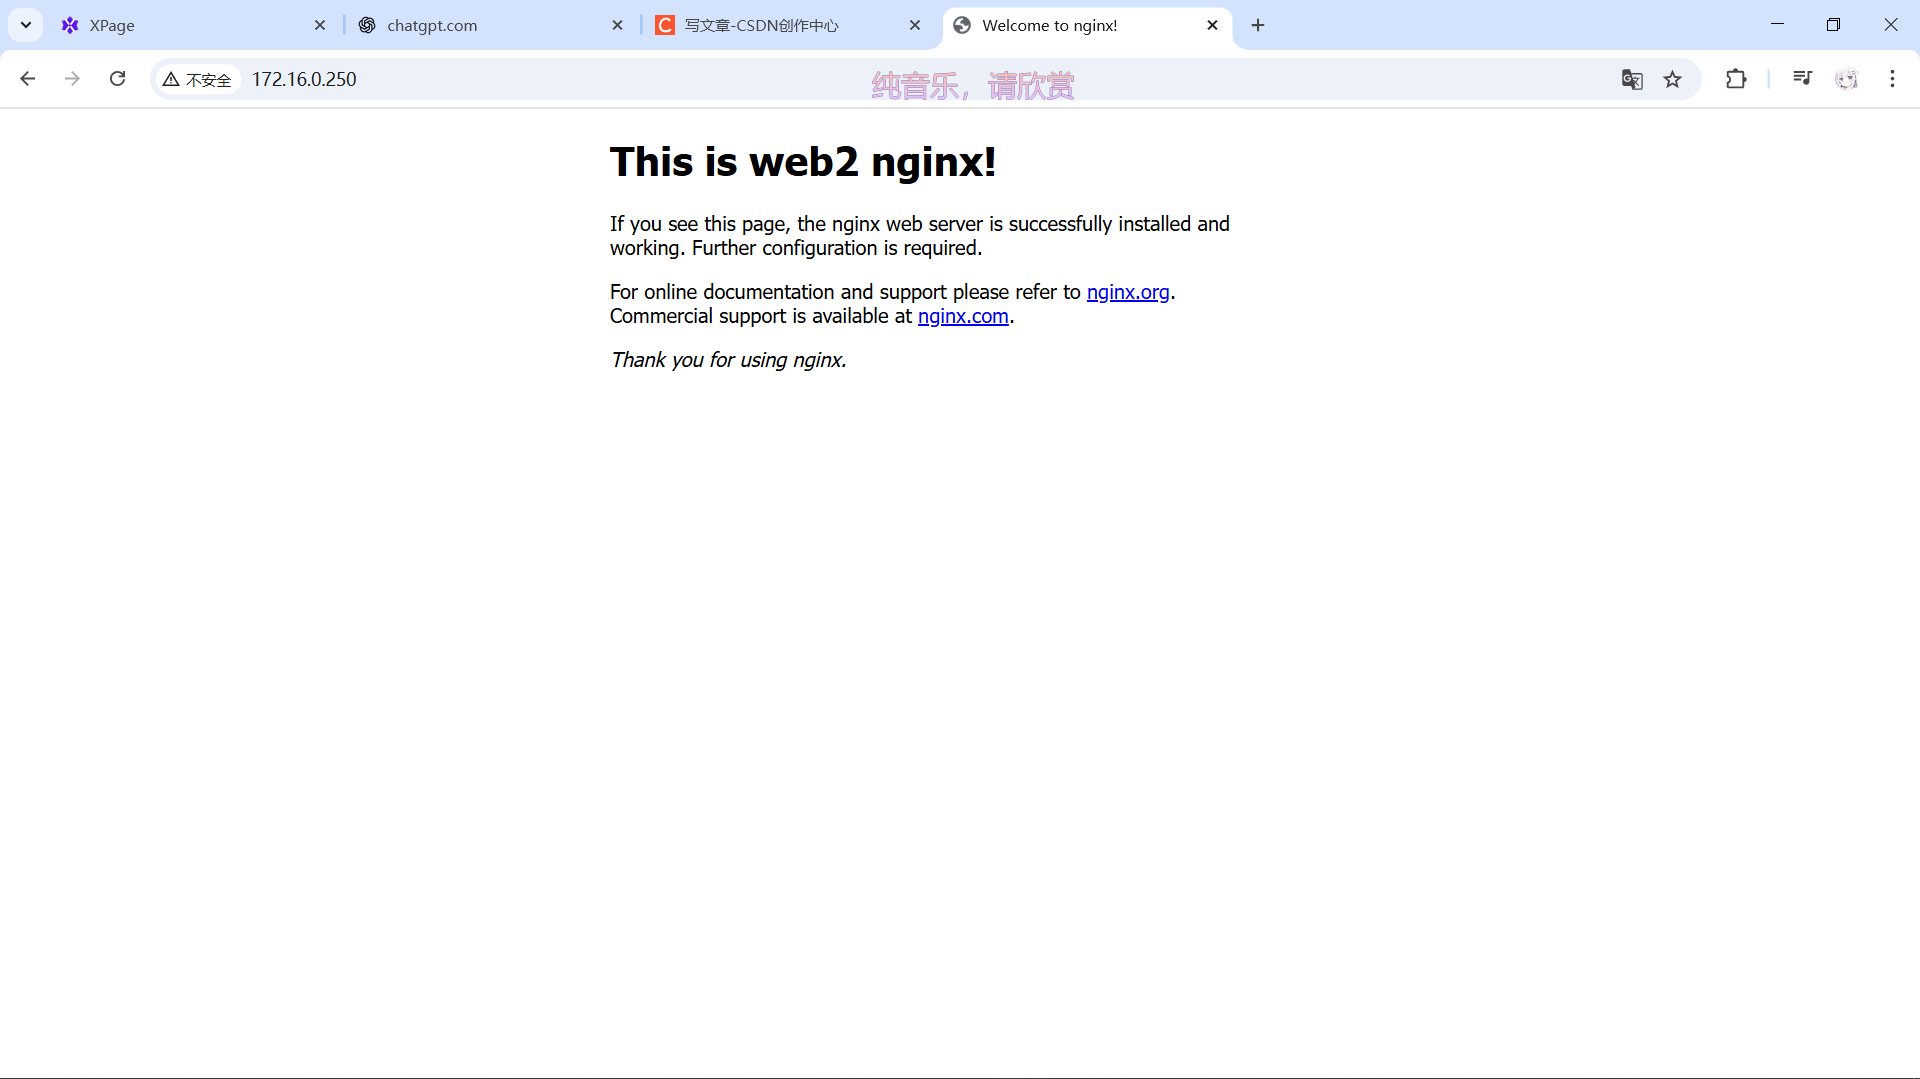
访问 VIP:
http://172.16.0.250
-
应显示 Server1 页面。
停止 Master Nginx 或 Keepalived:
systemctl stop nginx
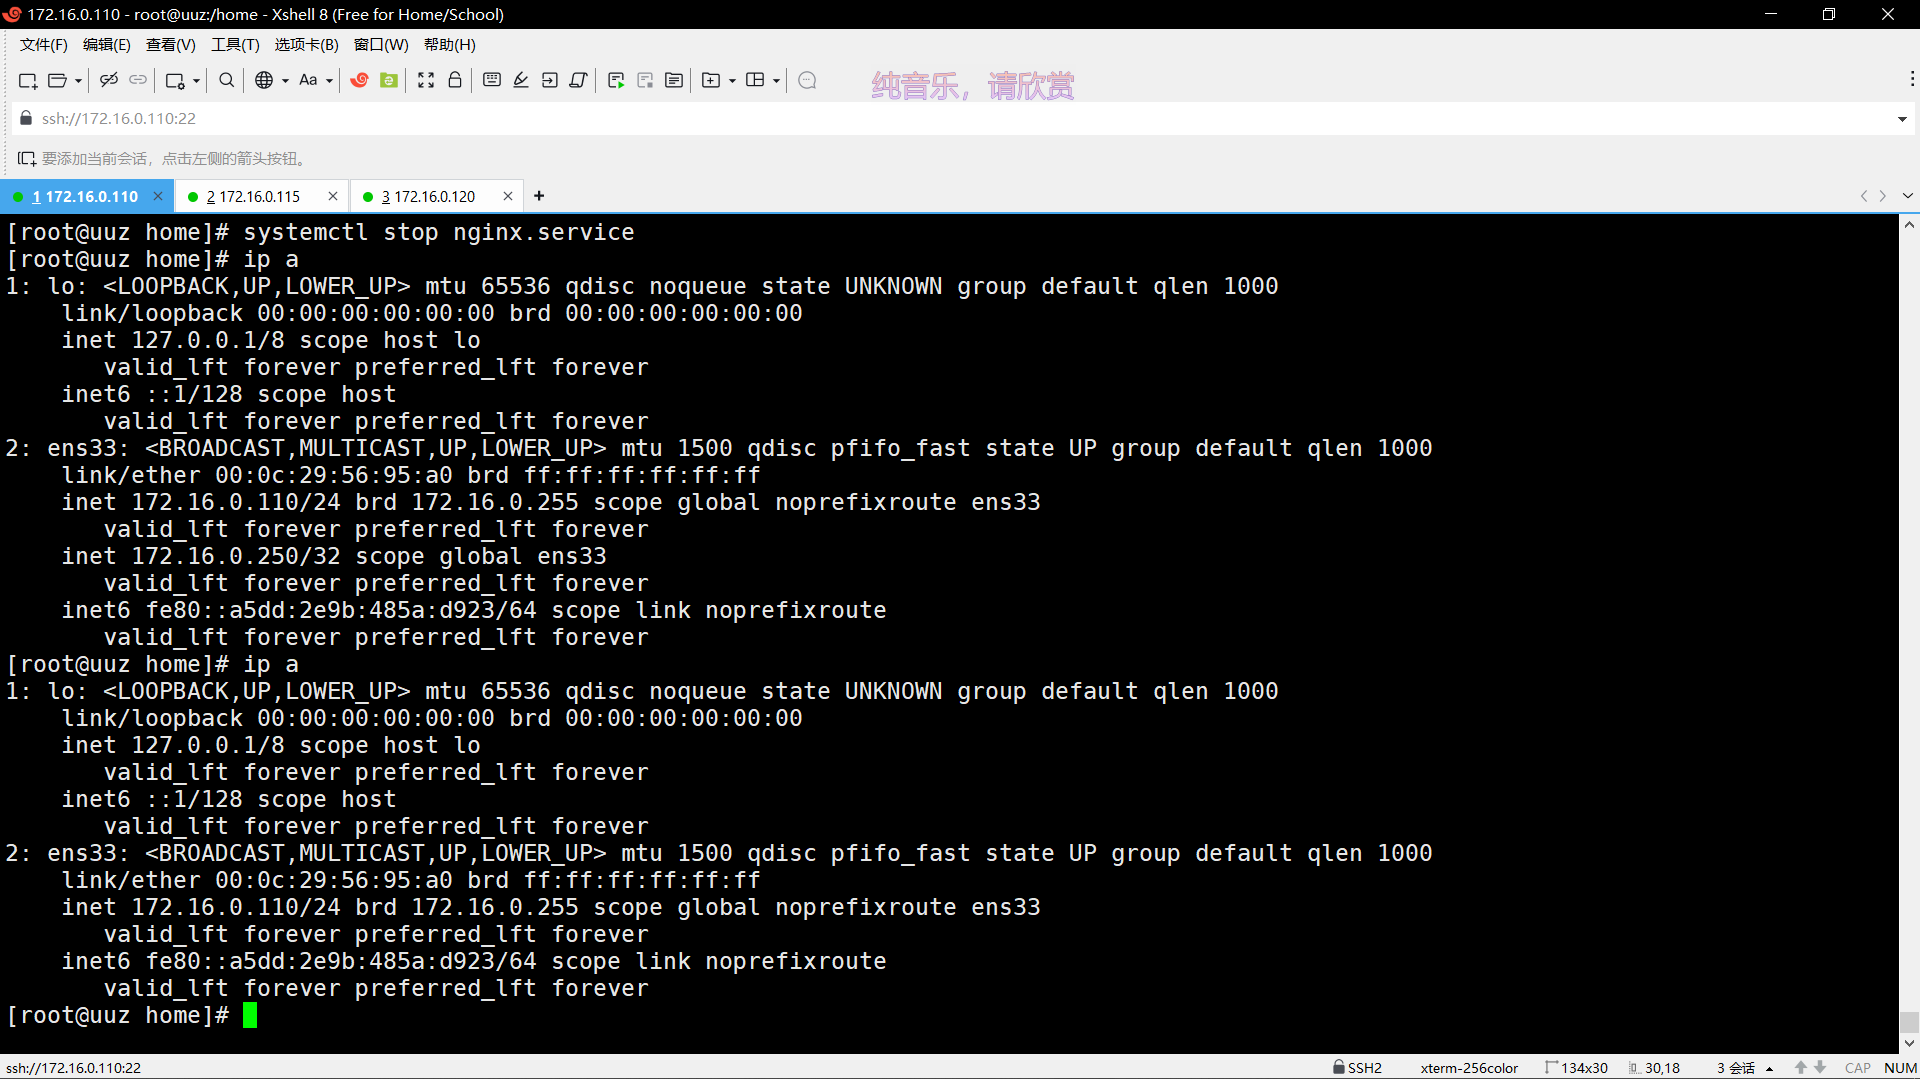
Backup 接管 VIP:
ip a
-
VIP 切换到 Backup。
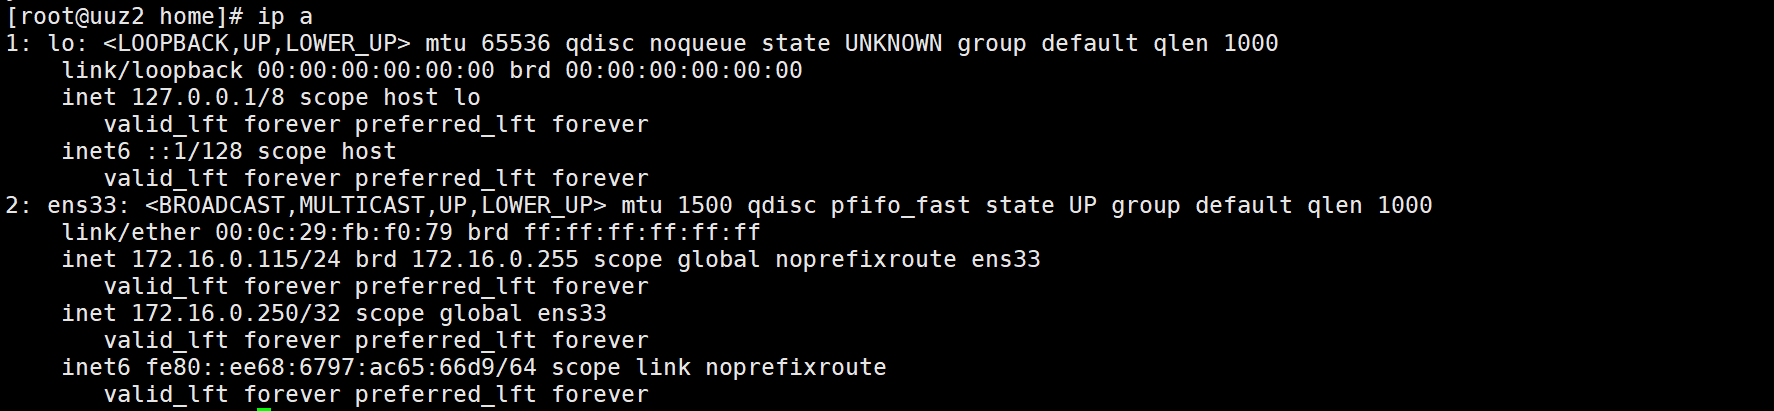
再次访问 VIP:
http://172.16.0.250
-
显示 Server2 页面,验证高可用。
![]()
七、注意事项
-
VIP 必须与服务器处于同一网段,避免 IP 冲突。
-
可以增加
nopreempt控制 Master 恢复是否抢回 VIP。 -
健康检查脚本应尽量检查 HTTP 响应,而非仅仅进程。
-
防火墙需允许 HTTP 流量:
firewall-cmd --permanent --add-service=http
firewall-cmd --reload
-
advert_int不宜过低,避免网络抖动。
八、总结
通过以上步骤,已成功搭建 Nginx + Keepalived 高可用环境:
-
客户端访问 VIP,无需关心哪台服务器提供服务。
-
当 Master 异常时,Backup 自动接管 VIP。
-
健康检查脚本可确保只有正常运行的节点提供服务。
这种 HA 架构可扩展到多台 Nginx 节点,并结合 负载均衡 提高整体服务稳定性。


 3779
3779

 被折叠的 条评论
为什么被折叠?
被折叠的 条评论
为什么被折叠?
 到【灌水乐园】发言


