


RabbitMQ是流行的开源消息队列系统,用erlang语言开发。在项目中,将一些无需即时返回且耗时的操作提取出来,进行了异步处理,需要用到RabbitMQ
没有找到一篇完整的文章介绍Spring如何整合Rabbitmq应用,琢磨一天搞出的一个入门的demo与伙伴们分享.
第一步linux环境下安装rabbitMQ,小弟用的是ubantu,不想浪费太多时间这种安装上
sudo apt-get install rabbitmq-server
默认启动端口5672 测试账户guest 密码guest
官方常用命令,想更改用户的可以参考,这里不作详细说明http://www.rabbitmq.com/man/rabbitmqctl.1.man.html
也可以省去安装115.28.141.137个人私服已配置好
第二步添加依赖包
|
1
2
3
4
5
6
7
8
9
10
11
|
<dependency>
<groupId>org.springframework.amqp</groupId>
<artifactId>spring-rabbit</artifactId>
<version>
1.3
.
5
.RELEASE</version>
</dependency>
<dependency>
<groupId>commons-lang</groupId>
<artifactId>commons-lang</artifactId>
<version>
2.6
</version>
</dependency>
|
第三步配置生产者工程服务配置
|
1
2
3
4
5
6
7
8
9
10
11
12
13
14
15
16
17
18
19
20
21
22
23
24
25
26
27
28
29
30
31
32
33
34
35
36
37
38
39
40
41
42
43
44
45
46
47
48
49
50
51
|
<?xml version=
"1.0"
encoding=
"UTF-8"
?>
<beans xmlns=
"http://www.springframework.org/schema/beans"
xmlns:context=
"http://www.springframework.org/schema/context"
xmlns:xsi=
"http://www.w3.org/2001/XMLSchema-instance"
xmlns:task=
"http://www.springframework.org/schema/task"
xmlns:rabbit=
"http://www.springframework.org/schema/rabbit"
xsi:schemaLocation="http:
//www.springframework.org/schema/beans
http:
//www.springframework.org/schema/beans/spring-beans-3.0.xsd
http:
//www.springframework.org/schema/context
http:
//www.springframework.org/schema/context/spring-context.xsd
http:
//www.springframework.org/schema/integration/ip
http:
//www.springframework.org/schema/integration/ip/spring-integration-ip-2.0.xsd
http:
//www.springframework.org/schema/integration http://www.springframework.org/schema/integration/spring-integration.xsd
http:
//www.springframework.org/schema/task http://www.springframework.org/schema/task/spring-task-3.0.xsd
http:
//www.springframework.org/schema/beans http://www.springframework.org/schema/beans/spring-beans-3.0.xsd
http:
//www.springframework.org/schema/rabbit
http:
//www.springframework.org/schema/rabbit/spring-rabbit-1.0.xsd
">
<!-- 引入jdbc配置文件 -->
<context:property-placeholder location=
"classpath:conf/jdbc.properties"
/>
<!-- 扫描文件(自动将servicec层注入) -->
<context:component-scan base-
package
=
"mq.service"
/>
<!-- 连接服务配置 -->
<rabbit:connection-factory id=
"connectionFactory"
host=
"115.28.141.137"
username=
"guest"
password=
"guest"
port=
"5672"
/>
<rabbit:admin connection-factory=
"connectionFactory"
/>
<!-- queue 队列声明 -->
<rabbit:queue id=
"queue_one"
durable=
"true"
auto-delete=
"false"
exclusive=
"false"
name=
"queue_one"
/>
<!-- exchange queue binging key 绑定 -->
<rabbit:direct-exchange name=
"my-mq-exchange"
durable=
"true"
auto-delete=
"false"
id=
"my-mq-exchange"
>
<rabbit:bindings>
<rabbit:binding queue=
"queue_one"
key=
"queue_one_key"
/>
</rabbit:bindings>
</rabbit:direct-exchange>
<!-- spring amqp默认的是jackson
的一个插件,目的将生产者生产的数据转换为json存入消息队列,由于fastjson的速度快于jackson,这里替换为fastjson的一个实现
-->
<bean id=
"jsonMessageConverter"
class
=
"mq.util.FastJsonMessageConverter"
></bean>
<!-- spring template声明-->
<rabbit:template exchange=
"my-mq-exchange"
id=
"amqpTemplate"
connection-factory=
"connectionFactory"
message-converter=
"jsonMessageConverter"
/>
</beans>
|
FastJsonMessageConverter 类代码如下
|
1
2
3
4
5
6
7
8
9
10
11
12
13
14
15
16
17
18
19
20
21
22
23
24
25
26
27
28
29
30
31
32
33
34
35
36
37
38
39
40
41
42
43
44
45
46
47
48
49
50
51
52
53
54
55
56
57
58
59
60
61
62
63
64
65
66
67
|
package
mq.util;
import
java.io.UnsupportedEncodingException;
import
org.springframework.amqp.core.Message;
import
org.springframework.amqp.core.MessageProperties;
import
org.springframework.amqp.support.converter.AbstractMessageConverter;
import
org.springframework.amqp.support.converter.MessageConversionException;
import
com.alibaba.druid.support.logging.Log;
import
com.alibaba.druid.support.logging.LogFactory;
import
com.alibaba.fastjson.JSON;
public
class
FastJsonMessageConverter
extends
AbstractMessageConverter {
private
static
Log log = LogFactory.getLog(FastJsonMessageConverter.
class
);
public
static
final
String DEFAULT_CHARSET =
"UTF-8"
;
private
volatile
String defaultCharset = DEFAULT_CHARSET;
public
FastJsonMessageConverter() {
super
();
//init();
}
public
void
setDefaultCharset(String defaultCharset) {
this
.defaultCharset = (defaultCharset !=
null
) ? defaultCharset
: DEFAULT_CHARSET;
}
public
Object fromMessage(Message message)
throws
MessageConversionException {
return
null
;
}
@SuppressWarnings
(
"unchecked"
)
public
<T> T fromMessage(Message message,T t) {
String json =
""
;
try
{
json =
new
String(message.getBody(),
"UTF-8"
);
}
catch
(UnsupportedEncodingException e) {
e.printStackTrace();
}
return
(T) JSON.parseObject(json, t.getClass());
}
protected
Message createMessage(Object objectToConvert,
MessageProperties messageProperties)
throws
MessageConversionException {
byte
[] bytes =
null
;
try
{
String jsonString = JSON.toJSONString(objectToConvert);
bytes = jsonString.getBytes(
this
.defaultCharset);
}
catch
(UnsupportedEncodingException e) {
throw
new
MessageConversionException(
"Failed to convert Message content"
, e);
}
messageProperties.setContentType(MessageProperties.CONTENT_TYPE_JSON);
messageProperties.setContentEncoding(
this
.defaultCharset);
if
(bytes !=
null
) {
messageProperties.setContentLength(bytes.length);
}
return
new
Message(bytes, messageProperties);
}
}
|
生产者代码Producer
|
1
2
3
4
5
6
7
8
9
10
11
12
13
14
15
16
17
18
19
20
|
<p>
package
mq.service;
</p>
<p>
import
org.springframework.amqp.core.AmqpTemplate;
import
org.springframework.beans.factory.annotation.Autowired;
import
org.springframework.stereotype.Service;
@Service
public
class
ProducerMq {
@Autowired
private
AmqpTemplate amqpTemplate;
public
void
sendDataToCrQueue(Object obj) {
amqpTemplate.convertAndSend(
"queue_one_key"
, obj);
}
}
</p>
|
第四步配置消费者服务工程配置
|
1
2
3
4
5
6
7
8
9
10
11
12
13
14
15
16
17
18
19
20
21
22
23
24
25
26
27
28
29
30
31
32
33
34
35
36
37
38
39
40
41
42
43
|
<?xml version=
"1.0"
encoding=
"UTF-8"
?>
<beans xmlns=
"http://www.springframework.org/schema/beans"
xmlns:context=
"http://www.springframework.org/schema/context"
xmlns:xsi=
"http://www.w3.org/2001/XMLSchema-instance"
xmlns:task=
"http://www.springframework.org/schema/task"
xmlns:rabbit=
"http://www.springframework.org/schema/rabbit"
xsi:schemaLocation="http:
//www.springframework.org/schema/beans
http:
//www.springframework.org/schema/beans/spring-beans-3.0.xsd
http:
//www.springframework.org/schema/context
http:
//www.springframework.org/schema/context/spring-context.xsd
http:
//www.springframework.org/schema/integration/ip
http:
//www.springframework.org/schema/integration/ip/spring-integration-ip-2.0.xsd
http:
//www.springframework.org/schema/integration http://www.springframework.org/schema/integration/spring-integration.xsd
http:
//www.springframework.org/schema/task http://www.springframework.org/schema/task/spring-task-3.0.xsd
http:
//www.springframework.org/schema/beans http://www.springframework.org/schema/beans/spring-beans-3.0.xsd
http:
//www.springframework.org/schema/rabbit
http:
//www.springframework.org/schema/rabbit/spring-rabbit-1.0.xsd
">
<!-- 引入jdbc配置文件 -->
<context:property-placeholder location=
"classpath:conf/jdbc.properties"
/>
<!-- 扫描文件(自动将servicec层注入) -->
<context:component-scan base-
package
=
"mq.service"
/>
<task:executor id=
"taskExecutor"
pool-size=
"1-4"
queue-capacity=
"128"
/>
<!-- 连接服务配置 -->
<rabbit:connection-factory id=
"connectionFactory"
host=
"115.28.141.137"
username=
"guest"
password=
"guest"
port=
"5672"
/>
<rabbit:admin connection-factory=
"connectionFactory"
/>
<!-- queue 队列声明-->
<rabbit:queue id=
"queue_one"
durable=
"true"
auto-delete=
"false"
exclusive=
"false"
name=
"queue_one"
/>
<!-- exchange queue binging key 绑定 -->
<rabbit:direct-exchange name=
"my-mq-exchange"
durable=
"true"
auto-delete=
"false"
id=
"my-mq-exchange"
>
<rabbit:bindings>
<rabbit:binding queue=
"queue_one"
key=
"queue_one_key"
/>
</rabbit:bindings>
</rabbit:direct-exchange>
<bean id=
"queueOneLitener"
class
=
"mq.service.QueueOneLitener"
/>
<!-- queue litener 观察 监听模式 当有消息到达时会通知监听在对应的队列上的监听对象-->
<rabbit:listener-container connection-factory=
"connectionFactory"
acknowledge=
"auto"
task-executor=
"taskExecutor"
>
<rabbit:listener queues=
"queue_one"
ref=
"queueOneLitener"
/> <span></span> </rabbit:listener-container>
</beans>
|
监听器代码queueOneLitener
|
1
2
3
4
5
6
7
8
9
10
11
|
package
mq.service;
import
org.springframework.amqp.core.Message;
import
org.springframework.amqp.core.MessageListener;
public
class
QueueOneLitener
implements
MessageListener{
public
void
onMessage(Message message) {
System.out.println(
" data :"
+
new
String(message.getBody()));
}
}
|
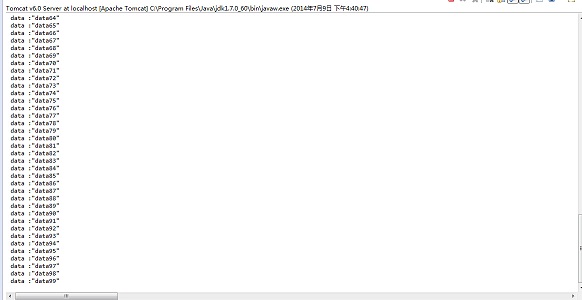
第五步测试
消费者端控制层生产数据
控制层Controller
|
1
2
3
4
5
6
7
8
9
10
11
12
13
14
15
16
17
18
19
20
21
22
23
|
package
mq.controller;
import
javax.annotation.Resource;
import
mq.service.ProducerMq;
import
org.springframework.stereotype.Controller;
import
org.springframework.web.bind.annotation.RequestMapping;
@Controller
public
class
MessageController {
@Resource
private
ProducerMq producer;
@RequestMapping
(
"/producer"
)
public
String producer()
throws
Exception {
for
(
int
i=
0
;i<
100
;i++){
producer.sendDataToCrQueue(
"data"
+i);
}
return
"index"
;
}
}
|
运行结果


 1219
1219

 被折叠的 条评论
为什么被折叠?
被折叠的 条评论
为什么被折叠?
 到【灌水乐园】发言


