


 本文介绍SpringMVC中处理表单提交数据的三种方法,重点推荐并演示了使用自定义Java类型参数配合@ModelAttribute注解的方式。
来源:https://blog.youkuaiyun.com/yh_zeng2/article/details/75172990
表单提交的数据也就是请求数据,分为Get和Post两种方式提交。
Controller中有三种方式获取表单数据:
- Controller的方法,添加HttpServletRequst类型入参,通过HttpServletRequst.getParameter()获取请求数据
- Controller的方法,添加对应表单字段name的参数,有几个表单字段就添加多少个对应的入参,如下
- @RequestMapping(value="/user/save", method=RequestMethod.POST)
- private String doSave(@RequestParam("userName") String userName, @RequestParam("age") Integer age, HttpSession session){
- Controller的方法,添加自定义Java类型的入参,并添加@ModelAttribute注解(实际上,可以不添加@ModelAttribute注解) ,由这个入参对象接收表单提交的数据,如下
- @RequestMapping(value="/user/save", method=RequestMethod.POST)
- private String doSave(@ModelAttribute User user, HttpSession session){
从上述描述,可以看出这几种方式的优缺点。
在这里,我推荐使用第三种方式,添加自定义Java类型的入参
下面我们就看看demo,如何使用第三种方式实现接收表单提交的数据
处理表单提交的Controller,FormSubmitController.java:
- package edu.mvcdemo.controller;
- import javax.servlet.http.HttpSession;
- import org.apache.commons.lang.builder.ReflectionToStringBuilder;
- import org.apache.commons.lang.math.RandomUtils;
- import org.apache.log4j.Logger;
- import org.springframework.context.annotation.Scope;
- import org.springframework.stereotype.Controller;
- import org.springframework.web.bind.annotation.ModelAttribute;
- import org.springframework.web.bind.annotation.PathVariable;
- import org.springframework.web.bind.annotation.RequestMapping;
- import org.springframework.web.bind.annotation.RequestMethod;
- import edu.mvcdemo.model.User;
- /**
- * @编写人: yh.zeng
- * @编写时间:2017-7-15 下午12:14:41
- * @文件描述: 表单提交demo
- */
- @Controller
- @Scope("singleton") //只实例化一个bean对象(即每次请求都使用同一个bean对象),默认是singleton
- public class FormSubmitController {
- private Logger logger = Logger.getLogger(FormSubmitController.class);
- @RequestMapping(value="/user/view/{userId}", method=RequestMethod.GET)
- private String viewUser(@PathVariable("userId") String userId){
- return "user/view";
- }
- @RequestMapping(value="/admin/user", method=RequestMethod.GET, params="add")
- private String addUser(){
- return "user/add";
- }
- @RequestMapping(value="/user/save", method=RequestMethod.POST)
- private String doSave(@ModelAttribute User user, HttpSession session){
- user.setNo(RandomUtils.nextInt(1000)); //模拟数据库持久化
- /**
- * 进行数据库的持久化,省略
- */
- logger.info(ReflectionToStringBuilder.toString(user));
- session.setAttribute("user", user);
- return "redirect:/user/view/"+user.getNo();
- }
- }
添加用户页面add.jsp:
- <%@ page language="java" contentType="text/html; charset=UTF-8"
- pageEncoding="UTF-8"%>
- <!DOCTYPE html PUBLIC "-//W3C//DTD HTML 4.01 Transitional//EN" "http://www.w3.org/TR/html4/loose.dtd">
- <html>
- <head>
- <meta http-equiv="Content-Type" content="text/html; charset=UTF-8">
- <title>添加用户</title>
- </head>
- <body>
- <form action="${pageContext.request.contextPath}/user/save" method="post">
- 用户名:<input type="text" name="userName"/> <br><br>
- 年龄:<input type="text" name="age"/> <br><br>
- <input type="submit" value="提交"/>
- </form>
- </body>
- </html>
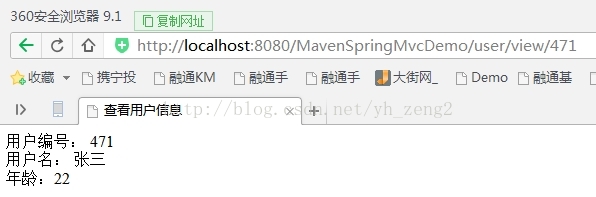
查看用户信息页面view.jsp:
- <%@ page language="java" contentType="text/html; charset=UTF-8"
- pageEncoding="UTF-8"%>
- <!DOCTYPE html PUBLIC "-//W3C//DTD HTML 4.01 Transitional//EN" "http://www.w3.org/TR/html4/loose.dtd">
- <html>
- <head>
- <meta http-equiv="Content-Type" content="text/html; charset=UTF-8">
- <title>查看用户信息</title>
- </head>
- <body>
- 用户编号: ${sessionScope.user.no} <br>
- 用户名: ${sessionScope.user.userName} <br>
- 年龄:${sessionScope.user.age}
- </body>
- </html>
Spring MVC配置的视图解析器:
- <bean class="org.springframework.web.servlet.view.InternalResourceViewResolver">
- <property name="prefix" value="/jsp/" />
- <property name="suffix" value=".jsp" />
- </bean>
效果:

点击【提交】之后,跳转到查看新添加的用户信息的页面
项目demo见https://github.com/zengyh/MavenSpringMvcDemo.git


 431
431

 被折叠的 条评论
为什么被折叠?
被折叠的 条评论
为什么被折叠?
 到【灌水乐园】发言


