


 本文详细介绍了如何在Spring Boot项目中进行远程调试,包括配置pom.xml以启用远程DEBUG模式,编写测试代码,使用IDEA打包jar,通过命令行启动项目,以及在IDEA中设置远程DEBUG配置。通过这些步骤,开发者可以方便地在远程服务器上进行程序调试,确保应用正常运行。
一、远程调试
将程序在测试环境中以debug模式启动,在本机使用IDEA在工程中设置断点进行调试。
二、环境搭建
2.1 编写测试代码
pom.xml
<?xml version="1.0" encoding="UTF-8"?>
<project xmlns="http://maven.apache.org/POM/4.0.0" xmlns:xsi="http://www.w3.org/2001/XMLSchema-instance"
	xsi:schemaLocation="http://maven.apache.org/POM/4.0.0 https://maven.apache.org/xsd/maven-4.0.0.xsd">
	<modelVersion>4.0.0</modelVersion>
	<parent>
		<groupId>org.springframework.boot</groupId>
		<artifactId>spring-boot-starter-parent</artifactId>
		<version>2.4.5</version>
		<relativePath/> <!-- lookup parent from repository -->
	</parent>
	<groupId>com.example</groupId>
	<artifactId>demo</artifactId>
	<version>0.0.1-SNAPSHOT</version>
	<name>demo</name>
	<description>Demo project for Spring Boot</description>
	<properties>
		<java.version>1.8</java.version>
	</properties>
	<dependencies>
		<dependency>
			<groupId>org.springframework.boot</groupId>
			<artifactId>spring-boot-starter-thymeleaf</artifactId>
		</dependency>
		<dependency>
			<groupId>org.springframework.boot</groupId>
			<artifactId>spring-boot-starter-web</artifactId>
		</dependency>

		<dependency>
			<groupId>org.projectlombok</groupId>
			<artifactId>lombok</artifactId>
			<optional>true</optional>
		</dependency>
		<dependency>
			<groupId>org.springframework.boot</groupId>
			<artifactId>spring-boot-starter-test</artifactId>
			<scope>test</scope>
		</dependency>
	</dependencies>

	<build>
		<plugins>
			<plugin>
				<groupId>org.springframework.boot</groupId>
				<artifactId>spring-boot-maven-plugin</artifactId>
				<configuration>
					<jvmArguments>-Xdebug -Xrunjdwp:transport=dt_socket,address=8081,server=y,suspend=n</jvmArguments>
				</configuration>
			</plugin>
		</plugins>
	</build>
</project>
其中配置jvmArguments参数 -Xdebug -Xrunjdwp:transport=dt_socket,address=8081,server=y,suspend=n
加了此配置后,打包后的项目发布服务器,可支持远程DEBUG;
具体参数详解:
-Xdebug 通知JVM工作在DEBUG模式下;
-Xrunjdwp 通知JVM使用(Java debug wire protocol)运行调试环境。该参数同时包含了一系列的调试选项; transport
指定了调试数据的传送方式,dt_socket是指用SOCKET模式,另有dt_shmem指用共享内存方式,其中,dt_shmem只适用于Windows平台;
address 调试服务器的端口号,客户端用来连接服务器的端口号; server=y/n VM 是否需要作为调试服务器执行;
suspend=y/n 是否在调试客户端建立连接之后启动 VM
application.yml
server:
  port: 8080
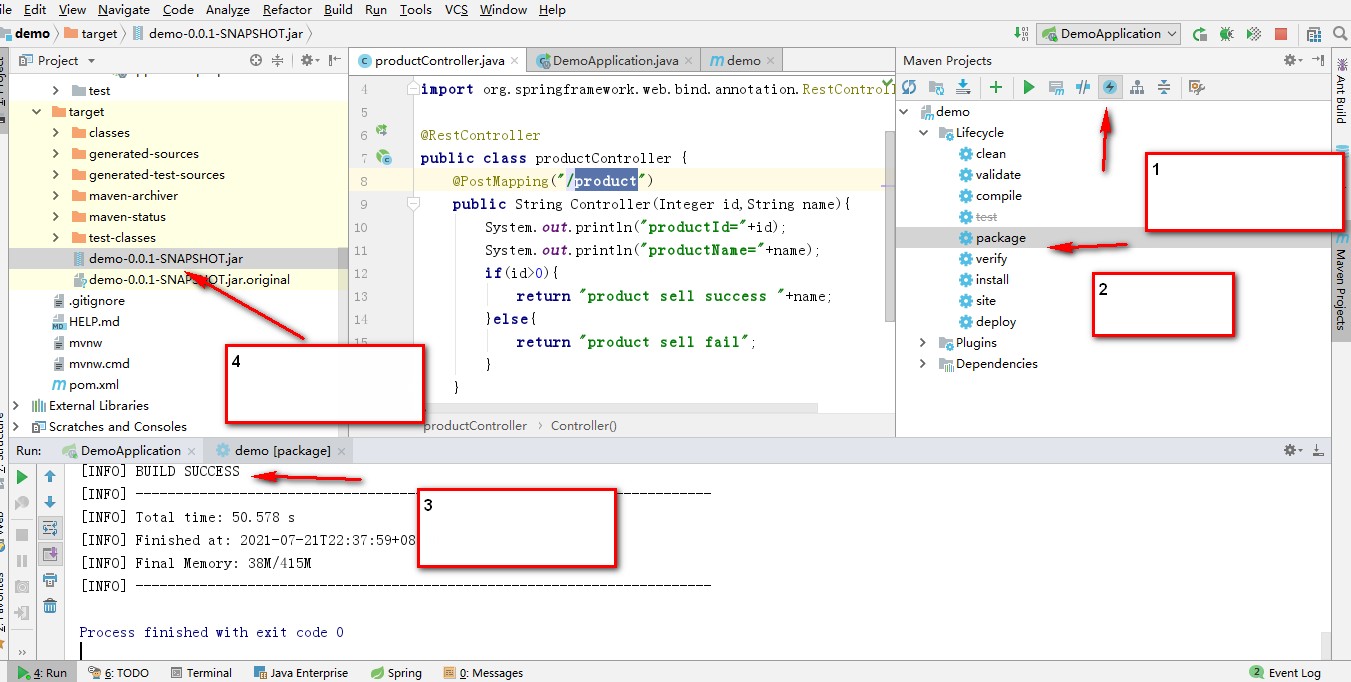
productController
package com.example.demo;

import org.springframework.web.bind.annotation.PostMapping;
import org.springframework.web.bind.annotation.RestController;

@RestController
public class productController {
    @PostMapping("/product")
    public String Controller(Integer id,String name){
        System.out.println("productId="+id);
        System.out.println("productName="+name);
        if(id>0){
            return "product sell success "+name;
        }else{
            return "product sell fail";
        }
    }
}
2.2 IDEA打包jar
测试IDEA项目,利用postman验证能否正常访问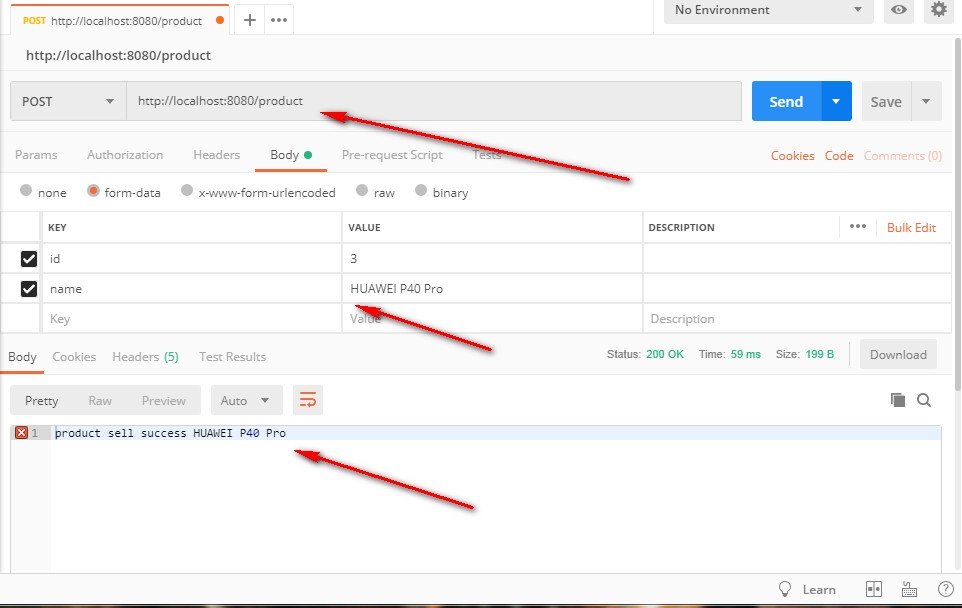
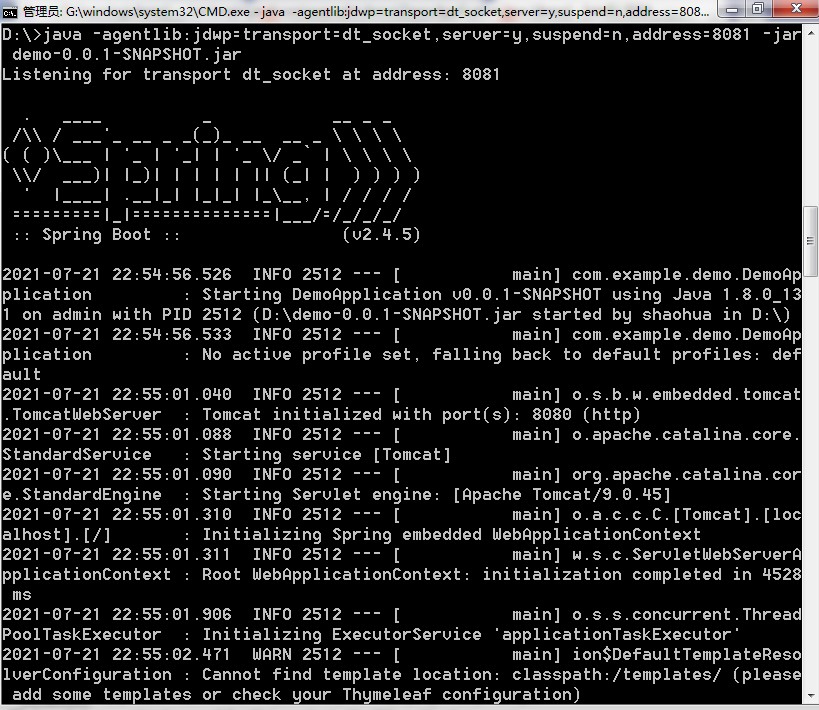
2.3 本地命令窗口启动项目
将打出的jar包放到本地磁盘D盘根目录,利用命令窗口启动本地项目
2.4 IDEA配置远程debug
2.4.1启动项下拉,选择 Edit Configurations…编辑配置
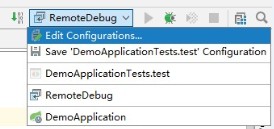
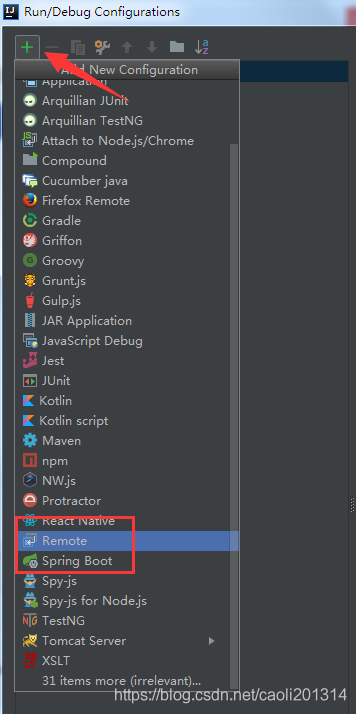
2.4.2 点击+,选择Remote,添加远程DEBUG配置
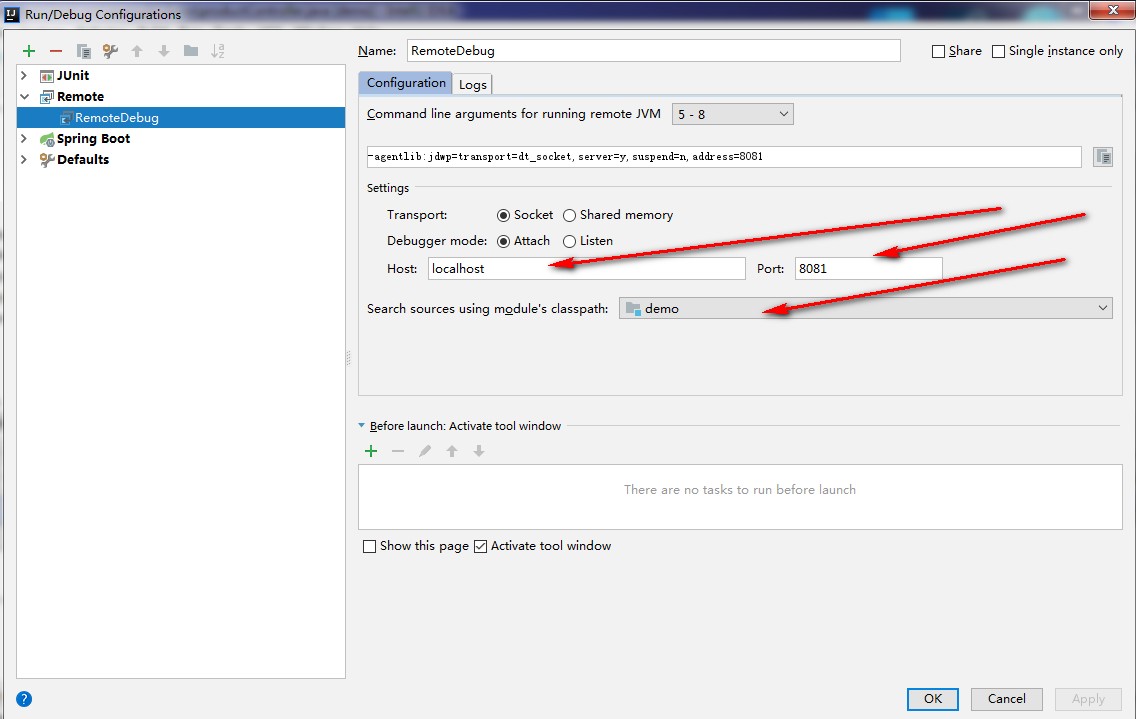
2.4.3 添加远程DEBUG配置项,Host和Port,配置后,点击Apply和OK按钮
三、IDEA远程DEBUG测试
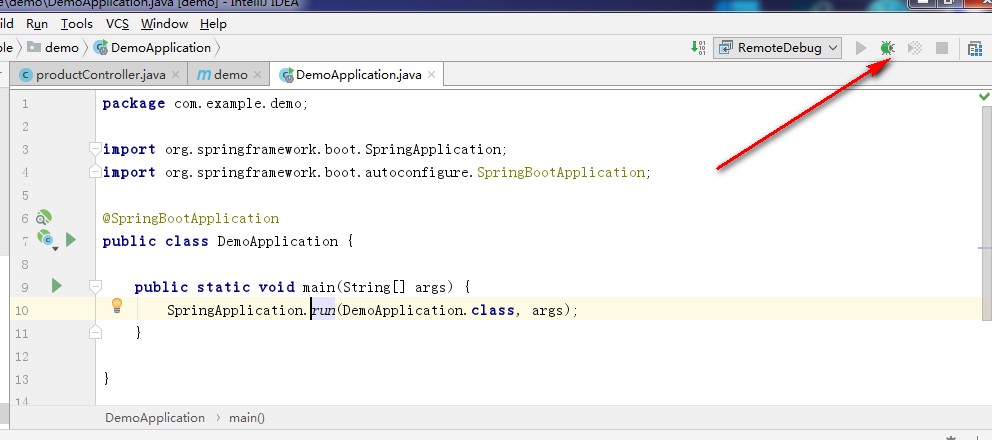
3.1 打断点,并启动RemoteDebug
3.2 利用postman测试
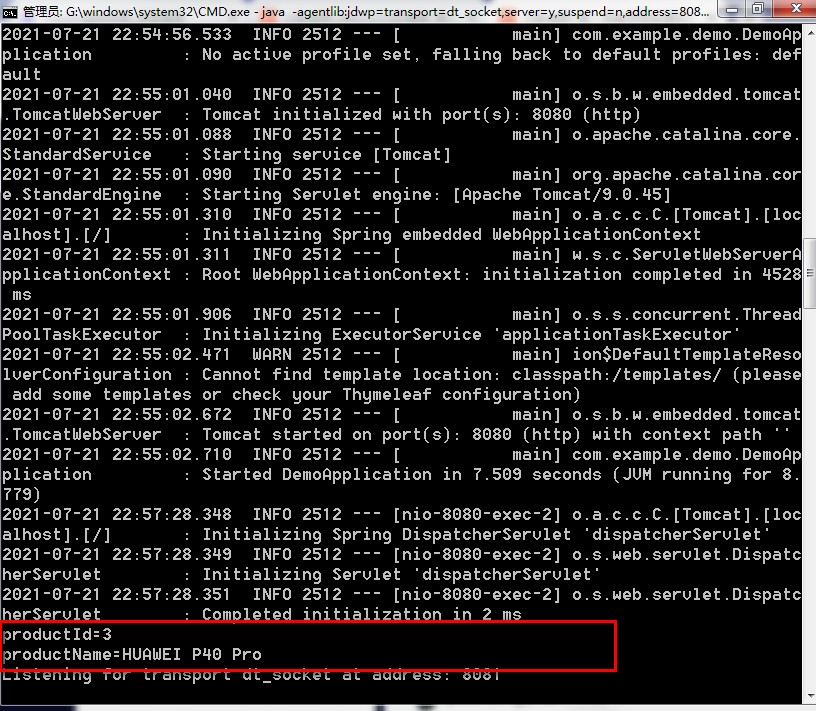
访问http://localhost:8080/product
发现进入断点
3.3 调试完成,cmd窗口显示执行结果
参考文章
https://blog.youkuaiyun.com/caoli201314/article/details/117914896


 1万+
1万+

 被折叠的 条评论
为什么被折叠?
被折叠的 条评论
为什么被折叠?
 到【灌水乐园】发言


