 Spring源码入门:从Servlet解析与实战开始


 本文介绍了如何通过学习Spring源码从基础的Servlet入手,包括Tomcat工作原理、web.xml配置详解,以及实战中创建Servlet、Listener和Filter的过程。后续将探讨Spring与Web容器的整合和核心启动机制。
前言
最近在学习Spring源码,断断续续的看了一阵子,感觉学的有些零散。好记性不如烂笔头,想要通过写系列文章的形式,来记录自己学习的心得体会。计划是从Spring核心的core、bean、context开始,逐渐到SpringBoot相关内容。希望自己能够坚持。
当下Java开发绕不过的一个东西就是Spring,绝大多数的Java应用都是基于Spring的开发。经过多年的发展,Spring生态内包含的内容也越来越多。网上各种教程一上来大都也是SSM开始,或是流行的SpringBoot。越来越高度的封装带来开发便利。
但是高度封装对学习原理并不是很友好,很多深层的东西都隐藏在层层代码中,让人不容易探寻,常常让人只知其然不知其所以然。我希望自己能够从最简单的内容开始,逐步学习,逐步抽丝剥茧,能真正理解、掌握Spring源码,
背景知识
Tomcat
Tomcat是常见的轻量应用服务器,它的结构可以简单化为Web服务器、Web容器、静态资源几部分。它主要负责三件事:
- 接收请求
- 处理请求
- 响应请求
其中,Web服务器主要负责接收请求、响应请求;Web容器中的Servlet则是负责处理请求,完成具体的业务逻辑。当然Tomcat内容不可能这么简单,但是我们可以先简单的这样理解,主要是明白Servlet在其中的作用。
web.xml
web.xml通常位于webapp/WEB-INF/,用以描述组成应用程序的servlet和其他组件、以及相关初始化参数等信息。常见的配置项有:
<?xml version="1.0" encoding="UTF-8"?>
<web-app xmlns="http://xmlns.jcp.org/xml/ns/javaee"
         xmlns:xsi="http://www.w3.org/2001/XMLSchema-instance"
         xsi:schemaLocation="http://xmlns.jcp.org/xml/ns/javaee http://xmlns.jcp.org/xml/ns/javaee/web-app_4_0.xsd"
         version="4.0">

    <!--监听器,会在一定条件下得到通知,触发逻辑-->
    <listener>
        <listener-class>cn.dingyufan.demo.listener.HelloListener</listener-class>
    </listener>

    <!--上下文参数-->
    <context-param>
        <param-name>myName</param-name>
        <param-value>dingyufan</param-value>
    </context-param>

    <!--过滤器,url-pattern都匹配的情况下,按自上而下的顺序依次过滤-->
    <filter>
        <filter-name>randomFilter</filter-name>
        <filter-class>cn.dingyufan.demo.filter.RandomFilter</filter-class>
    </filter>
    <!--过滤器的匹配规则-->
    <filter-mapping>
        <filter-name>randomFilter</filter-name>
        <url-pattern>/*</url-pattern>
    </filter-mapping>

    <!--servlet-->
    <servlet>
        <servlet-name>helloServlet</servlet-name>
        <servlet-class>cn.dingyufan.demo.servlet.HelloServlet</servlet-class>
    </servlet>
    <!--servlet对应的匹配规则,可以让应用服务器知道选择哪个Servlet-->
    <servlet-mapping>
        <servlet-name>helloServlet</servlet-name>
        <url-pattern>/*</url-pattern>
    </servlet-mapping>

</web-app>
复制代码
在应用服务器读取web.xml后,对其中内容的处理也是有顺序的:
- 首先为应用(application)创建自己的ServletContext,并将context-param存入ServletContext
- 创建listener实例,并在相应时机发出通知。常见的有ServletContextListener的实现类,会在ServletContext创建后得到通知,调用contextInitialized(event)方法
- 创建filter实例
- Servlet实例并不会在刚开始就初始化,而是在第一次接受到请求时初始化并相应请求。需要注意的是,即使请求被过滤器拦截了,这个Servlet还是会初始化实例。
servlet
说了这么多,终于到了今天的主角Servlet。很多人可能对Servlet只有一个模糊的概念,大概知道是怎么回事,但是很难描述。但是其实Servlet很简单,它本质上是在服务器软件中跑的一个程序。
我们来看javax.servlet包中Servlet接口源码,源码注释中描述的是:
A servlet is a small Java program that runs within a Web server.
Servlets receive and respond to requests from Web clients,
usually across HTTP, the HyperText Transfer Protocol.
Servlet接口定义了五个所有Servlet必须实现的方法
public interface Servlet {
    // 初始化Servlet调用
    public void init(ServletConfig config) throws ServletException;

    // 获取Servlet相关的配置,如初始化参数等
    public ServletConfig getServletConfig();

    // Servlet具体的业务逻辑方法
    public void service(ServletRequest req, ServletResponse res) throws ServletException, IOException;

    // 返回Servlet信息,如作者、版本等
    public String getServletInfo();

    // Servlet销毁时调用
    public void destroy();
}
复制代码
将上面的内容连起来看,我们想要通过Servlet来写一个web服务需要的步骤有:
- 编写Servlet实现类
- 在web.xml中对Servlet进行配置
- 服务部署在tomcat中
完成上述步骤,启动Tomcat,发出请求。那么我们编写的Servlet就会存在于Tomcat的Web容器当中,提供处理请求的功能。那下面我们动手实践一下。
Servlet实战
搭建项目框架
在IDEA中创建一个Maven项目,pom文件中添加依赖。完整pom.xml如下:
<?xml version="1.0" encoding="UTF-8"?>
<project xmlns="http://maven.apache.org/POM/4.0.0"
         xmlns:xsi="http://www.w3.org/2001/XMLSchema-instance"
         xsi:schemaLocation="http://maven.apache.org/POM/4.0.0 http://maven.apache.org/xsd/maven-4.0.0.xsd">
    <modelVersion>4.0.0</modelVersion>

    <groupId>cn.dingyufan</groupId>
    <artifactId>servlet-demo</artifactId>
    <version>1.0-SNAPSHOT</version>
    <packaging>war</packaging>

    <dependencies>
        <dependency>
            <groupId>javax.servlet</groupId>
            <artifactId>javax.servlet-api</artifactId>
            <version>4.0.1</version>
            <scope>provided</scope>
        </dependency>
    </dependencies>

    <build>
        <plugins>
            <plugin>
                <groupId>org.apache.maven.plugins</groupId>
                <artifactId>maven-war-plugin</artifactId>
                <version>2.4</version>
            </plugin>
        </plugins>
    </build>

</project>
复制代码
可以看到,其实只引入了一个依赖包 javax.servlet-api。
然后创建webapp/WEB-INF/web.xml,补全项目结构。完整文件目录如下
servlet-demo
    │
    ├─src
    │  ├─main
    │  │  ├─java
    │  │  ├─resources
    │  │  └─webapp
    │  │      └─WEB-INF
    │  │           └─web.xml
    │  └─test
    │      └─java
    │
    └─pom.xml
复制代码
web.xml初始内容为,如果没有可以自己拷贝进去
<?xml version="1.0" encoding="UTF-8"?>
<web-app xmlns="http://xmlns.jcp.org/xml/ns/javaee"
         xmlns:xsi="http://www.w3.org/2001/XMLSchema-instance"
         xsi:schemaLocation="http://xmlns.jcp.org/xml/ns/javaee http://xmlns.jcp.org/xml/ns/javaee/web-app_4_0.xsd"
         version="4.0">

</web-app>
复制代码
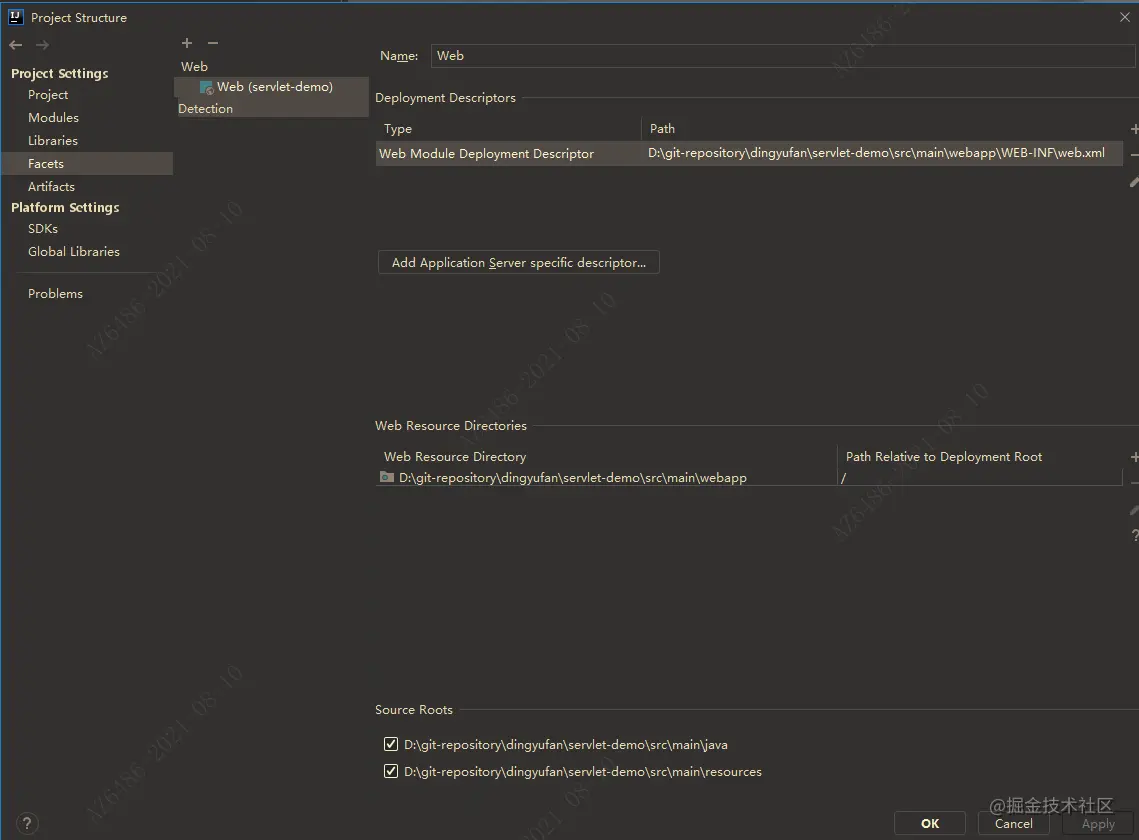
这里webapp目录如果是手动建的话,需要修改module settings,在Facets中配置好Deployment Descriptors和Web Resource Directories。前面也说过web.xml是描述部署的参数、组件的,这里Deployment Descriptors就是指定到我们的web.xml文件。
编写Servlet
package cn.dingyufan.demo.servlet;

import javax.servlet.Servlet;
import javax.servlet.ServletConfig;
import javax.servlet.ServletException;
import javax.servlet.ServletRequest;
import javax.servlet.ServletResponse;
import java.io.IOException;

public class HelloServlet implements Servlet {

    public void init(ServletConfig config) throws ServletException {
        System.out.println("HelloServlet.init()");
    }

    public ServletConfig getServletConfig() {
        return null;
    }

    public void service(ServletRequest req, ServletResponse res) throws ServletException, IOException {
        // 这里可以写具体的业务逻辑,数据读取等。demo里是向页面输出一段文字,
        res.getWriter().append("HelloServlet!").close();
    }

    public String getServletInfo() {
        return null;
    }

    public void destroy() {

    }
}
复制代码
配置web.xml
配置<servlet>与<servlet-mapping>。
<web-app xmlns="http://xmlns.jcp.org/xml/ns/javaee"
         xmlns:xsi="http://www.w3.org/2001/XMLSchema-instance"
         xsi:schemaLocation="http://xmlns.jcp.org/xml/ns/javaee http://xmlns.jcp.org/xml/ns/javaee/web-app_4_0.xsd"
         version="4.0">

    <servlet>
        <servlet-name>helloServlet</servlet-name>
        <servlet-class>cn.dingyufan.demo.servlet.HelloServlet</servlet-class>
    </servlet>

    <servlet-mapping>
        <servlet-name>helloServlet</servlet-name>
        <url-pattern>/*</url-pattern>
    </servlet-mapping>

</web-app>
复制代码
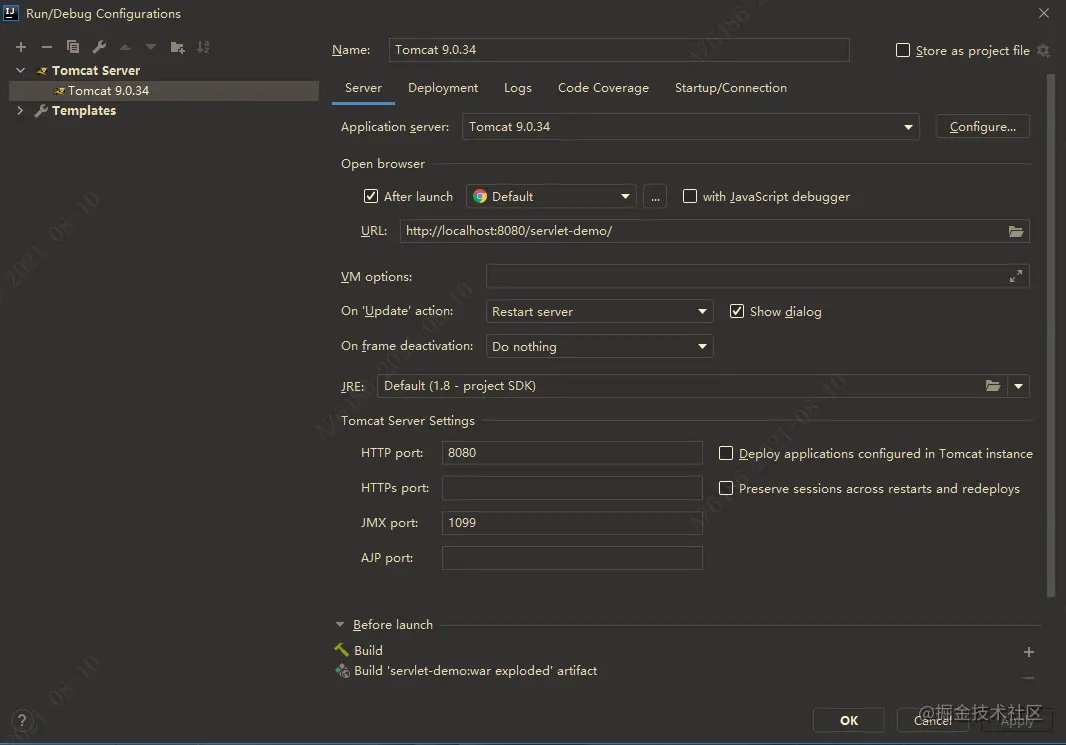
配置Tomcat
在IDEA的Run/Debug Configurationstans弹窗配置Tomcat
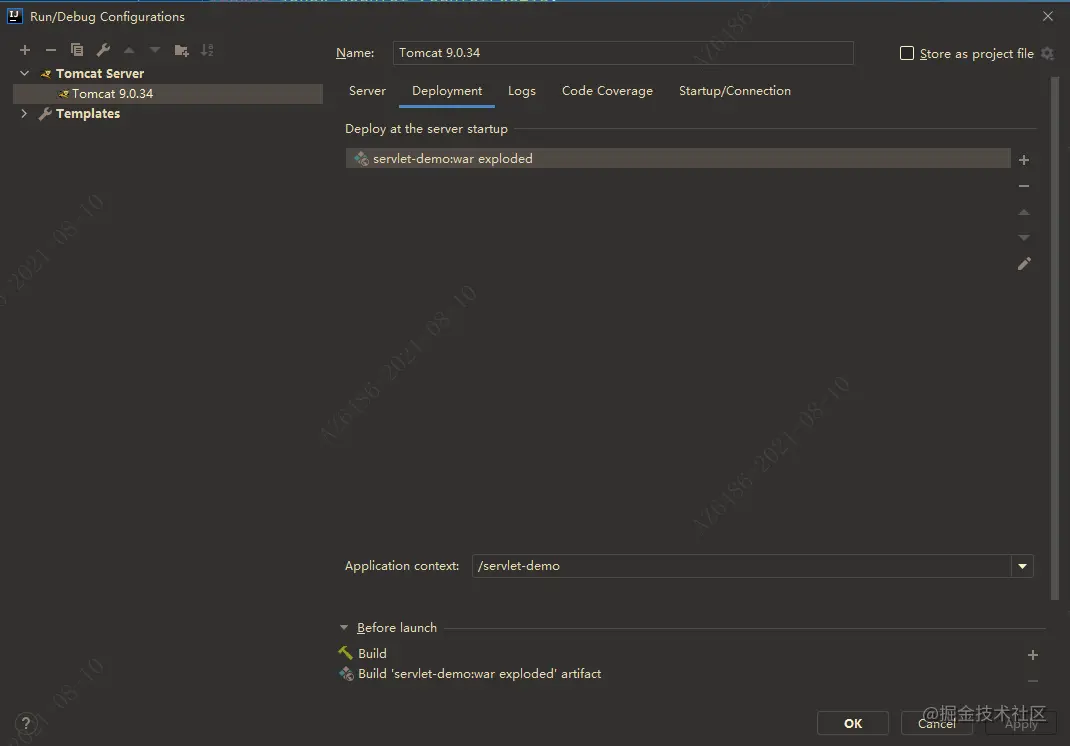
并在Deployment Tab页添加Artifact。注意Tab页下方的Application context配置。
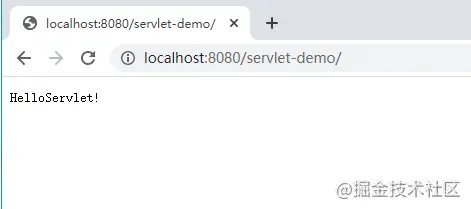
运行,并访问
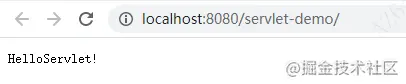
运行程序,浏览器访问localhost:8080/servlet-demo。可以成功看到response输出的消息。
附加
其实到这里就已经成功用Servlet来实现web服务了。想要更多、更复杂的业务,就可以写更多的Servlet。同样的,javax包中也有一些封装过的功能更加丰富的如HttpServlet等,可以更加方便的进行开发。
上面介绍web.xml的时候,提到了一些常见的组件,我们这里也都来实现一下。
编写Listener
我们来编写一个Listener,在ServletContext创建完成之后,打印web.xml中配置的数据。
先看接口ServletContextListener的源码,这个接口有两个默认空方法。实现类可以通过重写来实现想要的逻辑。
public interface ServletContextListener extends EventListener {
    // Servlet上下文初始化后调用
    default public void contextInitialized(ServletContextEvent sce) {}
    // Servlet上下文销毁后调用
    default public void contextDestroyed(ServletContextEvent sce) {}
}
复制代码
接下来是自己写一个实现类,读取myName参数的值。
public class HelloListener implements ServletContextListener {
    public void contextInitialized(ServletContextEvent sce) {
        String paramValue = sce.getServletContext().getInitParameter("myName");
        System.out.println("HelloListener.contextInitialized(), paramValue=>" + paramValue);
    }
}
复制代码
编写Filter
javax.servlet包中的Filter接口有init、destroy方法是默认空方法,也是提供实现类在过滤器初始化、销毁时可以进行一些处理。doFilter方法是过滤器的核心方法,就是在这个方法里,决定是过滤还是放行。如果放行,就把请求交给FilterChain中的下一个过滤器。
public interface Filter {

    default public void init(FilterConfig filterConfig) throws ServletException {}

    public void doFilter(ServletRequest request, ServletResponse response, FilterChain chain)
            throws IOException, ServletException;

    default public void destroy() {}
}
复制代码
我们来实现一个随机数奇偶过滤,如果随机数是奇数则过滤,偶数则放行。因为我们在过滤器销毁时不做其他处理,所以我们只实现init、doFilter方法。
public class RandomFilter implements Filter {

    public void init(FilterConfig filterConfig) throws ServletException {
        System.out.println("RandomFilter.init()");
    }

    public void doFilter(ServletRequest request, ServletResponse response, FilterChain chain)
            throws IOException, ServletException {

        int random = new Random().nextInt(9);
        System.out.println("RandomFilter.doFilter(),random=>" + random);
        // 判断随机数是否为奇数
        if ((random & 1) == 1) {
            response.getWriter().append("NO ENTRY!").close();
            return;
        }
        // 放行,进入下一个过滤器
        chain.doFilter(request, response);
    }
}
复制代码
把监听器、过滤器配置到web.xml中,完整的web.xml如下:
<?xml version="1.0" encoding="UTF-8"?>
<web-app xmlns="http://xmlns.jcp.org/xml/ns/javaee"
         xmlns:xsi="http://www.w3.org/2001/XMLSchema-instance"
         xsi:schemaLocation="http://xmlns.jcp.org/xml/ns/javaee http://xmlns.jcp.org/xml/ns/javaee/web-app_4_0.xsd"
         version="4.0">

    <listener>
        <listener-class>cn.dingyufan.demo.listener.HelloListener</listener-class>
    </listener>

    <context-param>
        <param-name>myName</param-name>
        <param-value>dingyufan</param-value>
    </context-param>

    <filter>
        <filter-name>randomFilter</filter-name>
        <filter-class>cn.dingyufan.demo.filter.RandomFilter</filter-class>
    </filter>

    <filter-mapping>
        <filter-name>randomFilter</filter-name>
        <url-pattern>/*</url-pattern>
    </filter-mapping>


    <servlet>
        <servlet-name>helloServlet</servlet-name>
        <servlet-class>cn.dingyufan.demo.servlet.HelloServlet</servlet-class>
    </servlet>

    <servlet-mapping>
        <servlet-name>helloServlet</servlet-name>
        <url-pattern>/*</url-pattern>
    </servlet-mapping>

</web-app>
复制代码
启动Tomcat,我们可以看到:HelloListener中的contextInitialized方法被调用,并且打印出了web.xml中的context-param参数的值;RandomFilter的init被调用;HelloServlet的init方法则未被调用。

我们通过浏览器对Servlet发出请求
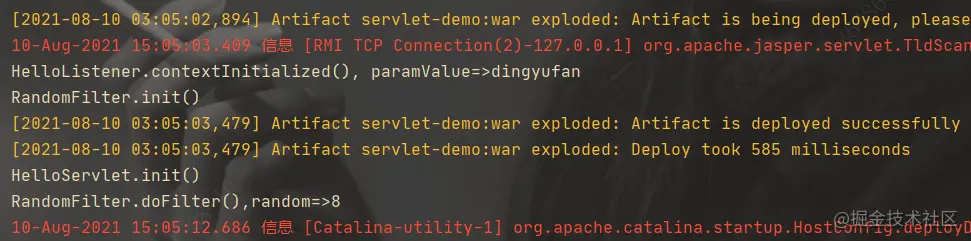
可以看到HelloServlet这时候才发生初始化,并响应了请求。同时看到请求也经过RandomFilter,未被拦截。
结语
为什么Spring源码学习的系列文章要从Servlet开始呢?因为接下来会讲引入Spring后,我们怎么来写一个Web服务,会看Spring是怎么和web容器结合的。Spring的启动入口在哪里,为什么Tomcat启动了Spring程序就可以访问了。然后进一步从源码层面开始学习Spring。


 1352
1352

 被折叠的 条评论
为什么被折叠?
被折叠的 条评论
为什么被折叠?
 到【灌水乐园】发言


