


 本文介绍了一个基于2xExplorer的驱动栏组件实现,该组件可在应用程序中提供快速访问计算机驱动器的功能。通过使用CXDriveBar类,可以轻松地在应用中集成垂直或水平的驱动栏,并能自动更新连接的USB设备。
Introduction
One of my favorite tools is the free 2xExplorer. It offers a very handy dual pane + tree view that really helps when you are working in several different directories. You can see some of the ways you can use 2xExplorer here. Anyway, one of the interesting things about 2xExplorer is that it has a drive bar next to the tree view, with a button for each drive that will take you to that drive. This is much faster than scrolling through a tree to get to a drive. Please note that the drive bar presented here is a fixed toolbar - not movable or dockable by the user.
The Demo App
The demo app shows two drive bars, one vertical and one horizontal:
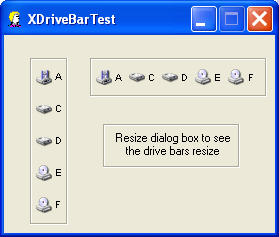
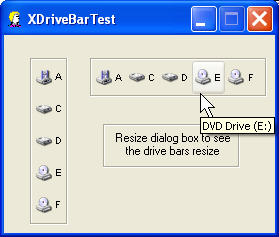
The buttons will show the drive label on the tooltip:
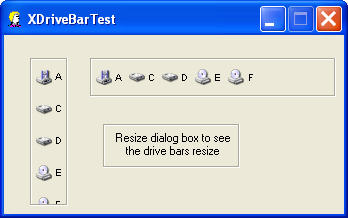
The dialog box can be resized, and the drive bars will also resize:
When a new drive is added (for example, a USB disk drive), the drive bars are automatically updated via the WM_DEVICECHANGE message:

Implementation Notes
CXDriveBar is derived from CXToolBar, which keeps track of the button locations and creates new CXPStyleButtonST buttons when necessary. The CXDriveBar class loads the system image list, determines what drives exist, and adds the drives to the drive bar via CXToolBar::AddButton().
The code in XDriveBarTestDlg.cpp takes care of creating the drive bars, and also contains the WM_DEVICECHANGE handler (this message is only sent to top-level windows). When a removable device (like a USB disk) is added or removed, several WM_DEVICECHANGE messages are sent. The demo app handles these messages by starting a 1½ second timer when it receives each WM_DEVICECHANGE message, so that the arrival of each message effectively restarts the timer. After the last WM_DEVICECHANGE message, the 1½ second timer ensures that the device is fully installed before updating the drive bars.
Because I wanted an etched look for the border of the drive bar, I decided to use a picture control for the frame, with the color set to etched. The picture control also serves as a placeholder on the dialog template for the drive bar.
How To Use
To integrate CXDriveBar into your app, you first need to add the following files to your project:
- SystemImageList.cpp
- SystemImageList.h
- ThemeHelperST.cpp
- ThemeHelperST.h
- XBtnST.cpp
- XBtnST.h
- XDriveBar.cpp
- XDriveBar.h
- XPStyleButtonST.cpp
- XPStyleButtonST.h
- XToolBar.cpp
- XToolBar.h
Next, include header file XDriveBar.h in appropriate project files (usually, dialog header files). You will probably want to copy and modify some of the code in XDriveBarTestDlg.cpp, such as CXDriveBarTestDlg::CreateDriveBars(), CXDriveBarTestDlg::OnDriveSelected(), CXDriveBarTestDlg::OnDeviceChange(), and CXDriveBarTestDlg::OnTimer().
Revision History
Version 1.0 - 2003 August 11
- Initial public release.
Acknowledgments
- Thanks to PJ Naughter for the
CSystemImageListclass: CTreeFileCtrl. - Thanks to Davide Calabro for the
CXPStyleButtonSTclass: CXPStyleButtonST.
Usage
This software is released into the public domain. You are free to use it in any way you like. If you modify it or extend it, please to consider posting new code here for everyone to share. This software is provided "as is" with no expressed or implied warranty. I accept no liability for any damage or loss of business that this software may cause.


 5875
5875

 被折叠的 条评论
为什么被折叠?
被折叠的 条评论
为什么被折叠?
 到【灌水乐园】发言


