React Native 提供了 Geolocation API,让我们可以很方便的获取当前的位置信息,或者监听位置的变化。下面通过样例演示如何使用。
一、获取当前的定位信息
1,getCurrentPosition()方法介绍
| 1 | static getCurrentPosition(geo_success, geo_error?, geo_options?)
|
该方法用于获取当前的位置,其参数如下:
(1)geo_success:成功回调函数
(2)geo_error:失败回调函数
(3)geo_options:传递的参数。其支持的属性有:
- timeout:指定获取地理位置的超时时间,默认不限时。单位为毫秒。
- maximumAge:最长有效期,在重复获取地理位置时,此参数指定多久再次获取位置。默认为 0,表示浏览器需要立刻重新计算位置。
- enableHighAccuracy:指示浏览器获取高精度的位置,默认为 false。当开启后,可能没有任何影响,也可能使浏览器花费更长的时间获取更精确的位置数据。
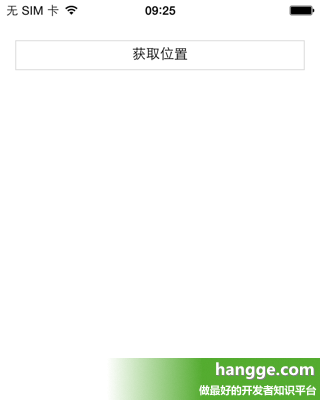
2,效果图
点击“获取位置”按钮后,获取当前设备地理位置信息,并弹出显示。

3,样例代码
| 1 2 3 4 5 6 7 8 9 10 11 12 13 14 15 16 17 18 19 20 21 22 23 24 25 26 27 28 29 30 31 32 33 34 35 36 37 38 39 40 41 42 43 44 45 46 47 48 49 50 51 52 53 54 55 56 57 58 59 | import React, { Component } from 'react';
import {
AppRegistry,
StyleSheet,
Text,
View
} from 'react-native';
var Geolocation = require('Geolocation');
//默认应用的容器组件
class App extends Component {
//渲染
render() {
return (
<View style={styles.container}>
<Text style={styles.item} onPress={this.getLocation.bind(this)}>获取位置</Text>
</View>
);
}
//获取位置
getLocation() {
Geolocation.getCurrentPosition(
location => {
var result = "速度:" + location.coords.speed +
"\n经度:" + location.coords.longitude +
"\n纬度:" + location.coords.latitude +
"\n准确度:" + location.coords.accuracy +
"\n行进方向:" + location.coords.heading +
"\n海拔:" + location.coords.altitude +
"\n海拔准确度:" + location.coords.altitudeAccuracy +
"\n时间戳:" + location.timestamp;
alert(result);
},
error => {
alert("获取位置失败:"+ error)
}
);
}
}
//样式定义
const styles = StyleSheet.create({
container:{
flex: 1,
marginTop:25
},
item:{
margin:15,
height:30,
borderWidth:1,
padding:6,
borderColor:'#ddd',
textAlign:'center'
},
});
AppRegistry.registerComponent('ReactDemo', () => App);
|
二、监视定位变化
1,watchPosition()方法介绍
如果我们需要设定一个回调函数来不断响应定位数据发生的变更(设备发生了移动,或获取到了更高精度的地理位置信息)。可以通过 watchPosition() 函数实现该功能。
watchPosition() 与 getCurrentPosition() 接收的参数相同,但回调函数会被调用多次。
我们可以直接调用 watchPosition() 函数,不需要先调用 getCurrentPosition() 函数。
2,clearWatch()方法介绍
根据传入的 watchid 来对应的位置监听活动。
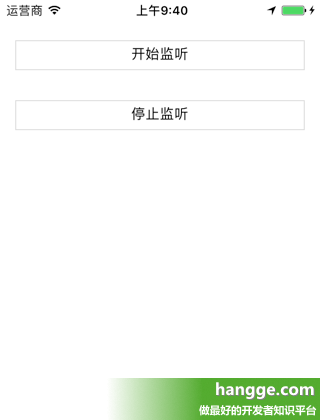
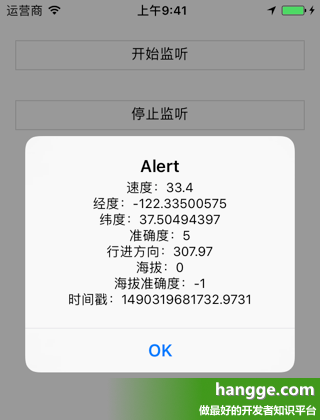
3,效果图
(1)点击“开始监听”按钮后便开始监视设备的位置变化,每当定位信息有发生变化则会弹出显示。
(2)点击“停止监听”按钮则停止对设备位置变化的监视。
4,样例代码
| 1 2 3 4 5 6 7 8 9 10 11 12 13 14 15 16 17 18 19 20 21 22 23 24 25 26 27 28 29 30 31 32 33 34 35 36 37 38 39 40 41 42 43 44 45 46 47 48 49 50 51 52 53 54 55 56 57 58 59 60 61 62 63 64 65 66 67 68 | import React, { Component } from 'react';
import {
AppRegistry,
StyleSheet,
Text,
View
} from 'react-native';
var Geolocation = require('Geolocation');
//监听定位的id
var watchID = null
//默认应用的容器组件
class App extends Component {
//渲染
render() {
return (
<View style={styles.container}>
<Text style={styles.item} onPress={this.beginWatch.bind(this)}>开始监听</Text>
<Text style={styles.item} onPress={this.stopWatch.bind(this)}>停止监听</Text>
</View>
);
}
//开始监听位置变化
beginWatch() {
watchID = Geolocation.watchPosition(
location => {
var result = "速度:" + location.coords.speed +
"\n经度:" + location.coords.longitude +
"\n纬度:" + location.coords.latitude +
"\n准确度:" + location.coords.accuracy +
"\n行进方向:" + location.coords.heading +
"\n海拔:" + location.coords.altitude +
"\n海拔准确度:" + location.coords.altitudeAccuracy +
"\n时间戳:" + location.timestamp;
alert(result);
},
error => {
alert("获取位置失败:"+ error)
}
);
}
//停止监听位置变化
stopWatch() {
Geolocation.clearWatch(watchID);
}
}
//样式定义
const styles = StyleSheet.create({
container:{
flex: 1,
marginTop:25
},
item:{
margin:15,
height:30,
borderWidth:1,
padding:6,
borderColor:'#ddd',
textAlign:'center'
},
});
AppRegistry.registerComponent('ReactDemo', () => App);
|
原文出自:www.hangge.com 转载请保留原文链接:http://www.hangge.com/blog/cache/detail_1620.html


 React Native提供Geolocation API可方便获取和监听位置信息。文章通过样例演示,介绍了获取当前定位信息的getCurrentPosition()方法,包括其参数及含义;还介绍了监视定位变化的watchPosition()和停止监听的clearWatch()方法,并给出了相应效果图和样例代码。


 4732
4732

 被折叠的 条评论
为什么被折叠?
被折叠的 条评论
为什么被折叠?
 到【灌水乐园】发言


