


还不错的文章,今天木有翻译完,原因是没心情了,明天翻译完,谢谢
Building the Game: Part 5 - Static Level Geometry
See the code for this post, or all posts in this series.
See the live demo.
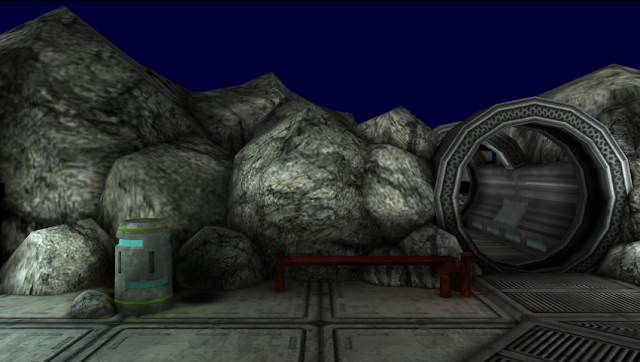
(WARNING! The live demo for this post will probably take a while to load and will most likely not run at 60 FPS! Optimizations will come in later posts.)
警告:这篇文章的demo可能会需要很长的载入时间,而且可能会不太流畅,可能低于60FPS,优化版稍后贴出来
Sorry about the long gap in posts, but this has proven to be one of the more challenging things I've attempted so far. That's primarily been because I wasn't too familiar with how Unity handled things behind the scenes until I started working on this particular post. I've found some surprising (and occasionally disappointing) things about how Unity handles it's levels, and it's forced me to rethink a couple of aspects of this project, but I think I've got a decent handle on it now and at this point the order of the day is progress in small increments.
很抱歉这么长时间一直没有更新,但是这被证明是我认为我做过的最具有挑战性的事情之一,最开始的时候我不知道unity如何处理场景,一直到我开始写这些帖子,我发现一些关于unity如何处理层的特别有趣,同时也让人伤透脑筋的事情,它驱使着我重新思考这些问题,
To that end, we're going to start talking about exporting, displaying, and interacting with levels from Unity, but we're going to do so one step at a time. Today's step is simply going to be getting the level geometry and lighting information exported and rendering brute force. We're not going to be worrying about collision detection, visibility culling, or anything else right now than just getting those triangles out of Unity and into our browser!
最后,我们开始讨论关于unity'是如何处理层的输出,展现和交互的一些事情,但是我们只能一步一步前进,今天我们取得的进步是使用unity的强大的野兽式的力量渲染了几何体和光源的层,关于碰撞检测,几何体的透明度选取,还有一些现在对于我们把我们的四面体放到我们的浏览器中没有关系的事,我们倒不是怎么着急。
Most of the level formats that I have worked with in the past have had contained most of the geometry needed to display them in a large internal mesh that's been broken up by visibility (the traditional "BSP Tree"), and then occasionally will have instances of common meshes (like crates or lights, etc) that need to be placed throughout the level. (The Source engine uses these and refers to them as "props") Typically the tools that you use to build these levels start by having you block out the large geometry with "brushes", convex polygons that typically make up the floor and walls of your level. Then you can go and place high detail meshes, usually imported from an external tool, to give the level some more detail and texture.
过去我的作品中用到的许多层的格式包含有许多几何体需要在很大的内部网格中显示的时候都会遭到破坏(通常的是 bsp树,就是一个八叉树的推广,用于碰撞检测,译者注),然而通常的网格的实例比如箱子和光线等需要通过层贴图上去,(源引擎通常把他们当成道具),你通常用的建立层的工具都是把你的几何体“刷”上去的,具有凹凸面的多边形通常在你的层中做地面,墙什么的,然后你可以贴高质的材质,
As such, I was surprised to learn that in Unity everything in the level is treated as, essentially, a "detail prop". What I mean by this is that even large scale geometry such as the floor or walls is defines by placing instances of a mesh throughout the level. Those instances may simply be of a texture cube that you created in-editor, or of a mesh that was imported from Blender or Maya, but Unity treats them all the same.
This approach has some upsides and some downsides, which I'm not going to dissect here, but it does give us one big advantage in that it's easier to get the basic rendering in place because everything is going to be rendered the same way! All we really need to do is put together a format that lets us define the positions, size, and rotations of mesh instances, and then we'll render them using the instancing technique described in the last BtG. We'll be sticking to JSON for this part of our format, and it's going to be dead simple for right now:
for (var i in this.props) {
var prop = this.props[i];
var url = prop.model;
prop.model = new model.Model();
prop.model.load(gl, url);
for(var j in prop.instances) {
instance = prop.instances[j];
instance.modelInstance = prop.model.createInstance();
// Set up the instance transform
instance.modelInstance.matrix = mat4.fromRotationTranslation(instance.rot, instance.pos);
mat4.scale(instance.modelInstance.matrix, [instance.scale, instance.scale, instance.scale]);
}
}
And drawing those instances is equally simple:
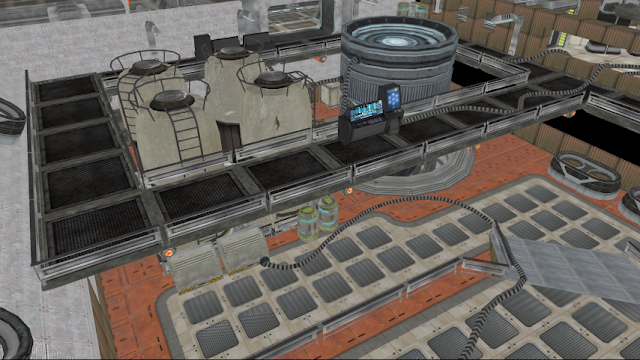
This, of course, is just a small segment of a level, (in this case, the "AngryBots" sample level included with Unity). And it's really cool to look at that and say "Hey! That actually looks like something!" We've made a jump from random floating crates to a full blown environment in just a few lines of code! (Mostly, anyway. We're ignoring the export for the moment.)
A key element is missing from our scene, however, and that's lighting. There are several different options for lighting. We could, for example, go with nothing but dynamic lights, a technique famously employed in Doom 3 (which is o pen source now! Sweet!) But the most common technique, and what we'll be using here, is static lighting via lightmaps. Lightmapping has been in use since the original Quake, and is alive and kicking in modern marvels like Modern Warfare 3, and it should serve use well in our game too. And, fortunately for us, Unity will build the lightmaps we want!
Unity's lightmaps work a bit differently than most others that I've seen, but I kinda like the way they're set up so for the moment I'm going to be sticking to how they do it for my own code too. Typically anything that gets lighmapped in a level will have a unique set of lightmap coordinates, even if that mesh is instanced several times throughout the level. This can mean you end up storing the same mesh with different lighting UVs over and over again. In Unity, and subsequently in our renderer, each mesh gets a single set of lightmaps UVs, as if it were just another normal texture. Each instance of the mesh within the level contains a lightmap index, a UV offset, and a UV scale. The meshes lightmap UVs are transformed in a shader by that offset and scale to line up with the rect on the lightmap that has been reserved for this mesh instance. The lighting information for the mesh is laid out the same way for each instance, just shifted around the texture.
The lightmaps color information is also a bit different, and it took me a moment to figure out how to display it correctly. The lightmap itself looks like this, but it will be hard too see much because there's a lot of alpha:
 If you try to simply multiply your texture colors by the lightmap RGB values like you might expect to be able to you'll just get an over-bright mess. What you actually need to do is modulate the RGB values by the alpha value multiplied by a brightness factor (I've found that 9 seems to match the Unity rendering reasonably closely.) I'm not 100% sure why they do this, aside from maybe some higher precision on brighter lights. It does give you some nice effects where the lighting can be really strong and starts to wash out the diffuse colors, though. Kind of a "psuedo-HDR". The shader code is pretty simple:
void main(void) {
vec4 color = texture2D(diffuse, vTexCoord);
vec4 lightValue = texture2D(lightmap, vLightCoord);
float brightness = 9.0;
gl_FragColor = vec4(color.rgb * lightValue.rgb * (lightValue.a * brightness), 1.0);
}
We also have to add the approriate lighting info to our level format. This means an array of lightmap paths at the beginning of the file
"lightmaps": ["root/texture/level1/light0.png","root/texture/level1/light1.png"]
And the lightmap index, offset, and scale for each instance

What a difference a few textures can make, huh? Now we have a nicely lit scene that we can fly around in and build the rest of our level information (collision, item positions, etc) on top of. The entire scene weighs in at about 32 Mb, which isn't spectacular but is far better than the 200Mb I was seeing for the Source Engine demo.
There are a couple of other implementation details that may be of interest here. I've implemented a simple Texture Manager (in texture.js) to do simple checks to see if a requested texture has already been loaded and if so return a reference to the existing one. This helps improve performance quite a bit, since this particular level tends to share textures between a lot of different meshes.
I've also gone and fixed some issues with the flying camera ( camera.js), since this is the first demo to really use it. I had made a few really stupid mistakes in earlier versions that caused the camera to lock up if you were looking straight up or down. (doh!) That's fixed here, though you'll want to avoid the flying camera from earlier posts code.
Of course, I've avoided talking about the export process for this the whole time and, um... I'm mostly going to keep avoiding it. Fact is, it's kinda ugly and I'm still working out wether or not I want to keep doing things the way I'm doing them now. If you really want to see all the gory details feel free to dive into WebGLExport.cs and look at the logic in ExportLevel. There are a few quirks that deserve special mention at this point, though:
I'm basically just looping through every mesh in the scene and exporting any that are visible and static. Anything that has a dynamic component to it is simply being skipped right now. This does leave a couple of gaps if you export a complicated scene like the one above, but handling dynamic scene components is a subject for another day.
Also, I'm kinda cheating on mesh scale at the moment. Unity stores instance scales as a 3 dimensional vector, and I'm boiling it down to a scalar value. Most of the time this will work fine, since scaling unevenly leads to squashed looking meshes, but if anyone is doing that intentionally in a Unity scene we'll loose it during the export. I'm doing it this was to keep my transform matrices orthogonal, which has various nice properties in terms of inverting and so on, but I may change my mind on this restriction later if a compelling reason presents itself.
Another thing worth mentioning about the export is a leak that I've run into and am really not sure how to fix. If you try to export a large scene with a lot of textures (like AngryBots) the export will die part way through and spit "Too many files open" out onto the console, at which point Unity basically needs to be restarted. Preventing texture exports will allow the entire level to be output without issue. Obviously I've got a file handle leak, but I can't see where, and nobody on Unity's Stack Overflow imposter seems to know (or care) either. Interestingly, it seems to perform better on OSX Lion but I can still get it to crash after a few exports. I'd appreciate anyone that cares to give any suggestions in this area.
Oh, and finally I should mention that Unity apparently hates the way that the rest of the world orients their X axis, so they've flipped it. Yeah, I was happy about that too. I'm still deciding wether or not I want to fix this, but the immediate consequence is that everything we export is mirrored for now. The easiest thing to do if this gets to be a problem would be to invert X on our projection matrix, but I'm gonna just leave it be for now.
So, where does this leave us? Well, we can render all the static, lightmapped geometry in a level just fine, but we are rendering ALL of it. There's no visibility culling yet. I was able to get away with that in Quake 3, but it probably won't fly here. (Note that on my MacBook I can render the whole AngryBots level at 60fps, but without much wiggle room. We need better performance if we want to start adding game logic.)
Beyond simple visibility culling, however, I'd like to try to optimize how some of the geometry is handled. There are some meshes that appear in the levels that don't really need to be "instanced", since they only appear once and won't be applicable to other levels. (Many of the floors and walls will meet this criteria.) It would be more efficient to pack this geometry into a level specific buffer and do some additional state sorting on it. That will be a nice future optimization at some point.
We also don't have any collision information in our export, and that will obviously be critical moving forward, as will be adding things like triggers for doors and items like health packs or weapons. And we're still sidestepping the whole material issue by rendering everything with a single shader. So... yeah. Long ways to go yet. This is a decent step in the right direction, though!
I'm hoping that the next post won't take as long as this one did, but sadly with Christmas just around the bend, a new project starting up at my work, and a WebGL Camp to prepare for I think that it's best to brace for a bit of a delay. Sorry in advance!
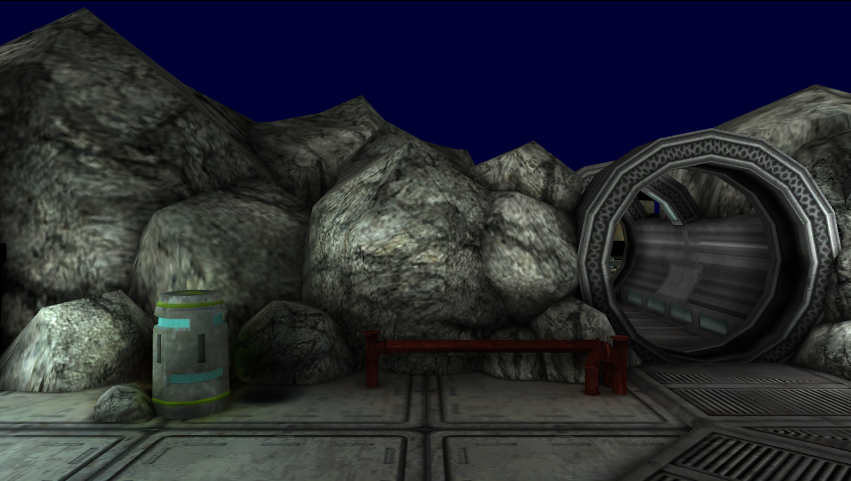
(WARNING! The live demo for this post will probably take a while to load and will most likely not run at 60 FPS! Optimizations will come in later posts.)
警告:这篇文章的demo可能会需要很长的载入时间,而且可能会不太流畅,可能低于60FPS,优化版稍后贴出来
Sorry about the long gap in posts, but this has proven to be one of the more challenging things I've attempted so far. That's primarily been because I wasn't too familiar with how Unity handled things behind the scenes until I started working on this particular post. I've found some surprising (and occasionally disappointing) things about how Unity handles it's levels, and it's forced me to rethink a couple of aspects of this project, but I think I've got a decent handle on it now and at this point the order of the day is progress in small increments.
很抱歉这么长时间一直没有更新,但是这被证明是我认为我做过的最具有挑战性的事情之一,最开始的时候我不知道unity如何处理场景,一直到我开始写这些帖子,我发现一些关于unity如何处理层的特别有趣,同时也让人伤透脑筋的事情,它驱使着我重新思考这些问题,
这些天也一直在慢慢的有所进展
To that end, we're going to start talking about exporting, displaying, and interacting with levels from Unity, but we're going to do so one step at a time. Today's step is simply going to be getting the level geometry and lighting information exported and rendering brute force. We're not going to be worrying about collision detection, visibility culling, or anything else right now than just getting those triangles out of Unity and into our browser!
最后,我们开始讨论关于unity'是如何处理层的输出,展现和交互的一些事情,但是我们只能一步一步前进,今天我们取得的进步是使用unity的强大的野兽式的力量渲染了几何体和光源的层,关于碰撞检测,几何体的透明度选取,还有一些现在对于我们把我们的四面体放到我们的浏览器中没有关系的事,我们倒不是怎么着急。
Most of the level formats that I have worked with in the past have had contained most of the geometry needed to display them in a large internal mesh that's been broken up by visibility (the traditional "BSP Tree"), and then occasionally will have instances of common meshes (like crates or lights, etc) that need to be placed throughout the level. (The Source engine uses these and refers to them as "props") Typically the tools that you use to build these levels start by having you block out the large geometry with "brushes", convex polygons that typically make up the floor and walls of your level. Then you can go and place high detail meshes, usually imported from an external tool, to give the level some more detail and texture.
过去我的作品中用到的许多层的格式包含有许多几何体需要在很大的内部网格中显示的时候都会遭到破坏(通常的是 bsp树,就是一个八叉树的推广,用于碰撞检测,译者注),然而通常的网格的实例比如箱子和光线等需要通过层贴图上去,(源引擎通常把他们当成道具),你通常用的建立层的工具都是把你的几何体“刷”上去的,具有凹凸面的多边形通常在你的层中做地面,墙什么的,然后你可以贴高质的材质,
As such, I was surprised to learn that in Unity everything in the level is treated as, essentially, a "detail prop". What I mean by this is that even large scale geometry such as the floor or walls is defines by placing instances of a mesh throughout the level. Those instances may simply be of a texture cube that you created in-editor, or of a mesh that was imported from Blender or Maya, but Unity treats them all the same.
This approach has some upsides and some downsides, which I'm not going to dissect here, but it does give us one big advantage in that it's easier to get the basic rendering in place because everything is going to be rendered the same way! All we really need to do is put together a format that lets us define the positions, size, and rotations of mesh instances, and then we'll render them using the instancing technique described in the last BtG. We'll be sticking to JSON for this part of our format, and it's going to be dead simple for right now:
{
"levelVersion": 1,
"name": "Sample Level",
"props": [
{
"model": "root/model/Barrel_Large",
"instances": [
{
"pos": [28, 3, -30],
"rot": [-1.2, -0.38, -0.05, 0.9],
"scale": 1
},
{
"pos": [7, 2.14, -62],
"rot": [0, 0, 0, 1],
"scale": 1.2
},
]
},
{
"model": "root/model/Barrel_Small",
"instances": [ ... ]
}
]
}
As you can see, all that our "level" really contains is paths to mesh files and then information about the transform of each mesh instance. Utilizing our previous post's instancing code, it's super easy to load the appropriate data into memory, as we show in
level.js:
for (var i in this.props) {
var prop = this.props[i];
var url = prop.model;
prop.model = new model.Model();
prop.model.load(gl, url);
for(var j in prop.instances) {
instance = prop.instances[j];
instance.modelInstance = prop.model.createInstance();
// Set up the instance transform
instance.modelInstance.matrix = mat4.fromRotationTranslation(instance.rot, instance.pos);
mat4.scale(instance.modelInstance.matrix, [instance.scale, instance.scale, instance.scale]);
}
}
And drawing those instances is equally simple:
for (var i in this.props) {
var prop = this.props[i];
prop.model.drawInstances(gl, viewMat, projectionMat);
}
Assuming that we have some way of exporting to this new format, we've can now render an entire level! Check it out!
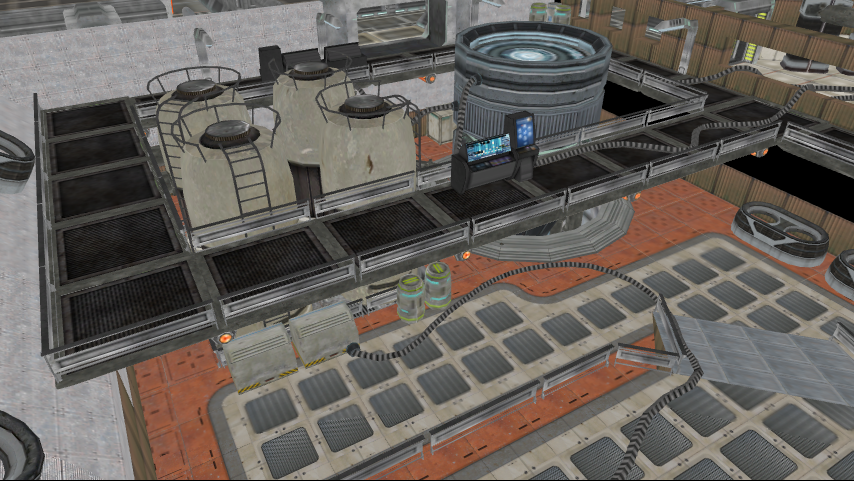
This, of course, is just a small segment of a level, (in this case, the "AngryBots" sample level included with Unity). And it's really cool to look at that and say "Hey! That actually looks like something!" We've made a jump from random floating crates to a full blown environment in just a few lines of code! (Mostly, anyway. We're ignoring the export for the moment.)
A key element is missing from our scene, however, and that's lighting. There are several different options for lighting. We could, for example, go with nothing but dynamic lights, a technique famously employed in Doom 3 (which is o pen source now! Sweet!) But the most common technique, and what we'll be using here, is static lighting via lightmaps. Lightmapping has been in use since the original Quake, and is alive and kicking in modern marvels like Modern Warfare 3, and it should serve use well in our game too. And, fortunately for us, Unity will build the lightmaps we want!
Unity's lightmaps work a bit differently than most others that I've seen, but I kinda like the way they're set up so for the moment I'm going to be sticking to how they do it for my own code too. Typically anything that gets lighmapped in a level will have a unique set of lightmap coordinates, even if that mesh is instanced several times throughout the level. This can mean you end up storing the same mesh with different lighting UVs over and over again. In Unity, and subsequently in our renderer, each mesh gets a single set of lightmaps UVs, as if it were just another normal texture. Each instance of the mesh within the level contains a lightmap index, a UV offset, and a UV scale. The meshes lightmap UVs are transformed in a shader by that offset and scale to line up with the rect on the lightmap that has been reserved for this mesh instance. The lighting information for the mesh is laid out the same way for each instance, just shifted around the texture.
The lightmaps color information is also a bit different, and it took me a moment to figure out how to display it correctly. The lightmap itself looks like this, but it will be hard too see much because there's a lot of alpha:

void main(void) {
vec4 color = texture2D(diffuse, vTexCoord);
vec4 lightValue = texture2D(lightmap, vLightCoord);
float brightness = 9.0;
gl_FragColor = vec4(color.rgb * lightValue.rgb * (lightValue.a * brightness), 1.0);
}
We also have to add the approriate lighting info to our level format. This means an array of lightmap paths at the beginning of the file
"lightmaps": ["root/texture/level1/light0.png","root/texture/level1/light1.png"]
And the lightmap index, offset, and scale for each instance
{
"pos": [0, 0, 0],
"rot": [0, 0, 0, 1],
"scale": 1,
"lightmap": {
"id": 1,
"scale": [0.0126953, 0.0126953],
"offset": [0.566791, 0.587325]
}
}
We'll also tweak our instance rendering to give us a way to render lightmapped instances (see
drawLightmappedInstances
in model.js). The result?
Not too shabby looking!

What a difference a few textures can make, huh? Now we have a nicely lit scene that we can fly around in and build the rest of our level information (collision, item positions, etc) on top of. The entire scene weighs in at about 32 Mb, which isn't spectacular but is far better than the 200Mb I was seeing for the Source Engine demo.
There are a couple of other implementation details that may be of interest here. I've implemented a simple Texture Manager (in texture.js) to do simple checks to see if a requested texture has already been loaded and if so return a reference to the existing one. This helps improve performance quite a bit, since this particular level tends to share textures between a lot of different meshes.
I've also gone and fixed some issues with the flying camera ( camera.js), since this is the first demo to really use it. I had made a few really stupid mistakes in earlier versions that caused the camera to lock up if you were looking straight up or down. (doh!) That's fixed here, though you'll want to avoid the flying camera from earlier posts code.
Of course, I've avoided talking about the export process for this the whole time and, um... I'm mostly going to keep avoiding it. Fact is, it's kinda ugly and I'm still working out wether or not I want to keep doing things the way I'm doing them now. If you really want to see all the gory details feel free to dive into WebGLExport.cs and look at the logic in ExportLevel. There are a few quirks that deserve special mention at this point, though:
I'm basically just looping through every mesh in the scene and exporting any that are visible and static. Anything that has a dynamic component to it is simply being skipped right now. This does leave a couple of gaps if you export a complicated scene like the one above, but handling dynamic scene components is a subject for another day.
Also, I'm kinda cheating on mesh scale at the moment. Unity stores instance scales as a 3 dimensional vector, and I'm boiling it down to a scalar value. Most of the time this will work fine, since scaling unevenly leads to squashed looking meshes, but if anyone is doing that intentionally in a Unity scene we'll loose it during the export. I'm doing it this was to keep my transform matrices orthogonal, which has various nice properties in terms of inverting and so on, but I may change my mind on this restriction later if a compelling reason presents itself.
Another thing worth mentioning about the export is a leak that I've run into and am really not sure how to fix. If you try to export a large scene with a lot of textures (like AngryBots) the export will die part way through and spit "Too many files open" out onto the console, at which point Unity basically needs to be restarted. Preventing texture exports will allow the entire level to be output without issue. Obviously I've got a file handle leak, but I can't see where, and nobody on Unity's Stack Overflow imposter seems to know (or care) either. Interestingly, it seems to perform better on OSX Lion but I can still get it to crash after a few exports. I'd appreciate anyone that cares to give any suggestions in this area.
Oh, and finally I should mention that Unity apparently hates the way that the rest of the world orients their X axis, so they've flipped it. Yeah, I was happy about that too. I'm still deciding wether or not I want to fix this, but the immediate consequence is that everything we export is mirrored for now. The easiest thing to do if this gets to be a problem would be to invert X on our projection matrix, but I'm gonna just leave it be for now.
So, where does this leave us? Well, we can render all the static, lightmapped geometry in a level just fine, but we are rendering ALL of it. There's no visibility culling yet. I was able to get away with that in Quake 3, but it probably won't fly here. (Note that on my MacBook I can render the whole AngryBots level at 60fps, but without much wiggle room. We need better performance if we want to start adding game logic.)
Beyond simple visibility culling, however, I'd like to try to optimize how some of the geometry is handled. There are some meshes that appear in the levels that don't really need to be "instanced", since they only appear once and won't be applicable to other levels. (Many of the floors and walls will meet this criteria.) It would be more efficient to pack this geometry into a level specific buffer and do some additional state sorting on it. That will be a nice future optimization at some point.
We also don't have any collision information in our export, and that will obviously be critical moving forward, as will be adding things like triggers for doors and items like health packs or weapons. And we're still sidestepping the whole material issue by rendering everything with a single shader. So... yeah. Long ways to go yet. This is a decent step in the right direction, though!
I'm hoping that the next post won't take as long as this one did, but sadly with Christmas just around the bend, a new project starting up at my work, and a WebGL Camp to prepare for I think that it's best to brace for a bit of a delay. Sorry in advance!

 2959


 扫一扫


 被折叠的 条评论
为什么被折叠?
 到【灌水乐园】发言


