


什么是动态组件
动态组件指的是动态切换组件的显示与隐藏。
如何实现动态组件渲染
vue 提供了一个内置的 <component> 组件,专门用来实现动态组件的渲染。示例代码如下:
src–>App.vue
<template>
  <div class="app-container">
    <h1>App 根组件</h1>
    <hr />
      <button @click="isName = 'Left'">Left</button>
      <button @click="isName = 'Right'">Right</button>
    <div class="box">
      <!-- 渲染 Left 组件和 Right 组件 -->
      <!-- 渲染 Left 组件和 Right 组件 -->
      <!-- 1. component 标签是 vue 内置的,作用:组件的占位符 -->
      <!-- 2. is 属性的值,表示要渲染的组件的名字 -->
      <!-- 3. is 属性的值,应该是组件在 components 节点下的注册名称 -->
      <component :is="isName"></component>
    </div>
  </div>
</template>

<script>

import Left from '@/components/Left.vue'
import Right from '@/components/Right.vue'

export default {
  data(){
    return {
      // comName 表示要展示的组件的名字
      isName:'Left'
    }
  },
  components:{
    Right,
    Left
  }
}
</script>

<style lang="less">
.app-container {
  padding: 1px 20px 20px;
  background-color: #efefef;
}
.box {
  display: flex;
}
</style>
src–>components–>Left.vue
<template>
  <div class="left-container">
    <h3>Left 组件  count的值是----{{ count }}</h3>
    <button @click="count += 1">+1</button>
  </div>
</template>

<script>
export default {
  data(){
    return {
      count:0
    }
  }
}
</script>

<style lang="less">
.left-container {
  padding: 0 20px 20px;
  background-color: orange;
  min-height: 250px;
  flex: 1;
}
</style>
src–>components–>Right.vue
<template>
  <div class="right-container">
    <h3>Right 组件  count的值是----{{ count }}</h3>
    <button @click="count += 1">+1</button>
  </div>
</template>

<script>
export default {
  data(){
    return {
      count:0
    }
  }
}
</script>

<style lang="less">
.right-container {
  padding: 0 20px 20px;
  background-color: orange;
  min-height: 250px;
  flex: 1;
}
</style>


使用 keep-alive 保持状态
默认情况下,切换动态组件时无法保持组件的状态。就比如上面的我们点击+1按钮再点击Right,再点击Left发现Left的页面count=1重置了,这是因为在切换Right时Left被销毁了。这一点我们通过vue调试工具可以看出当切换Right时Left标签就没了。为了使他保持上一次的状态,此时可以使用 vue 内置的 <keep-alive> 组件保持动态组件的状态。示例代码如下:
<keep-alive>
  <component :is="isName"></component>
</keep-alive>
演示:
src–>App.vue。src–>components–>Right.vue和src–>components–>Left.vue 代码不变。
<template>
  <div class="app-container">
    <h1>App 根组件</h1>
    <hr />
      <button @click="isName = 'Left'">Left</button>
      <button @click="isName = 'Right'">Right</button>
    <div class="box">
      <!-- keep-alive 会把内部的组件进行缓存,而不是销毁组件 -->
      <keep-alive>
        <component :is="isName"></component>
      </keep-alive>
    </div>
  </div>
</template>

<script>

import Left from '@/components/Left.vue'
import Right from '@/components/Right.vue'

export default {
  data(){
    return {
      isName:'Left'
    }
  },
  components:{
    Right,
    Left
  }
}
</script>

<style lang="less">
.app-container {
  padding: 1px 20px 20px;
  background-color: #efefef;
}
.box {
  display: flex;
}
</style>


keep-alive 对应的生命周期函数
当组件被缓存时,会自动触发组件的 deactivated 生命周期函数。
当组件被激活时,会自动触发组件的 activated 生命周期函数。
在 Vue2 中,<keep-alive> 是一个内置组件,用于缓存不活动的组件实例,避免重复渲染和销毁。当组件被 <keep-alive> 包裹时,其生命周期行为会发生变化,新增两个专属钩子函数 activated 和 deactivated,同时常规生命周期函数的触发逻辑也会改变。
注意:仅当组件被 <keep-alive> 缓存并重新激活 时触发。
首次加载
beforeCreate → created → beforeMount → mounted → activated
再次激活(从缓存恢复)
beforeRouteEnter(路由守卫) → activated
离开并缓存
deactivated → (后续若销毁还需 beforeDestroy/destroyed)
演示
src–>components–>Left.vue改变。src–>App.vue和src–>components–>Right.vue不变
<template>
  <div class="left-container">
    <h3>Left 组件  count的值是----{{ count }}</h3>
    <button @click="count += 1">+1</button>
  </div>
</template>

<script>
export default {
  data(){
    return {
      count:0
    }
  },
  created(){
    console.log('Left组件被创建了!');
  },
    // 不会执行 因为被缓存没有被销毁
  destroyed(){
    console.log('Left组件被销毁了!');
  },

  // 当组件第一次被创建的时候,既会执行 created 生命周期,也会执行 activated 生命周期
  // 当时,当组件被激活的时候,只会触发 activated 生命周期,不再触发 created。因为组件没有被重新创建
  activated(){
    console.log('组件被激活了,activated');
  },
  deactivated(){
    console.log('组件被缓存了,deactivated');
  }
}
</script>

<style lang="less">
.left-container {
  padding: 0 20px 20px;
  background-color: orange;
  min-height: 250px;
  flex: 1;
}
</style>
结果
# 结果是
Left组件被创建了!
组件被激活了,activated
# 点击Right
组件被缓存了,deactivated
# 点击Left
组件被激活了,activated
keep-alive 的 include 属性
上面的代码你会发现当我们点击Right后 再点击Left发现Right被缓存了,如果我们不希望Right被缓存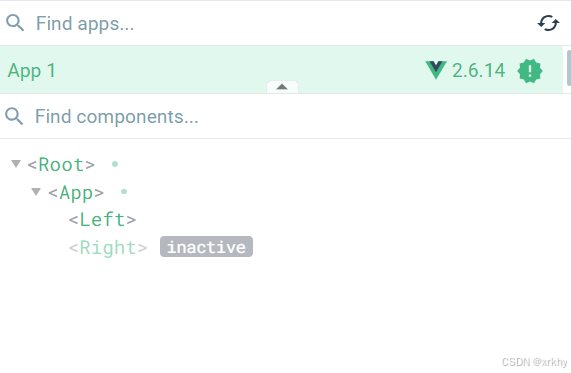
include 属性用来指定:只有名称匹配的组件会被缓存。多个组件名之间使用英文的逗号分隔:
<keep-alive include="Left">  //Left被缓存
  <component :is="isName"></component>
</keep-alive>
------------------------------------
<keep-alive exclude="Right">//Right不被缓存
  <component :is="isName"></component>
</keep-alive>
<template>
  <div class="app-container">
    <h1>App 根组件</h1>
    <hr />
      <button @click="isName = 'Left'">Left</button>
      <button @click="isName = 'Right'">Right</button>
    <div class="box">
      <!-- 渲染 Left 组件和 Right 组件 -->
      <!-- 渲染 Left 组件和 Right 组件 -->
      <!-- 1. component 标签是 vue 内置的,作用:组件的占位符 -->
      <!-- 2. is 属性的值,表示要渲染的组件的名字 -->
      <!-- 3. is 属性的值,应该是组件在 components 节点下的注册名称 -->

      <!-- keep-alive 会把内部的组件进行缓存,而不是销毁组件 -->
      <!-- 在使用 keep-alive 的时候,可以通过 include 指定哪些组件需要被缓存; -->
      <!-- 或者,通过 exclude 属性指定哪些组件不需要被缓存;但是:不要同时使用 include 和 exclude 这两个属性 -->
      <keep-alive exclude="Right">
        <component :is="isName"></component>
      </keep-alive>
    </div>
  </div>
</template>

<script>

import Left from '@/components/Left.vue'
import Right from '@/components/Right.vue'

export default {
  data(){
    return {
      // comName 表示要展示的组件的名字
      isName:'Left'
    }
  },
  components:{
    Right,
    Left
  }
}
</script>

<style lang="less">
.app-container {
  padding: 1px 20px 20px;
  background-color: #efefef;
}
.box {
  display: flex;
}
</style>
结果
Left被缓存。Right没有被缓存


 3290
3290

 被折叠的 条评论
为什么被折叠?
被折叠的 条评论
为什么被折叠?
 到【灌水乐园】发言


