


 本文适合有HTML、CSS、JS基础者,介绍Vue项目入门与组件知识。先讲解准备工作,如环境配置、项目创建;接着阐述基础内容,包括响应式、指令等;最后深入组件,涉及注册、传值、事件、插槽、生命周期等,助读者掌握Vue开发要点。
Vue3学习
2025.8.1修改并更新部分内容
默认有html,css,js基础。
各位跳着看
在线编写:https://play.vuejs.org
1. 准备
vscode下完配好c和python环境。
npm换淘宝源,下载vue
vscode上下载volar插件
npm init vue@latest 创建vue项目
#项目目录解释
public 资源文件(浏览器图标)
src 源码文件夹
src/assets 存放公共资源,比如图片
.gitignore git忽略文件
package.json 信息描述文件
vite.config.js vue配置文件
在index.html中写入以下代码,将vue应用HelloVueApp挂载到对应id的div标签中。
{{}}用于输出对象的属性和函数返回值。
在一个vue项目中,有且只有一个vue的实例对象。
<head>
<meta charset="utf-8">
<title>Vue 测试实例 - 菜鸟教程(runoob.com)</title>
<script src="https://cdn.staticfile.org/vue/3.2.36/vue.global.min.js"></script>
</head>
<body>
<div id="hello-vue" class="demo">
  {{ message }}
</div>
<script>
const HelloVueApp = {
  data() {
    return {
      message: 'Hello Vue!!'
    }
  }
}
Vue.createApp(HelloVueApp).mount('#hello-vue')
//使用createApp()创建新的应用实例
//传入createApp()的对象实际是一个根组件
//应用挂载(mount)到id为hello-vue的html标签上
</script>
</body>
2. 基础
1. 响应式基础
1. vue2与vue3风格对比
vue2 选项式API
<script>
//vue2 Options API
//1.引入组件
import Demo1 from "./components/Demo1.vue"

//2.注入组件(局部注册)
export default{
    data(){
        return{
            count:0,
            loading:false,
            error:null
        }
    },
    computed:{
       addCount(){
            return this.count*2;
       }
    } ,
    methods:{
        async fetchData(){
            this.loading = true;
            try{
                //fetch()是浏览器原生 API 用于向指定 URL 发送 HTTP 请求,并返回一个 Promise 对象
                //也可使用主流的axios  HTTP客户端
                const res = await fetch('/api/data')
                this.data = await res.json();// 解析响应为 JSON
            }catch(e){
                this.error = e;
            }finally{
                this.loading = false;
            }
        }
    },
    components:{
        Demo1
    }
}
</script>
vue3 组合式API
<script setup>
import { ref, computed } from 'vue'
import Demo1 from "./components/Demo1.vue"

const count = ref(0)
const loading = ref(false)
const error = ref(null)
const data = ref(null)

const addCount = computed(() => count.value * 2)

async function fetchData() {
  loading.value = true
  error.value = null
  try {
    const response = await fetch('/api/data')
    data.value = await response.json()
  } catch (err) {
    error.value = err
  } finally {
    loading.value = false
  }
}
</script>
2. ref,reactive,toRef,toRefs
正常情况都用ref。
解包指的是自动访问 ref 对象的 .value 属性,无需手动调用 .value 即可直接获取或修改其值。
ref
适用于基本类型(字符串、数字、布尔值)和引用类型(对象、数组)
在JavaScript中需要通过.value访问,在模板中自动解包
支持直接重新赋值(value = newValue)
保持响应性,可直接传递整个ref
使用Object.defineProperty()实现
如果将一个新的 ref 赋值给一个关联了已有 ref 的属性,那么它会替换掉旧的 ref
reactive
仅适用于对象类型(对象、数组、Map、Set等)
直接访问属性,不需要.value
不支持直接替换整个对象(会失去响应式)
解构会失去响应性,需使用toRefs保持响应性
使用ES6的Proxy实现深度响应式
toRef
引用,修改响应式数据会影响以前的数据。
toRefs
在组合式函数中返回 toRefs(state),允许调用方安全解构而不丢失响应性
将 reactive 对象转换为普通对象,但每个属性都是 ref
为了不覆盖reactive()返回的proxy对象,一般在reactive定义时定义成b=reactive({list:[1,2,3]}),通过b.list来修改。
<template>
  <button @click="changeAName">改变A name</button>
  <button @click="changeAUser">改变A User</button>
  <button @click="changeB">改变B</button>
</template>

<script setup>
import { reactive, watch } from 'vue'

let a = reactive({
  user: {
    name: 'John',
    age: 11
  }
})
let b = reactive({ count: 0 })

const changeAName = () => {
  a.user.name="lili"
}
const changeAUser = () => {
  a.user={
    name: 'tom',
    age: 13
    }
}
const changeB = () => {
  b=reactive({count:789}) //错误修改方式
  //当直接替换整个响应式对象时,Vue 的响应式系统会断开与旧proxy对象的连接,导致侦听器失效。
  //b.count = 456 // 正确修改方式
}

// 不能直接侦听响应式对象的属性值,需要提供一个 getter 函数
// 点击第一个和第二个按钮都会触发
watch(
  () => a.user.name,
  (newCount,oldValue) => {
    console.log(`new A name is: ${newCount}`)
  },
)

// 一个返回响应式对象的 getter 函数,只有在返回不同的对象时,才会触发回调,可以加deep参数转成深层侦听器
//点击第二个按钮会触发,不加deep参数第一个按钮无法触发
watch(
  () => a.user,
  (newCount,oldValue) => {
    console.log(`new A user is: ${newCount}`)
  },//{deep:true}
)

watch(
  () => b.count,//改成b也不行
  (newCount) => {
    console.log(`new B count is: ${newCount}`)
    //无输出,因为因为侦听器仍绑定在旧代理对象上
  },{deep:true}
)
</script>
<template>
  <button @click="testRef1">测试ref1</button>
  <button @click="testRef2">测试ref2</button>
  <button @click="testToRef">测试toRef</button>
  <button @click="testToRefs">测试toRefs</button>
  <br>state: {{state}}
  <br>s2: {{s2}}
  <br>s3: {{s3}}
</template>

<script setup>
import { reactive, toRef ,ref,toRefs} from 'vue'

const state = reactive({ name: 'Alice', age: 25 })
const tRef1=ref(state)
const testRef1=()=>{
  tRef1.value.name = 'Bob'
  console.log(state.name) //state的值和{{state}}会更新
  //因为当用 ref 包装一个响应式对象时,Vue 会直接复用原对象的代理引用(不会创建新代理)
  //tRef  -> { value: Proxy } <- state
  //            │
  //            └──> 原始对象 { name: 'Alice', age: 25 }
}

const s2={ name: 'Alice' };
const tRef2=ref(s2)
const testRef2=()=>{
  tRef2.value.name = 'Bob'
  console.log(s2.name) //点击第二个按钮,s2的值会更新,但是{{s2}}不会跟随更新
  //ref 检测到参数是普通对象时,会通过 reactive() 自动创建新代理对象
  //代理对象会将其修改同步到原始对象
  //s2     --> { name: 'Alice' } (原始对象)
  //tRef2  --> { value: Proxy }
  //              │
  //              └──> 新代理对象(与s2无直接引用关系)

}

const nameRef = toRef(state, 'name') // 保持与state.name的连接
const testToRef=()=>{
  nameRef.value = 'Bob'
  console.log(state.name) // state和{{state}}都更新
}

const s3 = reactive({ count: 0,cost:486 })
const c=(function(v1){
    return { ...toRefs(v1) } // 解构后仍响应
  })(s3) //匿名函数自调用
const testToRefs=()=>{
  c.count.value =456
  c.cost.value=789
  console.log(s3) // s3和{{s3}}都更新
}
</script>
2. 指令
| 指令 | 简写 | 说明 |
|---|---|---|
| v-bind | : | 属性绑定 |
| v-if…v-else…v-else-if | 条件渲染,有较高的切换渲染开销 | |
| v-show | 条件性地显示或隐藏元素,有较高的初始渲染开销 | |
| v-for | 列表渲染 | |
| v-on | @ | 事件监听 |
| v-model | 双向绑定 |
1. 属性绑定与条件渲染
修改index.html对应部分
<div id="hello-vue" >
    <p v-bind:class="msg">p标签class属性与msg的值绑定</p>
    <p v-bind="obj">绑定多个值</p>
    <p v-if="flag">false隐藏</p>
    <p v-if="type === 'A'">A</p>
    <p v-else-if="type === 'B'">B</p>
    <p v-else="type === 'C'">C</p>
    <p v-show="flag">使用css的display</p>
</div>

const HelloVueApp = {
  data() {
    return {
      msg: 'jkloli',
		obj:{class:"123",id:"456"},
		flag:false,
		type:"B"
    }}}
2. 列表渲染 v-for
v-for遍历列表有两个参数,第二个参数表示下标。
v-for遍历对象有三个参数,三个参数依次为value,key,index。
v-for可以设置key来管理状态,减少重复渲染的次数。
in也可以写成of
  <div id="hello-vue" >
    <div v-for="i in result">
      <p>{{i.id}}</p>
      <p>{{i.name}}</p>
    </div>
    <p v-for="(j,index) in list">内容{{j}},下标{{index}}</p>
    <p v-for="(v,k,i) in obj" :key="i">{{v}},{{k}},{{i}}</p>
  </div>

const HelloVueApp = {
  data() {
    return {
      result:[{"id":"1","name":"雪"},{"id":"2","name":"梅"}],
      list:['a','b','c'],
      obj:{"name":"zs","age":99}
    }}}
3. 事件处理 v-on
事件处理分为内联事件处理和方法事件处理。
在index.html里
<!DOCTYPE html>
<html>
  <head>
    <meta charset="utf-8">
    <title>Vue 测试实例</title>
  </head>
  <body>
    <div id="app"></div>
    <script type="module" src="/src/main.js"></script>
  </body>
</html>
在App.vue里,导入Demo1,因为使用了
<script setup>//单文件
import Demo1 from "./components/Demo1.vue"
</script>
<template>
    <Demo1/>
</template>
在main.js里
import { createApp } from 'vue'
import App from './App.vue'
createApp(App).mount('#app')
在Demo1.vue里
<template>
<h3>内联事件处理器</h3>
<button v-on:click="count++">Add</button><br>
<h3>方法事件处理器</h3>
<button @click="mimusCount">minus</button><br>
<p>{{ count }}</p>
</template>

<script>
export default{
    data(){
        return{
            count:0
        }
    },
    methods:{
        mimusCount(){
            this.count-=1
        }
    }
}
</script>
4. 事件参数
事件参数可以获取event(事件)对象和通过事件传递数据。
在Demo1.vue里
<template>
    <p @click="getN(n,$event)" v-for="(n,i) in l" :key="i">{{ n }}</p>
    </template>

    <script>
    export default{
        data(){
            return{
                l:["zs","ls","ww"]
            }
        },
        methods:{
            getN(name,e){
                console.log(name);
                console.log(e);
            }
        }
    }
    </script>

点击左侧的zs即可在控制台打印event对象
5. 事件修饰符
事件捕获:事件从文档根节点(Document 对象)流向目标节点,途中会经过目标节点的各个父级节点,并在这些节点上触发捕获事件,直至到达事件的目标节点;
事件冒泡:与事件捕获相反,事件会从目标节点流向文档根节点,途中会经过目标节点的各个父级节点,并在这些节点上触发捕获事件,直至到达文档的根节点。整个过程就像水中的气泡一样,从水底向上运动。
v-on提供事件修饰符。
| 事件修饰符 | 说明 |
|---|---|
| .stop | 阻止事件冒泡 |
| .prevent | 阻止默认事件 |
| .self | 只有自己触发自己才执行,忽略内部冒泡传递的触发信号 |
| .capture | 从最外层向里捕获 |
| .once | 最多触发一次 |
| .passive | 不阻止默认事件 |
| 按键修饰符 | 按键修饰符 |
|---|---|
| .enter | .tab |
| .delete 捕获Delete和Backspace | .esc |
| .space | .up |
| .down | .left |
| .right | .middle |
| .ctrl | |
| .alt | .shift |
.exact修饰符,语序控制触发一个事件所需的确定组合的系统按键修饰符。
<!-- 当按下 Ctrl 时,即使同时按下 Alt 或 Shift 也会触发-->
<button @click.ctrl="onClick">A</button>
<!-- 仅当按下 Ctrl 且未按任何其他键时才会触发 -->
<button @click.ctrl.exact="onCtrlClick">A</button>
<template>
    <a @click.prevent="HK" href="https://www.baidu.com">百度</a>
    <div @click="c1">
        <p @click.stop="c2">若冒泡,先打印c2,再打印c1。这里加了.stop不冒泡</p>
    </div>
    <div @click.self="c1">点我只触发c1
        <p @click="c2">会冒泡,点我只触发c2,因为外部.self忽略了内部冒泡信号</p>
    </div>
    </template>

    <script>
    export default{
        data(){
            return{
                l:["zs","ls","ww"]
            }
        },
        methods:{
            HK(){
                console.log("HK");
            },
            c1(){
                console.log("c1");
            },
            c2(){
                console.log("c2");
            }
        }
    }
    </script>
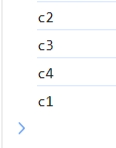
以下代码点击c4,依次打印c2,c3,c4,c1(先由外向内捕获,再由内向外冒泡)。
<template>
    <div @click="c1">c1
        <div @click.capture="c2">c2
            <div @click.capture="c3">c3
                <div @click="c4">c4
                </div>
            </div>
        </div>
    </div>
    </template>

    <script>
    export default{
        data(){
            return{
            }
        },
        methods:{
            c1(){
                console.log("c1");
            },
            c2(){
                console.log("c2");
            },
            c3(){
                console.log("c3");
            },
            c4(){
                console.log("c4");
            }
        }
    }
    </script>
6. 数组变化侦测
变更方法:变更方法会改变原数组。
不可变方法:不改变原数组,返回新数组。
| 变更方法 | 说明 |
|---|---|
| push() | 向数组末尾添加元素,并返回新的长度。 |
| pop() | 删除并返回数组的最后一个元素 |
| shift() | 删除并返回第一个元素 |
| unshift() | 向数组的开头添加元素,并返回新的长度 |
| splice(index,len,[list]) | 从index向后删除len个元素,在index前插入[list] |
| this.list.sort((a,b)=>a.id-b.id) | 升序排序数组 |
| reverse() | 数组翻转 |
| 不可变方法 | 说明 |
|---|---|
| filter() | 返回符合条件的数组 |
| concat() | 连接数组 |
| slice() | 从已有数组返回选定元素 |
<template>
    <p @click="c1">修改原数组</p>
    <p @click="c2">替换数组</p>
    <li v-for="i in numbers" :key="i">{{ i }}</li>
    </template>

    <script>
    export default{

        data(){
            return{
                numbers:[1,2,3,4,5,6]
            }
        },
        methods:{
            c1(){
                this.numbers.push(10);
            },
            c2(){
                this.numbers= this.numbers.concat([7,8,9]);
            }
        }
    }
    </script>
3. 计算属性 computed
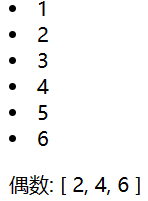
一个计算属性仅会在其响应式依赖更新时才重新计算。也就是说只要this.list的值不变,调用多次even也只会计算一次。
<template>
    <li v-for="i in list" :key="i">{{ i }}</li>
    <p>偶数: {{even}}</p>
    </template>

    <script>
    export default{
        data(){
            return{
                list:[1,2,3,4,5,6]
            }
        },
        computed:{
            even(){
                return this.list.filter((i)=>i%2==0)
            }
        }
    }
    </script>
4. 类与样式绑定
class 和 style 的 v-bind 用法提供了特殊的功能增强。除了字符串外,表达式的值也可以是对象,数组或数组嵌套对象。
<template>
    <p :class="{'a':isA,'b':isB}">class="a b"</p>
    <p :class="[jk,gg]">class="jkloli giegie"</p>
<p :style="obj">Red Taylor Swift</p>
    </template>

    <script>
    export default{
        data(){
            return{
                isA:true,
                isB:true,
                jk:"jkloli",
                gg:"giegie",
                obj:{color:"red",
                fontSize:30+'px'}
            }
        }
    }
    </script>
5. 侦听器 watch
在Vue2选项式 API 中,我们可以使用watch函数在每次响应式状态发生变化时触发回调函数。
<template>
<p>{{msg}}</p>
<button @click="uD">修改</button>
    </template>

    <script>
    export default{
        data(){
            return{
                msg:"hello"
            }
        },
        methods:{
            uD(){
                this.msg="world";
            }
        },
        watch:{//watch选项
            //newValue改变之后新数据
            //oldValue改变之前旧数据
            msg(newValue,oldValue){
                //函数名必须与侦听对象同名
                console.log(newValue,oldValue);
            }
        }
    }
    </script>
在Vue3组合式API中,我们可以使用 watch 函数在每次响应式状态发生变化时触发回调函数
watch 的第一个参数可以是不同形式的“数据源”:它可以是一个 ref (包括计算属性)、一个响应式对象、一个 getter 函数、或多个数据源组成的数组
watch的第三个参数可选,有以下几种
{ deep: true } //深层侦听
{ immediate: true } //即时回调(先触发一次)
{ once: true } //一次性
<template>
  <button @click="changeAName">改变A name</button>
  <button @click="changeAUser">改变A User</button>
  <button @click="changeB">改变B</button>
</template>

<script setup>
import { reactive, watch } from 'vue'

let a = reactive({
  user: {
    name: 'John',
    age: 11
  }
})
let b = reactive({ count: 0 })

const changeAName = () => {
  a.user.name="lili"
}
const changeAUser = () => {
  a.user={
    name: 'tom',
    age: 13
    }
}
const changeB = () => {
  b=reactive({count:789}) //错误修改方式
  //当直接替换整个响应式对象时,Vue 的响应式系统会断开与旧对象的连接,导致侦听器失效。
  //b.count = 456 // 正确修改方式
}

// 不能直接侦听响应式对象的属性值,需要提供一个 getter 函数
// 点击第一个和第二个按钮都会触发
watch(
  () => a.user.name,
  (newCount,oldValue) => {
    console.log(`new A name is: ${newCount}`)
  },
)

// 一个返回响应式对象的 getter 函数,只有在返回不同的对象时,才会触发回调,可以加deep参数转成深层侦听器
//点击第二个按钮会触发,不加deep参数第一个按钮无法触发
watch(
  () => a.user,
  (newCount,oldValue) => {
    console.log(`new A user is: ${newCount}`)
  },//{deep:true}
)

watch(
  () => b.count,//改成b也不行
  (newCount) => {
    console.log(`new B count is: ${newCount}`)
    //无输出,因为因为侦听器仍绑定在旧代理对象上
  },{deep:true}
)
</script>
watchEffect()
立即运行一个函数,同时响应式地追踪其依赖,并在依赖更改时重新执行。
watchEffect如果监听reactive定义的对象是不起作用的,只能监听对象中的属性。
比如以下内容可以用watchEffect() 简写
const todoId = ref(1)
const data = ref(null)

watch(
  todoId,
  async () => {
    const response = await fetch(
      `https://jsonplaceholder.typicode.com/todos/${todoId.value}`
    )
    data.value = await response.json()
  },
  { immediate: true }
)
watchEffect(async () => {
  const response = await fetch(
    `https://jsonplaceholder.typicode.com/todos/${todoId.value}`
  )
  data.value = await response.json()
})
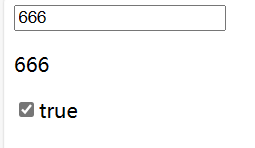
6. 表单输入绑定 v-model
双向绑定,改变输入框的值会改变msg的值
<template>
    <input type="text" v-model.lazy="msg">
    <p>{{msg}}</p>
    <input type="checkbox" id="checkbox" v-model="checked"/>
    <label for="checkbox">{{checked}}</label>
        </template>

        <script>
        export default{
            data(){
                return{
                    msg:"hello",
                    checked:false
                }
            }
        }
        </script>
| v-model修饰符 | 说明 |
|---|---|
| .lazy | 在每次change事件后更新数据(失去焦点更新) |
| .number | 转为数字类型 |
| .trim | 过滤首尾空白 |
7. 模板引用 ref
通过ref属性给DOM元素或子组件添加一个引用(reference),然后可以通过this.$refs来访问这个元素。
挂载结束后引用都会暴露在this.$refs上。
<template>
    <input type="text" ref="abc">
    <button @click="getValue">获取属性值</button>
        </template>

        <script>
        export default{
            data(){
                return{
                }
            },
            methods:{
                getValue(){
                    console.log(this.$refs.abc.value);
                }
            }
        }
        </script>
8. 组件基础
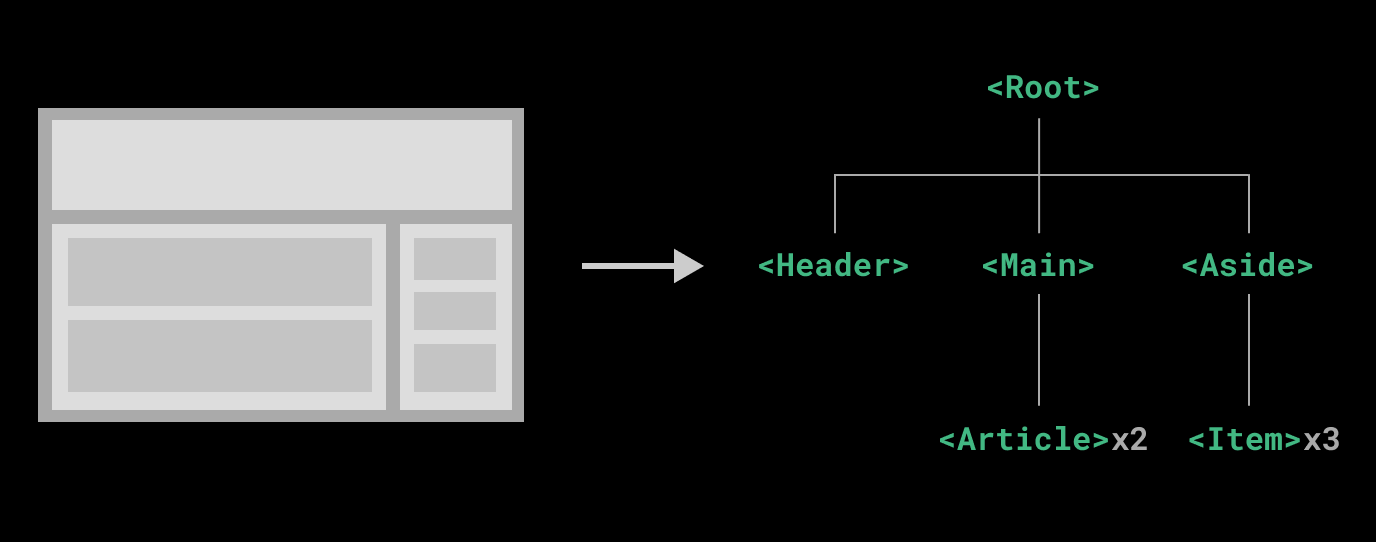
组件允许我们将 UI 划分为独立的、可重用的部分,并且可以对每个部分进行单独的思考。在实际应用中,组件常常被组织成层层嵌套的树状结构。
当使用构建步骤时,我们一般会将 Vue 组件定义在一个单独的 .vue 文件中,这被叫做单文件组件(简称 SFC)。此外,我们还可以在Demo1.vue里引入其它组件形成组件嵌套。
3. 深入组件
1. 组件注册(全局和局部)
一个vue组件在使用前需要先被”注册“,vue在渲染模板时才能找到对应的实现。组件注册有全局注册和局部注册两种。
全局注册没法移除未使用的组件。
1. 全局注册
全局注册我们可以使用 Vue 应用实例的 .component() 方法,让组件在vue当前 Vue 应用中全局可用。
./components/Demo1.vue里
<template>
<p class="Redc">{{msg}}</p>
</template>

<script>
        export default{
            data(){
                return{
                    msg:18
                }
            }
        }
</script>
<!--scoped让当前样式只在当前组件中生效-->
<style scoped>
    .Redc{
        color:red;
    }
</style>
main.js
import { createApp } from 'vue'
import App from './App.vue'
import Demo1 from './components/Demo1.vue'//引入

const app = createApp(App)
//下面写组件注册
app.component("Demo1",Demo1)
app.mount("#app")
App.vue
<template>
    <Demo1 /><!--在这显示-->
    </template>
    <script>
    </script>
    <!--scoped让当前样式只在当前组件中生效-->
    <style scoped>
    </style>
2. 局部注册
局部注册可以使用components显式注册。
在使用<script setup>的单文件组件中,导入的组件可以直接在模板中使用,无需注册。
main.js
import { createApp } from 'vue'
import App from './App.vue'
const app = createApp(App)
app.mount("#app")
App.vue里
<template>
<!-- 3.显示组件-->
<Demo1/>
</template>

<script>
//1.引入组件
import Demo1 from "./components/Demo1.vue"

//2.注入组件(局部注册)
export default{
    components:{
        Demo1
    }
}
</script>
<style>
</style>
<script setup>
import Demo1 from "./components/Demo1.vue"
</script>
2. 父传子 props
在Vue2选项式API中,我们可以用props在组件间传递数据,并且只能由父组件传到子组件,且不能直接在子组件修改父组件传来的数据。但是我们可以传递函数,让函数在子组件调用时修改父组件数据。
在传递过程中我们还可以设置props校验,判断传入数据类型,设置数据默认值,设置必选项(必须传入该数据)。
如果是数组和对象,必须通过工厂函数返回默认值。

App.vue
<template>
<!-- 3.显示组件-->
<Father />
</template>

<script setup>
import Father from "./components/Father.vue"
</script>
Father.vue 父组件
<template>
    <h3>Father</h3>
    <input style="text" v-model:="msg" />
    <Child :jkloli="cD" :title="msg" />
</template>

<script>
import Child from './Child.vue'
export default {
    data(){
        return{
            msg:"Father data"
        }
    },
    methods:{
        cD(data,e){
            this.msg=data;
        }
    },
    components:{
        Child //局部注册
    }
}
</script>
Child.vue 子组件
<template>
    <h3>Child</h3>
    <p>{{title}}</p>
    <li v-for="(j,i) in arr" :key="i">{{j}}</li>
    <input type="text" v-model="vv">
    <button @click="jkloli(vv,$event)">间接修改父组件msg</button>
  </template>
  <script>
  export default {
      data(){
          return{
                vv:""
          }
      },
      //props:["jkloli","title"]
      props:{
          jkloli:{
              type:Function,
              //数据需要满足的类型,不满足报警告
              required:true //必选项
          },
          title:{
              type:[String,Number,Array],
              default:"Child" //默认值
          },
          arr:{
              type:Array,
              default(){
                  return [1,2,3,4];
              }
          }

      }
  }
  </script>
Vue3组合式API中,使用defineProps
Father.vue
<template>
  <Child
    :bookInfo="parentData"
    :count="counter"
    status="active"
  />
</template>

<script setup>
import { reactive, toRef ,ref,toRefs,onMounted} from 'vue'
import Child from './Child.vue'
const parentData = ref({
  title: 'Vue3教程',
  author: '张三',
  publishDate: '2025-08-01',
  tags: ['前端', 'Vue', '组合式API']
})

const counter = ref(15)
</script>
Child.vue
<template>
    <h3>Child</h3>
</template>
<script lang="ts" setup><!--需要指定为ts语法-->
import {ref,defineProps} from 'vue'
const props = defineProps({
  bookInfo: {
    type: [Object,null],
    required: true,
    default: () => ({})
  },
  count: {
    type: Number,
    default: 0
  },
   status: {
    type: String,
    validator: (value : string) => ['active', 'inactive'].includes(value)
  }
})

console.log('接收到的书籍信息:', props.bookInfo)
console.log('计数:', props.count)
console.log('状态:', props.status)
</script>

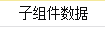
3. 组件事件实现子传父

在Vue2选项式API中,组件的模板表达式中,可以直接使用 $emit 方法触发自定义事件,实现子传父。
Father.vue
<template>
    <h3>Father</h3>
子组件传递的数据: <p>{{msg}}</p>
    <Child @someEvent="getHandle"/>
</template>

<script>
import Child from './Child.vue'
export default {
    data(){
        return{
            msg:""
        }
    },
    methods:{
        getHandle(data){//事件处理
            console.log("自定义事件someEvent触发了");
            this.msg=data;
        }
    },
    components:{
        Child //局部注册
    }

}
</script>
Child.vue
<template>
    <h3>Child</h3>
    <input type="text" v-model="msg">
    <button @click="adr">传递数据</button>
  </template>
  <script>
  export default {
      data(){
          return{
              msg:""
          }
      },
      methods:{//或者用侦听器实时更新数据
          adr(){
              //触发自定义事件someEvent
              this.$emit("someEvent",this.msg);
          }
      }
  }
  </script>
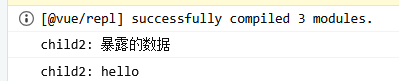
在Vue3组合式API中,可以使用defineExpose和defineEmit
defineEmits() 宏不能在子函数中使用。如上所示,它必须直接放置在 <script setup> 的顶级作用域下。
Father.vue
<template>
  <Child @updateData="handleData" />
  <!--使用@事件名 接收子组件传递的数据,并触发回调函数handleData-->
  <Child2 ref="childRef" />
  <!--使用 ref 获取子组件实例并操作暴露的数据-->
</template>

<script setup>
import { reactive, toRef ,ref,toRefs,onMounted} from 'vue'
import Child from './Child.vue'
import Child2 from './Child2.vue'
const handleData = (payload) => {
  console.log(payload.value) // 输出:'子组件数据'
}
const childRef = ref(null)
onMounted(() => {
  console.log("child2: "+childRef.value.childData) // 输出:'暴露的数据'
  console.log("child2: "+childRef.value.cd2)
})
</script>
Child.vue
<template>
    <h3>Child</h3>
    <button @click="sendData">点击发送给父组件</button>
</template>
<script setup>
import {ref,defineEmits,defineExpose} from 'vue'
// 子组件
// 使用 defineEmits 定义自定义事件,通过 emit() 触发
const emit = defineEmits(['updateData'])
const sendData = () => {
  emit('updateData', { value: '子组件数据' })
}
</script>
Child2.vue
<template>
  <h3>Child2</h3>
</template>

<script setup>
import {ref,defineEmits,defineExpose} from 'vue'
  // 子组件
const childData = ref('暴露的数据')
const cd2=ref('hello')
defineExpose({ childData ,cd2})

</script>
4. 透传attributes
“透传 attribute”指的是传递给一个组件,却没有被该组件声明为 props 或 emits的 attribute 或者 v-on 事件监听器。最常见的例子就是 class、style 和 id。
当一个组件以单个元素为根作渲染时,透传的 attribute 会自动被添加到根元素上。
App.vue
<template>
    <!-- 传递class给子组件Demo1-->
    <Demo1 class="a-c" />
    </template>
    <script setup>
    import Demo1 from "./components/Demo1.vue"
    </script>
Demo1.vue
<template>
    <!--1. 必须是唯一根元素,比如有且只有一个h3-->
    <h3>透传属性</h3>
    </template>
    <script>
            export default{
                //inheritAttrs:false //禁用 Attributes 继承
            }
    </script>
    <!--scoped让当前样式只在当前组件中生效-->
    <style scoped>
    .a-c{
        color:red;
    }
    </style>
5. 插槽 slot(重点)
1. 简介
我们可以使用插槽在子组件中渲染父组件传递的模板片段。
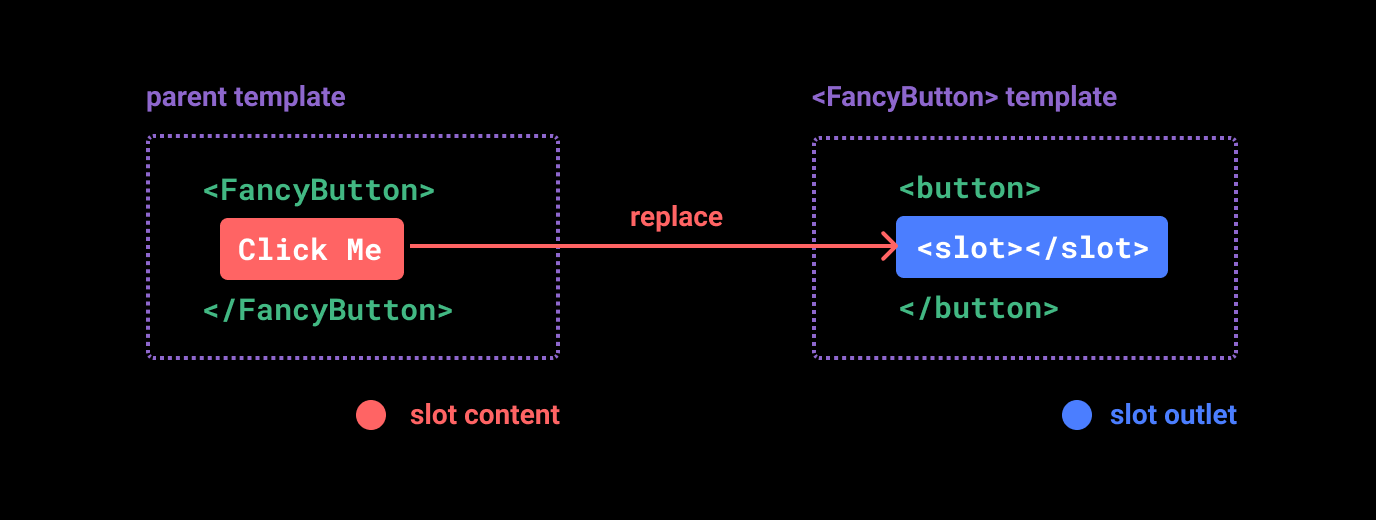
<slot> 元素是一个插槽出口 (slot outlet),标示了父元素提供的插槽内容 (slot content) 将在哪里被渲染。
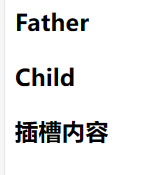
Father.vue
<template>
    <h3>Father</h3>
    <Child>
        <h3>插槽内容</h3>
    </Child>
</template>

<script setup>
import Child from './Child.vue'
</script>
Child.vue
<template>
    <h3>Child</h3>
    <slot></slot>
  </template>
  <script>
  </script>
2. 渲染作用域
插槽内容可以访问到父组件的数据作用域,因为插槽内容本身是在父组件模板中定义的。
Father.vue
<template>
    <h3>Father</h3>
    <Child>
        <h3>{{msg}}</h3>
    </Child>
</template>

<script>
import Child from './Child.vue'
export default{
    data(){
        return{
            msg:"666"
        }
    },
    components:{
        Child
    }
}
</script>
3. 插槽默认值
<slot>在slot里写插槽默认值</slot>
4. 具名插槽
<slot> 元素可以有一个特殊的属性name,用来给各个插槽分配唯一的 ID,以确定每一处要渲染的内容。
v-slot,简写#,意思是将这部分的模板片段传入子组件对应名称的插槽中。
Father.vue
<template>
  <h3>Father</h3>
    <Child>
        <template v-slot:A><!--要为具名插槽A传内容-->
            <p>hello world</p>
        </template>
        <template #B><!--要为具名插槽B传内容-->
            <p>xss</p>
        </template>
    </Child>
</template>
<script setup>
import Child from './Child.vue'
</script>
Child.vue
<template>
    <h3>Child</h3>
    <slot name="A">插槽A</slot>
    <hr>
    <slot name="B">插槽B</slot>
  </template>
  <script>
  </script>

5. 作用域插槽
可以像对组件传递 props 那样,向一个插槽的出口上传递 attributes。
子组件count传给父组件,然后父组件将count传给子组件显示。
Father.vue
<template>
    <h3>Father</h3>
    <Child v-slot="slotProps">
        {{slotProps.count}}
        {{slotProps.text}}
    </Child>
</template>

<script setup>
import Child from './Child.vue'
</script>
Child.vue
<template>
    <h3>Child</h3>
    <slot :count="65" :text=uname>插槽A</slot>
</template>
<script setup>
import {ref} from 'vue'
const uname=ref("张三");//ref is not defined
</script>
如果是具名插槽,Father.vue可以这样写
<template>
    <h3>Father</h3>
    <Child>
        <template #A="slotProps">
			{{slotProps.count}}
		</template>
    </Child>
</template>
<script setup>
import Child from './Child.vue'
</script>

6. 组件生命周期
每个 Vue 组件实例在创建时都需要经历一系列的初始化步骤,比如设置好数据侦听,编译模板,挂载实例到 DOM,以及在数据改变时更新 DOM。在此过程中,它也会运行被称为生命周期钩子的函数,让开发者有机会在特定阶段运行自己的代码。
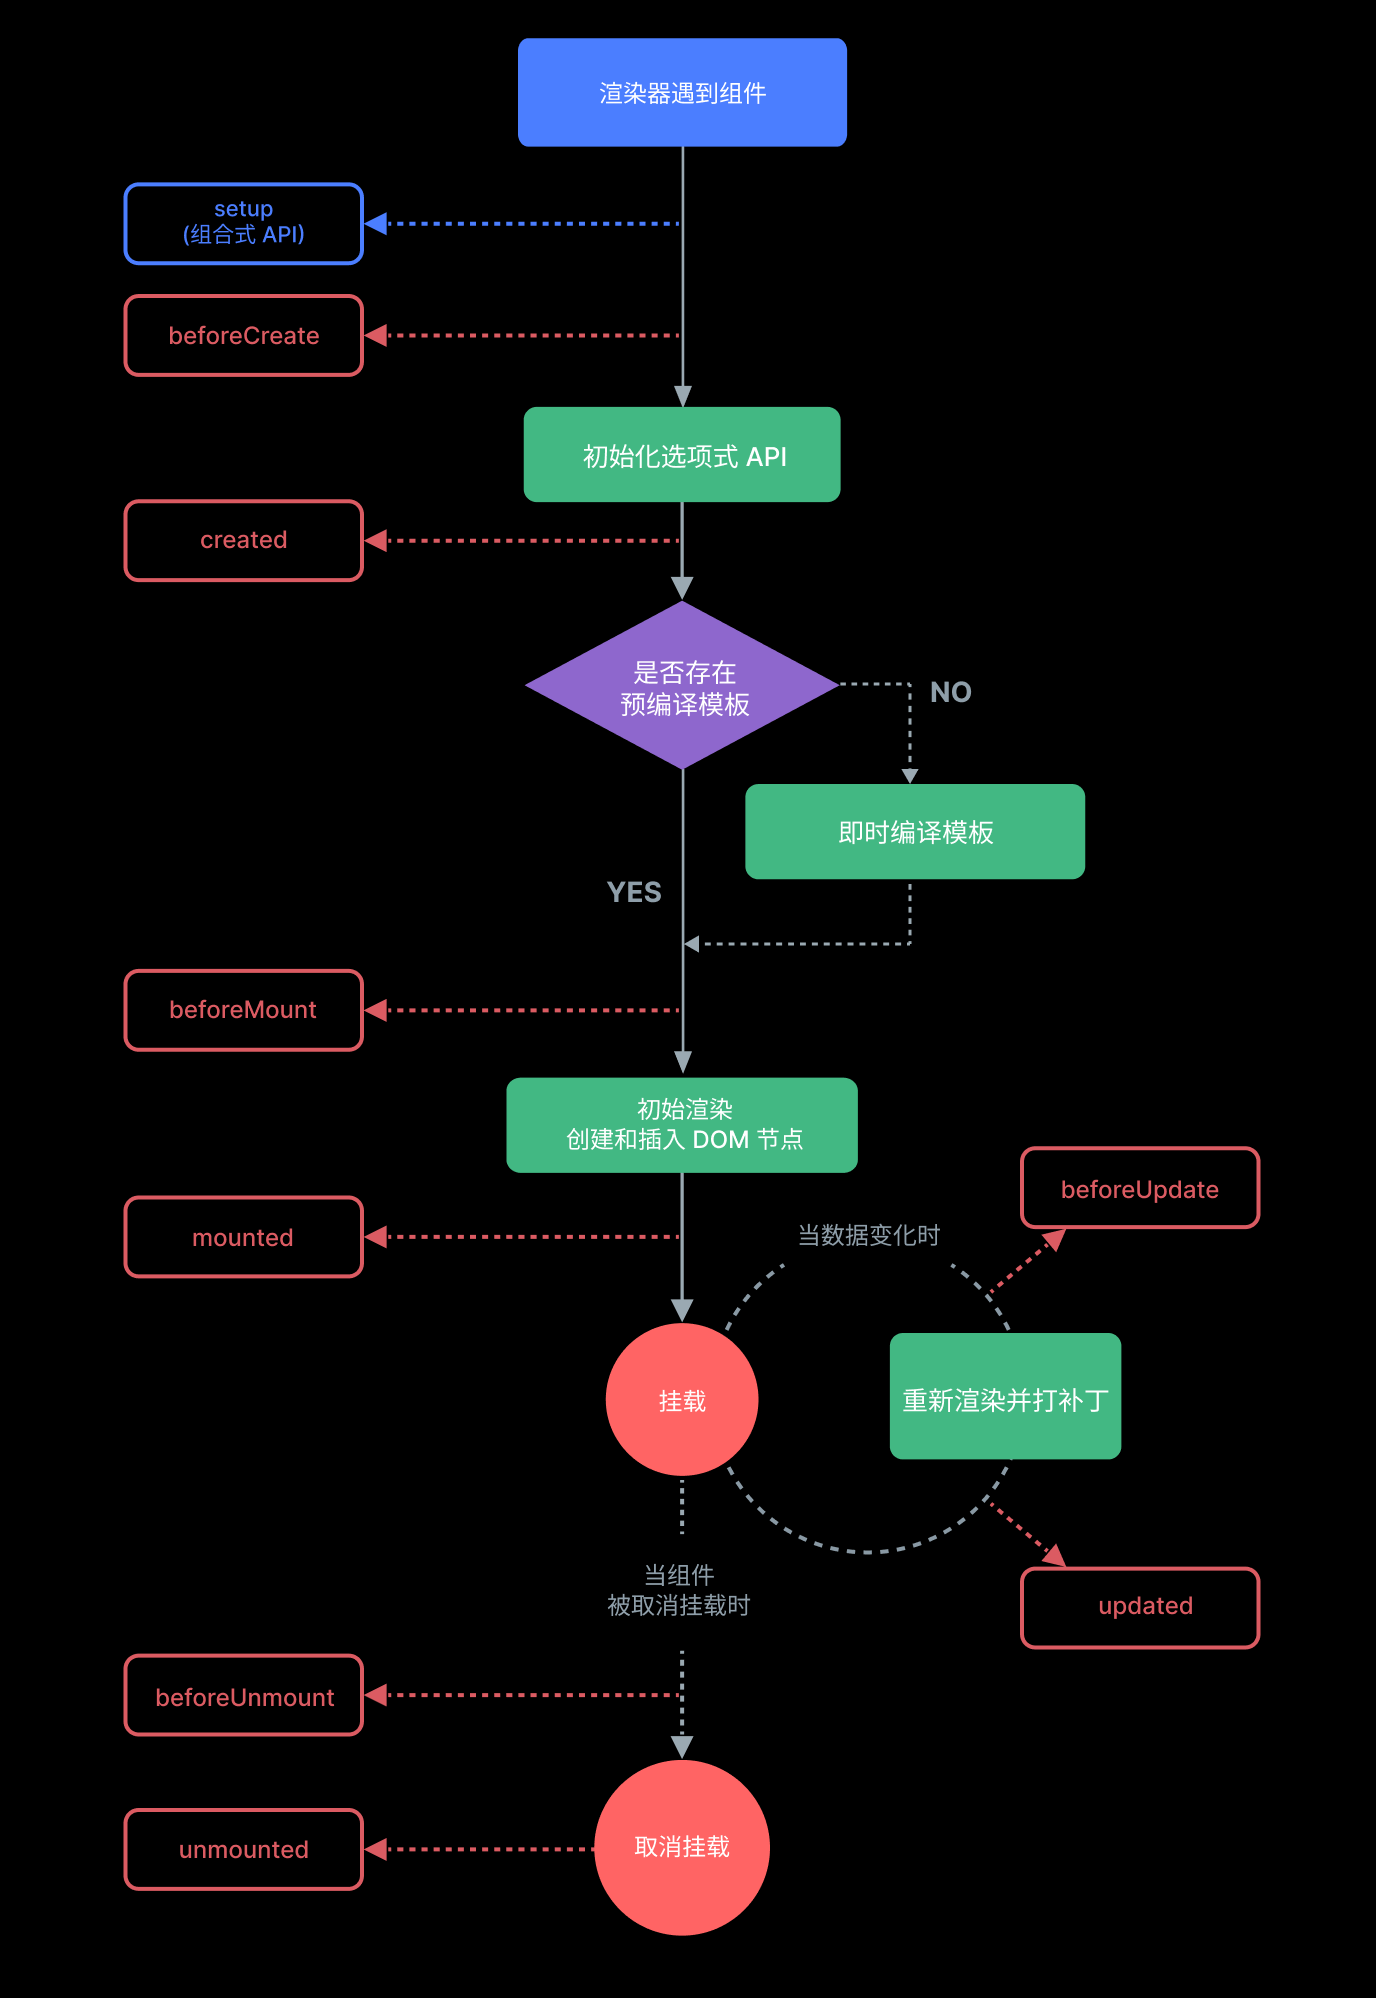
| vue2 | vue3 | 说明 |
|---|---|---|
| beforeCreate(){} | setup() | 组件创建前执行 |
| created(){} | setup() | 组件创建后执行 |
| beforeMount(){} | onBeforeMount(()=>{}) | 组件挂载到节点上之前执行 |
| mounted(){} | onMounted(()=>{}) | 组件挂载完成后执行 |
| beforeUpdate(){} | onBeforeUpdate(()=>{}) | 组件更新前执行 |
| updated(){} | onUpdated(()=>{}) | 组件更新完成后执行 |
| beforeDestroy(){} | onBeforeUnmount(()=>{}) | 组件卸载之前执行 |
| destroyed(){} | onUnmounted(()=>{}) | 组件卸载完成之后执行 |
| errorCaptured(){} | onErrorCaptured(()=>{}) | 当捕获一个来自子孙组件的异常时激活钩子函数 |
通过ref属性给DOM元素或子组件添加一个引用(reference),然后可以通过this.$refs来访问这个元素。
APP.vue
<template>
<h3>App</h3>
<p ref="name">you get it!</p>
</template>

<script>
    export default{
        beforeMount(){
            console.log(this.$refs.name);//undefined
        },
        mounted(){
            console.log(this.$refs.name);//<p>you get it!</p>
        }
    }
</script>

7. 动态组件
通过 Vue 的 <component> 元素和特殊的 is attribute 实现在两个组件间来回切换。
Demo1.vue和Demo2.vue随便写点内容。
App.vue
<template>
<h3>App</h3>
<component :is="CT"></component>
<button @click="changeHandle">切换组件</button>
</template>

<script>
import Demo1 from './components/Demo1.vue'
import Demo2 from './components/Demo2.vue'
export default{
    data(){
        return{
            CT:"Demo1"
        }
    },
    components:{
        Demo1,
        Demo2
    },
    methods:{
        changeHandle(){
            this.CT=this.CT=="Demo1"?"Demo2":"Demo1";
        }
    }
}
</script>
8. 组件保持存活
当使用<component :is="...">在多个组件间来回切换时,被切换掉的组件会被卸载,我们可以用<keep-alive>来使被切换掉的组件保持存活状态。比如下面的Demo1更新成新数据后,切Demo2再切回来依旧是新数据。
App.vue
<template>
<h3>App</h3>
    <keep-alive>
        <component :is="CT"></component>
    </keep-alive>
<button @click="changeHandle">切换组件</button>
</template>

<script>
import Demo1 from './components/Demo1.vue'
import Demo2 from './components/Demo2.vue'
export default{
    data(){
        return{
            CT:"Demo1"
        }
    },
    components:{
        Demo1,
        Demo2
    },
    methods:{
        changeHandle(){
            this.CT=this.CT=="Demo1"?"Demo2":"Demo1";
        }
    }
}
</script>
Demo1.vue
<template>
    <h3>Demo1</h3>
    <p>msg: {{msg}}</p>
    <button @click="changeHandle">更新数据</button>
    </template>
    <script>
    export default{
        data(){
            return{
                msg:"旧数据"
            }
        },
        methods:{
            changeHandle(){
                this.msg="新数据";
            }
        }
    }
    </script>
9. 异步组件
在大型项目中,我们可能需要拆分应用为更小的块,并仅在需要时再从服务器加载相关组件。Vue 提供了 defineAsyncComponent方法来实现此功能。
App.vue
<template>
    <h3>App</h3>
        <keep-alive>
            <component :is="CT"></component>
        </keep-alive>
    <button @click="changeHandle">切换组件</button>
    </template>

    <script>
    import {defineAsyncComponent} from 'vue'
    import Demo1 from './components/Demo1.vue'
    //异步加载组件
    const Demo2=defineAsyncComponent(()=>import('./components/Demo2.vue'))
    export default{
        data(){
            return{
                CT:"Demo1"
            }
        },
        components:{
            Demo1,
            Demo2
        },
        methods:{
            changeHandle(){
                this.CT=this.CT=="Demo1"?"Demo2":"Demo1";
            }
        }
    }
    </script>
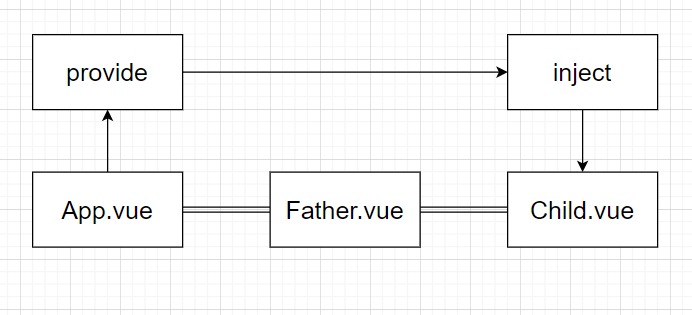
10. 依赖注入(重点)
有一些多层级嵌套的组件,形成了一颗巨大的组件树,而某个深层的子组件需要一个较远的祖先组件中的部分数据。此时使用props会非常麻烦(prop逐级透传),因此我们可以使用provide和inject解决这一问题。
inject注入会在组件自身的状态之前被解析,因此你可以在 data() 中访问到注入的属性。
App.vue
<template>
    <Father />
    </template>
    <script>
    import Father from "./components/Father.vue"
    export default{
        components:{
            Father
        },
        provide:{
            msg:"App的数据"
        }
    }
    </script>
App.vue中provide也可以读取data选项中的数据
<template>
    <Father />
    </template>
    <script>
    import Father from "./components/Father.vue"
    export default{
        data(){
            return{
                msg:"App的数据"
            }
        },
        components:{
            Father
        },
        provide(){
            return{
                msg:this.msg
            }
        }
    }
    </script>
Father.vue
<template>
    <h3>Father</h3>
    <Child />
</template>
<script setup>
import Child from './Child.vue'
</script>
Child.vue
<template>
    <h3>Child</h3>
	<p>{{msg}}</p>
</template>
<script>
export default{
      inject:["msg"]
}
</script>
此外,我们还可以在整个应用层面提供依赖
main.js
import { createApp } from 'vue'
import App from './App.vue'
const app = createApp(App)
app.provide("msg","hello world")
//msg为注入名,hello world为值
app.mount("#app")


 被折叠的 条评论
为什么被折叠?
被折叠的 条评论
为什么被折叠?
 到【灌水乐园】发言


