


 本文档介绍了如何在基于 Nebular 的 Angular 项目中创建并集成自定义模块。首先,通过 ng g m 命令在指定目录下生成带有路由的模块。接着,创建模块组件,组件内仅包含路由插座,并配置路由。最后,将新模块添加到应用的左侧菜单栏,以便用户访问。
https://akveo.github.io/nebular/#/docs/installation/based-on-starter-kit-ngxadmin
一、在指定文件夹下生成带路由的模块
ng g m --routing pages/attend

常用新建指令:
ng g cl my-new-class: 新建 class
ng g c my-new-component: 新建组件ng g d my-new-directive: 新建指令
ng g e my-new-enum: 新建枚举
ng g m my-new-module: 新建模块
ng g p my-new-pipe: 新建管道
ng g s my-new-service: 新建服务
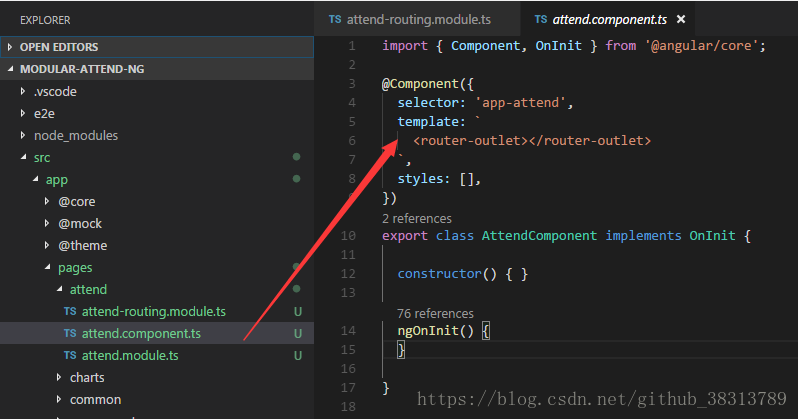
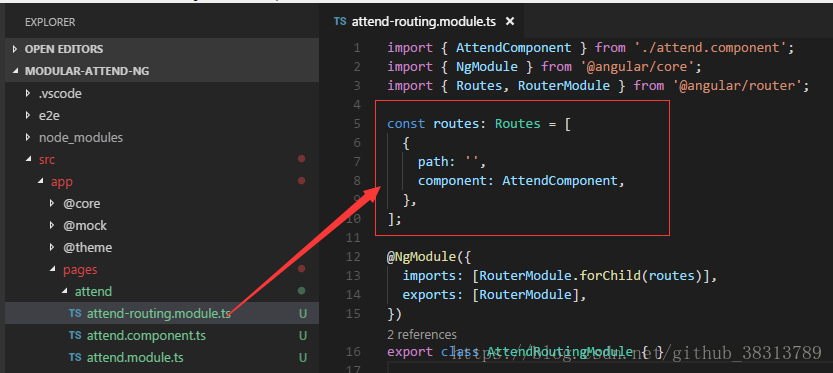
二、创建模块部分组件,组建中只放一个路由插座,配置路由
ng g c -it -is pages/attend
可选项:
--flat: boolean, 默认为false, 表示在src/app目录下生成组件而不是在src/app/site-header目录中--inline-template: boolean, 默认为false, 表示使用内联模板而不是使用独立的模板文件--inline-style: boolean, 默认为false, 表示使用内联样式而不是使用独立的样式文件--prefix: boolean, 默认为true, 使用.angular-cli.json配置的前缀作为组件选择器的前缀--spec: boolean, 默认为true, 表示生成包含单元测试的 spec 文件--view-encapsulation: string, 用于设置组件的视图封装策略--change-detection: string, 用于设置组件的变化检测策略
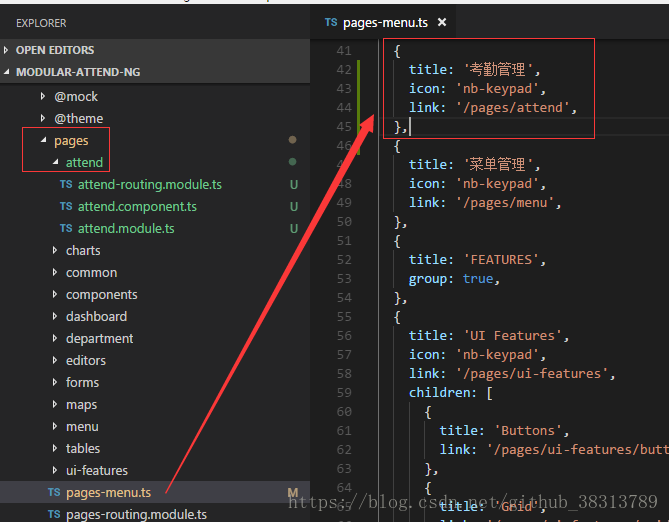
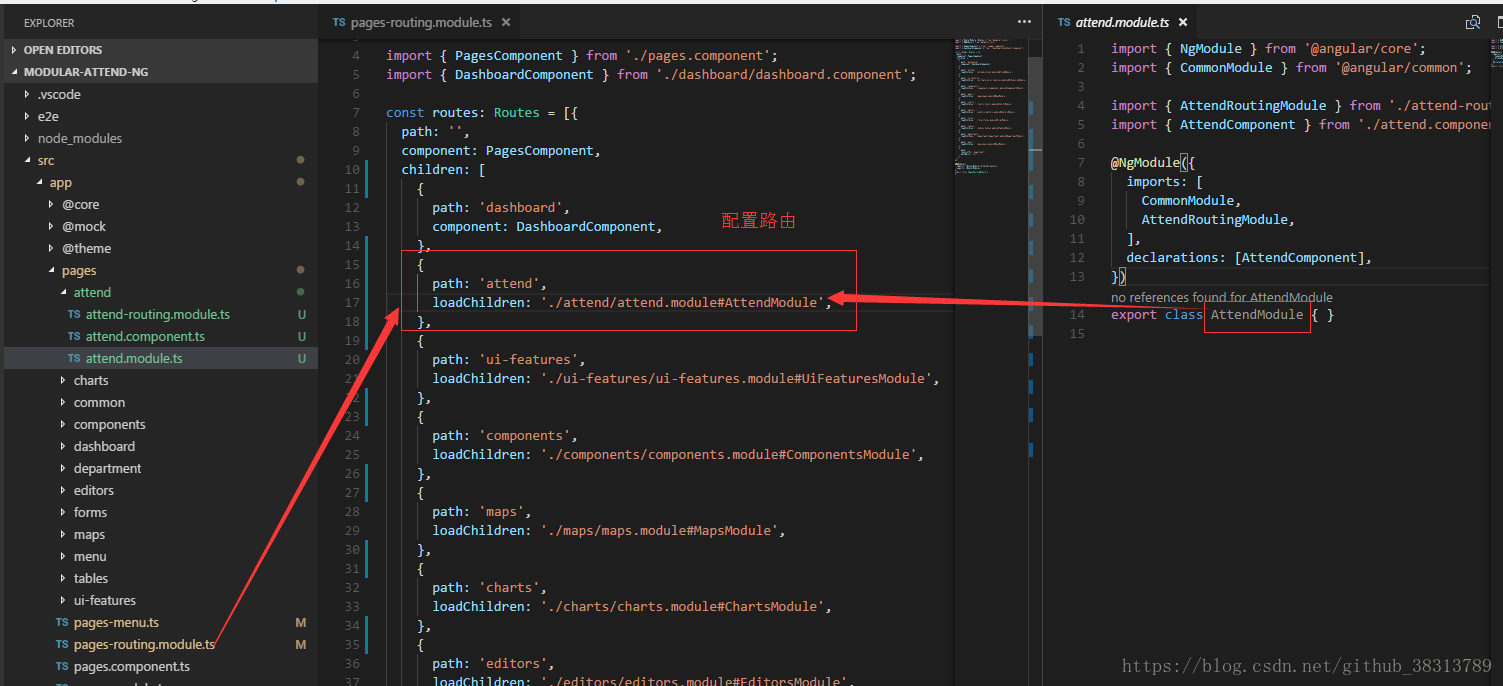
三、将我们编写的模块加入左侧菜单栏


 155
155

 被折叠的 条评论
为什么被折叠?
被折叠的 条评论
为什么被折叠?
 到【灌水乐园】发言


