


 本文详细介绍了Javaagent的使用和原理,包括动态attach方式加载agent,通过字节码修改实现类的增强。通过示例代码展示了如何创建agentjar,如何使用attach工具远程加载,并解析了JVM的加载逻辑。最后,讨论了IDEA中的debug与Javaagent的关系,揭示了Javaagent在APM系统中的应用潜力。
前言
说道Javaagent是最近经常在使用这个技术,顺便了解了原理与根源,实际上就是jvm开个代理字节码修改的instrument接口。但实际上使用,根据使用的方式不同而略有区别。
1. Javaagent使用
实际上,笔者在前段时间写了arthas的启动原理(83条消息) arthas 启动原理分析_fenglllle的博客-优快云博客,简单的说明了Javaagent的2种方式,jvm参数方式与动态attach。
以动态attach为例,实际上以jvm参数的agent类似,动态attach支持远程attach。
1.1 agent jar,demo
public class AgentMainDemo {
    private static synchronized void main(String args, Instrumentation inst) {
        try {
            System.out.println("agent exec ......");
            inst.addTransformer(new ClassFileTransformer() {
                @Override
                public byte[] transform(ClassLoader loader, String className, Class<?> classBeingRedefined, ProtectionDomain protectionDomain, byte[] classfileBuffer) throws IllegalClassFormatException {
                    //字节码修改,替换
                    System.out.println("------ byte instead -----");
                    return new byte[0];
                }
            }, true);
            Class<?> clazz = Class.forName("com.feng.agent.demo.ReTransformDemo");
            inst.retransformClasses(clazz);
        } catch (ClassNotFoundException | UnmodifiableClassException e) {
            e.printStackTrace();
        }
    }

    public static void premain(String args, Instrumentation inst) {
        main(args, inst);
    }

    public static void agentmain(String args, Instrumentation inst) {
        main(args, inst);
    }
}
pom打包manifest支持
            <plugin>
                <groupId>org.apache.maven.plugins</groupId>
                <artifactId>maven-assembly-plugin</artifactId>
                <executions>
                    <execution>
                        <goals>
                            <goal>single</goal>
                        </goals>
                        <phase>package</phase>
                        <configuration>
                            <descriptorRefs>
                                <descriptorRef>jar-with-dependencies</descriptorRef>
                            </descriptorRefs>
                            <archive>
                                <manifestEntries>
                                    <Premain-Class>com.feng.agent.demo.AgentMainDemo</Premain-Class>
                                    <Agent-Class>com.feng.agent.demo.AgentMainDemo</Agent-Class>
                                    <Can-Retransform-Classes>true</Can-Retransform-Classes>
                                </manifestEntries>
                            </archive>
                        </configuration>
                    </execution>
                </executions>
            </plugin>
1.2 运行的Java应用&tools.jar
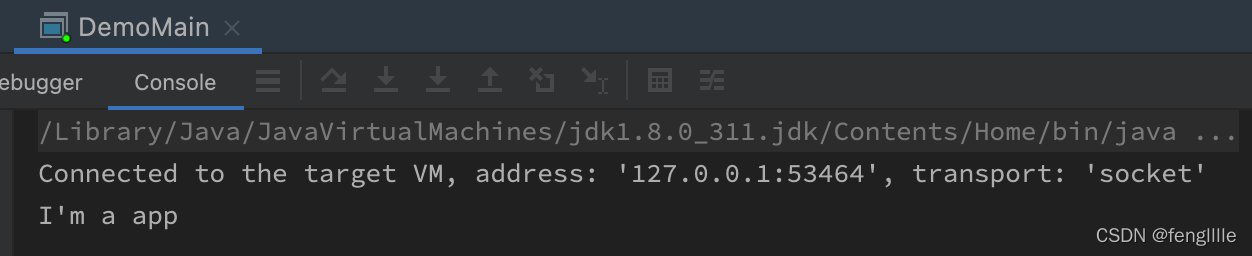
public class DemoMain {
    public static void main(String[] args) throws InterruptedException {
        System.out.println("I'm a app");
        Thread.sleep(100000000000l);
    }
}
执行,可以debug执行都行。执行后pid笔者为 3041
tools.jar,需要载入才行
public class AttachMain {
    public static void main(String[] args) throws IOException, AttachNotSupportedException, AgentLoadException, AgentInitializationException {
        VirtualMachine machine = null;
        try {
            machine = VirtualMachine.attach("3041");
            machine.loadAgent("/Users/huahua/IdeaProjects/java-agent-demo/attach-demo/src/main/resources/agent-demo-jar-with-dependencies.jar");
        } finally {
            if (machine != null) {
                machine.detach();
            }
        }

    }
}
1.3 执行结果
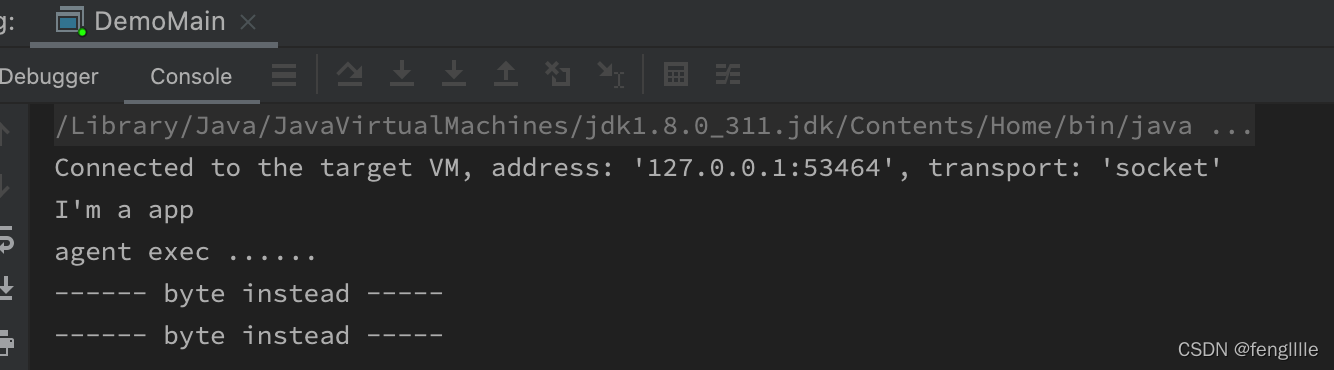
可以看到agent exec 的字样,说明agent已经load了,且进行了字节码替换。实际上transform的ClassFileTransformer可以形成调用链,一个类可以被多次transform。transform默认是有
ClassFileTransformer的。
2. Javaagent原理
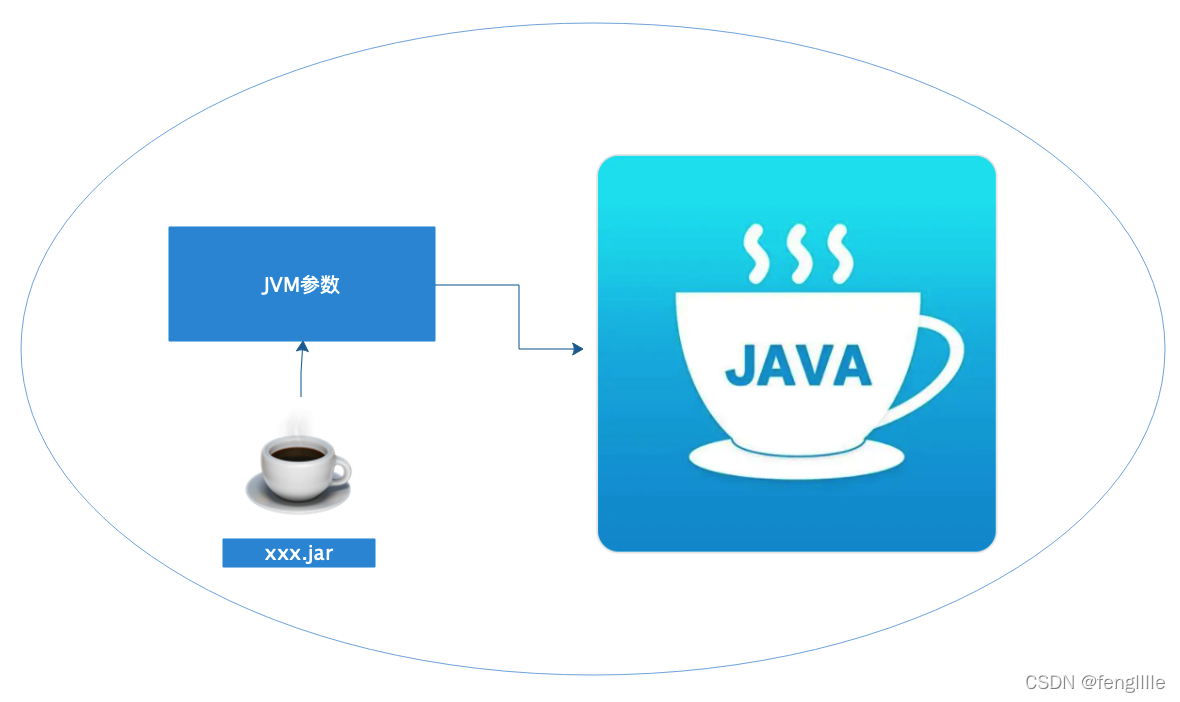
简单介绍Javaagent的原理:Javaagent分为jvm参数方式与动态attach方式
jvm参数方式:这种方式比较常用,因为可以通过启动参数内置
动态attach:这种方式比较灵活,可以多次attach,且可以销毁attach的agent。
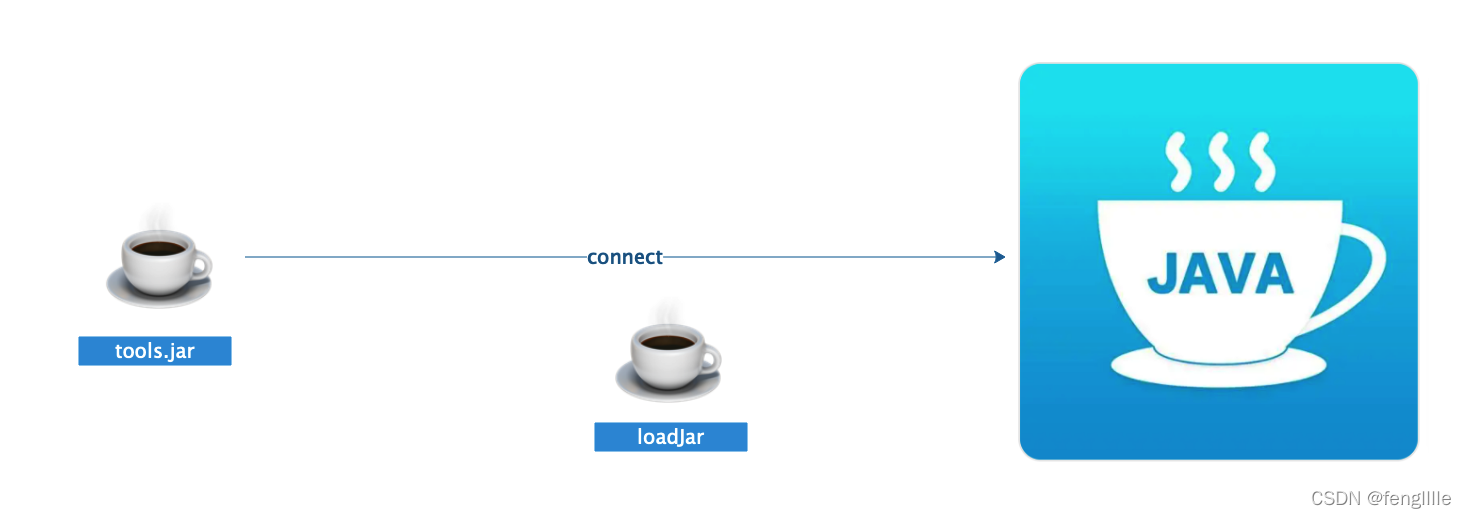
实际上jvm加载逻辑差不多,这里以复杂的动态attach为例
关键还是:provider.attachVirtualMachine(id);
    public static VirtualMachine attach(String id)
        throws AttachNotSupportedException, IOException
    {
        if (id == null) {
            throw new NullPointerException("id cannot be null");
        }
        List<AttachProvider> providers = AttachProvider.providers();
        if (providers.size() == 0) {
            throw new AttachNotSupportedException("no providers installed");
        }
        AttachNotSupportedException lastExc = null;
        for (AttachProvider provider: providers) {
            try {
                return provider.attachVirtualMachine(id);
            } catch (AttachNotSupportedException x) {
                lastExc = x;
            }
        }
        throw lastExc;
    }
然后进一步跟踪:
可以看到使用了SPI技术,笔者Mac系统,如果是Linux或者win,这里是不同的
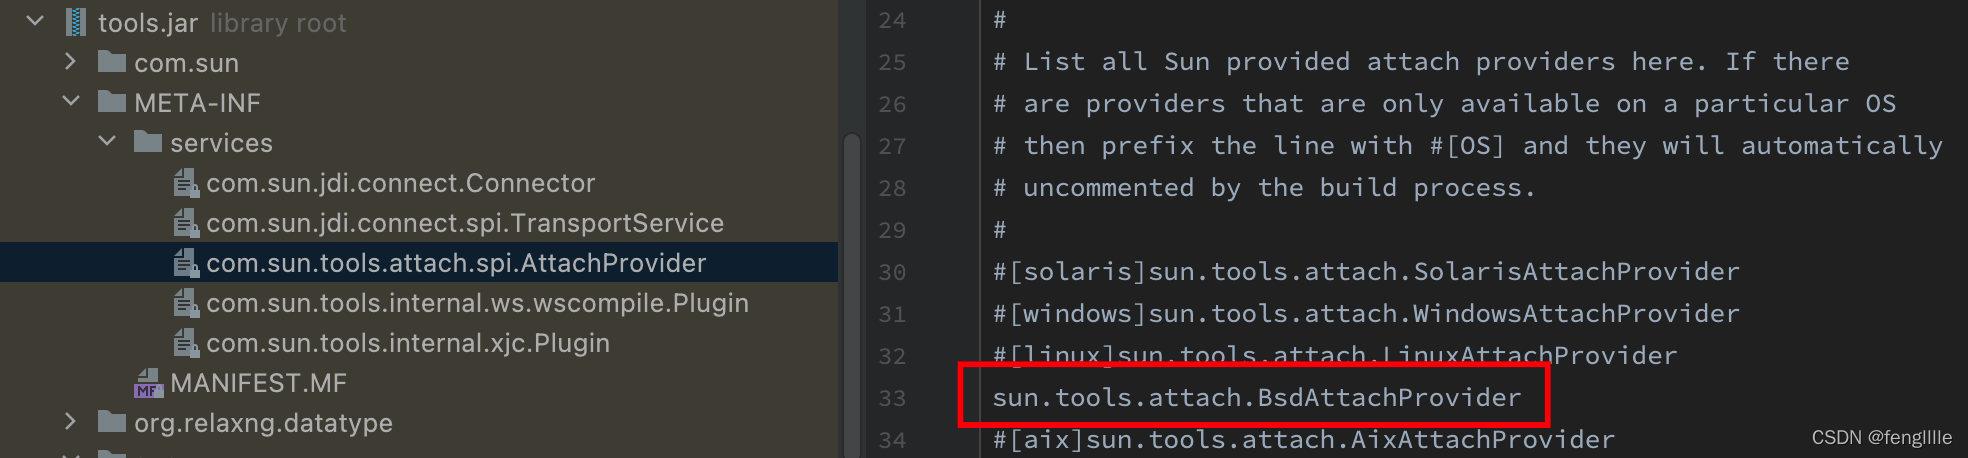
逻辑大同小异:
static {
    System.loadLibrary("attach");
    tmpdir = getTempDir();
}
先load c的lib,然后获取临时目录
    BsdVirtualMachine(AttachProvider provider, String vmid)
        throws AttachNotSupportedException, IOException
    {
        super(provider, vmid);

        // This provider only understands pids
        int pid;
        try {
            pid = Integer.parseInt(vmid);
        } catch (NumberFormatException x) {
            throw new AttachNotSupportedException("Invalid process identifier");
        }

        //这段注释很明显,先找socket文件,找不到就创建attach文件,发送quit信号,再试查找socket文件
        // Find the socket file.
        // If not found then we attempt to start the attach mechanism in the target VM by sending it a QUIT signal.
        // Then we attempt to find the socket file again.
        //查找socket文件
        path = findSocketFile(pid);
        if (path == null) {
            File f = new File(tmpdir, ".attach_pid" + pid);
            //创建attach文件
            createAttachFile(f.getPath());
            try {
                //发送退出信号,启动attach mechanism连接途径
                sendQuitTo(pid);

                // give the target VM time to start the attach mechanism
                int i = 0;
                long delay = 200;
                int retries = (int)(attachTimeout() / delay);
                do {
                    try {
                        Thread.sleep(delay);
                    } catch (InterruptedException x) { }
                    //多次查找socket文件
                    path = findSocketFile(pid);
                    i++;
                } while (i <= retries && path == null);
                if (path == null) {
                    throw new AttachNotSupportedException(
                        "Unable to open socket file: target process not responding " +
                        "or HotSpot VM not loaded");
                }
            } finally {
                f.delete();
            }
        }

        // Check that the file owner/permission to avoid attaching to
        // bogus process
        checkPermissions(path);

        // Check that we can connect to the process
        // - this ensures we throw the permission denied error now rather than
        // later when we attempt to enqueue a command.
        //socket创建
        int s = socket();
        try {
            //连接socket,相当于远程(另一个jvm进程)连上了pid
            connect(s, path);
        } finally {
            close(s);
        }
    }

    // Return the socket file for the given process.
    // Checks temp directory for .java_pid<pid>.
    private String findSocketFile(int pid) {
        String fn = ".java_pid" + pid;
        File f = new File(tmpdir, fn);
        return f.exists() ? f.getPath() : null;
    }
建立socket连接,就进行下一步,loadjar
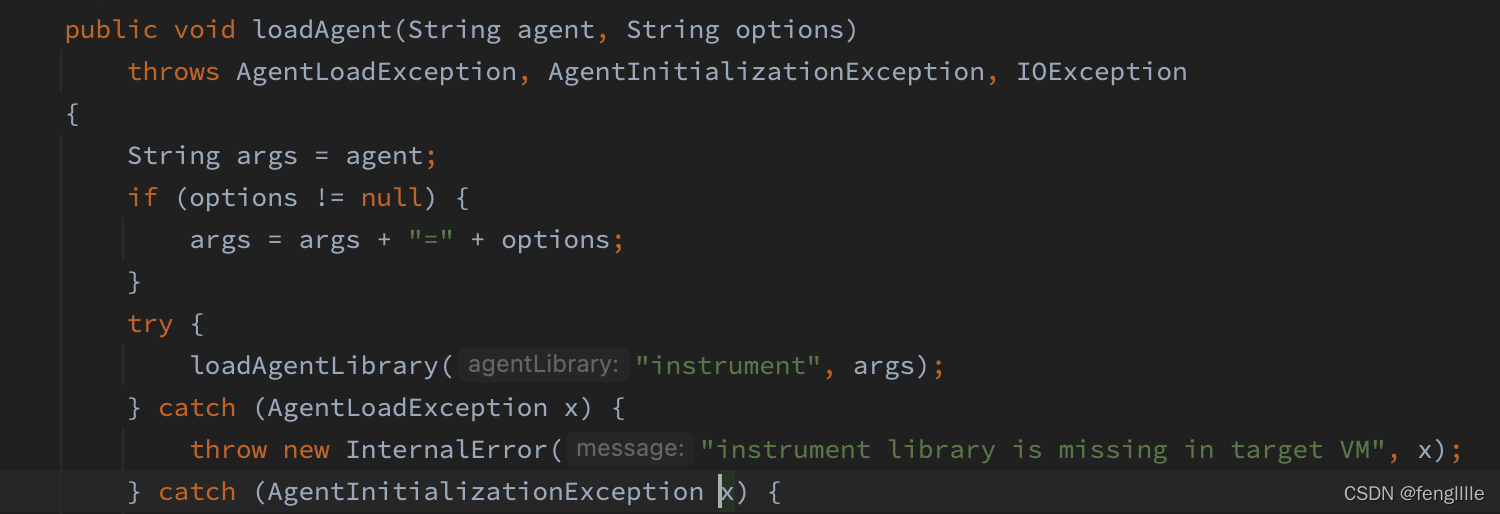
实际上这里就可以看到是要加载instrument。执行load指令,拿到结果,实际上load jar加载结束,agent就注入生效了,这个过程是JDK触发完成
    private void loadAgentLibrary(String agentLibrary, boolean isAbsolute, String options)
        throws AgentLoadException, AgentInitializationException, IOException
    {
        InputStream in = execute("load",
                                 agentLibrary,
                                 isAbsolute ? "true" : "false",
                                 options);
        try {
            int result = readInt(in);
            if (result != 0) {
                throw new AgentInitializationException("Agent_OnAttach failed", result);
            }
        } finally {
            in.close();

        }
    }
继续load
    InputStream execute(String cmd, Object ... args) throws AgentLoadException, IOException {
        assert args.length <= 3;                // includes null

        // did we detach?
        String p;
        synchronized (this) {
            if (this.path == null) {
                throw new IOException("Detached from target VM");
            }
            p = this.path;
        }

        // create UNIX socket
        int s = socket();

        // connect to target VM
        try {
            connect(s, p);
        } catch (IOException x) {
            close(s);
            throw x;
        }

        IOException ioe = null;

        // connected - write request
        // <ver> <cmd> <args...>
        try {
            writeString(s, PROTOCOL_VERSION);
            writeString(s, cmd);

            for (int i=0; i<3; i++) {
                if (i < args.length && args[i] != null) {
                    //把jar的路径写给JVM,就结束了,JVM指令执行load指令
                    writeString(s, (String)args[i]);
                } else {
                    writeString(s, "");
                }
            }
        } catch (IOException x) {
            ioe = x;
        }


        // Create an input stream to read reply
        SocketInputStream sis = new SocketInputStream(s);

        // Read the command completion status
        int completionStatus;
        try {
            completionStatus = readInt(sis);
        } catch (IOException x) {
            sis.close();
            if (ioe != null) {
                throw ioe;
            } else {
                throw x;
            }
        }

        if (completionStatus != 0) {
            sis.close();

            // In the event of a protocol mismatch then the target VM
            // returns a known error so that we can throw a reasonable
            // error.
            if (completionStatus == ATTACH_ERROR_BADVERSION) {
                throw new IOException("Protocol mismatch with target VM");
            }

            // Special-case the "load" command so that the right exception is
            // thrown.
            if (cmd.equals("load")) {
                throw new AgentLoadException("Failed to load agent library");
            } else {
                throw new IOException("Command failed in target VM");
            }
        }

        // Return the input stream so that the command output can be read
        return sis;
    }
jdk里面如何执行的呢,打开OpenJDK InvocationAdapter.c,jvm参数加载的agent执行
Agent_OnLoad函数
而动态attach的agent,执行
Agent_OnAttach函数
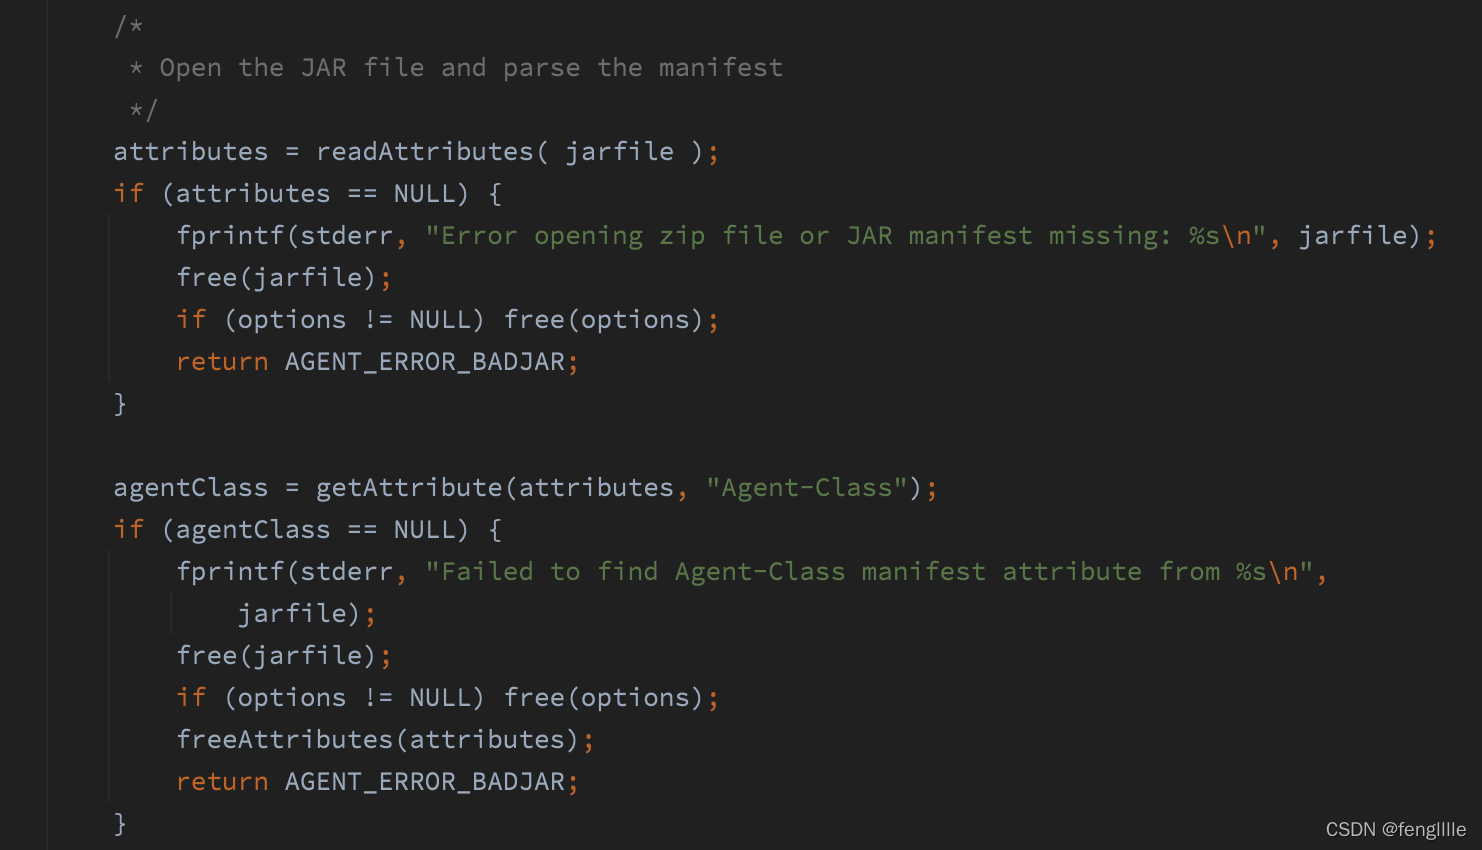
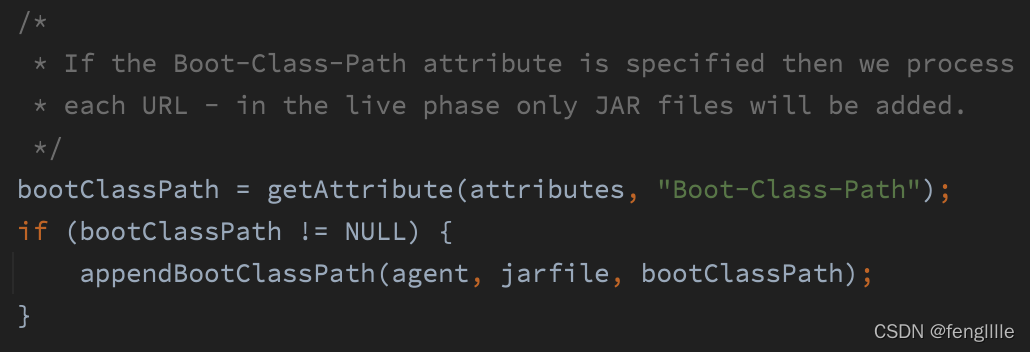
之所以读取manifest文件是jdk定义的,这个是动态attach,读取Agent-Class,另外还有 boot-class-path
下面才是核心
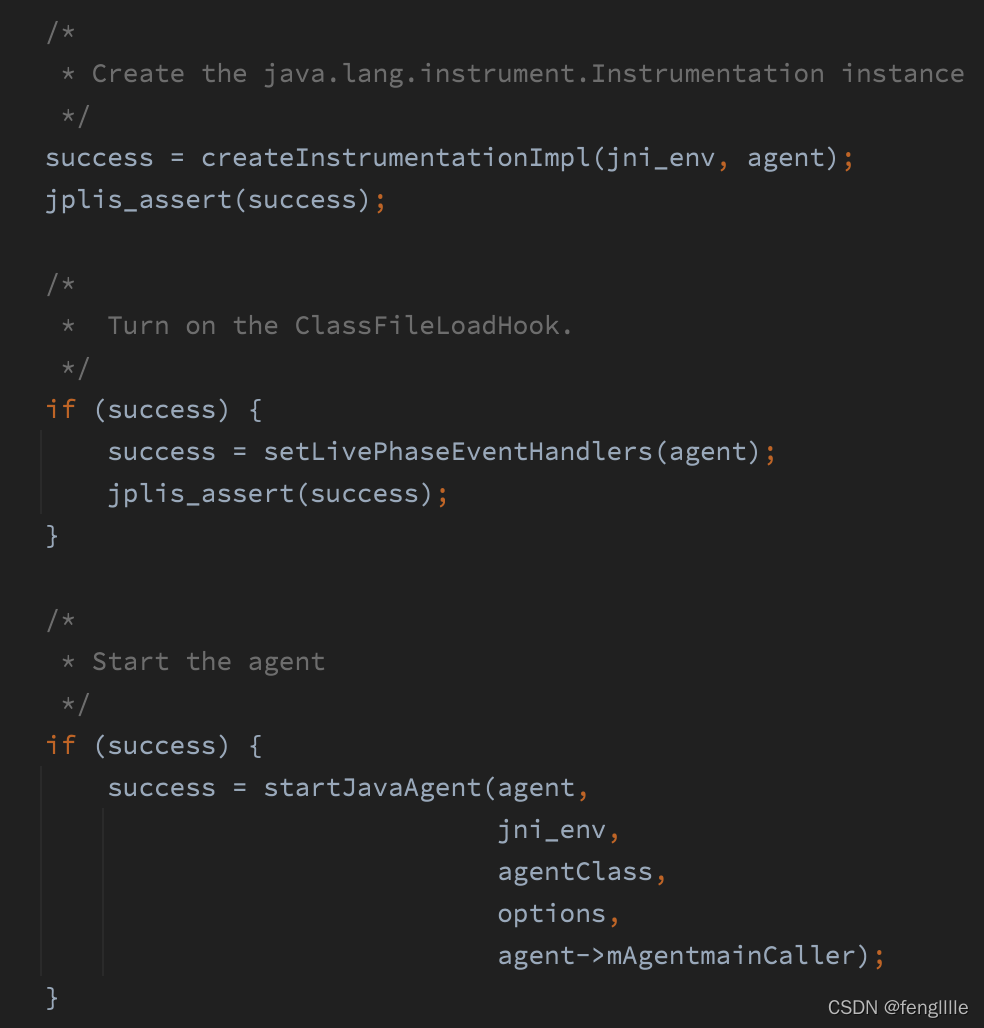
3部曲
1. 创建InstrumentationImpl实例
2. 打开ClassFileLoadHook,这个与字节码替换回调相关
3. 启动agent,实际上是调用第一步创建InstrumentationImpl实例的loadClassAndCallAgentmain方法
    private void loadClassAndCallPremain(String var1, String var2) throws Throwable {
        this.loadClassAndStartAgent(var1, "premain", var2);
    }

    private void loadClassAndCallAgentmain(String var1, String var2) throws Throwable {
        this.loadClassAndStartAgent(var1, "agentmain", var2);
    }
另一个方法就是jvm参数方式的调用函数
3. idea debug
之所以说idea的debug能力是笔者在使用jmx技术时,发现😋

是不是很有意思,-javaagent
前面是jvmti的能力,开启debug,后面居然是一个agent,有意思

然后查看这个premain的class

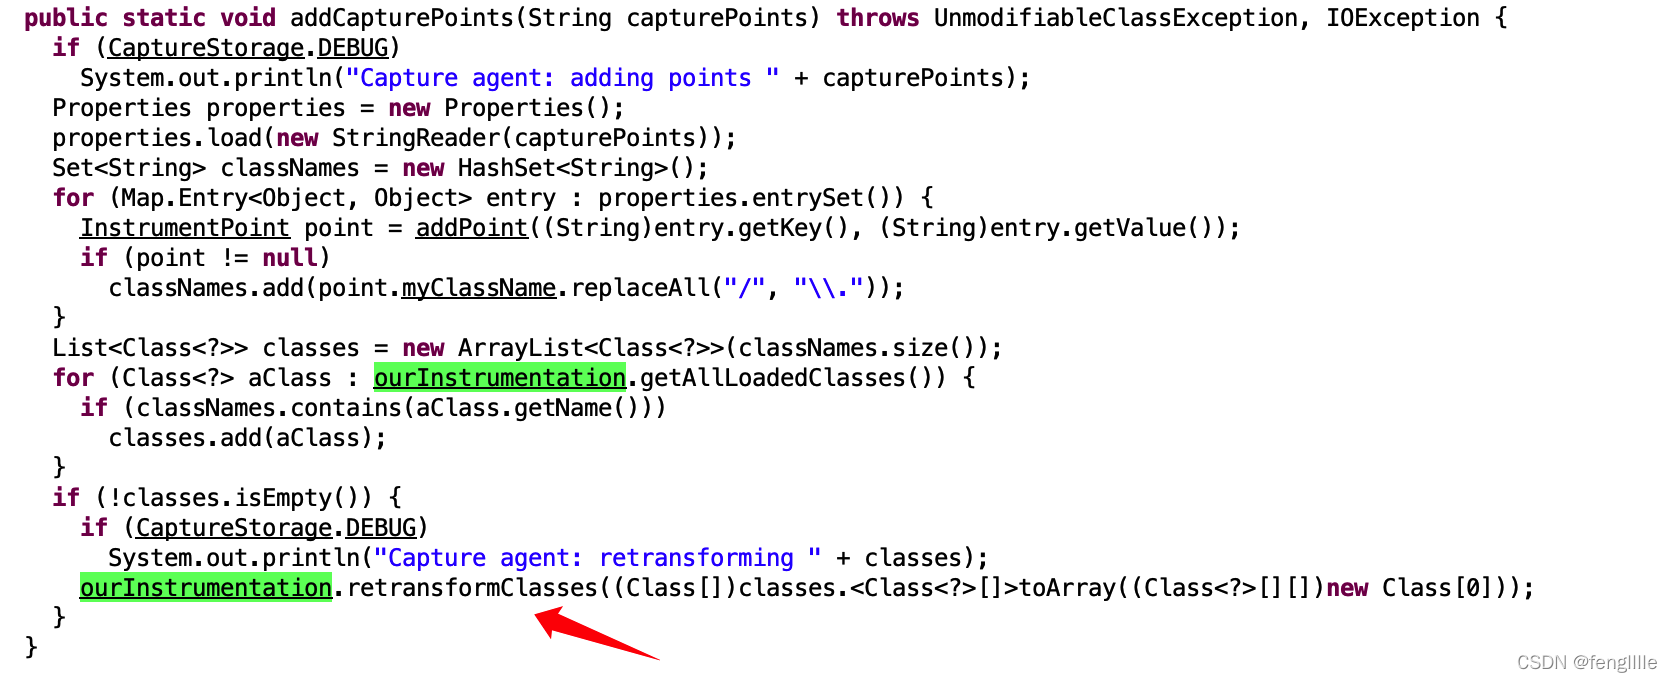
idea转换器,关键类
CaptureInstrumentor来capture方法
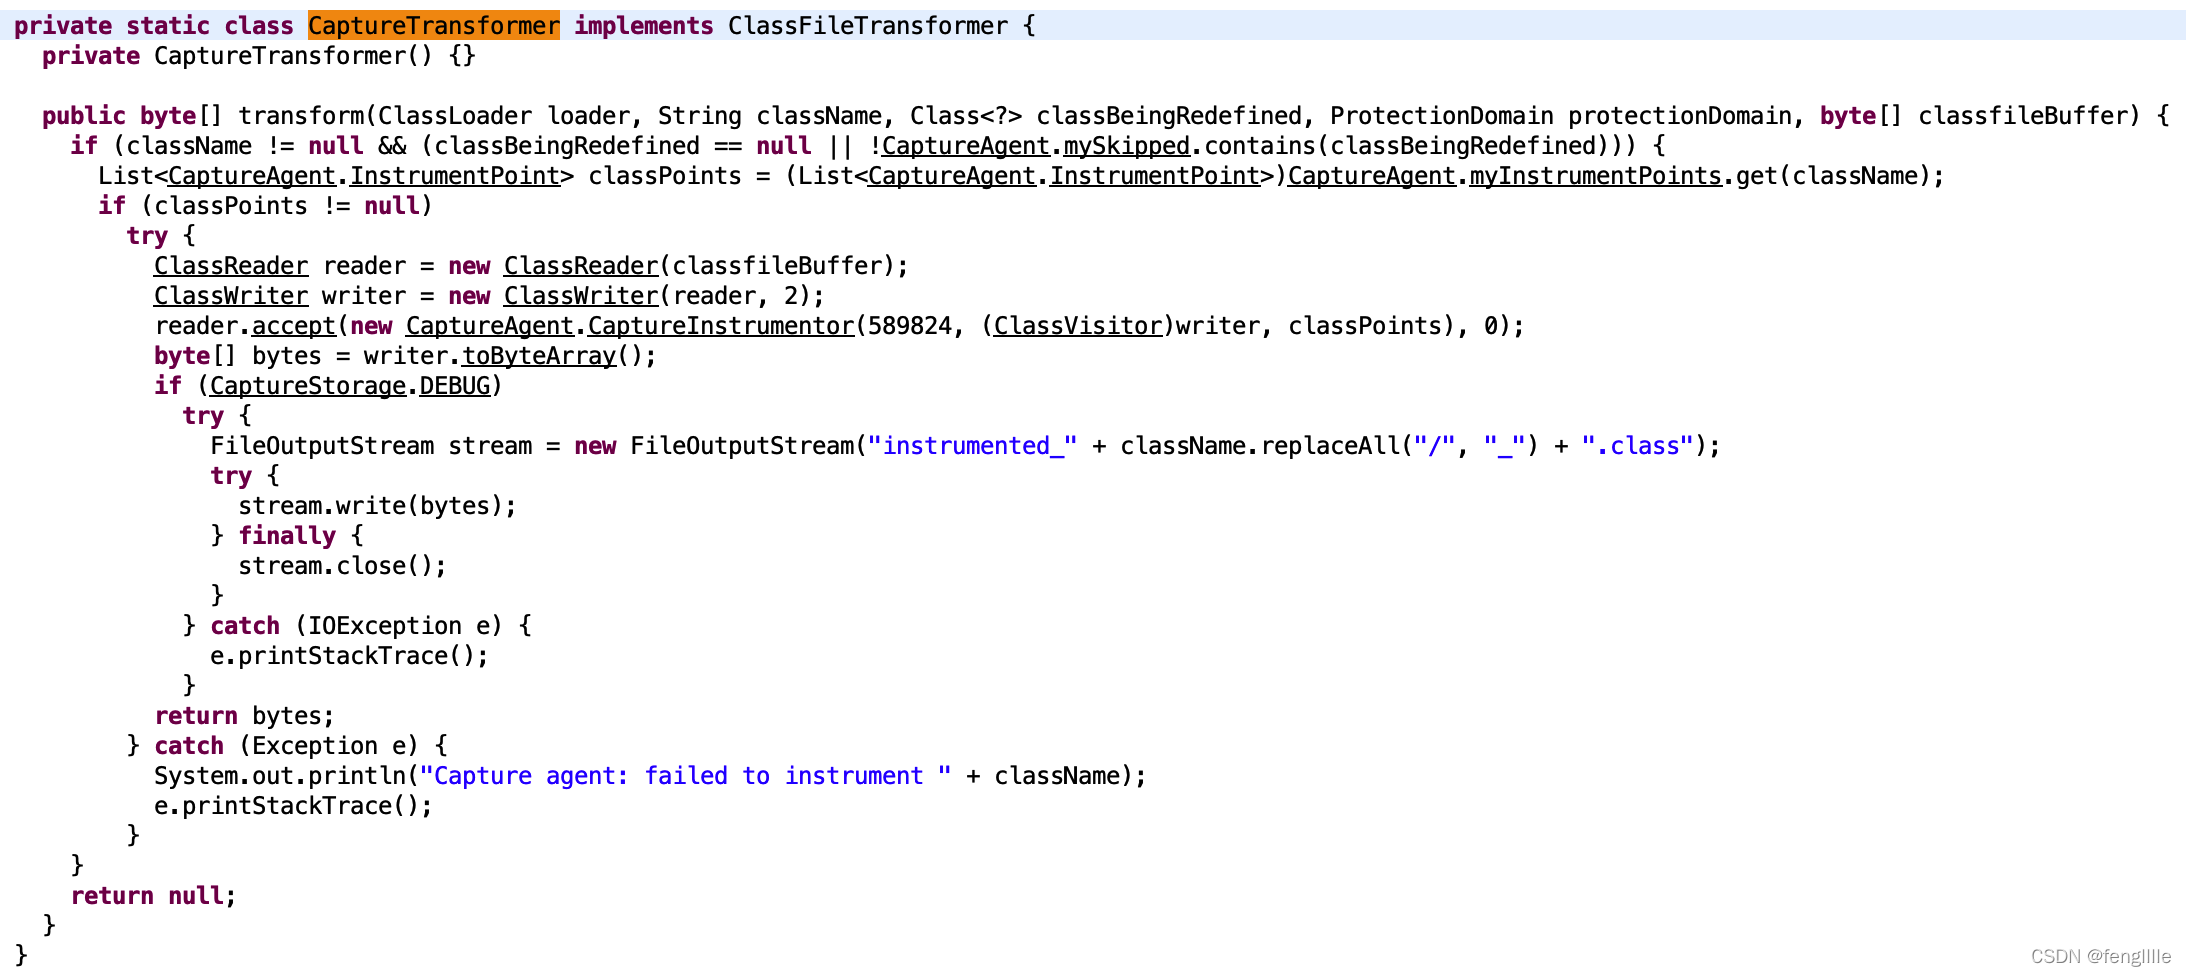
打断点的时候,类转换了
总结
实际上Javaagent类似一个sidecar的能力,不侵入应用代码即可实现字节码替换的原理,执行前检查,通过字节码修改的方式。
如果配合jmx技术,那么可以用来做APM系统非常nice,实际上pinpoint skywalking等也是使用的这种技术实现的,本次讲解了Javaagent的实现原理,现在使用就会非常明白。


 8853
8853

 被折叠的 条评论
为什么被折叠?
被折叠的 条评论
为什么被折叠?
 到【灌水乐园】发言


