 Spring Boot配置文件详解


 本文详细介绍了Spring Boot的配置文件,包括properties和YAML文件示例、常用配置项,如服务端口、数据库连接等。还阐述了@Value和@ConfigurationProperties注入方式、参数间引用、自定义配置文件、随机值配置、配置文件优先级以及多环境配置等内容。
配置文件
- SpringBoot使用一个全局的配置文件application.properties或application.yml
- 配置文件路径:src/main/resource目录下或类路径下的/config下
- 这两种配置文件的区别是格式不一致,示例均采用.properties格式,但实际上以后的主流应该是以yml为主的
properties文件示例(application.properties)
server.port=80
YAML文件示例(application.yml)
server:
  port: 80
常用配置项
server.port=9090 # 服务端口号
server.tomcat.uri-encoding=UTF-8 #以Tomcat为web容器时的字符编码
spring.data.mongodb.uri=mongodb://localhost:27017/mydb #mongodb连接
spring.application.name=customer # 应用名称,一般就是项目名称,这个名称在SpringCloud中比较关键
spring.profiles.active=dev #指定当前的活动配置文件,主要用于多环境多配置文件的应用中
spring.http.encoding.charset=UTF-8 #http请求的字符编码
spring.http.multipart.max-file-size=10MB #设置文件上传时单个文件的大小限制
spring.http.multipart.max-request-size=100MB #设置文件上传时总文件大小限制
spring.thymeleaf.prefix=classpath:/templates/ #配置在使用Thymeleaf做页面模板时的前缀,即页面所在路径
spring.thymeleaf.suffix=.html #设置在使用Thymeleaf做页面模板时的后缀
spring.thymeleaf.cache=false #设置在使用Thymeleaf做页面模板时是否启用缓存
spring.mvc.static-path-pattern=/** #设置静态资源的请求路径
spring.resources.static-locations=classpath:/static/,classpath:/public/ #指定静态资源的路径
##以下是使用MySQL数据库的配置
hibernate.dialect=org.hibernate.dialect.MySQL5Dialect #指定数据库方言
hibernate.show_sql=true #是否显示sql语句
hibernate.hbm2dll.auto=update #设置使用Hibernate的自动建表方式
entitymanager.packagesToScan=com.zslin #设置自动扫描的包前缀
spring.datasource.url=jdbc:mysql://localhost:3306/customer?
useUnicode=true&characterEncoding=utf-8&useSSL=true&autoReconnect=true #数据库链接
spring.datasource.username=root #数据库用户名
spring.datasource.password=123 #数据库用户对应的密码
spring.datasource.driver-class-name=com.mysql.jdbc.Driver #数据库驱动名称
@Value注入
application.properties提供自定义属性的支持,这样我们就可以把一些常量配置在这里:
com.dudu.name="嘟嘟MD"
com.dudu.want="祝大家鸡年大吉吧"
然后直接在要使用的地方通过注解@Value(value=”${config.name}”)就可以绑定到你想要的属性上面
@RestController
public class UserController {

    @Value("${com.dudu.name}")
    private  String name;
    @Value("${com.dudu.want}")
    private  String want;

    @RequestMapping("/")
    public String hexo(){
        return name+","+want;
    }
}
我们启动工程输入http://localhost:8080 就可以看到打印了”嘟嘟MD祝大家鸡年大吉吧”。
乱码问题参照方法二,亲测有效 https://blog.youkuaiyun.com/amoscn/article/details/84635094
@ConfigurationProperties注入
有时候属性太多了,一个个绑定到属性字段上太累,官方提倡绑定一个对象的bean,这里我们建一个ConfigBean.java类,顶部需要使用注解@ConfigurationProperties(prefix = “com.dudu”)来指明使用哪个
@ConfigurationProperties(prefix = "com.dudu")
public class ConfigBean {
    private String name;
    private String want;

    // 省略getter和setter
}
这里配置完还需要在spring Boot入口类加上@EnableConfigurationProperties并指明要加载哪个bean,如果不写ConfigBean.class,在bean类那边添加
@SpringBootApplication
@EnableConfigurationProperties({ConfigBean.class})
public class Chapter2Application {

    public static void main(String[] args) {
        SpringApplication.run(Chapter2Application.class, args);
    }
}
最后在Controller中引入ConfigBean使用即可,如下:
@RestController
public class UserController {
    @Autowired
    ConfigBean configBean;

    @RequestMapping("/")
    public String hexo(){
        return configBean.getName()+configBean.getWant();
    }
}
## 更加详细信息参照 https://www.cnblogs.com/duanxz/p/4520571.html
参数间引用
在application.properties中的各个参数之间也可以直接引用来使用,就像下面的设置:
com.dudu.name="嘟嘟MD"
com.dudu.want="祝大家鸡年大吉吧"
com.dudu.yearhope=${com.dudu.name}在此${com.dudu.want}
使用自定义配置文件
有时候我们不希望把所有配置都放在application.properties里面,这时候我们可以另外定义一个,这里我明取名为test.properties,路径跟也放在src/main/resources下面。
com.md.name="哟西~"
com.md.want="祝大家鸡年,大吉吧"
我们新建一个bean类,如下:
@Configuration
@ConfigurationProperties(prefix = "com.md")
@PropertySource("classpath:test.properties")
public class ConfigTestBean {
    private String name;
    private String want;
    // 省略getter和setter
}
随机值配置
配置文件中${random} 可以用来生成各种不同类型的随机值,从而简化了代码生成的麻烦,例如 生成 int 值、long 值或者 string 字符串。
dudu.secret=${random.value}
dudu.number=${random.int}
dudu.bignumber=${random.long}
dudu.uuid=${random.uuid}
dudu.number.less.than.ten=${random.int(10)}
dudu.number.in.range=${random.int[1024,65536]}
配置文件的优先级
application.properties和application.yml文件可以放在一下四个位置:
外置,在相对于应用程序运行目录的/congfig子目录里。
外置,在应用程序运行的目录里
内置,在config包内
内置,在Classpath根目录
同样,这个列表按照优先级排序,也就是说,src/main/resources/config下application.properties覆盖src/main/resources下application.properties中相同的属性,如图:
此外,如果你在相同优先级位置同时有application.properties和application.yml,那么application.yml里面的属性就会覆盖application.properties里的属性。
Profile-多环境配置
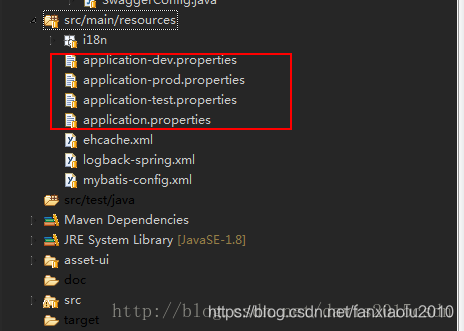
在Spring Boot中多环境配置文件名需要满足application-{profile}.properties的格式,其中{profile}对应你的环境标识,比如:
- application-dev.properties:开发环境
- application-test.properties:测试环境
- application-prod.properties:生产环境
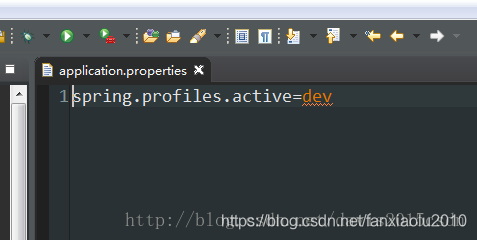
至于哪个具体的配置文件会被加载,需要在application.properties文件中通过spring.profiles.active属性来设置,其值对应{profile}值。
如:spring.profiles.active=dev就会加载application-dev.properties配置文件内容
下面,以不同环境配置不同的服务端口为例,进行样例实验。
针对各环境新建不同的配置文件application-dev.properties、application-test.properties、application-prod.properties
在这三个文件均都设置不同的server.port属性,如:dev环境设置为8001,test环境设置为8002,prod环境设置为8003
application.properties中设置spring.profiles.active=dev,就是说默认以dev环境设置


 被折叠的 条评论
为什么被折叠?
被折叠的 条评论
为什么被折叠?
 到【灌水乐园】发言


