


 本文介绍Nginx的负载均衡配置方法,包括upstream模块的使用及基于IP hash的分配策略,并展示了如何配置Shiro进行权限管理和认证,涉及自定义Realm、过滤器配置等。
一、nginx.config 配置

#user  nobody;
worker_processes  1;

#error_log  logs/error.log;
#error_log  logs/error.log  notice;
#error_log  logs/error.log  info;

#pid        logs/nginx.pid;


events {
    worker_connections  1024;
}


http {
    include       mime.types;
    default_type  application/octet-stream;

    #log_format  main  '$remote_addr - $remote_user [$time_local] "$request" '
    #                  '$status $body_bytes_sent "$http_referer" '
    #                  '"$http_user_agent" "$http_x_forwarded_for"';

    #access_log  logs/access.log  main;

    sendfile        on;
    #tcp_nopush     on;

    #keepalive_timeout  0;
    keepalive_timeout  65;

    #gzip  on;

    upstream  tomcat {
     ip_hash;
        server 127.0.0.1:8180  ;
        server 127.0.0.1:8181  ;
        server 127.0.0.1:8182  ;
    }


    server {
        listen       8011;
        server_name  localhost;

        #charset koi8-r;

        #access_log  logs/host.access.log  main;

        location / {
            #root   html;
            #index  index.html index.htm;
            proxy_pass http://tomcat;
            proxy_redirect default;

            #设置主机头和客户端真实地址,以便服务器获取客户端真实IP
            proxy_set_header Host $host;
            proxy_set_header X-Real-IP $remote_addr;
            proxy_set_header X-Forwarded-For $proxy_add_x_forwarded_for;

            #禁用缓存
            proxy_buffering off;
        }

     #开启nginx监控
        location /status {
            stub_status on;
            access_log off;
        }

        #error_page  404              /404.html;

        # redirect server error pages to the static page /50x.html
        #
        #error_page   500 502 503 504  /50x.html;
        #location = /50x.html {
        #    root   html;
        #}


        # proxy the PHP scripts to Apache listening on 127.0.0.1:80
        #
        #location ~ \.php$ {
        #    proxy_pass   http://127.0.0.1;
        #}

        # pass the PHP scripts to FastCGI server listening on 127.0.0.1:9000
        #
        #location ~ \.php$ {
        #    root           html;
        #    fastcgi_pass   127.0.0.1:9000;
        #    fastcgi_index  index.php;
        #    fastcgi_param  SCRIPT_FILENAME  /scripts$fastcgi_script_name;
        #    include        fastcgi_params;
        #}

        # deny access to .htaccess files, if Apache's document root
        # concurs with nginx's one
        #
        #location ~ /\.ht {
        #    deny  all;
        #}
    }


    # another virtual host using mix of IP-, name-, and port-based configuration
    #
    #server {
    #    listen       8000;
    #    listen       somename:8080;
    #    server_name  somename  alias  another.alias;

    #    location / {
    #        root   html;
    #        index  index.html index.htm;
    #    }
    #}


    # HTTPS server
    #
    #server {
    #    listen       443 ssl;
    #    server_name  localhost;

    #    ssl_certificate      cert.pem;
    #    ssl_certificate_key  cert.key;

    #    ssl_session_cache    shared:SSL:1m;
    #    ssl_session_timeout  5m;

    #    ssl_ciphers  HIGH:!aNULL:!MD5;
    #    ssl_prefer_server_ciphers  on;

    #    location / {
    #        root   html;
    #        index  index.html index.htm;
    #    }
    #}

}
以上,有颜色地方是关键,这里采用ip_cash方式分发请求,还有其他方式可以看一下http://www.cnblogs.com/hz-cww/p/6956663.html
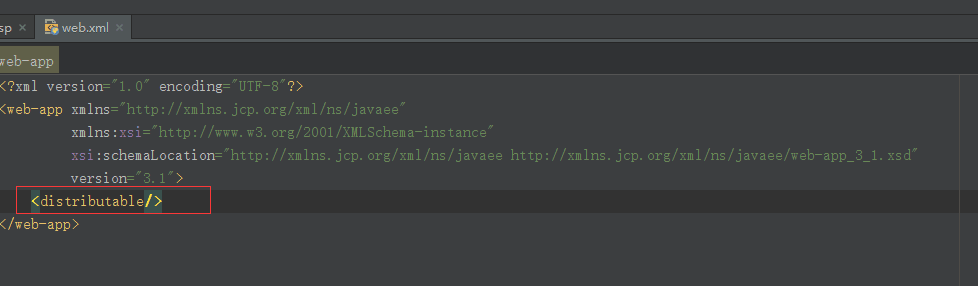
二、web.xml 配置
这里web.xml需要添加:<distributable/>
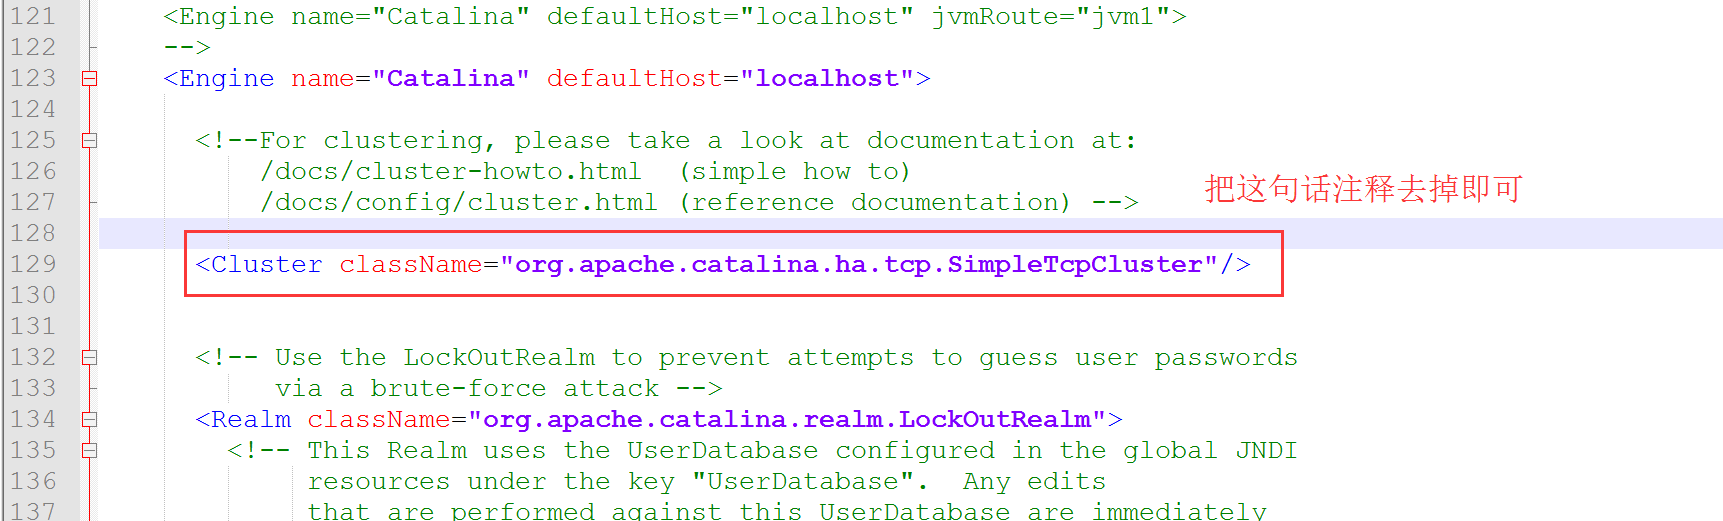
三、tomcat 配置
四、shiro.xml 配置
配置shiro使用tomcat默认会使用Servlet容器的Session即可,以下配置仅作参考
<?xml version="1.0" encoding="UTF-8"?>
<beans xmlns="http://www.springframework.org/schema/beans"
    xmlns:xsi="http://www.w3.org/2001/XMLSchema-instance"
    xsi:schemaLocation="http://www.springframework.org/schema/beans http://www.springframework.org/schema/beans/spring-beans.xsd">

    <!-- 缓存管理器(自带) -->
    <!--<bean id="cacheManager" class="org.apache.shiro.cache.MemoryConstrainedCacheManager"/>-->

    <!-- 继承自AuthorizingRealm的自定义Realm,即指定Shiro验证用户登录的类为自定义的ShiroDbRealm.java -->
    <bean id="codeRealm" class="com.rk.kbk.shiro.CodeRealm"/>

    <!-- 继承自AuthorizingRealm的自定义Realm,即指定Shiro验证用户登录的类为自定义的ShiroDbRealm.java -->
    <bean id="passwordRealm" class="com.rk.kbk.shiro.PasswordRealm"/>
    <!-- 踢出用户 -->
    <bean id="sessionDAO" class="org.apache.shiro.session.mgt.eis.MemorySessionDAO" />

  <!-- 注释此处即可,默认使用Servlet容器Session-->
    <!-- <bean id="sessionManager" class="org.apache.shiro.web.session.mgt.DefaultWebSessionManager">
        <property name="sessionDAO" ref="sessionDAO" />
        <property name="globalSessionTimeout" value="-1000"/>
    </bean>-->
    <!-- Shiro默认会使用Servlet容器的Session,可通过sessionMode属性来指定使用Shiro原生Session -->
    <!-- 即<property name="sessionMode" value="native"/>,详细说明见官方文档 -->
    <!-- 这里主要是设置自定义的单Realm应用,若有多个Realm,可使用'realms'属性代替 -->
    <bean id="securityManager" class="org.apache.shiro.web.mgt.DefaultWebSecurityManager">
        <property name="realms">
            <list>
                <ref bean="codeRealm" />
                <ref bean="passwordRealm" />
            </list>
        </property>
        <!--<property name="sessionManager" ref="sessionManager" />-->
        <!-- 使用下面配置的缓存管理器 -->
        <!-- <property name="cacheManager" ref="cacheManager"/>-->
    </bean>

    <!-- Shiro主过滤器本身功能十分强大,其强大之处就在于它支持任何基于URL路径表达式的、自定义的过滤器的执行 -->
    <!-- Web应用中,Shiro可控制的Web请求必须经过Shiro主过滤器的拦截,Shiro对基于Spring的Web应用提供了完美的支持 -->
    <bean id="shiroFilter" class="org.apache.shiro.spring.web.ShiroFilterFactoryBean">
        <!-- Shiro的核心安全接口,这个属性是必须的 -->
        <property name="securityManager" ref="securityManager"/>
        <!-- 要求登录时的链接(可根据项目的URL进行替换),非必须的属性,默认会自动寻找Web工程根目录下的"/login.jsp"页面 -->
        <property name="loginUrl" value="/login.map"/>
        <!-- 登录成功后要跳转的连接(本例中此属性用不到,因为登录成功后的处理逻辑在LoginController里硬编码为main.jsp了) -->
        <!-- <property name="successUrl" value="/index.html"/> -->
        <!-- 用户访问未对其授权的资源时,所显示的连接 -->
        <!-- 若想更明显的测试此属性可以修改它的值,如unauthor.jsp,然后用[玄玉]登录后访问/admin/listUser.jsp就看见浏览器会显示unauthor.jsp -->
        <property name="unauthorizedUrl" value="/unauthorized.html"/>
        <!-- Shiro连接约束配置,即过滤链的定义 -->
        <!-- 此处可配合我的这篇文章来理解各个过滤连的作用http://blog.youkuaiyun.com/jadyer/article/details/12172839 -->
        <!-- 下面value值的第一个'/'代表的路径是相对于HttpServletRequest.getContextPath()的值来的 -->
        <!-- anon:它对应的过滤器里面是空的,什么都没做,这里.do和.jsp后面的*表示参数,比方说login.jsp?main这种 -->
        <!-- authc:该过滤器下的页面必须验证后才能访问,它是Shiro内置的一个拦截器org.apache.shiro.web.filter.authc.FormAuthenticationFilter -->
        <property name="filterChainDefinitions">
            <value>
                 # 注意此处配置的路径不需要输入工程名,  / 就包括  http://地址:端口/项目名/
                 <!--/api/user/login/** = anon-->
                 <!--/api/user/pcLogin/** = anon-->
                 <!--/api/user/register/** = anon-->
                 <!---->
                 <!--/api/user/logout = logout-->
                 <!---->
                 <!--/assets/**  = anon-->
                 <!--/css/**  = anon-->
                 <!--/img/**  = anon-->
                 <!--/js/**  = anon-->
                 <!--/tpl/**  = anon-->

                 <!--/login.html  = anon-->

                 # authc 必须放在最后
                 /** = anon
            </value>
        </property>
    </bean>

    <!-- 保证实现了Shiro内部lifecycle函数的bean执行 -->
    <bean id="lifecycleBeanPostProcessor" class="org.apache.shiro.spring.LifecycleBeanPostProcessor"/>

    <!-- 开启Shiro的注解(如@RequiresRoles,@RequiresPermissions),需借助SpringAOP扫描使用Shiro注解的类,并在必要时进行安全逻辑验证 -->
    <!-- 配置以下两个bean即可实现此功能 -->
    <!-- Enable Shiro Annotations for Spring-configured beans. Only run after the lifecycleBeanProcessor has run -->
    <!-- 由于本例中并未使用Shiro注解,故注释掉这两个bean(个人觉得将权限通过注解的方式硬编码在程序中,查看起来不是很方便,没必要使用) -->
    <!--
    <bean class="org.springframework.aop.framework.autoproxy.DefaultAdvisorAutoProxyCreator" depends-on="lifecycleBeanPostProcessor"/>
      <bean class="org.apache.shiro.spring.security.interceptor.AuthorizationAttributeSourceAdvisor">
        <property name="securityManager" ref="securityManager"/>
      </bean>
    -->

</beans>


 6578
6578

 被折叠的 条评论
为什么被折叠?
被折叠的 条评论
为什么被折叠?
 到【灌水乐园】发言


