


1、下载最新的源代码文件
gcc-13.2.0.tar.xz![]() https://ftp.gnu.org/gnu/gcc/gcc-13.2.0/gcc-13.2.0.tar.xzhttps://ftp.gnu.org/gnu/gcc/gcc-15.2.0/gcc-15.2.0.tar.xz
https://ftp.gnu.org/gnu/gcc/gcc-13.2.0/gcc-13.2.0.tar.xzhttps://ftp.gnu.org/gnu/gcc/gcc-15.2.0/gcc-15.2.0.tar.xz![]() https://ftp.gnu.org/gnu/gcc/gcc-15.2.0/gcc-15.2.0.tar.xz
https://ftp.gnu.org/gnu/gcc/gcc-15.2.0/gcc-15.2.0.tar.xz
解压后,根据 contrib/download_prerequisites 中的依赖文件包
gmp='gmp-6.2.1.tar.bz2'
mpfr='mpfr-4.1.0.tar.bz2'
mpc='mpc-1.2.1.tar.gz'
isl='isl-0.24.tar.bz2'
base_url='https://gcc.gnu.org/pub/gcc/infrastructure/'
【免费】升级Gcc13、14、15需要的依赖库资源-优快云下载![]() https://download.youkuaiyun.com/download/eamon100/91972670
https://download.youkuaiyun.com/download/eamon100/91972670
依赖项下载:
Index of /pub/gcc/infrastructure![]() https://gcc.gnu.org/pub/gcc/infrastructure/
https://gcc.gnu.org/pub/gcc/infrastructure/
下载后放入源文件目录,注释掉 contrib/download_prerequisites中的下载和校验
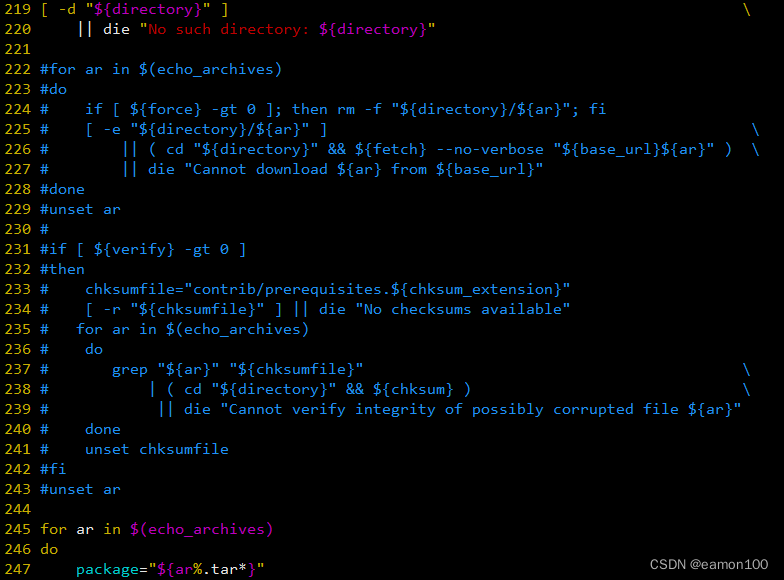
运行./contrib/download_prerequisites ,解压下载的依赖包,完成后提示 All prerequisites downloaded successfully.
在源码目录新建一个build文件夹 : mkdir build
目录结构如下:

2、编译安装
进入build文件夹,执行
#../configure --enable-threads=posix --enable-checking=release --enable-languages=c,c++ -disable-multilib
../configure  --enable-languages=c,c++  --prefix=/usr
--mandir=/usr/share/man
--infodir=/usr/share/info  --enable-shared --enable-threads=posix
--enable-checking=release --with-system-zlib
--enable-__cxa_atexit --disable-libunwind-exceptions
--enable-gnu-unique-object
--enable-multilib  --build=aarch64-redhat-linux
--enable-link-serialization=1
../configure --with-system-zlib --enable-threads=posix --enable-shared
--enable-checking=release --enable-languages=c,c++ --enable-__cxa_atexit
--enable-gnu-unique-object --enable-link-serialization=1
-disable-multilib --disable-libunwind-exceptions #make –j6 编译
#make install 安装
make install DESTDIR=/your/dir
可能遇到的报错:
cc1plus: fatal error: gengtype-lex.cc: No such file or directory
需要安装: yum install flex bison
3、修改系统使用的gcc/g++
一般gcc/g++会安装到/usr/local/bin中,而编译时默认使用的是/usr/bin中的版本,因此,需要重新制作链接。
sudo rm -rf /usr/bin/gcc
sudo rm -rf /usr/bin/g++
sudo ln -s /usr/local/bin/gcc /usr/bin/gcc
sudo ln -s /usr/local/bin/g++ /usr/bin/g++
最后,检验安装是否成功.查看版本。会看到:gcc -v
程序运行时,搜索库的路径一般是/usr/lib64优先于/usr/local/lib64,导致程序运行时报错:
[root@rocky95 ~]# ./a.out
./a.out: /lib64/libstdc++.so.6: version `GLIBCXX_3.4.**' not found (required by ./a.out)
查看动态库文件:
[root@raspi3 lib64]# pwd
/lib64
[root@raspi3 lib64]#
[root@raspi3 lib64]# ll libstdc*
lrwxrwxrwx 1 root root      19  2月 12  2025 libstdc++.so.6 -> libstdc++.so.6.0.29
-rwxr-xr-x 1 root root 2294688  2月 12  2025 libstdc++.so.6.0.29
[root@raspi3 lib64]#
[root@raspi3 lib64]#
[root@raspi3 lib64]# strings libstdc++.so.6 | grep XX
GLIBCXX_3.4
GLIBCXX_3.4.1
GLIBCXX_3.4.2
GLIBCXX_3.4.3
GLIBCXX_3.4.4
GLIBCXX_3.4.5
GLIBCXX_3.4.6
GLIBCXX_3.4.7
GLIBCXX_3.4.8
GLIBCXX_3.4.9
GLIBCXX_3.4.10
GLIBCXX_3.4.11
GLIBCXX_3.4.12
GLIBCXX_3.4.13
GLIBCXX_3.4.14
GLIBCXX_3.4.15
GLIBCXX_3.4.16
GLIBCXX_3.4.17
GLIBCXX_3.4.18
GLIBCXX_3.4.19
GLIBCXX_3.4.20
GLIBCXX_3.4.21
GLIBCXX_3.4.22
GLIBCXX_3.4.23
GLIBCXX_3.4.24
GLIBCXX_3.4.25
GLIBCXX_3.4.26
GLIBCXX_3.4.27
GLIBCXX_3.4.28
GLIBCXX_3.4.29
CXXABI_1.3
CXXABI_1.3.1
CXXABI_1.3.2
CXXABI_1.3.3
CXXABI_1.3.4
CXXABI_1.3.5
CXXABI_1.3.6
CXXABI_1.3.7
CXXABI_1.3.8
CXXABI_1.3.9
CXXABI_1.3.10
CXXABI_1.3.11
CXXABI_1.3.12
CXXABI_1.3.13
CXXABI_TM_1
GLIBCXX_DEBUG_MESSAGE_LENGTH
修改系统配置文件,改变默认库文件搜索顺序
[root@rocky9 etc]# cat ld.so.conf
/usr/local/lib64
/usr/local/lib
include ld.so.conf.d/*.conf
[root@rocky9 etc]#
或者增加搜索文件:
[root@rocky95 ld.so.conf.d]# echo '/usr/local/lib64' | tee /etc/ld.so.conf.d/locallib64.conf
/usr/local/lib64
[root@rocky95 ld.so.conf.d]# cat locallib64.conf
/usr/local/lib64
[root@rocky95 ld.so.conf.d]# echo '/usr/local/lib' | tee /etc/ld.so.conf.d/locallib.conf
/usr/local/lib
[root@rocky95 ld.so.conf.d]# cat locallib.conf
/usr/local/lib
[root@rocky95 ld.so.conf.d]# ldconfig


修改了配置文件后,你需要运行ldconfig命令来更新缓存,这样更改才会生效。
运行ldconfing和ldconfig -v
[root@rocky9 etc]# ldconfig
[root@rocky9 etc]# ldconfig -v | grep /usr/local
ldconfig: 无法对 /libx32 进行 stat 操作: 没有那个文件或目录
ldconfig: 多次给出路径“/usr/lib”
(from <builtin>:0 and <builtin>:0)
ldconfig: 多次给出路径“/usr/lib64”
(from <builtin>:0 and <builtin>:0)
ldconfig: 无法对 /usr/libx32 进行 stat 操作: 没有那个文件或目录
/usr/local/lib: (from /etc/ld.so.conf.d/locallib.conf:1)
/usr/local/lib64: (from /etc/ld.so.conf.d/locallib64.conf:1)
4、cmake中的配置
配置环境变量
vim /etc/profile  # 最下方添加以下内容
export CC=/usr/local/bin/gcc
export CXX=/usr/local/bin/g++
CMakePresets.json配置文件修改:
    {
      "name": "linux-debug",
      "displayName": "Linux Debug",
      "generator": "Unix Makefiles",
      "binaryDir": "${sourceDir}/out/build/${presetName}",
      "installDir": "${sourceDir}/out/install/${presetName}",
      "cacheVariables": {
        "CMAKE_CXX_COMPILER": "/usr/local/bin/g++",
        "CMAKE_C_COMPILER": "/usr/local/bin/gcc",
        "CMAKE_C_COMPILER_RANLIB": "/usr/local/bin/gcc-ranlib",
        "CMAKE_C_COMPILER_AR": "/usr/local/bin/gcc-ar",
        "CMAKE_CXX_COMPILER_RANLIB": "/usr/local/bin/gcc-ranlib",
        "CMAKE_CXX_COMPILER_AR": "/usr/local/bin/gcc-ar",
        "CMAKE_BUILD_TYPE": "Debug"
      },
      "condition": {
        "type": "equals",
        "lhs": "${hostSystemName}",
        "rhs": "Linux"
      },
      "vendor": {
        "microsoft.com/VisualStudioRemoteSettings/CMake/1.0": {
          "sourceDir": "$env{HOME}/.vs/$ms{projectDirName}"
        }
      }
    },
或者在CMakeLists.txt中增加配置项:
set(CMAKE_C_COMPULER "/usr/local/bin/gcc")
set(CMAKE_CXX_COMPULER "/usr/local/bin/g++")
几个环境变量:
vim /etc/profile # 最下方添加以下内容
export CC=/usr/local/bin/gcc
export CXX=/usr/local/bin/g++
export LD_LIBRARY_PATH="/usr/local/lib64:$LD_LIBRARY_PATH"
export PATH="/usr/local/bin:$PATH"
PATH是系统查找可执行文件的路径,系统通过PATH寻找这个命令,再运行这个命令(可执行文件)。所以,PATH 配置的路径下的可执行程序可以在任何位置执行,并且可以通过which来定位命令文件的位置。
LIBRARY_PATH 和 LD_LIBRARY_PATH 的主要区别在于它们的使用阶段和作用
LIBRARY_PATH:主要用于程序编译阶段,告诉编译器(如gcc)在编译时寻找动态链接库(.so文件)的附加搜索路径。
当编译一个程序并且该程序依赖于某些非标准路径下的共享库时,设置LIBRARY_PATH可以确保编译器找到这些库并正确链接到可执行文件中。
LD_LIBRARY_PATH:主要用于程序运行阶段,指定动态链接器(ld.so)在加载已编译好的可执行文件时查找动态链接库的额外路径。
当一个可执行文件需要加载系统默认路径之外的共享库来运行时,设置LD_LIBRARY_PATH可以让操作系统在运行时找到并加载那些非标准位置的动态链接库。
C_INCLUDE_PATH、CPLUS_INCLUDE_PATH以及CPATH常被用于在全局性地添加预处理C/C++时的包含目录,其中C_INCLUDE_PATH仅对预处理C有效,CPLUS_INCLUDE_PATH仅对预处理C++有效,而CPATH对所有语言均有效
查看系统GLIBC的版本号:
[root@raspi3 11]# ldd --version
ldd (GNU libc) 2.34
Copyright (C) 2021 自由软件基金会。
这是一个自由软件;请见源代码的授权条款。本软件不含任何没有担保;甚至不保证适销性
或者适合某些特殊目的。
由 Roland McGrath 和 Ulrich Drepper 编写。
[root@raspi3 11]#
[root@raspi3 11]# rpm -qa | grep glibc
glibc-common-2.34-168.el9_6.23.aarch64
glibc-gconv-extra-2.34-168.el9_6.23.aarch64
glibc-2.34-168.el9_6.23.aarch64
glibc-langpack-en-2.34-168.el9_6.23.aarch64
glibc-devel-2.34-168.el9_6.23.aarch64
glibc-all-langpacks-2.34-168.el9_6.23.aarch64
GCC依赖的共享库
[root@raspi3 ~]# find / -name libc.so*
/usr/lib64/libc.so
/usr/lib64/libc.so.6

[root@raspi3 ~]# gcc -print-file-name=libc.so
/usr/lib/gcc/aarch64-redhat-linux/11/../../../../lib64/libc.so


[root@raspi3 ~]# gcc -print-file-name=libc.so.6
/usr/lib/gcc/aarch64-redhat-linux/11/../../../../lib64/libc.so.6

[root@raspi3 ~]# find / -name libstdc++.*
/usr/share/gdb/auto-load/usr/lib64/__pycache__/libstdc++.so.6.0.29-gdb.cpython-39.pyc
/usr/share/gdb/auto-load/usr/lib64/__pycache__/libstdc++.so.6.0.29-gdb.cpython-39.opt-1.pyc
/usr/share/gdb/auto-load/usr/lib64/libstdc++.so.6.0.29-gdb.py
/usr/lib64/libstdc++.so.6.0.29
/usr/lib64/libstdc++.so.6
/usr/lib/gcc/aarch64-redhat-linux/11/libstdc++.so

[root@raspi3 ~]# gcc -print-file-name=libstdc++.so
/usr/lib/gcc/aarch64-redhat-linux/11/libstdc++.so

[root@raspi3 ~]# gcc -print-file-name=libstdc++.so.6
/usr/lib/gcc/aarch64-redhat-linux/11/../../../../lib64/libstdc++.so.6
5、使用标准库模块
# 首先编译 std 模块生成 CMI (gcm.cache),参数不变不用重新编译
g++ -std=c++23 -fmodules -O2 -c -fmodule-only -fsearch-include-path bits/std.cc
# 然后就可以编译自己的源文件了
g++ -std=c++23 -fmodules -O2 hello.cpp -o hello.out
[root@rocky95 ~]# cat hello.cpp
import std;

//#include<iostream>


int main() {
     std::println("hello world");
    //std::cout<<"hello world"<<std::endl;
    return 0;
}
[root@rocky95 ~]#
[root@rocky95 ~]#
cmake编译
[root@rocky95 ~]# cat CMakeLists.txt
cmake_minimum_required(VERSION 3.10)
project(Hello)
#set(CMAKE_VERBOSE_MAKEFILE ON)

add_custom_command(
    OUTPUT gcm.cache/std.gcm
    COMMAND g++ -std=c++23 -fmodules -O3 -c -fmodule-only -fsearch-include-path bits/std.cc
)

add_custom_command(
    OUTPUT hello.out
    COMMAND g++ -std=c++23 -fmodules -O3  hello.cpp -o hello.out
)

add_custom_target(
    target ALL
    DEPENDS gcm.cache/std.gcm hello.out
)
[root@rocky95 ~]#
编译和运行C++程序是的搜索路径:
1、头文件的搜索路径
双引号形式(#include "...")
1、在当前源文件所在目录查找
2、从 -I 指定的目录查找
3、查找系统默认路径 /usr/include 和 /usr/local/include ;
4、最后搜索gcc的一系列自带目录(如/usr/include/c++/4.8.5)。
尖括号形式(#include <...>)
1、直接跳过当前目录,从-I参数指定的路径开始查找
2、搜索环境变量指定的路径( C_INCLUDE_PATH,CPLUS_INCLUDE_PATH,OBJC_INCLUDE_PATH 等)
3、查找系统默认路径 /usr/include 和 /usr/local/include ;
系统默认路径优先级
1、手动指定的-I路径优先级最高
2、/usr/local/include
3、/usr/include
4、最后搜索gcc的一系列自带目录(如/usr/include/c++/4.8.5)。
而环境变量设置的路径会在默认路径之前,但晚于-I参数指定的路径被搜索
2、编译时库文件搜索顺序
1、-L参数指定路径:优先搜索通过gcc -Ldir 显式指定的目录
2、LIBRARY_PATH环境变量:若未通过-L指定,则查找环境变量LIBRARY_PATH定义的路径(部分系统可能无效)
3、GCC内置库路径:包括安装时配置的路径,可通过gcc --print-search-dirs | grep libraries查看,这是当初编译gcc时写在程序内的。
[root@raspi3 ~]# gcc --print-search-dirs
安装:/usr/lib/gcc/aarch64-redhat-linux/11/

程序:=/usr/libexec/gcc/aarch64-redhat-linux/11/:/usr/libexec/gcc/aarch64-redhat-linux/11/:/usr/libexec/gcc/aarch64-redhat-linux/:/usr/lib/gcc/aarch64-redhat-linux/11/:/usr/lib/gcc/aarch64-redhat-linux/:/usr/lib/gcc/aarch64-redhat-linux/11/../../../../aarch64-redhat-linux/bin/aarch64-redhat-linux/11/:/usr/lib/gcc/aarch64-redhat-linux/11/../../../../aarch64-redhat-linux/bin/

库:=/usr/lib/gcc/aarch64-redhat-linux/11/:
/usr/lib/gcc/aarch64-redhat-linux/11/../../../../aarch64-redhat-linux/lib/aarch64-redhat-linux/11/:
/usr/lib/gcc/aarch64-redhat-linux/11/../../../../aarch64-redhat-linux/lib/../lib64/:
/usr/lib/gcc/aarch64-redhat-linux/11/../../../aarch64-redhat-linux/11/:
/usr/lib/gcc/aarch64-redhat-linux/11/../../../../lib64/:
/lib/aarch64-redhat-linux/11/:
/lib/../lib64/:
/usr/lib/aarch64-redhat-linux/11/:
/usr/lib/../lib64/:
/usr/lib/gcc/aarch64-redhat-linux/11/../../../../aarch64-redhat-linux/lib/:
/usr/lib/gcc/aarch64-redhat-linux/11/../../../:
/lib/:
/usr/lib/4、ld默认搜索路径:通过ld -verbose | grep SEARCH_DIR获取,通常为/lib、/usr/lib、/usr/local/lib等
[root@raspi3 ~]# ld -verbose | grep SEARCH_DIR
SEARCH_DIR("=/usr/aarch64-redhat-linux/lib64");
SEARCH_DIR("=/usr/lib64");
SEARCH_DIR("=/usr/local/lib64");
SEARCH_DIR("=/lib64");
SEARCH_DIR("=/usr/aarch64-redhat-linux/lib");
SEARCH_DIR("=/usr/local/lib");
SEARCH_DIR("=/lib");
SEARCH_DIR("=/usr/lib");
3、运行程序时共享库文件的搜索顺序
1、编译时指定的RPATH:通过-Wl,-rpath=./lib 设置的路径优先级最高 (运行时动态库的搜索路径第一搜索路径是编译目标代码时指定的动态库路径,可以设置相对路径)
2、LD_LIBRARY_PATH环境变量:用户自定义的动态库路径
3、/etc/ld.so.conf配置:系统级动态库路径配置文件
[root@raspi3 ~]# ll /etc/ld.so.c
ld.so.cache   ld.so.conf    ld.so.conf.d/
[root@raspi3 ~]#
[root@raspi3 ~]# cat /etc/ld.so.conf
include ld.so.conf.d/*.conf
[root@raspi3 ~]#
[root@raspi3 ~]# ll /etc/ld.so.conf.d/
总用量 0
4、默认系统路径:如/lib、/usr/lib等
-Wl,-rpath是GCC编译时传递给链接器(ld)的关键参数组合,用于指定程序运行时动态库的搜索路径。
其核心机制和用法如下:
参数分解与作用
-Wl:指示GCC将逗号后的参数传递给底层链接器(ld)
-rpath:链接器选项,将指定路径嵌入二进制文件的DT_RPATH或DT_RUNPATH段,运行时优先搜索该路径
运行时库搜索优先级,使用该参数后,动态库加载顺序变为:
-rpath指定路径(如-Wl,-rpath=/custom/lib)
LD_LIBRARY_PATH环境变量
系统默认路径(如/lib、/usr/lib)
典型应用场景
1、自定义库路径:当动态库未安装在标准目录时,避免设置全局环境变量
gcc -o program program.c -L/path/to/libs -lmylib -Wl,-rpath=/path/to/libs
2、多路径指定:通过多个-Wl,-rpath传递不同路径
gcc -Wl,-rpath=/path1 -Wl,-rpath=/path2
注意事项:
开发与部署分离:建议仅在开发阶段使用,发布时应通过系统配置(如ld.so.conf)管理库路径
路径安全性:避免硬编码敏感路径,防止安全风险
调试工具:可通过ldd验证库路径是否生效
该参数通过将库路径编码到二进制文件中,实现了运行时依赖的精确控制,是解决动态库加载问题的有效手段
常用rpm 命令:
[root@raspi3 ~]# rpm -qf /usr/lib64/libc.so.6
glibc-2.34-168.el9_6.23.aarch64
[root@raspi3 ~]# rpm -qf /usr/lib64/libc.so
glibc-devel-2.34-168.el9_6.23.aarch64
[root@raspi3 ~]#
[root@raspi3 ~]#
[root@raspi3 ~]# rpm -qf /usr/lib64/libstdc++.so.6
libstdc++-11.5.0-5.el9_5.aarch64
[root@raspi3 ~]# rpm -qa | grep c++
libstdc++-11.5.0-5.el9_5.aarch64
libstdc++-devel-11.5.0-5.el9_5.aarch64
gcc-c++-11.5.0-5.el9_5.aarch64
[root@raspi3 ~]#
[root@raspi3 ~]# rpm -qi gcc-c++
Name : gcc-c++
Version : 11.5.0
Release : 5.el9_5
Architecture: aarch64
Install Date: 2025å¹´03æ16æ¥ æææ¥ 10æ¶38å50ç§
Group : Unspecified
Size : 32466321
License : GPLv3+ and GPLv3+ with exceptions and GPLv2+ with exceptions and LGPLv2+ and BSD
Signature : RSA/SHA256, 2025å¹´02æ13æ¥ ææå 00æ¶44å52ç§, Key ID 702d426d350d275d
Source RPM : gcc-11.5.0-5.el9_5.src.rpm
Build Date : 2025å¹´02æ12æ¥ ææä¸ 21æ¶10å51ç§
Build Host : pb-e4f48404-35b4-4e2d-a3cb-b139ad8dd610-b-aarch64
Packager : Rocky Linux Build System (Peridot) <releng@rockylinux.org>
Vendor : Rocky Enterprise Software Foundation
URL : http://gcc.gnu.org
Summary : C++ support for GCC
Description :
This package adds C++ support to the GNU Compiler Collection.
It includes support for most of the current C++ specification,
including templates and exception handling.


 1093
1093

 被折叠的 条评论
为什么被折叠?
被折叠的 条评论
为什么被折叠?
 到【灌水乐园】发言


