


 本文详细介绍Django REST framework的功能和优势,包括强大的Web API构建工具、认证策略、序列化支持等。并提供了一个使用该框架创建简单模型支持API的实例教程。
个人博客地址——https://www.dogebug.cn/
GitHub地址——https://github.com/yanshigou/
layout: post
title: Djangorestframework
date: 2018-10-15 13:28:00
comments: true
subtitle: Django REST framework is a powerful and flexible toolkit for building Web APIs.
author: dzt
tags:
- python
- Django
先来看一下官方文档
Django REST framework is a powerful and flexible toolkit for building Web APIs.
Some reasons you might want to use REST framework:
- The Web browsable API is a huge usability win for your developers.
- Authentication policies including packages for OAuth1a and OAuth2.
- Serialization that supports both ORM and non-ORM data sources.
- Customizable all the way down - just use regular function-based views if you don’t need the more powerful features.
- Extensive documentation, and great community support.
- Used and trusted by internationally recognised companies including Mozilla, Red Hat, Heroku, and Eventbrite.
Requirements
REST framework requires the following:
- Python (2.7, 3.4, 3.5, 3.6, 3.7)
- Django (1.11, 2.0, 2.1)
The following packages are optional:
- coreapi (1.32.0+) - Schema generation support.
- Markdown (2.1.0+) - Markdown support for the browsable API.
- django-filter (1.0.1+) - Filtering support.
- django-crispy-forms - Improved HTML display for filtering.
- django-guardian (1.1.1+) - Object level permissions support.
Installation
Install using pip, including any optional packages you want…
pip install djangorestframework
pip install markdown       # Markdown support for the browsable API.
pip install django-filter  # Filtering support
…or clone the project from github.
git clone git@github.com:encode/django-rest-framework.git
Add 'rest_framework' to your INSTALLED_APPS setting.
INSTALLED_APPS = (
    ...
    'rest_framework',
)
If you’re intending to use the browsable API you’ll probably also want to add REST framework’s login and logout views. Add the following to your root urls.py file.
urlpatterns = [
    ...
    url(r'^api-auth/', include('rest_framework.urls'))
]
Note that the URL path can be whatever you want.
Example
Let’s take a look at a quick example of using REST framework to build a simple model-backed API.
We’ll create a read-write API for accessing information on the users of our project.
Any global settings for a REST framework API are kept in a single configuration dictionary named REST_FRAMEWORK. Start off by adding the following to your settings.py module:
REST_FRAMEWORK = {
    # Use Django's standard `django.contrib.auth` permissions,
    # or allow read-only access for unauthenticated users.
    'DEFAULT_PERMISSION_CLASSES': [
        'rest_framework.permissions.DjangoModelPermissionsOrAnonReadOnly'
    ]
}
Don’t forget to make sure you’ve also added rest_framework to your INSTALLED_APPS.
We’re ready to create our API now. Here’s our project’s root urls.py module:
from django.conf.urls import url, include
from django.contrib.auth.models import User
from rest_framework import routers, serializers, viewsets

# Serializers define the API representation.
class UserSerializer(serializers.HyperlinkedModelSerializer):
    class Meta:
        model = User
        fields = ('url', 'username', 'email', 'is_staff')

# ViewSets define the view behavior.
class UserViewSet(viewsets.ModelViewSet):
    queryset = User.objects.all()
    serializer_class = UserSerializer

# Routers provide an easy way of automatically determining the URL conf.
router = routers.DefaultRouter()
router.register(r'users', UserViewSet)

# Wire up our API using automatic URL routing.
# Additionally, we include login URLs for the browsable API.
urlpatterns = [
    url(r'^', include(router.urls)),
    url(r'^api-auth/', include('rest_framework.urls', namespace='rest_framework'))
]
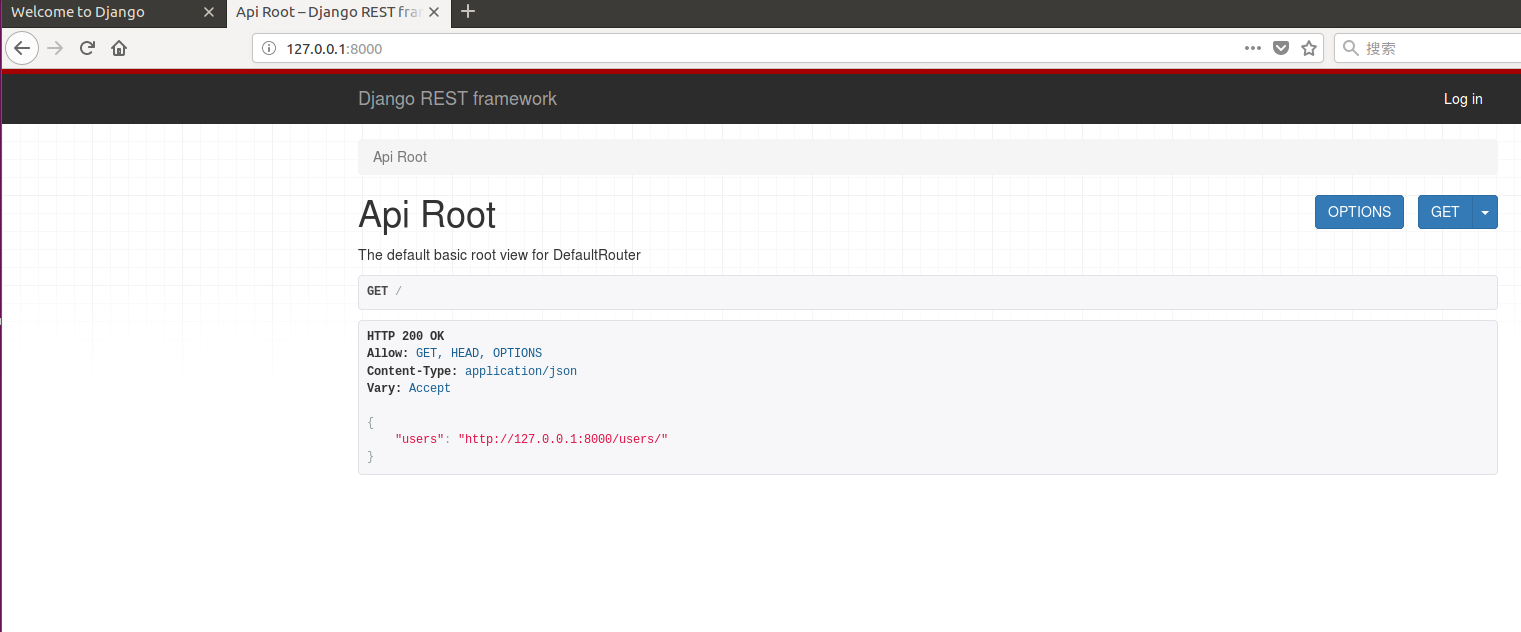
You can now open the API in your browser at http://127.0.0.1:8000/, and view your new ‘users’ API. If you use the login control in the top right corner you’ll also be able to add, create and delete users from the system.
个人博客地址——https://www.dogebug.cn/
GitHub地址——https://github.com/yanshigou/
禁止不留原创地址、署名的转载
本人保留所有法定权利。违者必究


 4046
4046

 被折叠的 条评论
为什么被折叠?
被折叠的 条评论
为什么被折叠?
 到【灌水乐园】发言


