


 本文详细介绍了如何使用Shell脚本部署Nginx作为反向代理,并配置其连接到多个Web服务器。此外,还提供了一个监控脚本,用于检查Nginx的状态和监控服务器的内存使用情况,当超过设定阈值时通过邮件报警。
一、shell脚本部署nginx反向代理和三个web服务
1 对反向代理服务器进行配置
#!/bin/bash

#修改用户交互页面 用户输入参数执行相应的参数
#安装epel扩展包和nginx
function ng_yum_install(){

    yum install epel-release -y
    yum install nginx -y
    yum install rpcbind nfs-utils -y

}
#nginx init function
#nginx status
#nginx 开机enable
function ng_init(){

    systemctl start nginx
    systemctl enable nginx
}

#脚本执行
ng_yum_install
sed -ri '/^http/a \ \ \ \ upstream pythonweb{\n server\ 192.168.43.21;weight=3;\n server\ 192.168.43.23;\nserver\ 192.168.43.24;\n}' /etc/nginx/nginx.conf  #四个反斜杠是四个空格
sed -ri '/^ +location \/ /a proxy_pass http:\/\/pythonweb;' /etc/nginx/nginx.conf

systemctl stop firewalld
systemctl enable firewalld

echo 'share 192.168.43.0/24(rw,sync,fsid=0)' >/etc/exports
 chmod -R o+w /share #修改share目录的权限
systemctl enable nfs-service.service
systemctl enable rpcbind.service
systemctl start rpcbind.service
systemctl start nfs_service.service
2 对三台web服务器分别进行配置
function ng_yum_install(){

    yum install epel-release -y
    yum install nginx -y
    yum install rpcbind nfs-utils -y #安装rpcbind和nfs
    systemctl enable rpcbind.service && systemctl start rpcbind.service

}
#nginx init function
#nginx status
#nginx 开机enable
function ng_init(){

    systemctl start nginx
    systemctl enable nginx
}


ng_yum_install

mkdir /html
touch /html/index.html
echo 'welcome nginx' >/html/index.html
 sed -ri '/^ +location \/ /a root \/html;\nindex index.html; ' /etx/nginx/nginx.conf


ng_init
systemctl stop firewalld
systemctl enable firewalld

mount -t nfs 192.168.43.20:/share /var/www.html
二、编写监控脚本 服务 内存 磁盘使用率 异常报警
ps aux |grep nginx |grep -v 'grep'
if[ $? -ne 0 ]
then
        echo 'nginx is die'
        systemctl start nginx
        if[  $? -eq 0  ]
        then
                echo 'nginx now is activing'
        fi
fi
1 Python 发送邮件工具
将此文件放到/bin下并给予可执行权限
#!/usr/bin/python
# -*- coding: UTF-8 -*-
import sys
import smtplib
import email.mime.multipart
import email.mime.text

server = 'smtp.163.com'
port = '25'

def sendmail(server,port,user,pwd,msg):
    smtp = smtplib.SMTP()
    smtp.connect(server,port)
    smtp.login(user, pwd)
    smtp.sendmail(msg['from'], msg['to'], msg.as_string())
    smtp.quit()
    print('邮件发送成功email has send out !')


if __name__ == '__main__':
    msg = email.mime.multipart.MIMEMultipart()
    msg['Subject'] = 'python'
    msg['From'] = 'example@163.com' #发件人地址
    msg['To'] = 'example@163.com' #收件人地址
    user = '邮箱用户名'
    pwd = 'stmp客户端密码'
    content='%s\n%s' %('\n'.join(sys.argv[1:4]),' '.join(sys.argv[4:])) #格式处理,专门针对我们的邮件格式

    txt = email.mime.text.MIMEText(content, _charset='utf-8')
    msg.attach(txt)

    sendmail(server,port,user,pwd,msg)
2 内存监控脚本
#!/bin/bash
mem_limit=0 #测试的时候设置成0 后期根据实际需要设置
function memcheck(){
memtotal=`free |awk 'NR==2{print $2}'`
memuse1=`free |awk 'NR==2{print $3}'`
memuse2=`free |awk 'NR==2{print $6}'`
mempercent=`echo "scale=2;($memuse1+$memuse2)/$memtotal"|bc -l |cut -d. -f2`
#echo ${mempercent}%
if [ $mempercent -gt $mem_limit ]
then
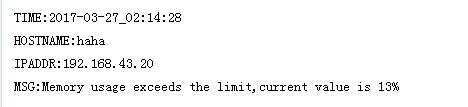
msg="TIME:$(date +%F_%T)
HOSTNAME:$(hostname)
IPADDR:$(ifconfig |awk 'NR==2{print $2}')
MSG:Memory usage exceeds the limit,current value is ${mem_percent}%"
echo $msg
/usr/bin/mail $msg
fi
}
memcheck #执行函数
下面是shell中执行成功的界面

这是邮箱收到的信息
3 计划任务crond
crond默认是开机启动的
crontab -e -u root  #  为root用户添加计划任务

* * * * *

*代表分钟、小时、日、月、周
crontab -l 查看上次添加的计划任务
tail -f /var/log/cron # 查看日志


 被折叠的 条评论
为什么被折叠?
被折叠的 条评论
为什么被折叠?
 到【灌水乐园】发言


