


 本文介绍了SpringCache在SpringBoot项目中的应用,包括如何通过注解如@EnableCaching开启缓存,以及如何使用@Cacheable、@CachePut和@CacheEvict进行数据缓存和管理。还涉及了自定义缓存配置和策略的选择。
目录
1.自我介好😳😳😳
Spring Cache是一个框架,实现了基于注解的缓存功能,只需要简单地加一个注解,就能实现缓存功能。Spring Cache提供了一层抽象,底层可以切换不同的cache实现。具体就是通过CacheManager接口来统一不同的缓存技术。
CacheManager是Spring提供的各种缓存技术抽象接口。

步骤:
- 1.引入依赖:引入redis和springcache的依赖
- 2.写配置:配置使用redis作为缓存
- 3.测试 :测试各个注解功能
2.常用注解 💕💕💕
- @EnableCaching开启缓存注解功能
- @Cacheable在方法执行前spring先查看缓存中是否有数据,如果有数据,则直接返回缓存数据;若没有数据,调用方法并将方法返回值放到缓存中
- @CachePut将方法的返回值放到缓存中
- @CacheEvict将一条或多条数据从缓存中删除
注意:在spring boot项目中,使用缓存技术只需在项目中导入相关缓存技术的依赖包,并在启动类上使用@EnableCaching开启缓存支持即可。
3.@EnableCaching🤦♂️🤦♂️🤦♂️
@EnableCaching 是启用缓存的注解,标注在任何一个可自动注入的类上即可开启。
@Slf4j
@SpringBootApplication
@EnableCaching
public class SpirngbootReidsApplication {

    public static void main(String[] args) {
        SpringApplication.run(SpirngbootReidsApplication.class, args);
    }

}4.@CachePut🤷♀️🤷♀️🤷♀️
- @CachePut将方法的返回值放到缓存中
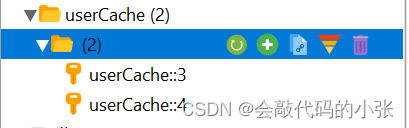
value:缓存的名称,每个缓存下面有多个key
key:缓存的key
 @CachePut(value = "userCache",key = "#result.userId")
    @PostMapping
    public User save(@RequestBody User user){
        userService.save(user);
        return user;
    }
5.@CacheEvict🎶🎶🎶
- @CacheEvict将一条或多条数据从缓存中删除
value:缓存名称,每个缓存名称下面可以有多个key
key:缓存key
删除
 @CacheEvict(value = "userCache", key = "#id")
    @DeleteMapping("/{id}")
    public void delete(@PathVariable("id") Integer id) {
        userService.removeById(id);
    }
修改
  @CacheEvict(value = "userCache",key = "#user.userId")
    @PutMapping
    public User update(@RequestBody User user) {
        userService.updateById(user);
        return user;
    }
6.@Cacheable 🤩🤩🤩
- @Cacheable在方法执行前spring先查看缓存中是否有数据,如果有数据,则直接返回缓存数据;若没有数据,调用方法并将方法返回值放到缓存中
value:缓存名称,每个缓存名称下面可以有多个key
key:缓存key
condition:条件,满足条件时才缓存数据
unless: 满足条件,不缓存
sync=true:加锁,防止缓存击穿
   @Cacheable(value = "userCache", key = "#id", condition = "#result!=null")
    @GetMapping(value = "/{id}")
    public User get(@PathVariable("id") Integer id) {
        User user = userService.getById(id);
        return user;
    }
@Cacheable(value = "userCache", key = "#id", unless = "#result==null")
@GetMapping(value = "/{id}")
public User get(@PathVariable("id") Integer id) {
User user = userService.getById(id);
return user;
}7.缓存规则自定义配置 🥞🥞🥞
添加配置类
@Configuration
@EnableCaching
public class MyCacheConfig {

    @Bean
    RedisCacheConfiguration redisCacheConfiguration(CacheProperties cacheProperties) {
        RedisCacheConfiguration config = RedisCacheConfiguration.defaultCacheConfig();
        //转换为json,序列化机制
        config.serializeKeysWith(RedisSerializationContext.SerializationPair.fromSerializer(new StringRedisSerializer()));
        config.serializeValuesWith(RedisSerializationContext.SerializationPair.fromSerializer(new GenericFastJsonRedisSerializer()));
        //将配置文件中的东西生效
        CacheProperties.Redis redisProperties = cacheProperties.getRedis();
        if (redisProperties.getTimeToLive()!=null){
             config = config.entryTtl(redisProperties.getTimeToLive());
        }
        if (redisProperties.getKeyPrefix()!=null){
            config=config.prefixKeysWith(redisProperties.getKeyPrefix());
        }
        if (!redisProperties.isCacheNullValues()){
            config=config.disableCachingNullValues();
        }
        if (!redisProperties.isUseKeyPrefix()){
            config=config.disableKeyPrefix();
        }

        return config;
    }
}
spring:
#redis缓存
redis:
port: 6379
host: 192.168.20.130
#springCache缓存
cache:
type: redis
redis:
#存活时间
time-to-live: 3600000
#缓存前缀,如果指定,也用前缀,如果没有则默认使用缓存的名字作为前缀
key-prefix: CAHCE_
#是否使用缓存前缀
use-key-prefix: true
#是否缓存空值,防止缓存穿透
cache-null-values: true
- 读多写少的数据,及时性,一致性要求不高的,完全可以使用springcache
- 要求高,特殊数据,特殊处理


 到【灌水乐园】发言


