


最新案例动态,请查阅【案例共创】基于华为开发者空间使用 FastAPI 构建 MCP 天气查询服务。小伙伴们快来领取华为开发者空间进行实操吧!
本案例由开发者:胡琦提供
案例简介:本案例将指导您在华为云开发者空间中使用 FastAPI 框架构建一个功能完整的 MCP(Model ContextProtocol)天气查询服务。通过本案例,您将学会如何将传统的 REST API 转换为 MCP 工具,让 AI 模型能够实时获取天气信息并与用户进行智能交互。
一、概述
1. 案例介绍
在传统的 AI 对话系统中,模型只能基于训练数据回答问题,无法获取实时信息。MCP 协议的出现解决了这一痛点,它允许 AI 模型通过标准化的接口调用外部工具和服务,获取实时数据。
本案例将指导您在华为云开发者空间中使用 FastAPI 框架构建一个功能完整的 MCP(Model ContextProtocol)天气查询服务。通过本案例,您将学会如何将传统的 REST API 转换为 MCP 工具,让 AI模型能够实时获取天气信息并与用户进行智能交互。
华为开发者空间是为全球开发者打造的专属开发者空间,致力于为每位开发者提供一台云主机、一套开发工具和云上存储空间,汇聚昇腾、鸿蒙、鲲鹏、GaussDB、欧拉等华为各项根技术的开发工具资源,并提供配套案例指导开发者 从开发编码到应用调测,基于华为根技术生态高效便捷的知识学习、技术体验、应用创新。
2. 适用对象
- 企业
- 个人开发者
- 高校学生
3. 案例时间
本案例总时长预计90分钟。
4. 案例流程
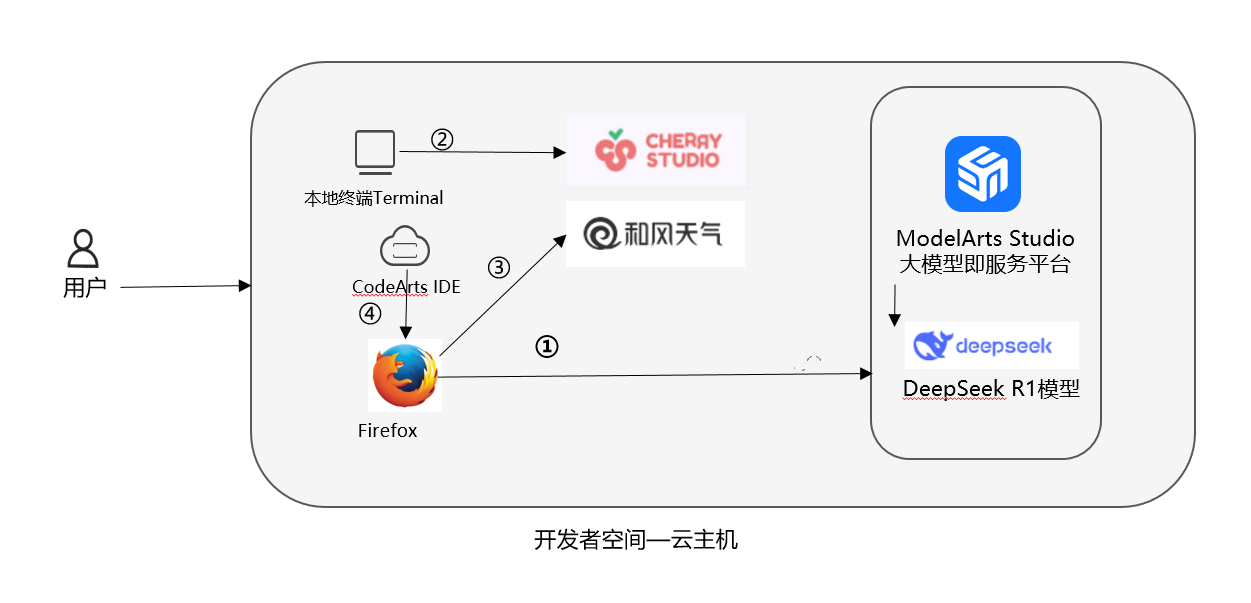
说明:
- 云主机获取部署DeepSeek;
- 终端安装Cherry Studio;
- 搭建部署MCP;
- 调用和风天气API。
5. 资源总览
本案例预计花费0元。
| 资源名称 | 规格 | 单价(元) | 时长(分钟) |
|---|---|---|---|
| 华为开发者空间 - 云主机 | 鲲鹏通用计算增强型 kc2.xlarge.2 | 4vCPUs8G | Ubuntu | 免费 | 90 |
注意事项:
本案例基于免费额度,如需更高配额请自行申请。
API 可能存在调用次数限制,超出免费额度需付费或申请扩容。
二、环境配置
1. 开发者空间配置
面向广大开发者群体,华为开发者空间提供一个随时访问的“开发桌面云主机”、丰富的“预配置工具集合”和灵活使用的“场景化资源池”,开发者开箱即用,快速体验华为根技术和资源。
如果还没有领取开发者空间云主机,可以参考免费领取云主机文档领取。
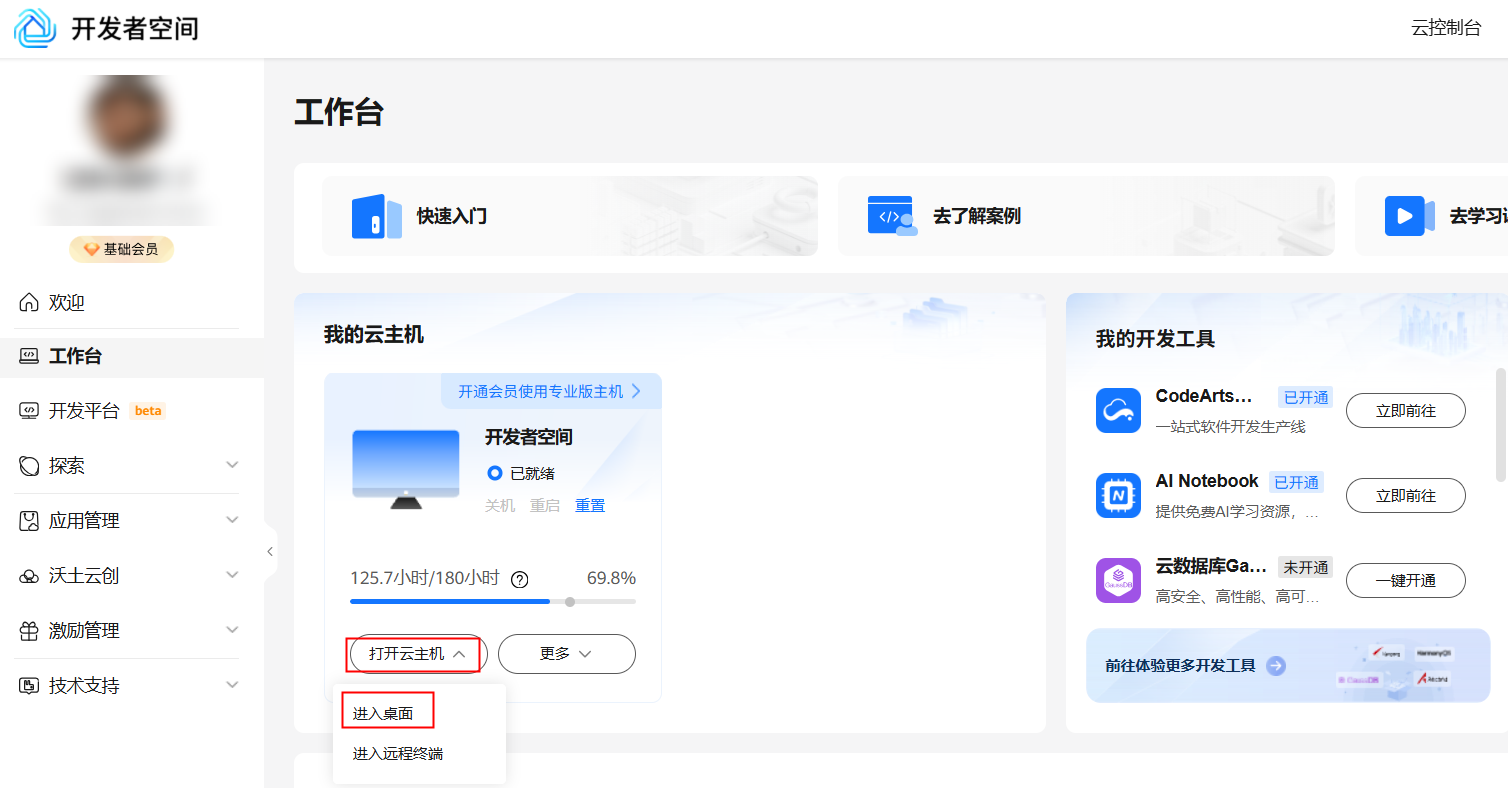
领取云主机后可以直接进入华为开发者空间工作台界面,点击打开云主机 > 进入桌面连接云主机。

2. 配置 MaaS 模型服务
-
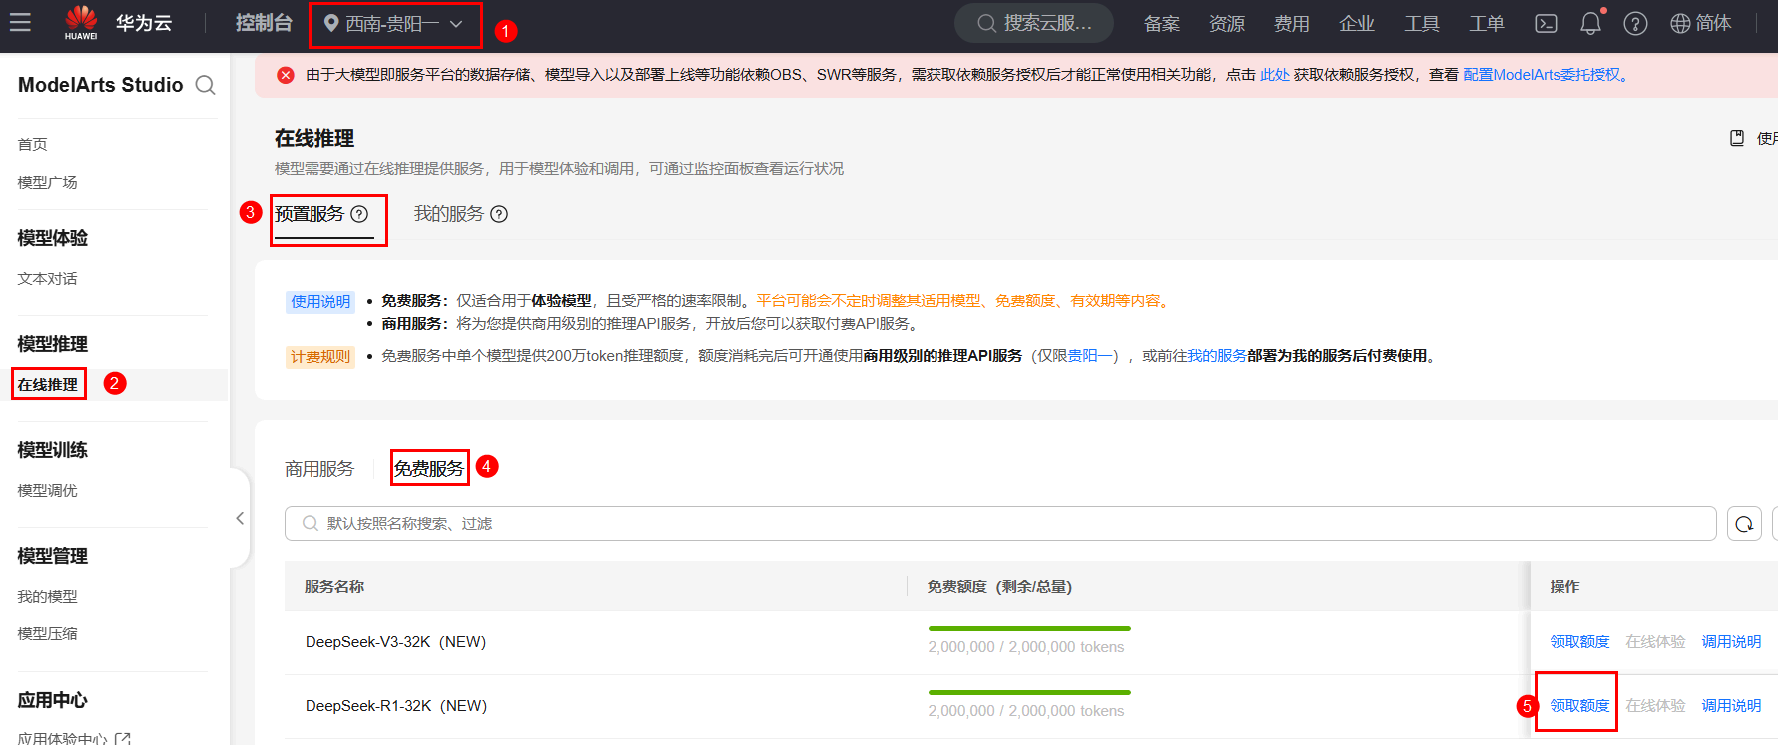
访问华为云 MaaS 服务
在云主机内,使用火狐浏览器登录MaaS大模型即服务平台区域选择【西南-贵阳一】,在左侧菜单栏,选择【在线推理】 > 【预置服务】 > 【免费服务】,选择【DeepSeek-R1-32K(NEW)】模型,点击【领取额度】,领取200万免费tokens。
-
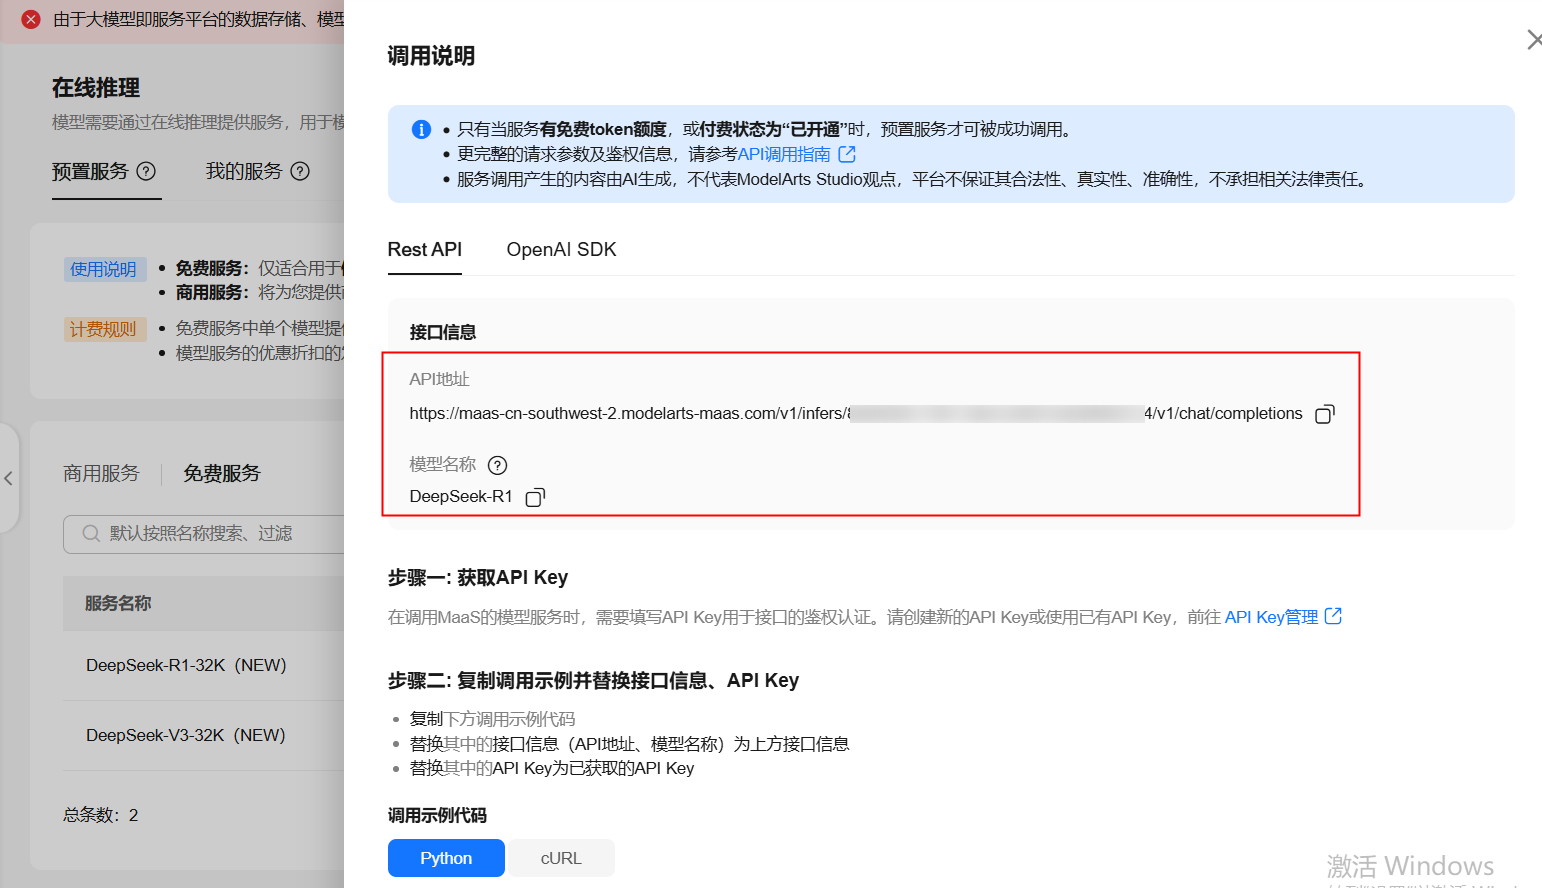
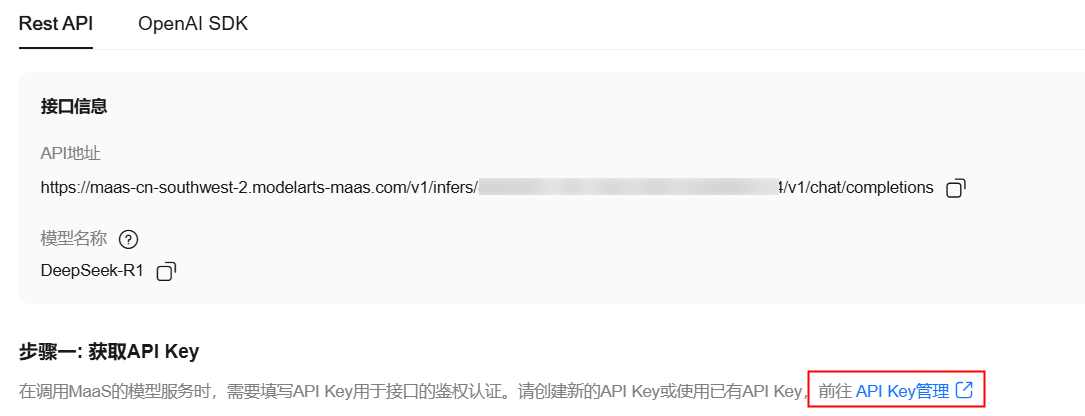
获取 API 地址和模型名称
领取完成后,点击对应服务操作栏中的【调用说明】,这里我们可以获取两个关键信息:模型名称和API地址。
-
获取 API 密钥
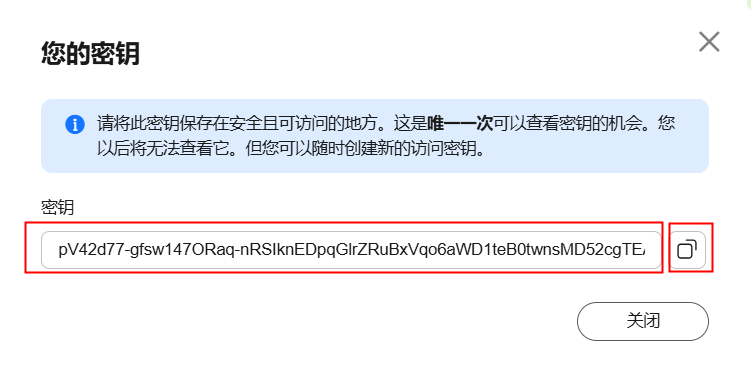
点击【API Key管理】进入创建API Key页面,点击右上角【创建API Key】,自定义标签和描述,点击【确定】创建API Key。
注意:API Key仅会在新建后显示⼀次,且在第三步配置Cherry Studio时会用到,请及时复制并妥善保存,若API Key丢失,请新建API Key。
点击API-key管理:
创建API Key:

注意保存当前API Key:
至此,我们获取到了所需的 API 地址、模型名称和 API 密钥。
3. 安装 Cherry Studio
Cherry Studio是一款集多模型对话、知识库管理、AI绘画、翻译等功能于一体的全能AI助手平台。
CherryStudio的高度自定义的设计、强大的扩展能力和友好的用户体验,使其成为专业用户和AI爱好者的理想选择。
无论是零基础用户还是开发者,都能在CherryStudio中找到适合自己的AI功能,提升工作效率和创造力。
-
安装Cherry Studio
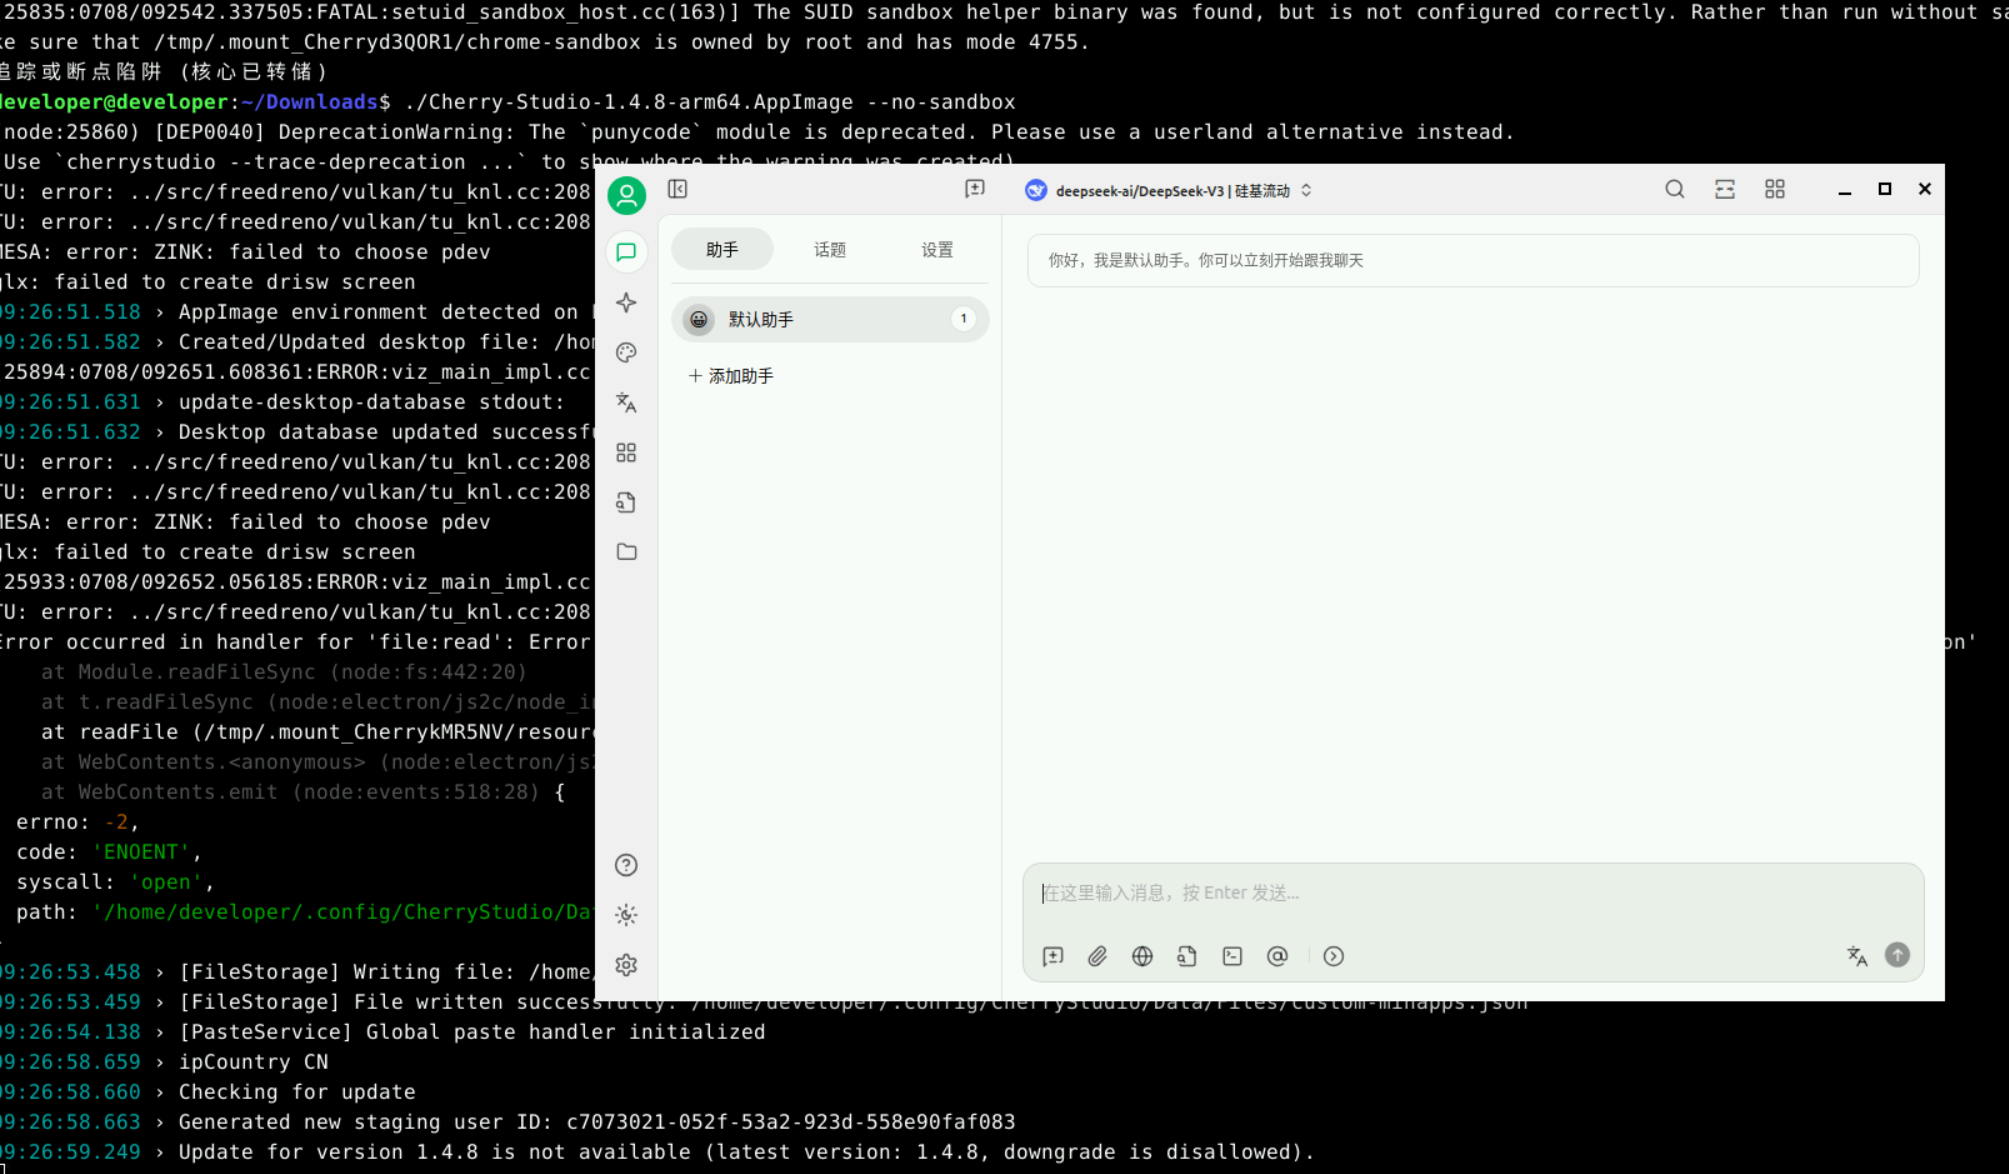
本案例中,使用《华为开发者空间部署Cherry Studio实现文本数据处理与分析》的“三. 云主机部署DeepSeek中的3. 安装CherryStudio”章节完成CherryStudio的安装。
运行成功界面如下:
-
Cherry Studio界面配置大模型
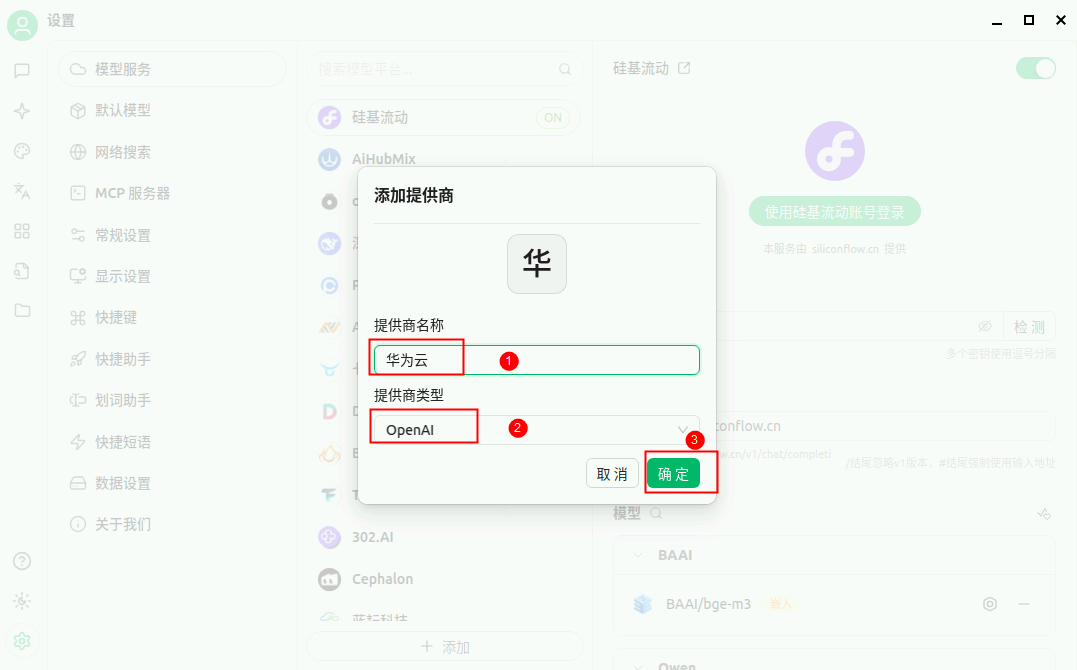
点击设置,添加供应商。
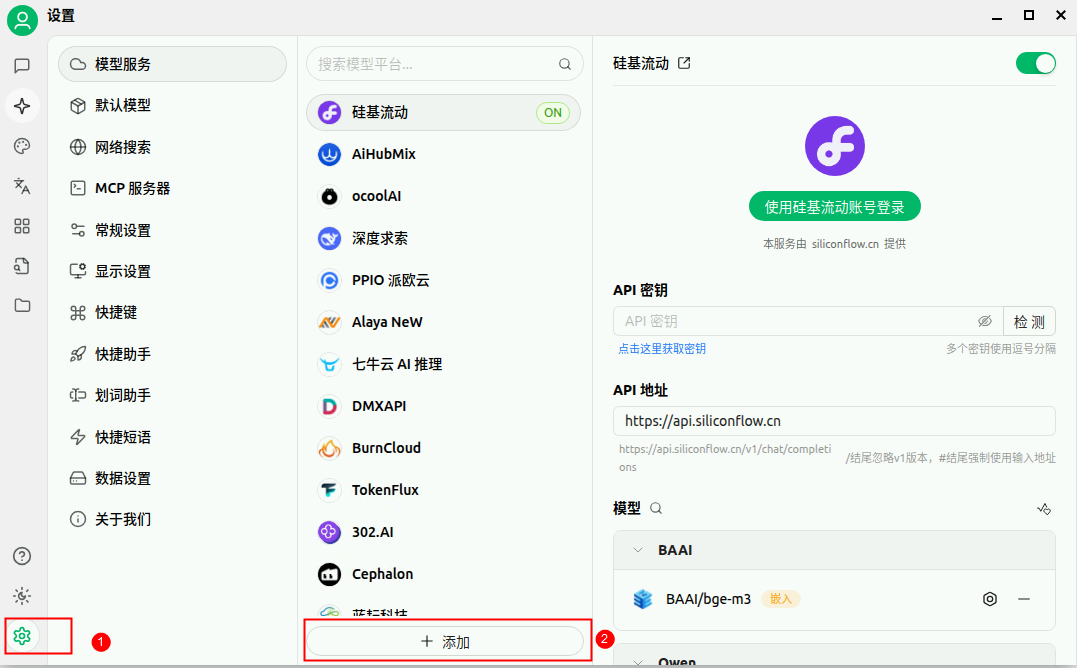
供应商设置为”华为云“,供应商类型设置为OpenAI。
把"二、环境配置"获得的API Key和API地址输入,并点击【模型】下的【添加】按钮,添加模型。
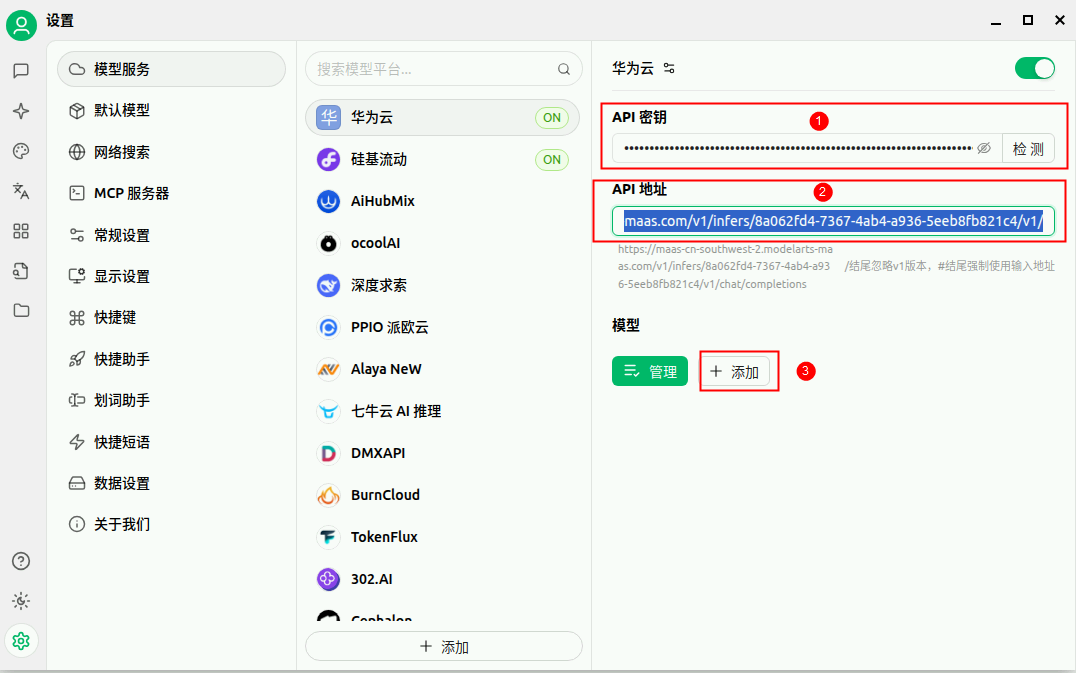
注:API地址只需要到 V1/即可,最后的地址不需要。
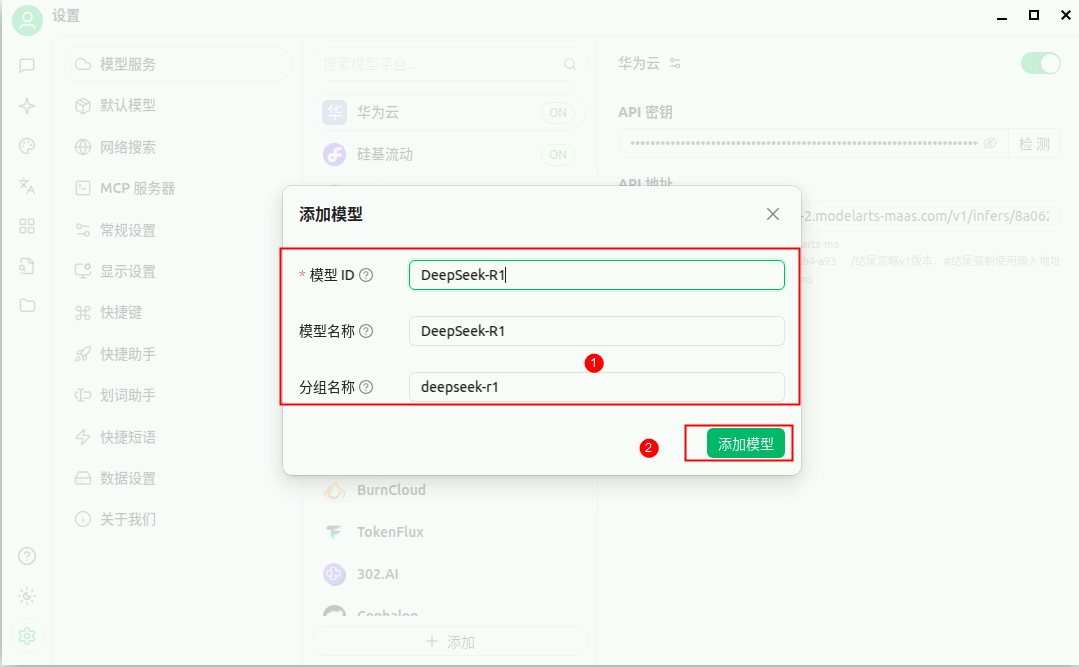
添加模型。
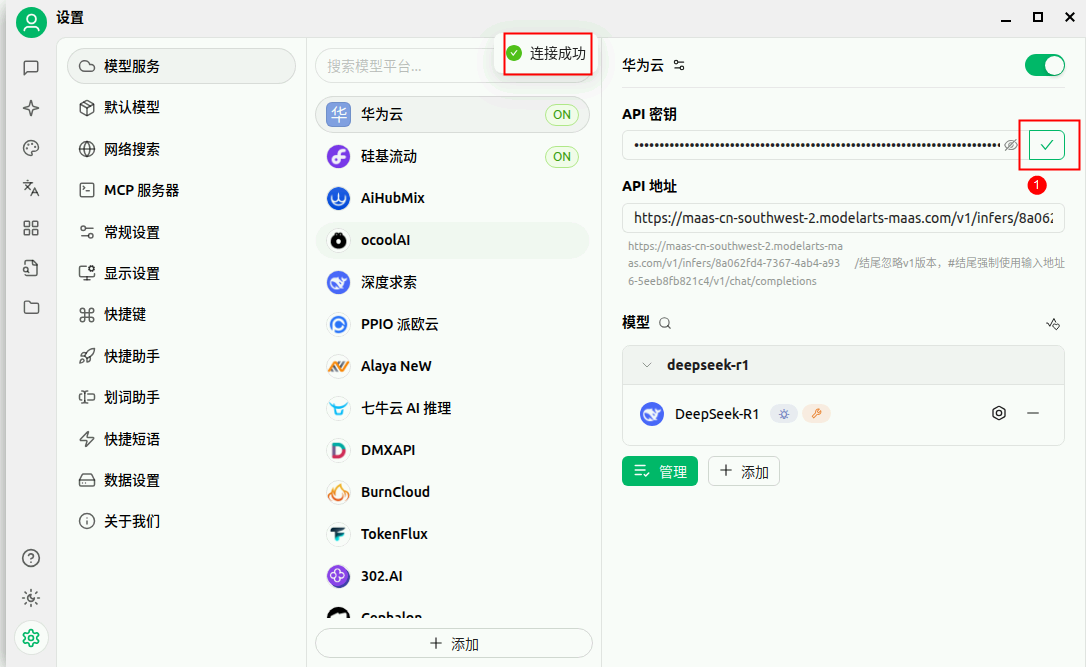
检测配置结果。
4. 和风天气API注册
- 注册和风天气
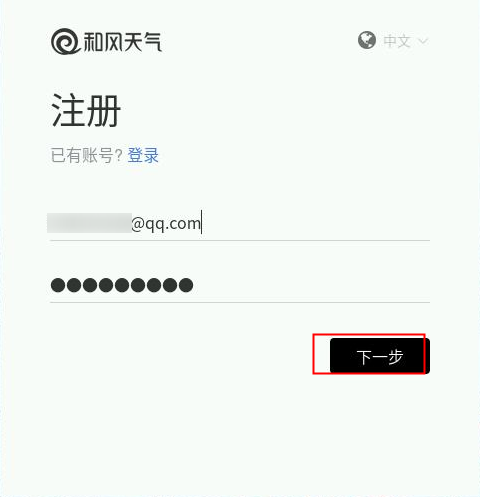
在云主机内,使用火狐浏览器登录和风天气 https://id.qweather.com/。若是没有注册,请先使用个人邮箱和手机号进行注册。
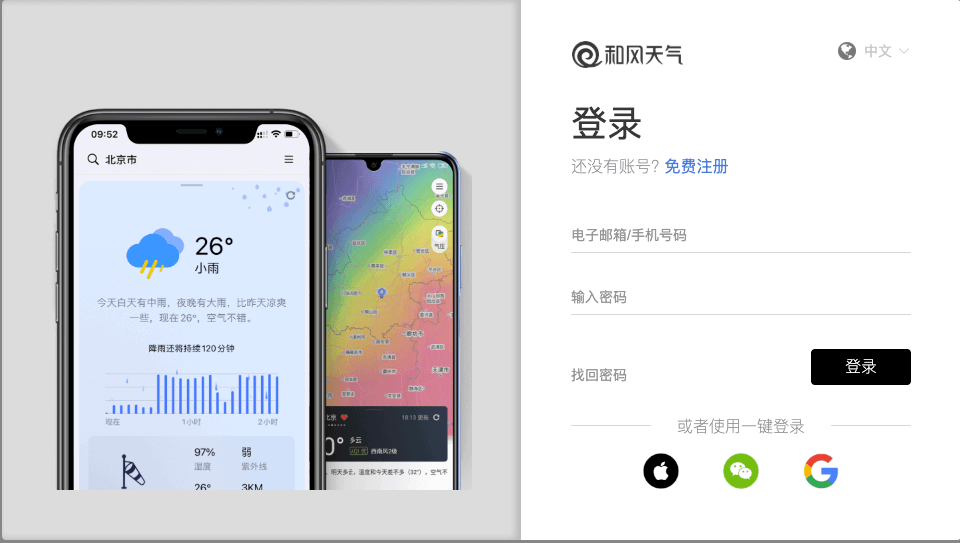 注册完成后进行登录。
- 创建项目
点击进入【开发服务控制台】。

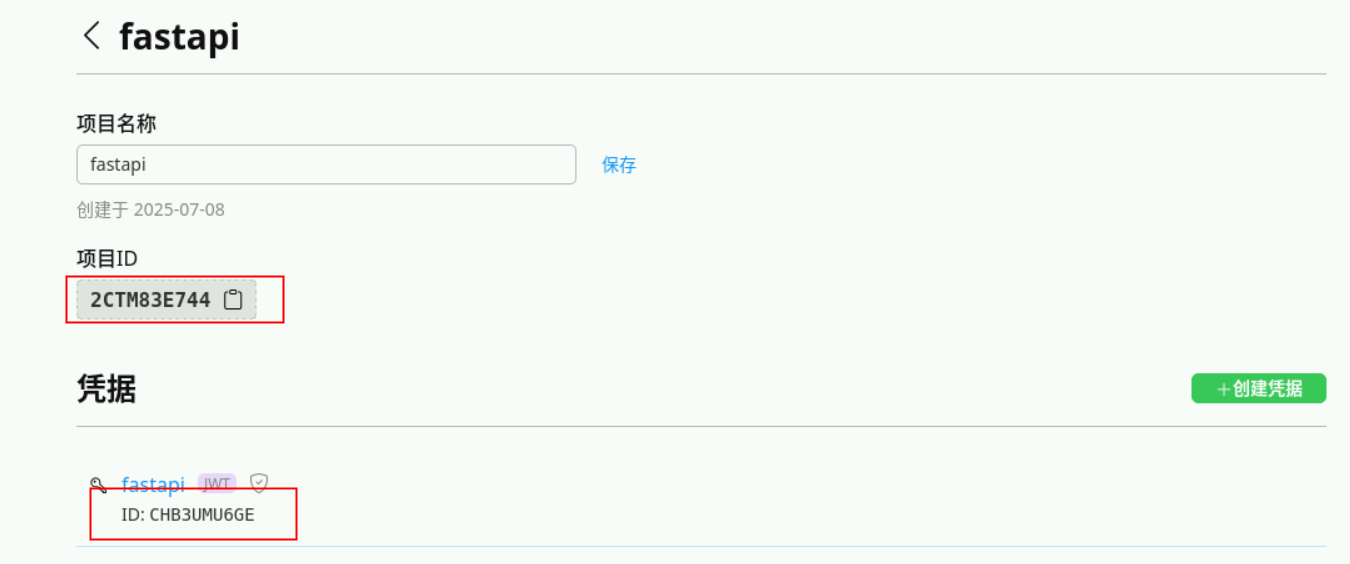
点击【项目管理】->【创建项目】。

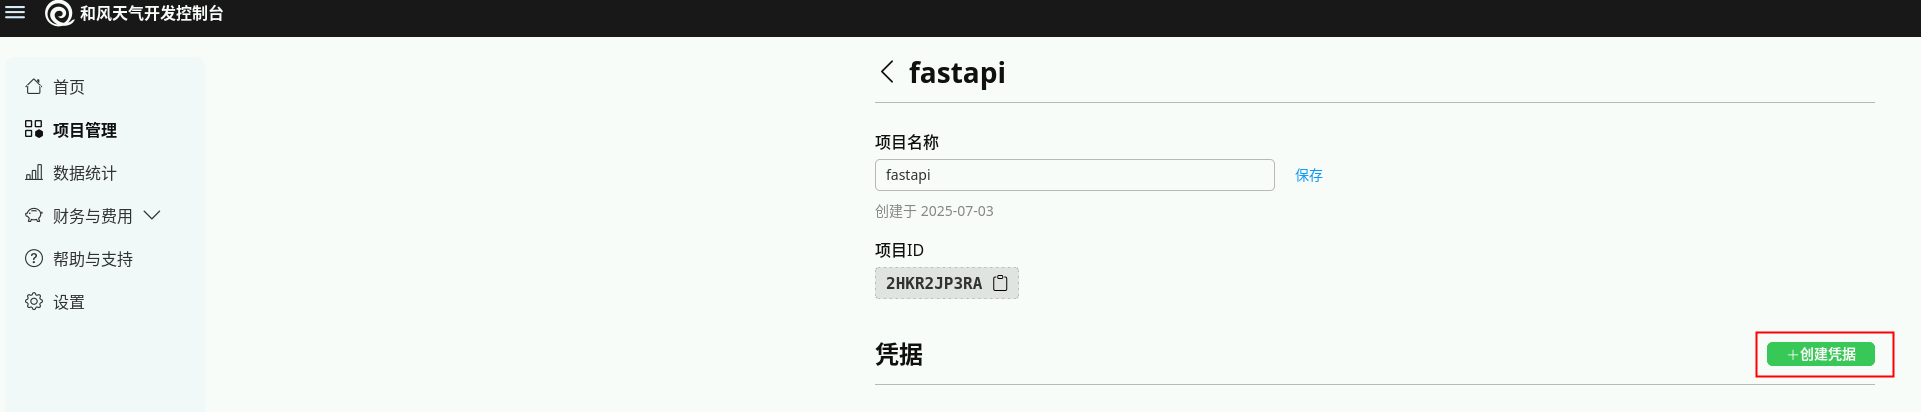
创建一个项目,如 fastapi ,创建之后此步骤获得PROJECT_ID(即项目ID)。
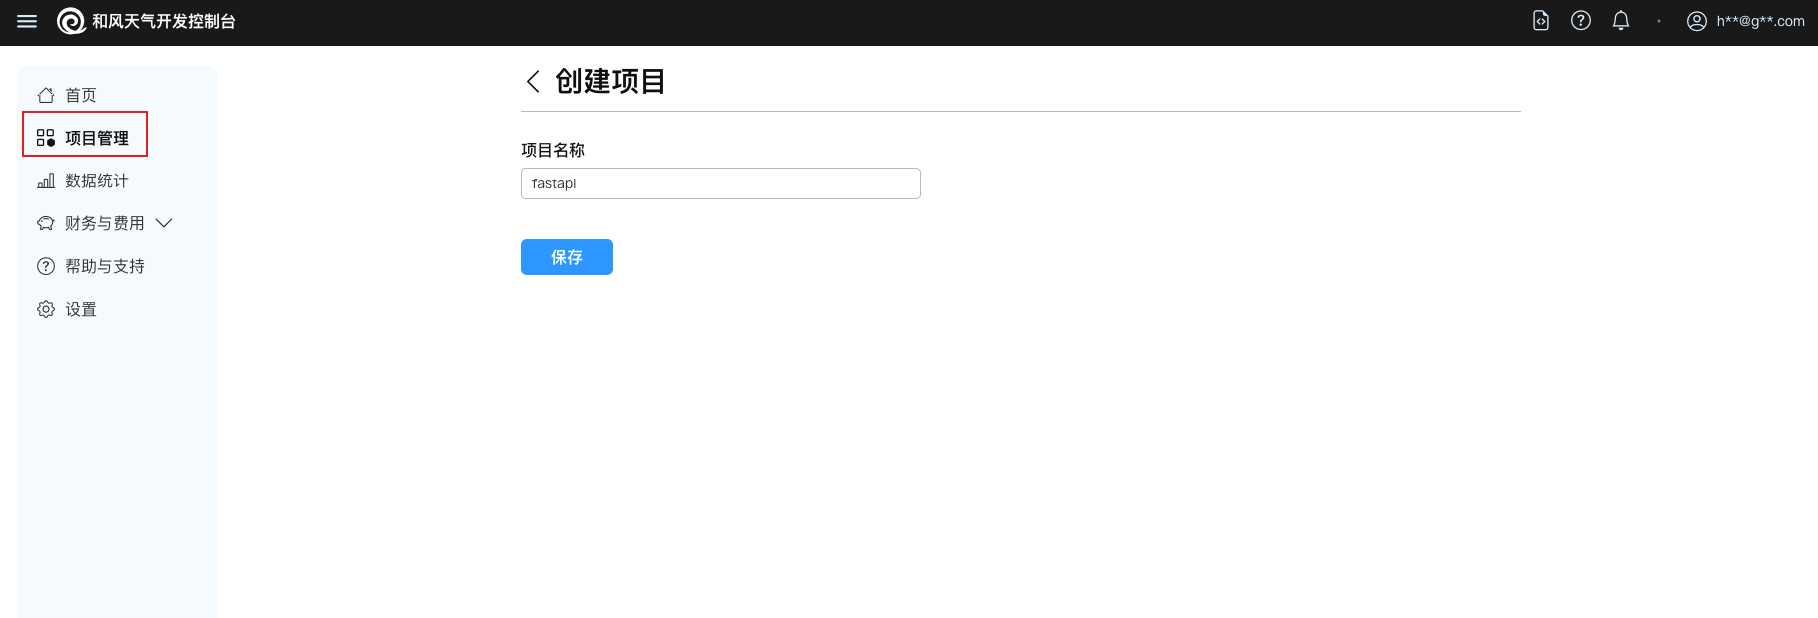

注:PROJECT_ID在后续代码实现中会用到,请注意保存获取。
- 创建凭据
1)点击项目fastapi ,点击创建凭据开始创建 JWT凭据,需先在本地生成公私钥对再创建,创建之后此步骤获得PRIVATE_KEY和KEY_ID。

2)点击如下图连接创建和使用身份认证。
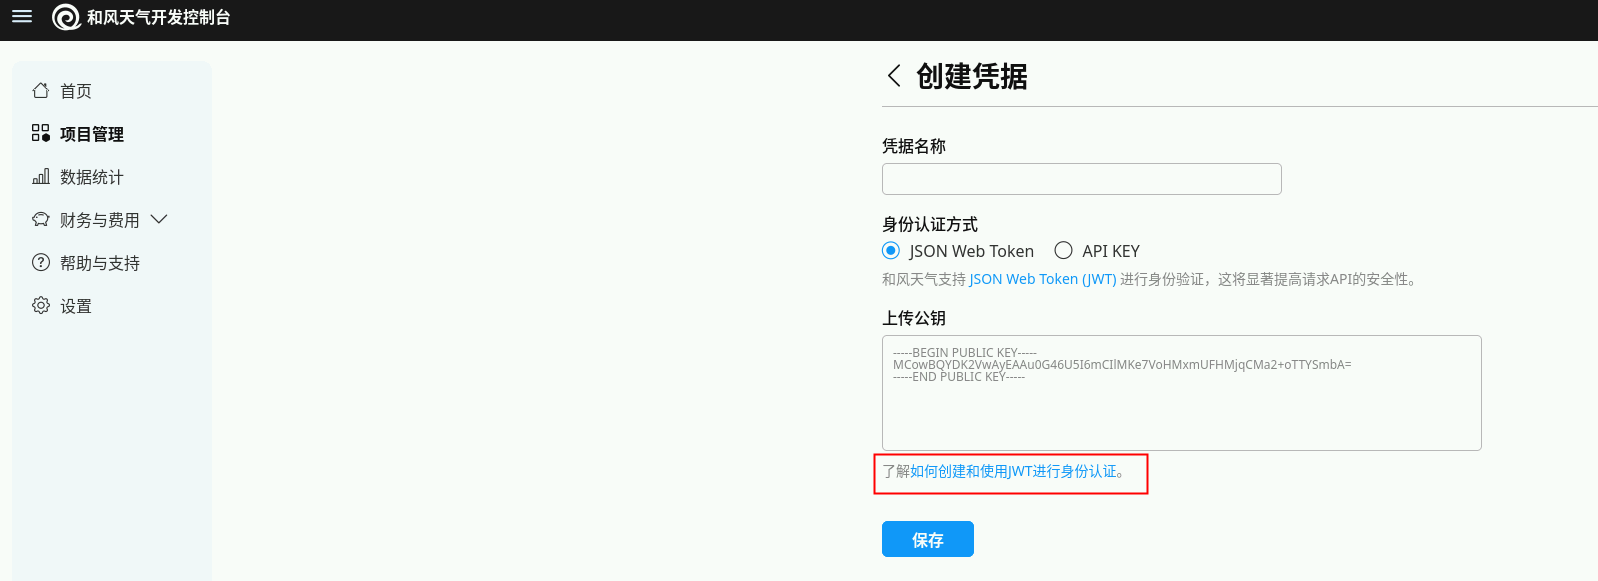
注: 虽然 APIKey 更简单,但推荐使⽤JSON Web Token (JWT)的认证的式获得更高等级的安全性以及不受限的API请求。
或者打开终端,粘贴下列文本生成公钥和私钥:
openssl genpkey -algorithm ED25519 -out ed25519-private.pem \
&& openssl pkey -pubout -in ed25519-private.pem > ed25519-public.pem
3)点击右下角【所有应用程序】,在【文件管理器】中就可以看到生成的公钥和密钥了。

4)上传公钥
打开公钥,将公钥上传,点击【保存】。
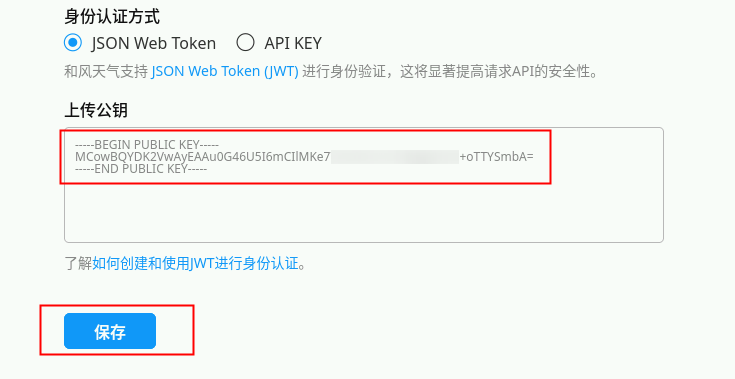
这样我们就获取到了PRIVATE_KEY和KEY_ID。
注1: 整个公钥都要上传,包括抬头的 BEGIN PUBLIC KEY 及结尾的 END PUBLIC KEY。
注2: PRIVATE_KEY和KEY_ID会在核心代码实现中用到,请注意保存。
注3: PRIVATE_KEY可以选择开发工具(例:CodeArts IDE for Java)打开。
5)获取API Host
点击设置,查找API Host,如下图所示。
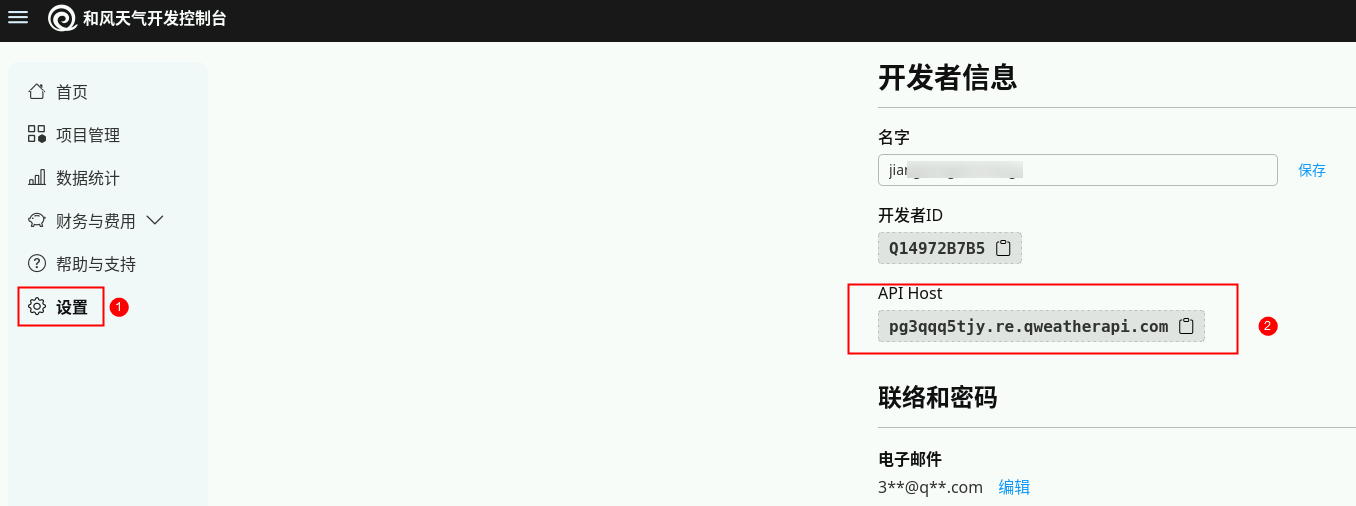
至此,我们天气查询 MCP 中需要用到的配置信息已经全部获取。
三、项目搭建
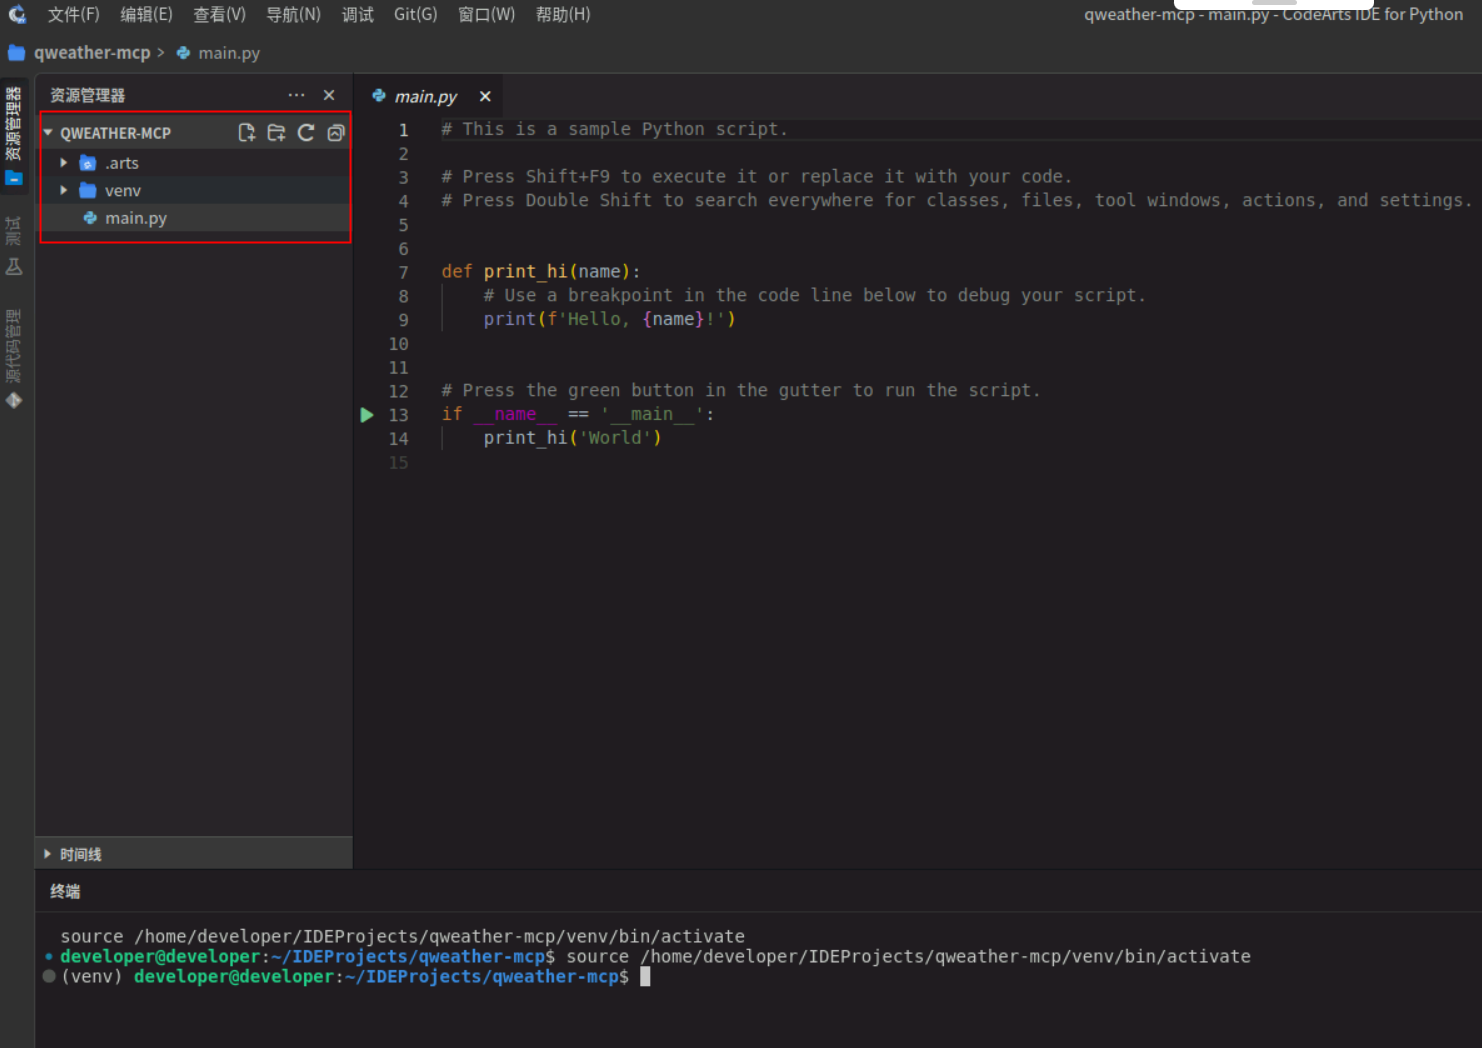
1.项目初始化
使用使用CodeArts IDE for Python创建项目工程或者使用脚本创建项目目录:
mkdir qweather-mcp
cd qweather-mcp
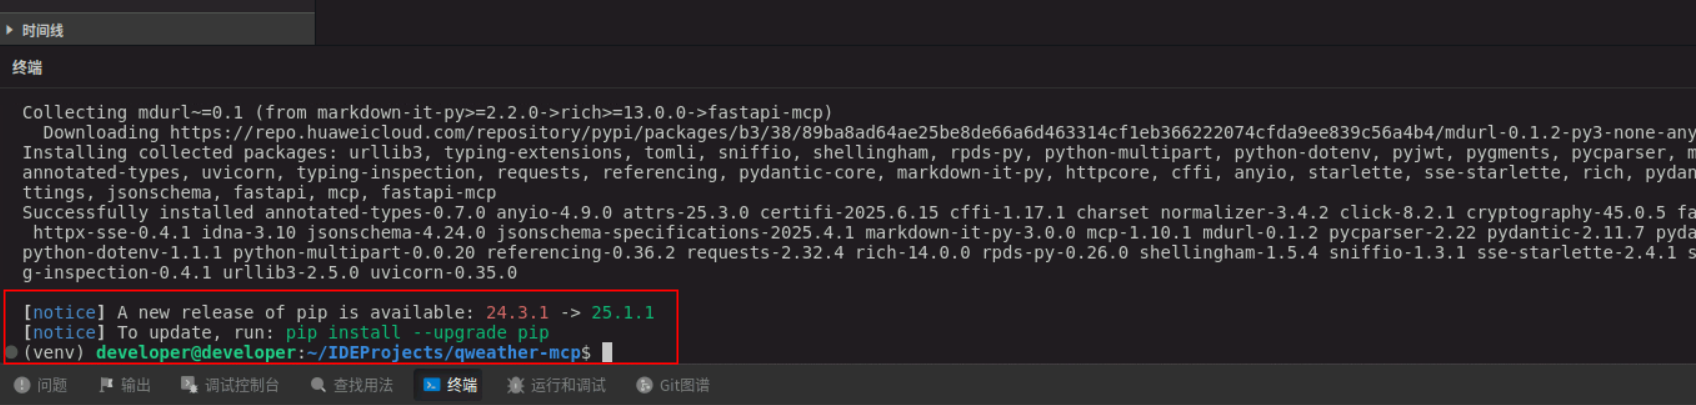
安装依赖包:
pip install fastapi uvicorn fastapi-mcp pyjwt cryptography requests -i https://repo.huaweicloud.com/repository/pypi/simple
执行结果如下:
2. 核心代码实现
- 引⼊依赖
from fastapi import FastAPI, HTTPException, Depends, Query, status
from fastapi.security import HTTPBearer
from pydantic import BaseModel, Field
from typing import List, Optional, Dict, Any
import jwt
import time
import requests
from datetime import datetime
import base64
from cryptography.hazmat.primitives import serialization
from cryptography.hazmat.backends import default_backend

# 引⼊ fastapi_mcp
from fastapi_mcp import FastApiMCP, AuthConfig
- 配置天⽓服务 API
代码中所示PRIVATE_KEY、PROJECT_ID、KEY_ID、WEATHER_API_HOST均为和风天气API注册步骤获得,开发者需要将自己本地获取的上述值替换到代码中。
app = FastAPI(title="天⽓查询API")
# 配置项 - 在实际应⽤中应从环境变量或配置⽂件中读取

# PRIVATE_KEY = """YOUR_PRIVATE_KEY"""
# PROJECT_ID = "YOUR_PROJECT_ID"
# KEY_ID = "YOUR_KEY_ID"
# WEATHER_API_HOST = "your_api_host"
PRIVATE_KEY = "MC4CAQAwBQYDK2VwBCIEIG2wMZga50X1YDHmR8jkE5TGKNXpriFPXXCT/kgwZkcT"
PROJECT_ID = "3MKPRE78RN"
KEY_ID = "T8B7JMU7AY"
WEATHER_API_HOST = "ky6mte27bb.re.qweatherapi.com"
- 定义响应 Model
# 响应模型
class Location(BaseModel):
    name: str
    id: str
    lat: str
    lon: str
    adm2: str
    adm1: str
    country: str
    tz: str
    utcOffset: str
    isDst: str
    type: str
    rank: str
    fxLink: str

class LocationResponse(BaseModel):
    code: str
    location: List[Location]

class WeatherNow(BaseModel):
    obsTime: str
    temp: str
    feelsLike: str
    icon: str
    text: str
    wind360: str
    windDir: str
    windScale: str
    windSpeed: str
    humidity: str
    precip: str
    pressure: str
    vis: str
    cloud: str
    dew: str

class ReferSources(BaseModel):
    sources: List[str]
    license: List[str]

class WeatherResponse(BaseModel):
    code: str
    updateTime: str
    fxLink: str
    now: WeatherNow
    refer: ReferSources

class JWTRequest(BaseModel):
    expiry_seconds: Optional[int] = 900 # 默认15分钟
    custom_claims: Optional[dict] = None # 允许添加⾃定义声明

class WeatherQuery(BaseModel):
    city: str = Field(..., description="城市名,如:北京")
- JWT 令牌⽣成
# 解码并加载私钥
try:
    _der_key_bytes = base64.b64decode(PRIVATE_KEY)
    PRIVATE_KEY = serialization.load_der_private_key(
        _der_key_bytes,
        password=None,
        backend=default_backend()
    )
except Exception as e:
    print(f"关键错误:⽆法从配置加载EdDSA私钥。错误: {e}")
    PRIVATE_KEY = None
    if PRIVATE_KEY is None:
        raise RuntimeError(f"关键错误:EdDSA私钥加载失败,应⽤⽆法启动。错误: {e}")

# 令牌缓存(简单实现,⽣产环境应使⽤Redis等缓存系统)
token_cache = {
    "token": None,
    "expires_at": 0
}

# Bearer Token 安全头
token_auth_scheme = HTTPBearer()
EXPECTED_BEARER_TOKEN = "huaweicloud" # 定义期望的固定Token

# Bearer Token 验证依赖
async def verify_bearer_token(token_payload = Depends(token_auth_scheme)):
    if token_payload.credentials != EXPECTED_BEARER_TOKEN:
        raise HTTPException(
            status_code=status.HTTP_401_UNAUTHORIZED,
            detail="⽆效的认证凭据",
            headers={"WWW-Authenticate": "Bearer"},
        )
    return token_payload.credentials

# ⽣成JWT令牌
def generate_jwt(expiry_seconds: int = 900):
    current_time = int(time.time())
    # 构建标准JWT载荷
    payload = {
        'iat': current_time - 30, # 颁发时间(提前30秒,避免时钟偏差问题)
        'exp': current_time + expiry_seconds, # 过期时间
        'sub': PROJECT_ID # 主题(项⽬ID)
    }
    # JWT头部
    headers = {
        'kid': KEY_ID # 密钥ID
    }
    if PRIVATE_KEY is None:
        raise ValueError("JWT⽣成失败: 私钥未初始化或加载失败。")
    try:
        # ⽣成JWT
        encoded_jwt = jwt.encode(payload, PRIVATE_KEY, algorithm='EdDSA', headers=headers)
        # 更新缓存
        token_cache["token"] = encoded_jwt
        token_cache["expires_at"] = current_time + expiry_seconds - 60 # 提前1 分钟过期,确保安全
        return encoded_jwt
    except Exception as e:
        raise ValueError(f"JWT⽣成失败: {str(e)}")

# 获取有效的JWT令牌(如果缓存中有有效令牌则使⽤缓存,否则⽣成新令牌)
def get_valid_token():
    current_time = int(time.time())
    # 检查缓存中的令牌是否有效
    if token_cache["token"] and token_cache["expires_at"] > current_time:
        return token_cache["token"]
    # ⽣成新令牌
    return generate_jwt()

@app.post("/generate-jwt", operation_id="generate_jwt", tags=["JWT"])
async def create_jwt(request: JWTRequest = JWTRequest()):
    """
    ⽣成JWT令牌
    - 使⽤EdDSA算法签名
    - 默认有效期为15分钟
    - 可以添加⾃定义声明
    """
    try:
        encoded_jwt = generate_jwt(request.expiry_seconds)
        current_time = int(time.time())
        return {
            "jwt": encoded_jwt,
            "expires_at": datetime.fromtimestamp(current_time + request.expiry_seconds).isoformat(),
            "issued_at": datetime.fromtimestamp(current_time - 30).isoformat(),
            "valid_for_seconds": request.expiry_seconds
        }
    except Exception as e:
        raise HTTPException(status_code=500, detail=str(e))
- 天气查询接口
# 发送HTTP请求到天⽓API,并处理gzip压缩
def fetch_weather_api(endpoint: str, params: Dict[str, Any]):
    # 获取有效的JWT令牌
    token = get_valid_token()
    headers = {
        'Authorization': f'Bearer {token}',
        'Accept-Encoding': 'gzip' # 我们请求gzip压缩
    }
    url = f"https://{WEATHER_API_HOST}/{endpoint}"
    try:
        response = requests.get(url, headers=headers, params=params)
        # 检查响应状态
        if response.status_code != 200:
            # 如果是401或403,尝试刷新令牌并重试
            if response.status_code in [401, 403]:
                # 强制⽣成新令牌
                new_token = generate_jwt()
                # 更新请求头
                headers['Authorization'] = f'Bearer {new_token}'
                # 重试请求
                response = requests.get(url, headers=headers, params=params)

                # 如果还是失败,则抛出异常
                if response.status_code != 200:
                    raise HTTPException(
                        status_code=response.status_code,
                        detail=f"天⽓API请求失败: HTTP {response.status_code}"
                    )
            else:
                raise HTTPException(
                    status_code=response.status_code,
                    detail=f"天⽓API请求失败: HTTP {response.status_code}"
                )
        # 依赖 requests 库⾃动处理Gzip解压缩,并直接解析JSON
        # 旧的Gzip处理逻辑已被移除
        return response.json()
    except requests.exceptions.JSONDecodeError as e:
        # 如果响应不是有效的JSON(即使在解压缩后),则捕获此特定错误
        raise HTTPException(status_code=500, detail=f"天⽓API响应解析失败: ⽆效的JSON内容 - {str(e)}")
    except HTTPException:
        # 重新抛出已捕获的HTTPException,以便FastAPI处理
        raise
    except Exception as e:
        # 捕获其他潜在错误
        raise HTTPException(status_code=500, detail=f"天⽓API请求时发⽣未知错误:{str(e)}")

@app.get("/city/lookup", response_model=LocationResponse,
operation_id="lookup_city", tags=["天⽓查询"])
async def lookup_city(location: str = Query(..., description="城市名称,如:北京")):
    """
    根据城市名称查询位置ID
    - 返回城市的详细信息和位置ID
    - 位置ID⽤于后续天⽓查询
    """
    try:
        data = fetch_weather_api("geo/v2/city/lookup", {"location": location})
        return data
    except Exception as e:
        raise HTTPException(status_code=500, detail=str(e))

@app.get("/weather/now", response_model=WeatherResponse,
operation_id="get_weather_now", tags=["天⽓查询"])
async def get_weather_now(location: str = Query(..., description="位置ID,如:101010100")):
    """
    获取指定位置的实时天⽓
    - 需要提供位置ID
    - 返回当前天⽓详情
    """
    try:
        data = fetch_weather_api("v7/weather/now", {"location": location})
        return data
    except Exception as e:
        raise HTTPException(status_code=500, detail=str(e))
@app.post("/weather/by-city", response_model=WeatherResponse,
operation_id="get_weather_by_city", tags=["天⽓查询"])
async def get_weather_by_city(query: WeatherQuery):
    """
    ⼀站式查询城市天⽓
    - 只需提供城市名
    - ⾃动查询位置ID并获取天⽓
    """
    try:
        # 先查询城市ID
        location_data = fetch_weather_api("geo/v2/city/lookup", {"location":query.city})
        # 检查是否找到城市
        if location_data.get("code") != "200" or not location_data.get("location"):
            raise HTTPException(status_code=404, detail=f"找不到城市:{query.city}")
        # 获取第⼀个匹配城市的ID
        location_id = location_data["location"][0]["id"]
        # 查询天⽓
        weather_data = fetch_weather_api("v7/weather/now", {"location":location_id})
        return weather_data
    except HTTPException:
        raise
    except Exception as e:
        raise HTTPException(status_code=500, detail=str(e))
- 主程序及MCP集成
@app.get("/")
async def root():
    """主⻚ - 提供API简介"""
    return {
        "message": "天⽓查询API",
        "endpoints": [
        "/generate-jwt - ⽣成JWT令牌",
        "/city/lookup - 根据城市名查询位置ID",
        "/weather/now - 根据位置ID查询当前天⽓",
        "/weather/by-city - ⼀站式查询城市天⽓"
        ],
        "docs": "/docs 查看完整API⽂档"
    }

# mcp 实现
mcp = FastApiMCP(
    app,
    name="My Weather MCP",
    description="天⽓查询API",
    include_operations=["get_weather_by_city"], # 只公开 get_weather_by_city 接⼝作为 MCP tool
    auth_config=AuthConfig(dependencies=[Depends(verify_bearer_token)]) # MCP使⽤ Bearer Token 验证
)
mcp.mount()

# 启动服务器的命令(在命令⾏中运⾏):
# uvicorn main:app --reload
if __name__ == "__main__":
    import uvicorn
    uvicorn.run(app, host="0.0.0.0", port=8009)
完整代码如下:
from fastapi import FastAPI, HTTPException, Depends, Query, status
from fastapi.security import HTTPBearer
from pydantic import BaseModel, Field
from typing import List, Optional, Dict, Any
import jwt
import time
import requests
from datetime import datetime
import base64
from cryptography.hazmat.primitives import serialization
from cryptography.hazmat.backends import default_backend

# 引⼊ fastapi_mcp
from fastapi_mcp import FastApiMCP, AuthConfig

app = FastAPI(title="天⽓查询API")
# 配置项 - 在实际应⽤中应从环境变量或配置⽂件中读取

# PRIVATE_KEY = """YOUR_PRIVATE_KEY"""
# PROJECT_ID = "YOUR_PROJECT_ID"
# KEY_ID = "YOUR_KEY_ID"
# WEATHER_API_HOST = "your_api_host"
PRIVATE_KEY = "MC4CAQAwBQYDK2VwBCIEIG2wMZga50X1YDHmR8jkE5TGKNXpriFPXXCT/kgwZkcT"
PROJECT_ID = "3MKPRE78RN"
KEY_ID = "T8B7JMU7AY"
WEATHER_API_HOST = "ky6mte27bb.re.qweatherapi.com"

# 响应模型
class Location(BaseModel):
    name: str
    id: str
    lat: str
    lon: str
    adm2: str
    adm1: str
    country: str
    tz: str
    utcOffset: str
    isDst: str
    type: str
    rank: str
    fxLink: str

class LocationResponse(BaseModel):
    code: str
    location: List[Location]

class WeatherNow(BaseModel):
    obsTime: str
    temp: str
    feelsLike: str
    icon: str
    text: str
    wind360: str
    windDir: str
    windScale: str
    windSpeed: str
    humidity: str
    precip: str
    pressure: str
    vis: str
    cloud: str
    dew: str

class ReferSources(BaseModel):
    sources: List[str]
    license: List[str]

class WeatherResponse(BaseModel):
    code: str
    updateTime: str
    fxLink: str
    now: WeatherNow
    refer: ReferSources

class JWTRequest(BaseModel):
    expiry_seconds: Optional[int] = 900 # 默认15分钟
    custom_claims: Optional[dict] = None # 允许添加⾃定义声明

class WeatherQuery(BaseModel):
    city: str = Field(..., description="城市名,如:北京")

# 解码并加载私钥
try:
    _der_key_bytes = base64.b64decode(PRIVATE_KEY)
    PRIVATE_KEY = serialization.load_der_private_key(
        _der_key_bytes,
        password=None,
        backend=default_backend()
    )
except Exception as e:
    print(f"关键错误:⽆法从配置加载EdDSA私钥。错误: {e}")
    PRIVATE_KEY = None
    if PRIVATE_KEY is None:
        raise RuntimeError(f"关键错误:EdDSA私钥加载失败,应⽤⽆法启动。错误: {e}")

# 令牌缓存(简单实现,⽣产环境应使⽤Redis等缓存系统)
token_cache = {
    "token": None,
    "expires_at": 0
}

# Bearer Token 安全头
token_auth_scheme = HTTPBearer()
EXPECTED_BEARER_TOKEN = "huaweicloud" # 定义期望的固定Token

# Bearer Token 验证依赖
async def verify_bearer_token(token_payload = Depends(token_auth_scheme)):
    if token_payload.credentials != EXPECTED_BEARER_TOKEN:
        raise HTTPException(
            status_code=status.HTTP_401_UNAUTHORIZED,
            detail="⽆效的认证凭据",
            headers={"WWW-Authenticate": "Bearer"},
        )
    return token_payload.credentials

# ⽣成JWT令牌
def generate_jwt(expiry_seconds: int = 900):
    current_time = int(time.time())
    # 构建标准JWT载荷
    payload = {
        'iat': current_time - 30, # 颁发时间(提前30秒,避免时钟偏差问题)
        'exp': current_time + expiry_seconds, # 过期时间
        'sub': PROJECT_ID # 主题(项⽬ID)
    }
    # JWT头部
    headers = {
        'kid': KEY_ID # 密钥ID
    }
    if PRIVATE_KEY is None:
        raise ValueError("JWT⽣成失败: 私钥未初始化或加载失败。")
    try:
        # ⽣成JWT
        encoded_jwt = jwt.encode(payload, PRIVATE_KEY, algorithm='EdDSA', headers=headers)
        # 更新缓存
        token_cache["token"] = encoded_jwt
        token_cache["expires_at"] = current_time + expiry_seconds - 60 # 提前1 分钟过期,确保安全
        return encoded_jwt
    except Exception as e:
        raise ValueError(f"JWT⽣成失败: {str(e)}")

# 获取有效的JWT令牌(如果缓存中有有效令牌则使⽤缓存,否则⽣成新令牌)
def get_valid_token():
    current_time = int(time.time())
    # 检查缓存中的令牌是否有效
    if token_cache["token"] and token_cache["expires_at"] > current_time:
        return token_cache["token"]
    # ⽣成新令牌
    return generate_jwt()

@app.post("/generate-jwt", operation_id="generate_jwt", tags=["JWT"])
async def create_jwt(request: JWTRequest = JWTRequest()):
    """
    ⽣成JWT令牌
    - 使⽤EdDSA算法签名
    - 默认有效期为15分钟
    - 可以添加⾃定义声明
    """
    try:
        encoded_jwt = generate_jwt(request.expiry_seconds)
        current_time = int(time.time())
        return {
            "jwt": encoded_jwt,
            "expires_at": datetime.fromtimestamp(current_time + request.expiry_seconds).isoformat(),
            "issued_at": datetime.fromtimestamp(current_time - 30).isoformat(),
            "valid_for_seconds": request.expiry_seconds
        }
    except Exception as e:
        raise HTTPException(status_code=500, detail=str(e))

# 发送HTTP请求到天⽓API,并处理gzip压缩
def fetch_weather_api(endpoint: str, params: Dict[str, Any]):
    # 获取有效的JWT令牌
    token = get_valid_token()
    headers = {
        'Authorization': f'Bearer {token}',
        'Accept-Encoding': 'gzip' # 我们请求gzip压缩
    }
    url = f"https://{WEATHER_API_HOST}/{endpoint}"
    try:
        response = requests.get(url, headers=headers, params=params)
        # 检查响应状态
        if response.status_code != 200:
            # 如果是401或403,尝试刷新令牌并重试
            if response.status_code in [401, 403]:
                # 强制⽣成新令牌
                new_token = generate_jwt()
                # 更新请求头
                headers['Authorization'] = f'Bearer {new_token}'
                # 重试请求
                response = requests.get(url, headers=headers, params=params)

                # 如果还是失败,则抛出异常
                if response.status_code != 200:
                    raise HTTPException(
                        status_code=response.status_code,
                        detail=f"天⽓API请求失败: HTTP {response.status_code}"
                    )
            else:
                raise HTTPException(
                    status_code=response.status_code,
                    detail=f"天⽓API请求失败: HTTP {response.status_code}"
                )
        # 依赖 requests 库⾃动处理Gzip解压缩,并直接解析JSON
        # 旧的Gzip处理逻辑已被移除
        return response.json()
    except requests.exceptions.JSONDecodeError as e:
        # 如果响应不是有效的JSON(即使在解压缩后),则捕获此特定错误
        raise HTTPException(status_code=500, detail=f"天⽓API响应解析失败: ⽆效的JSON内容 - {str(e)}")
    except HTTPException:
        # 重新抛出已捕获的HTTPException,以便FastAPI处理
        raise
    except Exception as e:
        # 捕获其他潜在错误
        raise HTTPException(status_code=500, detail=f"天⽓API请求时发⽣未知错误:{str(e)}")

@app.get("/city/lookup", response_model=LocationResponse,
operation_id="lookup_city", tags=["天⽓查询"])
async def lookup_city(location: str = Query(..., description="城市名称,如:北京")):
    """
    根据城市名称查询位置ID
    - 返回城市的详细信息和位置ID
    - 位置ID⽤于后续天⽓查询
    """
    try:
        data = fetch_weather_api("geo/v2/city/lookup", {"location": location})
        return data
    except Exception as e:
        raise HTTPException(status_code=500, detail=str(e))

@app.get("/weather/now", response_model=WeatherResponse,
operation_id="get_weather_now", tags=["天⽓查询"])
async def get_weather_now(location: str = Query(..., description="位置ID,如:101010100")):
    """
    获取指定位置的实时天⽓
    - 需要提供位置ID
    - 返回当前天⽓详情
    """
    try:
        data = fetch_weather_api("v7/weather/now", {"location": location})
        return data
    except Exception as e:
        raise HTTPException(status_code=500, detail=str(e))
@app.post("/weather/by-city", response_model=WeatherResponse,
operation_id="get_weather_by_city", tags=["天⽓查询"])
async def get_weather_by_city(query: WeatherQuery):
    """
    ⼀站式查询城市天⽓
    - 只需提供城市名
    - ⾃动查询位置ID并获取天⽓
    """
    try:
        # 先查询城市ID
        location_data = fetch_weather_api("geo/v2/city/lookup", {"location":query.city})
        # 检查是否找到城市
        if location_data.get("code") != "200" or not location_data.get("location"):
            raise HTTPException(status_code=404, detail=f"找不到城市:{query.city}")
        # 获取第⼀个匹配城市的ID
        location_id = location_data["location"][0]["id"]
        # 查询天⽓
        weather_data = fetch_weather_api("v7/weather/now", {"location":location_id})
        return weather_data
    except HTTPException:
        raise
    except Exception as e:
        raise HTTPException(status_code=500, detail=str(e))

@app.get("/")
async def root():
    """主⻚ - 提供API简介"""
    return {
        "message": "天⽓查询API",
        "endpoints": [
        "/generate-jwt - ⽣成JWT令牌",
        "/city/lookup - 根据城市名查询位置ID",
        "/weather/now - 根据位置ID查询当前天⽓",
        "/weather/by-city - ⼀站式查询城市天⽓"
        ],
        "docs": "/docs 查看完整API⽂档"
    }

# mcp 实现
mcp = FastApiMCP(
    app,
    name="My Weather MCP",
    description="天⽓查询API",
    include_operations=["get_weather_by_city"], # 只公开 get_weather_by_city 接⼝作为 MCP tool
    auth_config=AuthConfig(dependencies=[Depends(verify_bearer_token)]) # MCP使⽤ Bearer Token 验证
)
mcp.mount()

# 启动服务器的命令(在命令⾏中运⾏):
# uvicorn main:app --reload
if __name__ == "__main__":
    import uvicorn
    uvicorn.run(app, host="0.0.0.0", port=8009)
四、测试验证
1. 启动服务
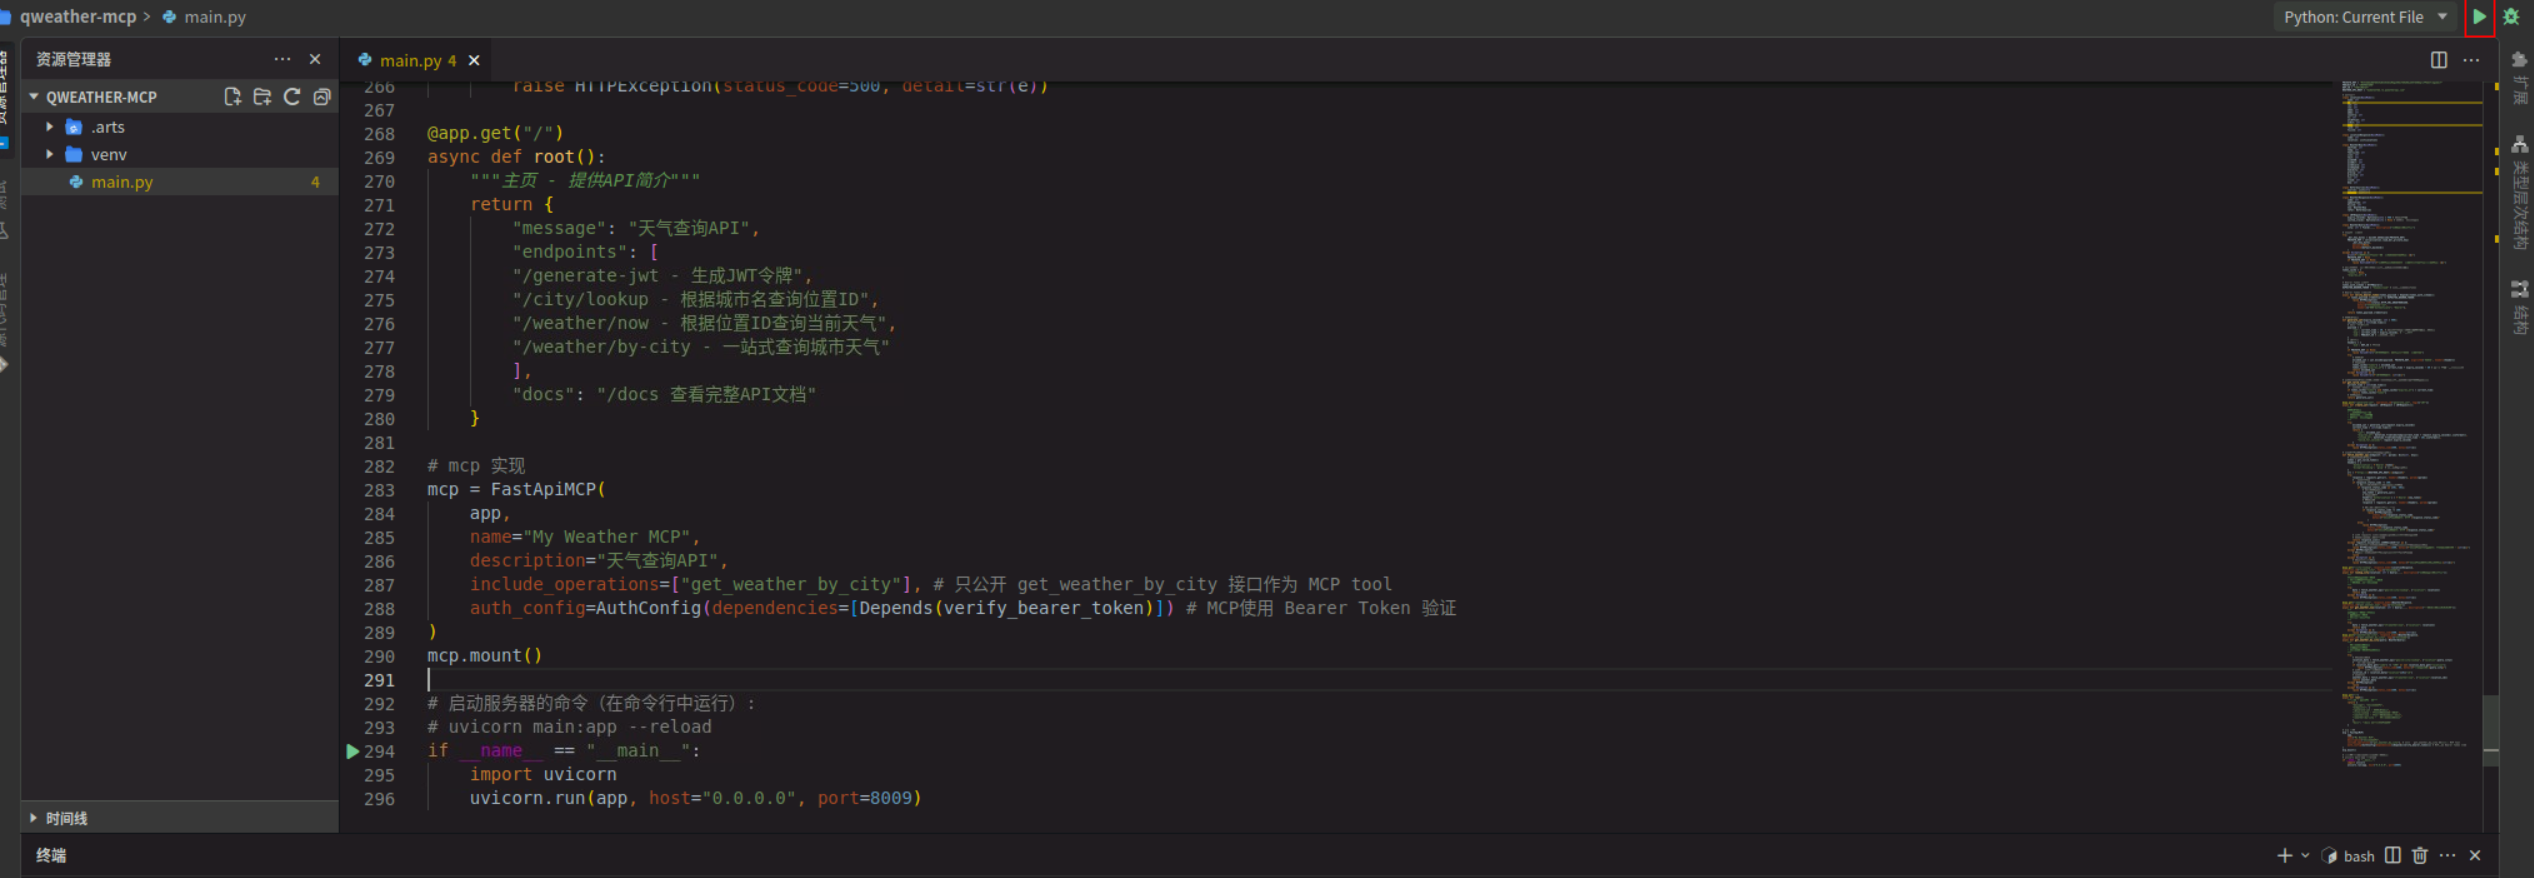
- 启动
使用命令启动:
pyhton main.py
或者直接点击右上角运行按钮:
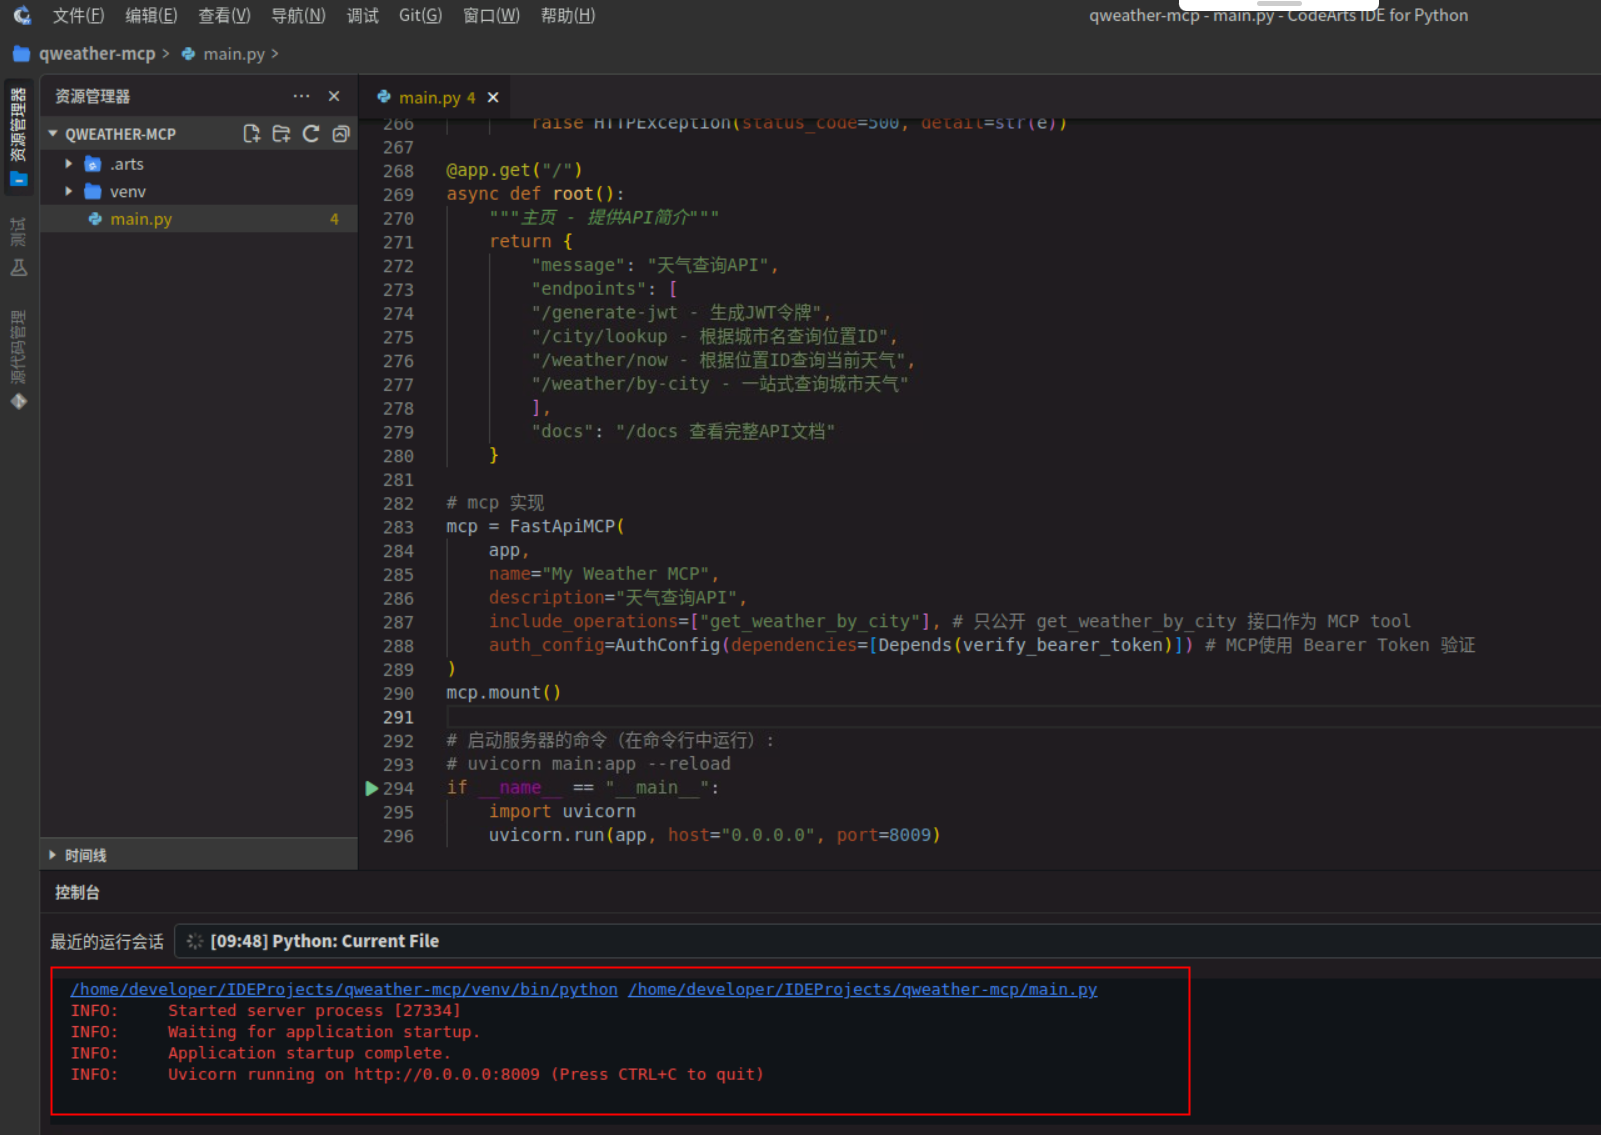
- 启动成功显示如下:
2. API ⽂档验证
-
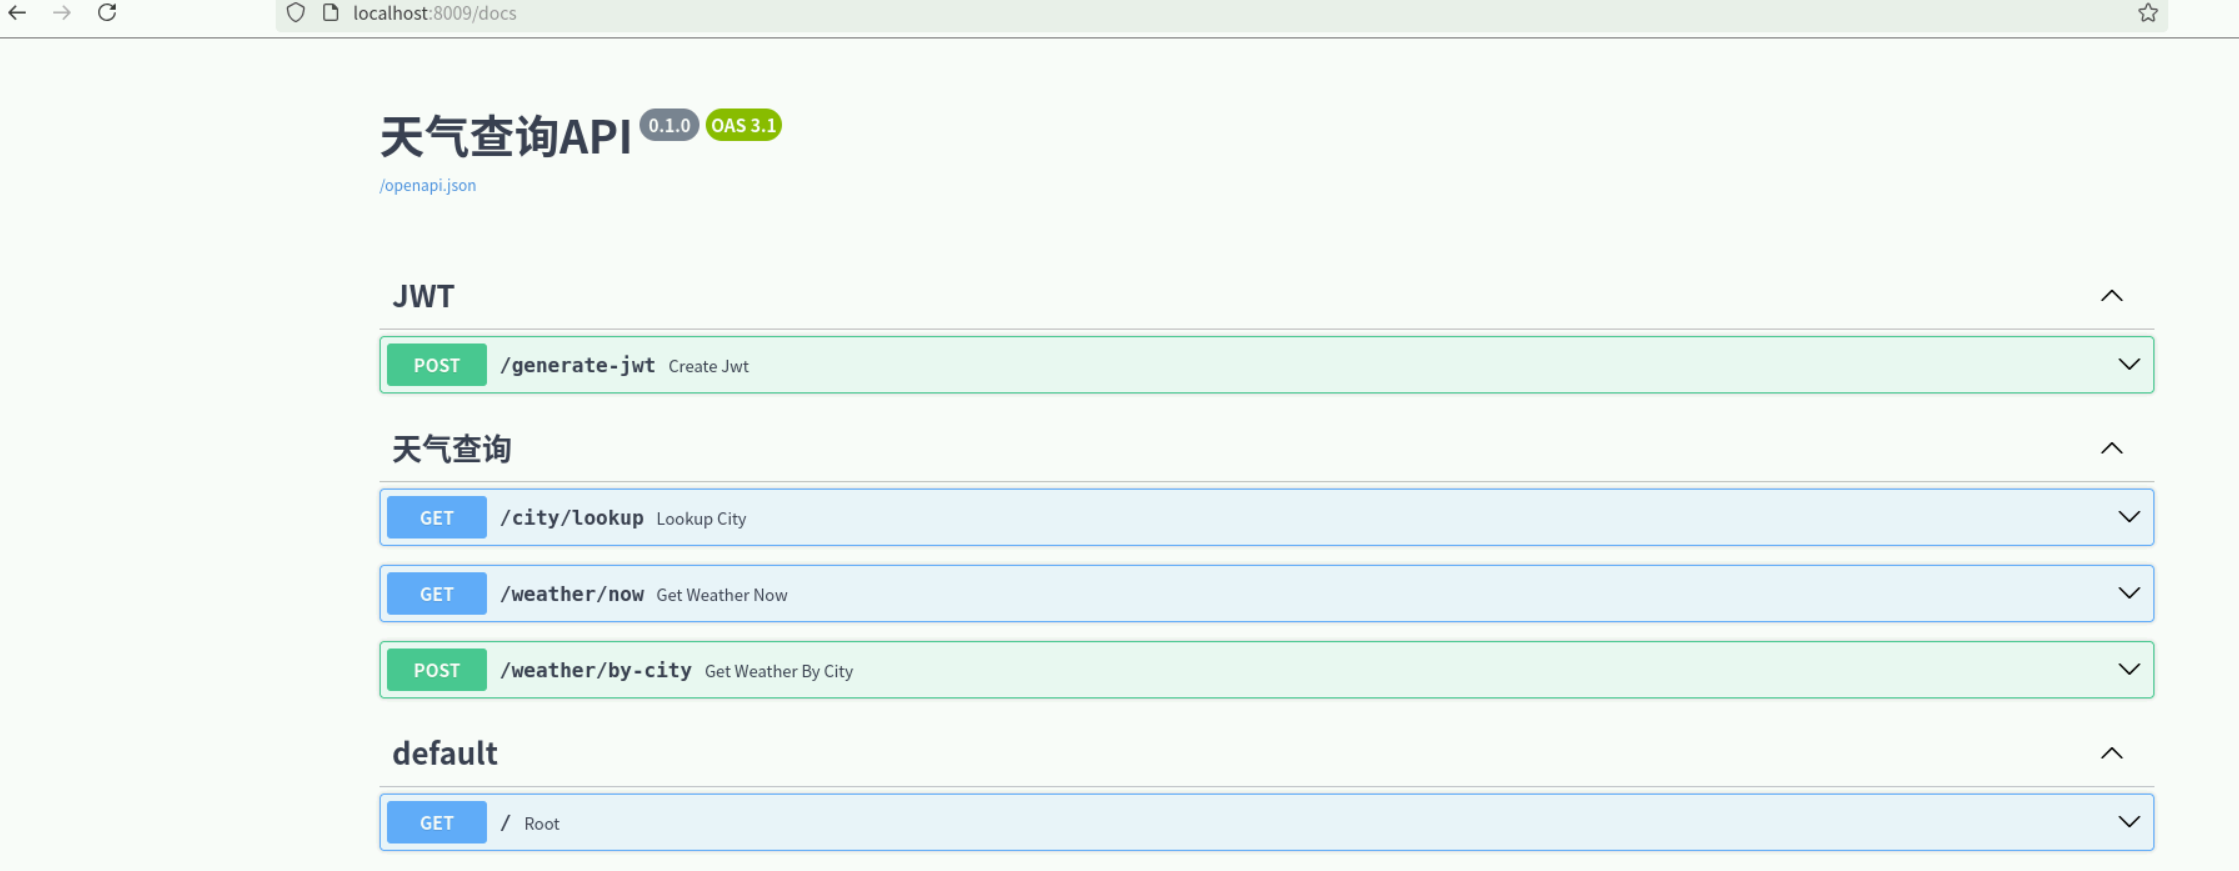
接口查看
我们可以使⽤浏览器访问 http://localhost:8009/docs 来查看并测试API。
-
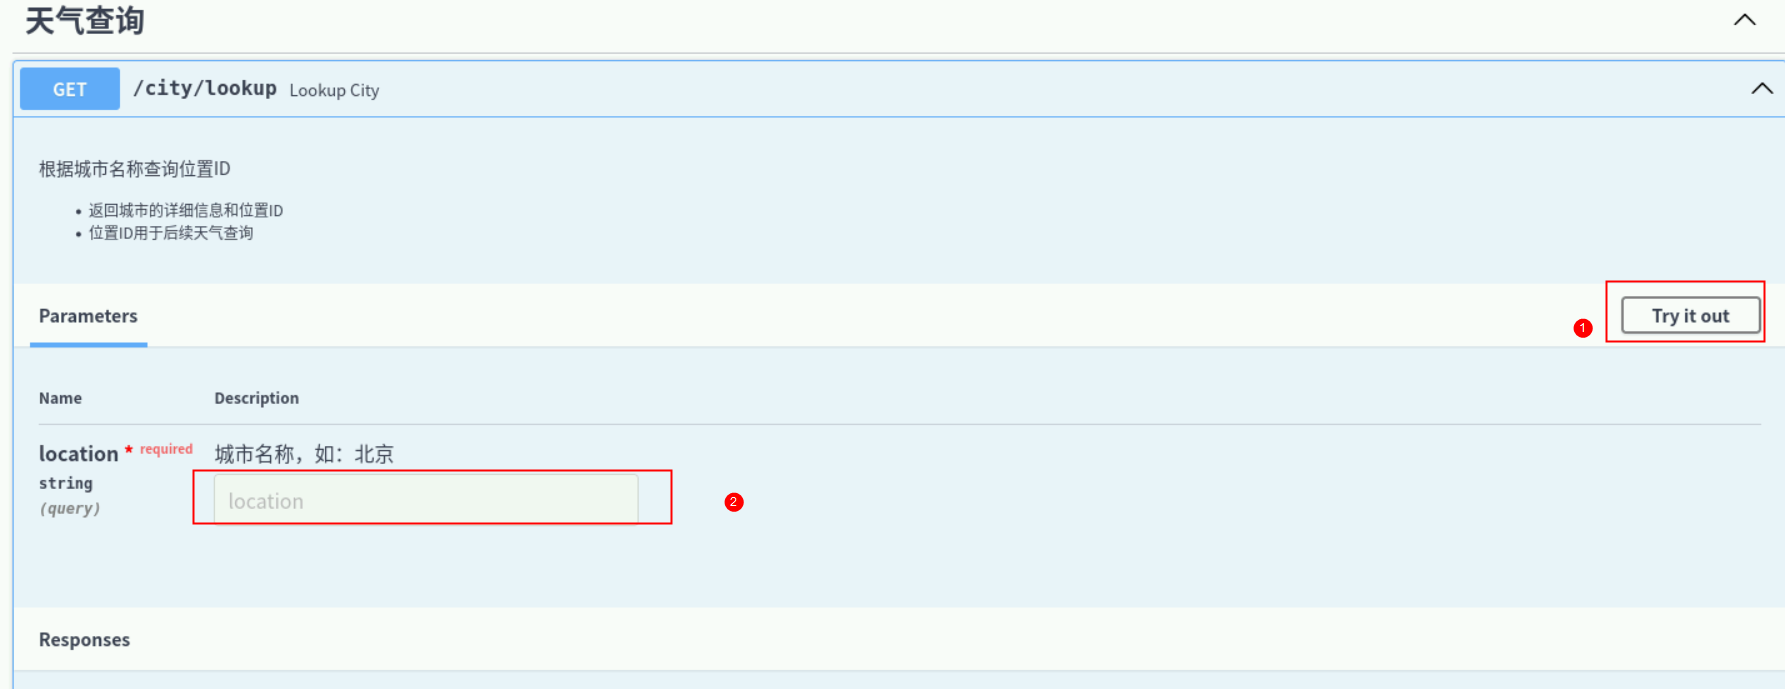
接口测试
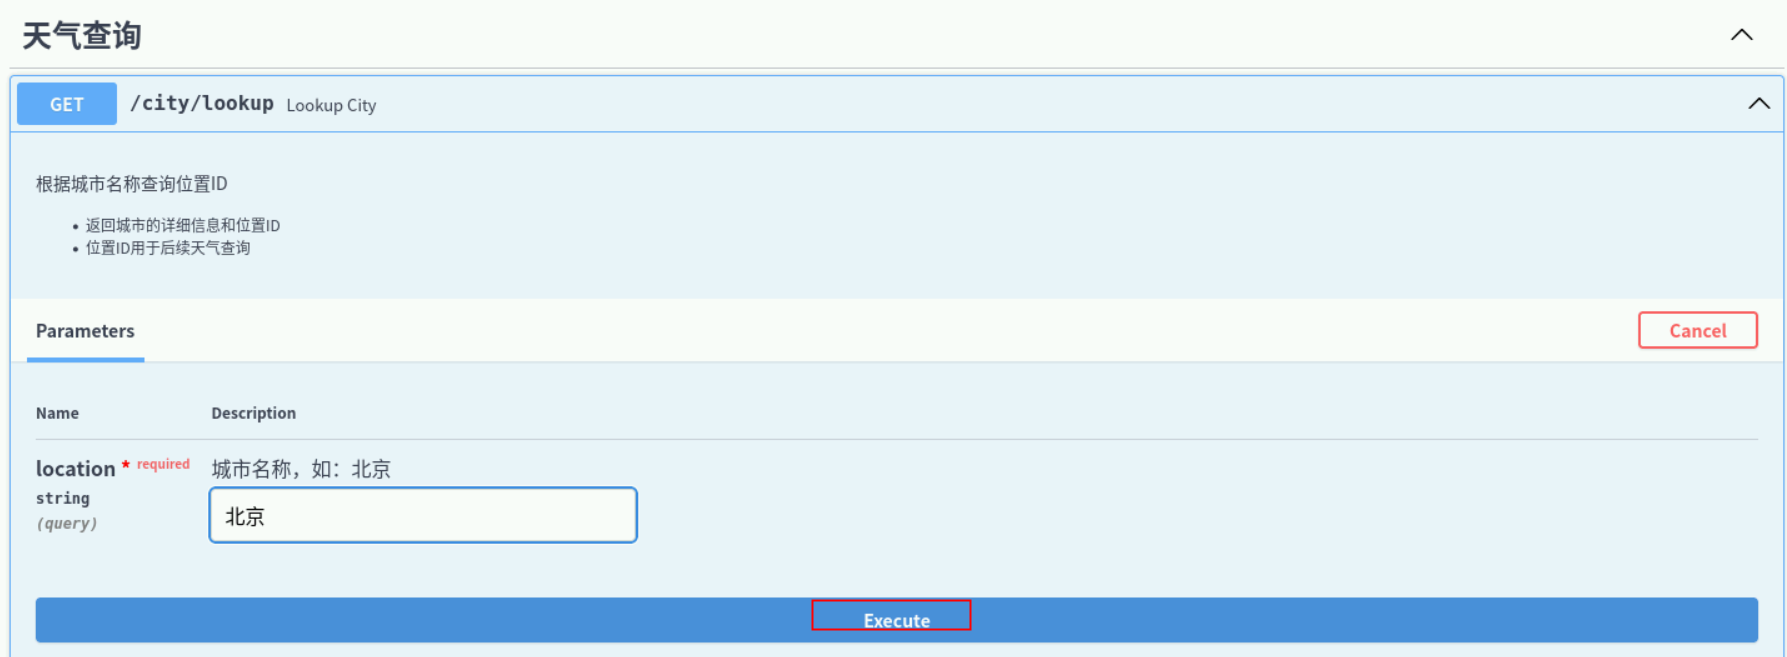
我们选择一个天气查询接口进行测试,点开右边【try it out】,在参数栏输入想要查询的地址,如:北京。
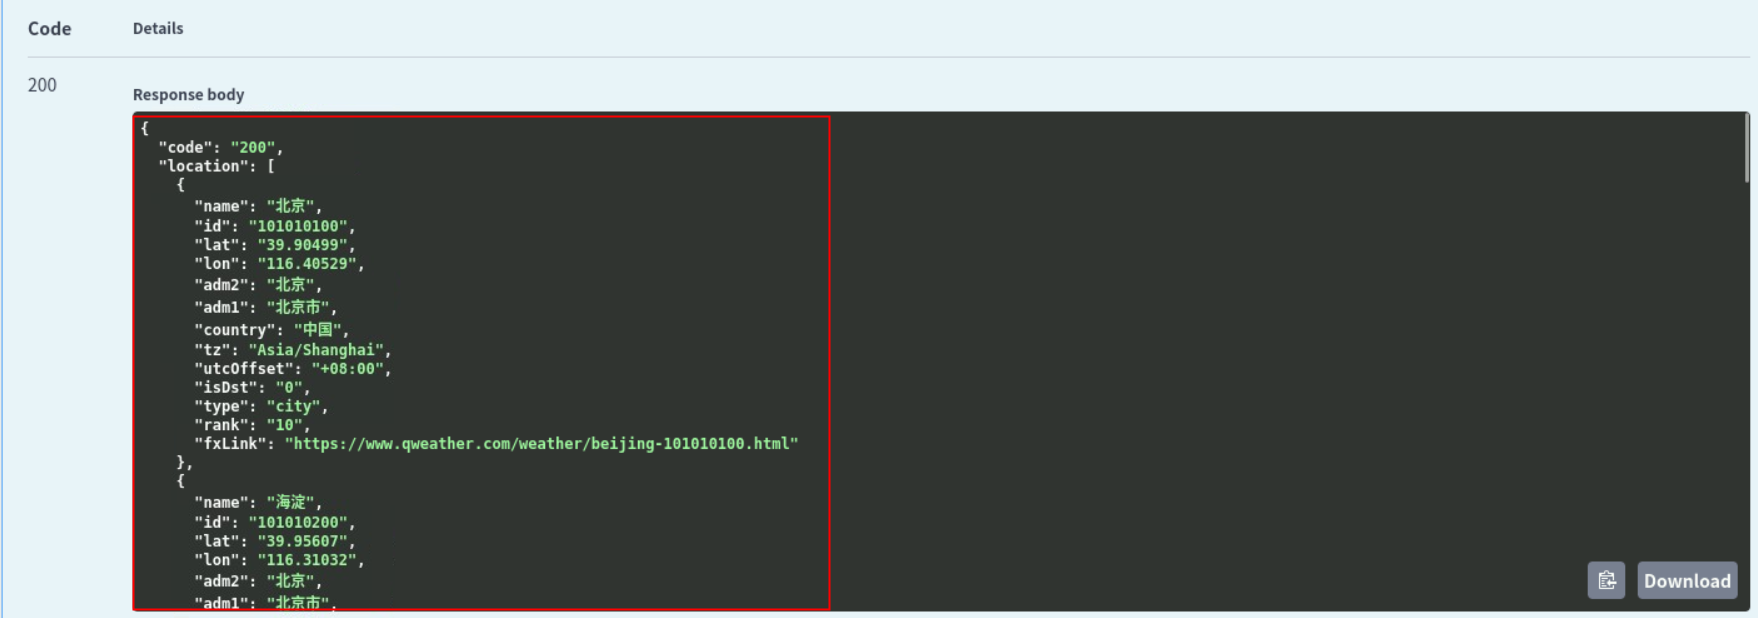
点击执行按钮,进行接口查询。
显示结果:
其他接口测试步骤都是类似,输入参数调用测试即可。
3. MCP 客户端集成
- Cherry Studio 配置
在Cherry Studio中点击【设置】,选择MCP服务器,【添加服务器】,【快速创建】。
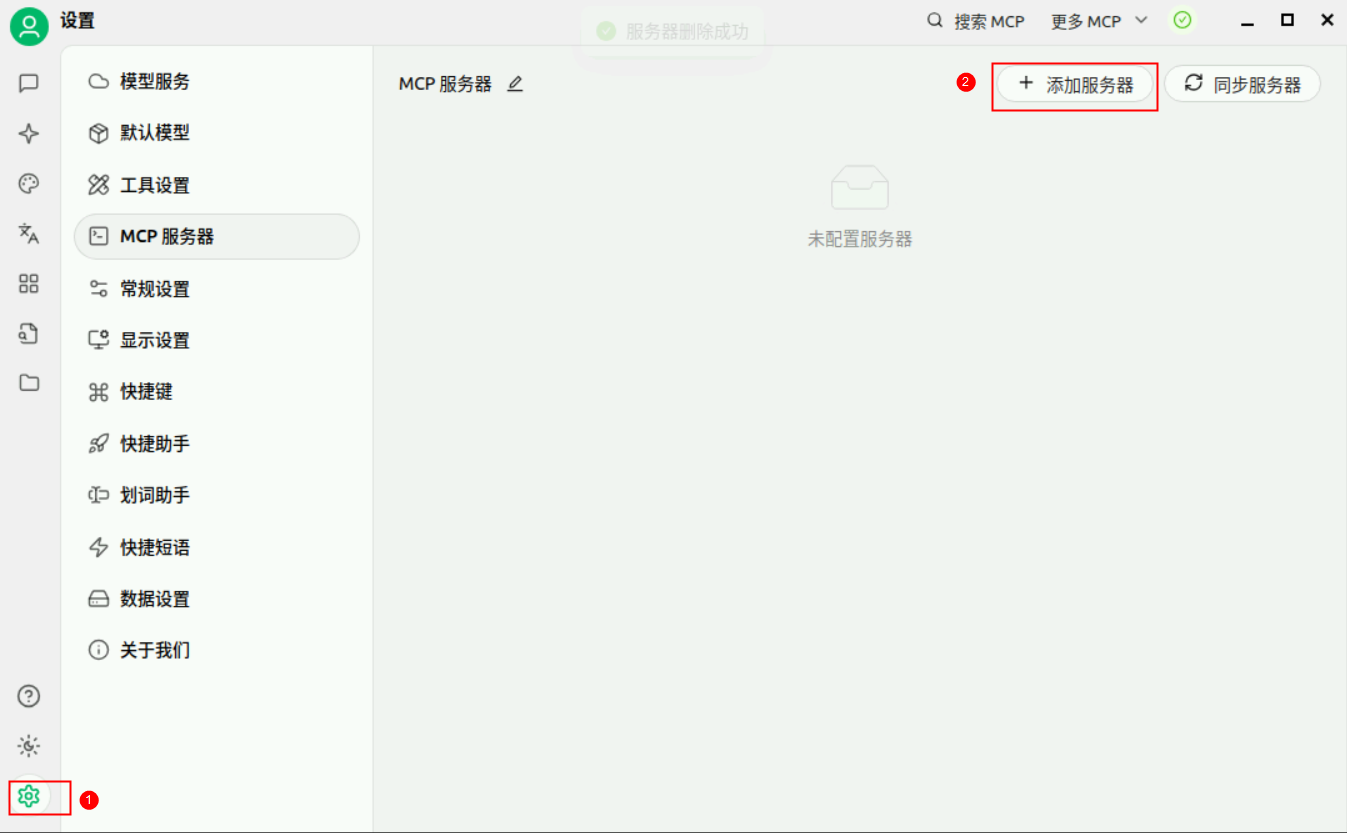
在配置项中输入【名称】、描述(可选)、【类型】、【URL】、【请求头】,点击【保存】。
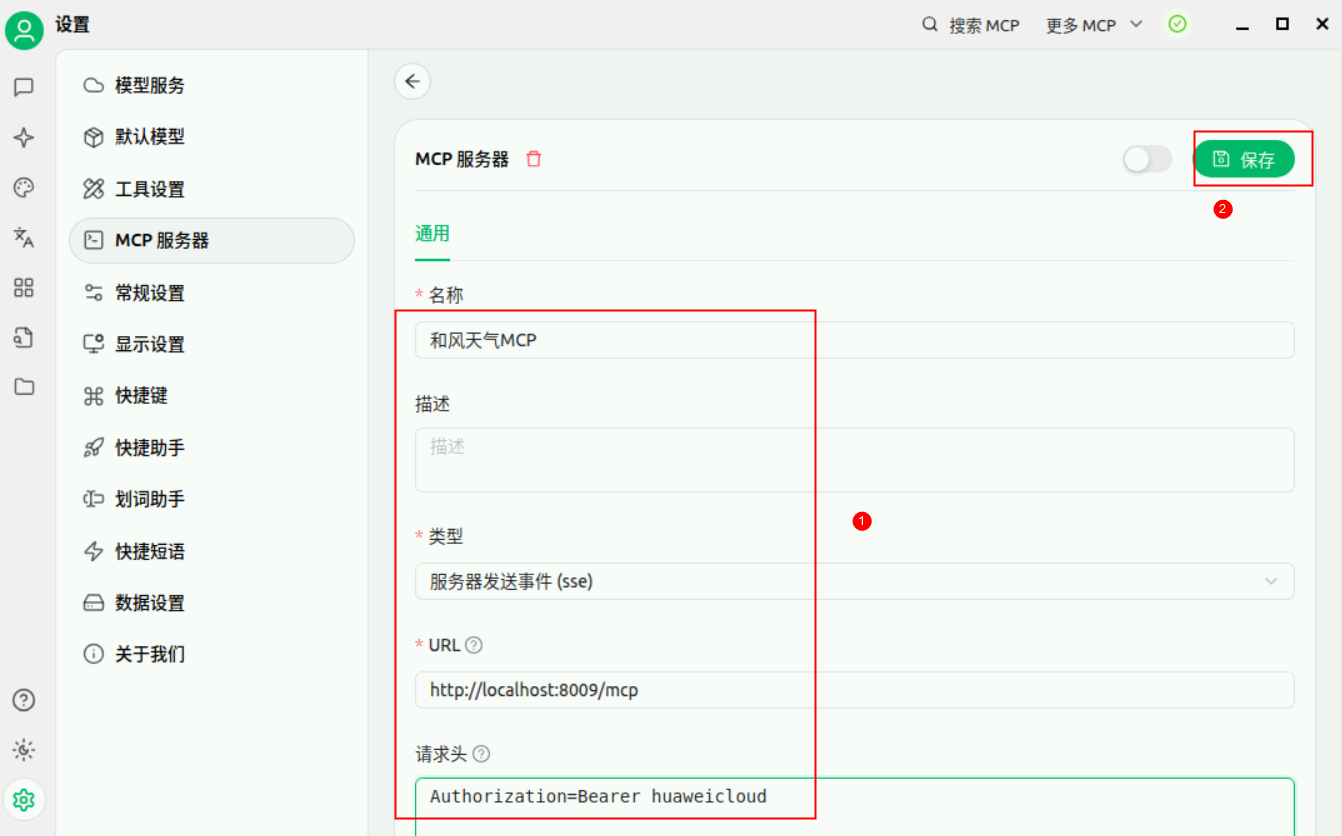
注:
名称:和风天气MCP
类型:下拉选择服务器发送事件(sse)
URL:http://localhost:8009/mcp
请求头:Authorization=Bearer huaweicloud
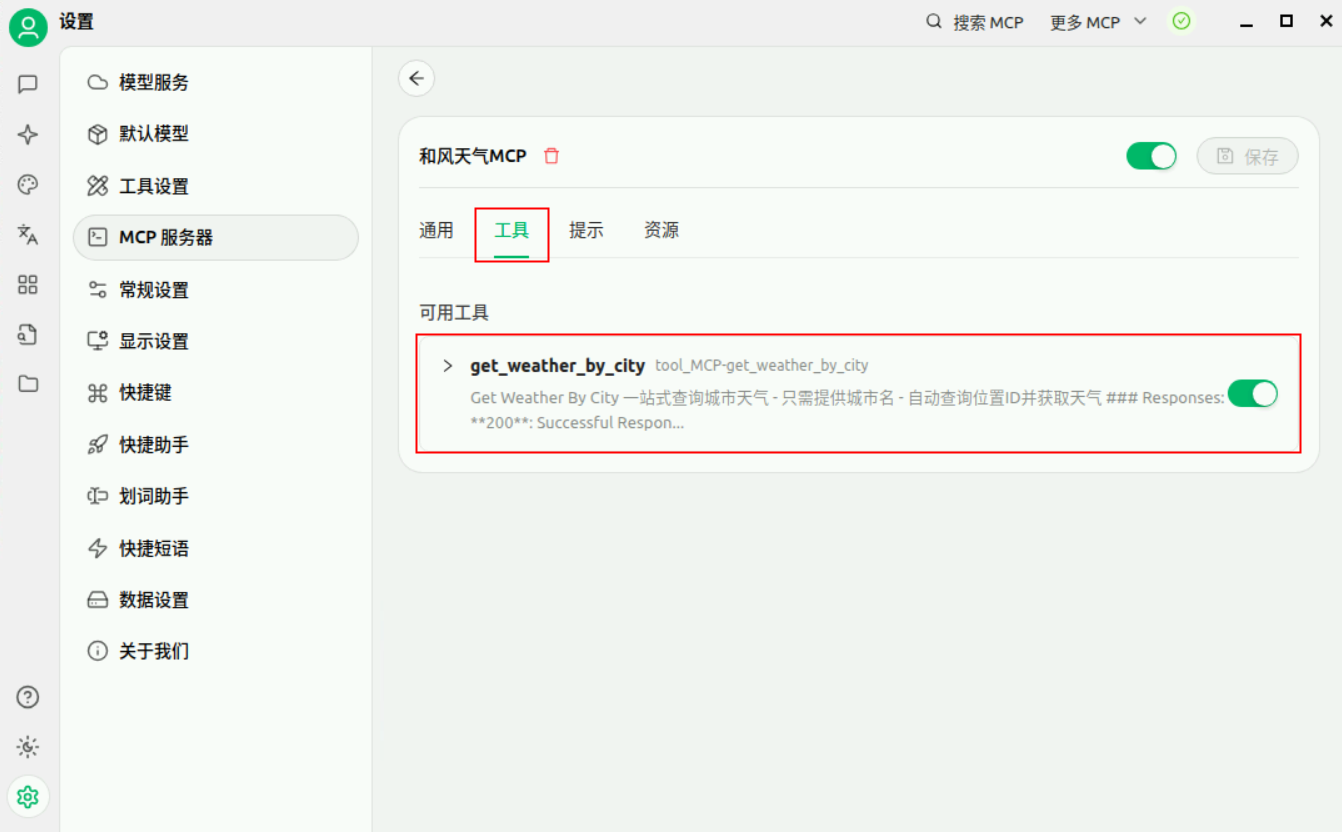
在工具中,我们可以看到 【get_weather_by_city】 接口已经添加到MCP服务中。
-
MCP 测试
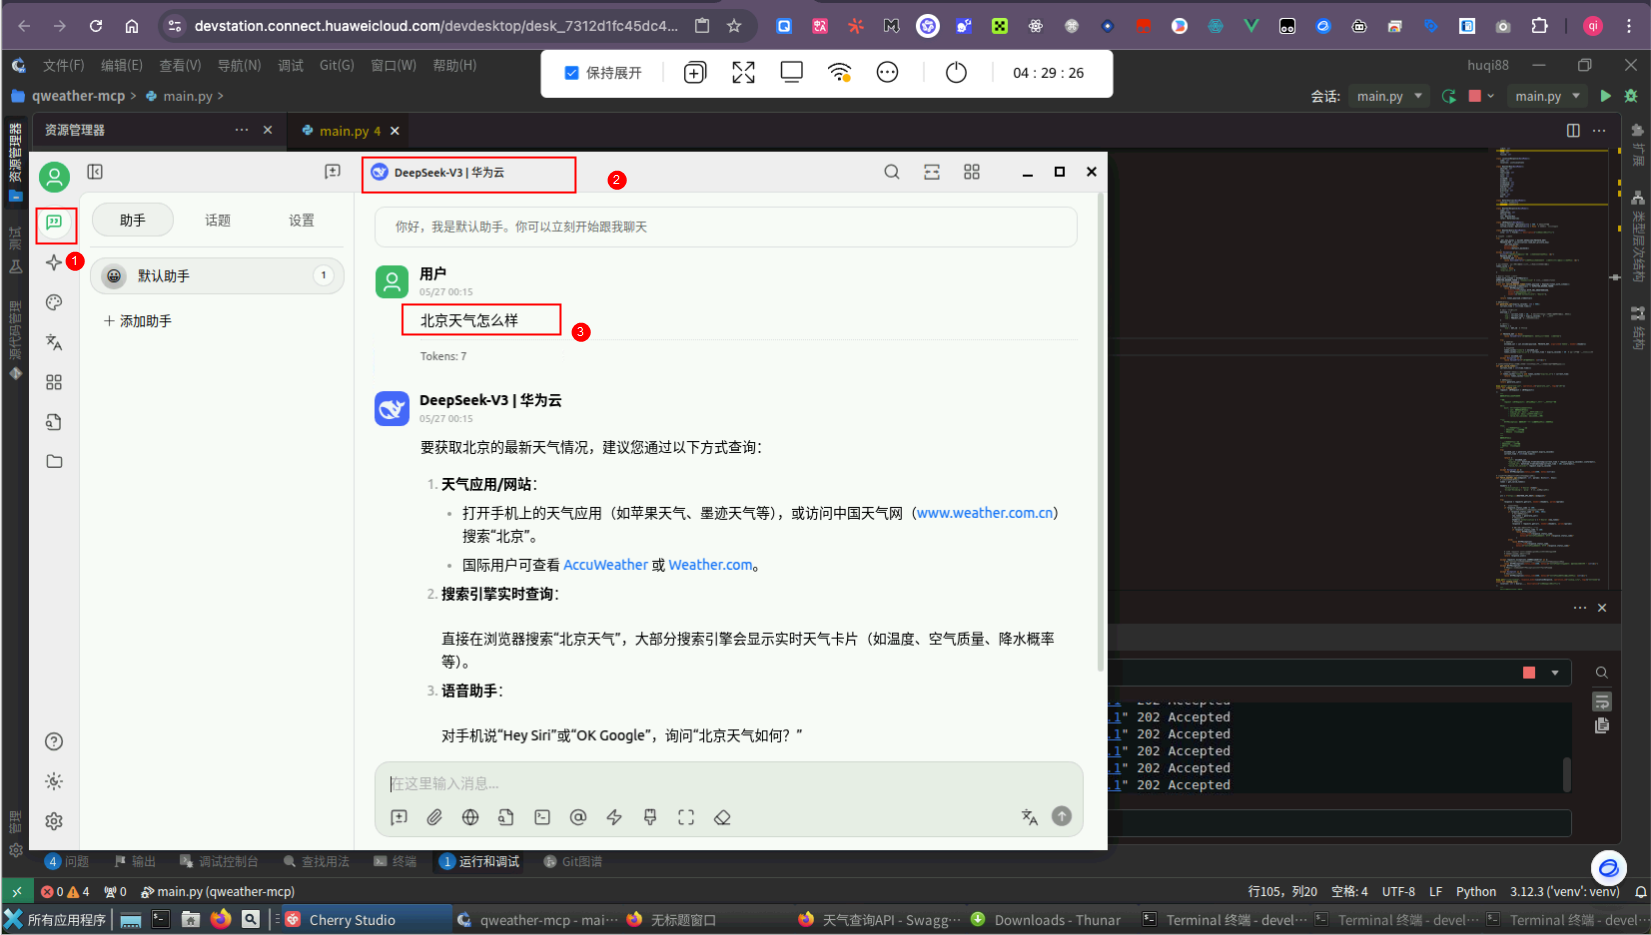
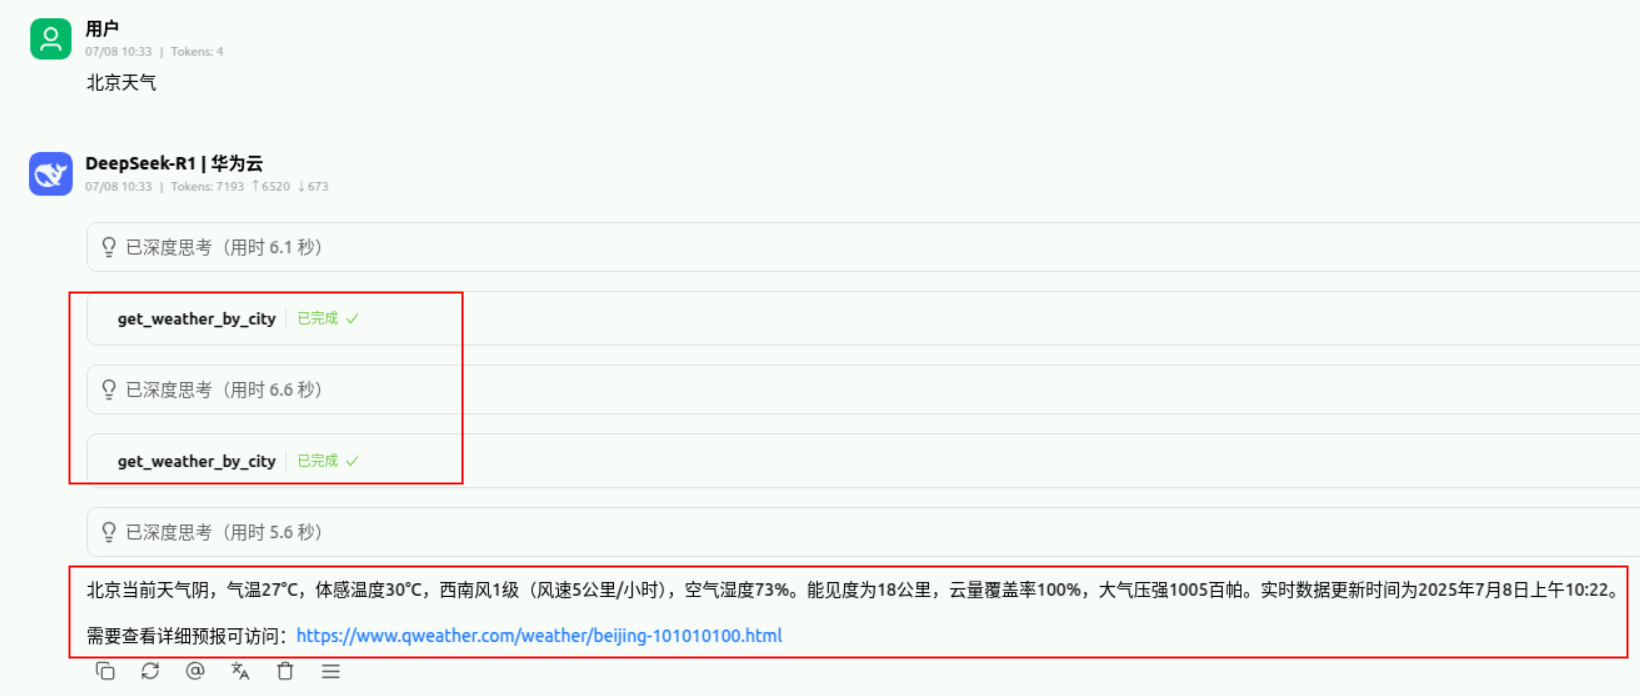
第一步左上角新建一个【话题】,第二步选中设置的华为云DeepSeek,先不开启 MCP 服务器设置。第三步直接输入北京天气怎么样 ,我们会发现大模型无法实时获取天气。
-
设置MCP
点击上方默认助手输入框。

在弹出来的设置界面,启用【和风天气MCP】。
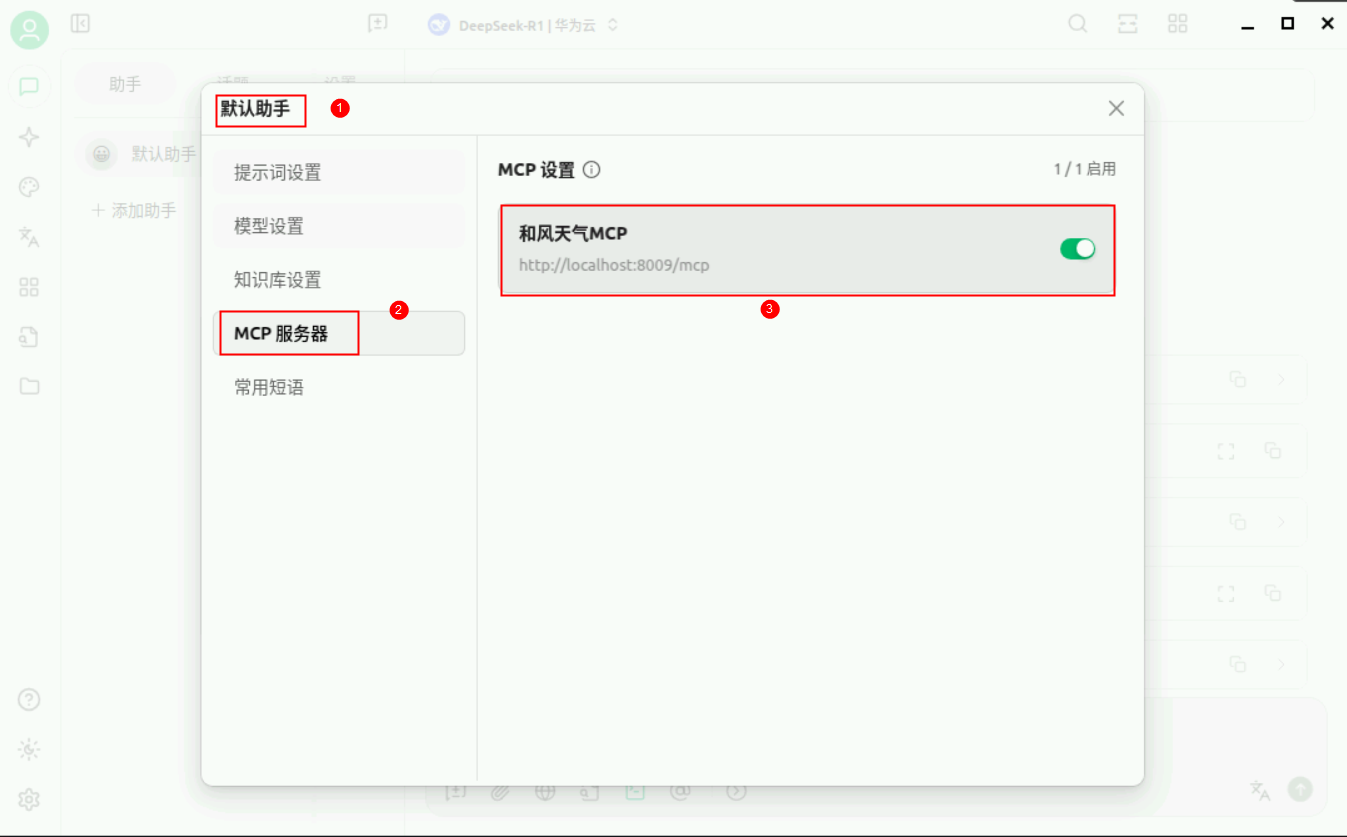
重新询问北京天气,显示成功调用【get_weather_by_city】方法,并且成功输出北京当前天气。
五、总结
1. 技术收获
通过本案例,您将掌握:
MCP协议: 理解 AI 模型与外部工具的交互机制;
FastAPI 开发: 快速构建高性能 Web API;
JWT 认证: 实现安全的 API 访问控制;
第三方 API 集成: 学会封装和调用外部服务;
错误处理: 构建健壮的服务应用。
2. 应用价值
实时数据获取: AI 模型可以获取最新的天气信息;
用户体验提升: 提供准确、及时的天气查询服务;
技术架构: 为更复杂的 MCP 应用奠定基础;
可扩展性: 可以轻松添加更多天气相关功能。
如果想要拓展更多功能,您可以动手试试看!


 298
298

 被折叠的 条评论
为什么被折叠?
被折叠的 条评论
为什么被折叠?
 到【灌水乐园】发言


