KVM provides a Virtio interface for the virtual hard disk and NIC. To use them in a Windows guest VM, the drivers from Fedora (you only need the ISO file) must first be installed into Windows. To install them in a Windows guest VM, it must also be started with these interfaces so that Windows can detect them. While the Windows guest could be started with the Virtio NIC without any problems, we can not start with the Windows image (i.e. the virtual hard disk image where Windows is installed on your guest VM) using the Virtio hard disk interface (until the driver is installed, Windows will not know how to use the Virtio hard disk interface). The easiest solution to this problem is to create another virtual disk that can use Virtio:
1 | qemu-img create -f qcow2 <image name> <size> |
Now, start the Windows VM with the Virtio interfaces:
1 | qemu-kvm \ |
2 | -hda <path to your Windows guest image> \ |
3 | -drive file=<your guest image file>,if=virtio \ |
4 | -drive file=<path to Virtio driver ISO>,media=cdrom,index=1 \ |
5 | -net nic,model=virtio \ |
6 | -net user \ |
7 | -boot d \ |
8 | -vga std \ |
9 | -m 1024 |
When Windows is loaded in your guest VM, go in to the Device Manager. Under Other Devices, there should be two entries – one for the SCSI controller to the the temporary virtual hard drive and the other for the Virtio network card.

On one of the items, right click on it and select Properties, go to the Driver tab. You should now see the following:

Click on Update Driver. In the next dialog, choose to specify a location and install the Red Hat Virtio drivers. The dialogs for installing the drivers will vary, depending on the installed version of Windows. It should be fairly easy to work how to install the drivers, but installing the drivers for Windows 7 and Windows XP are here if you need them ( skip to instructions for Windows 7).
Installing the Drivers on Windows XP
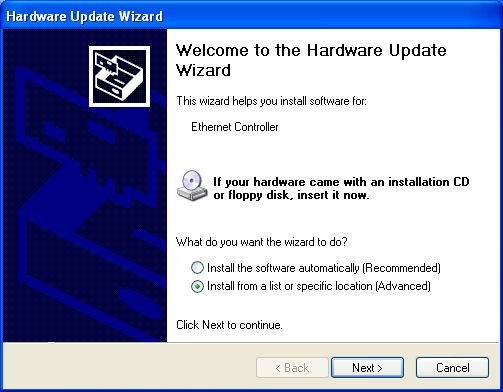
For Windows XP, choose Install from a list or specific location on the first prompt.
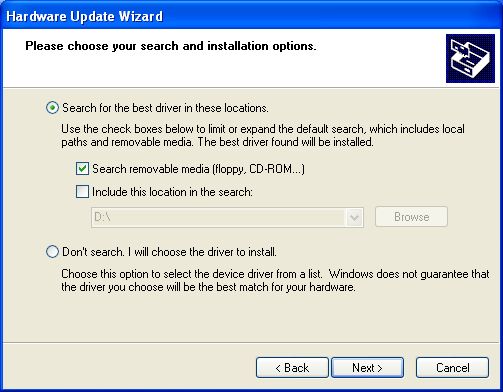
On the next set of options, choose Search for the best driver in these locations and ensure that Search removable media is ticked and click on Next again.
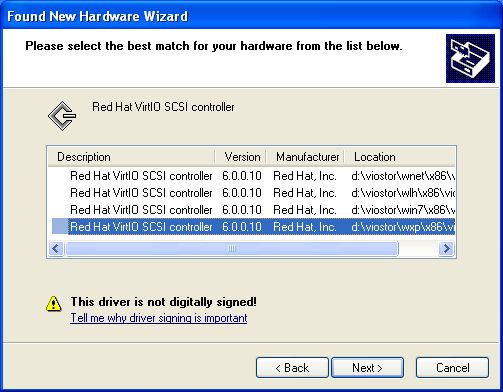
When installing the hard disk controller, you might be prompted, at this point, to choose a driver. At this point, choose the one in the wxp directory.
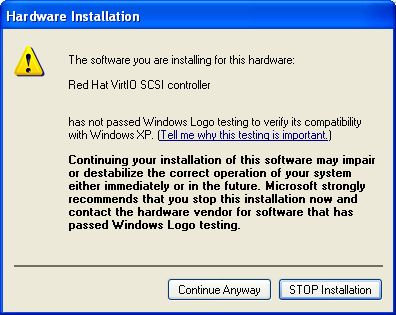
Eventually, you will probably be warned that you are installing an unsigned driver. Select Continue Anyway to install the driver.
When installation is complete, you should get a confirmation, similar to the following:
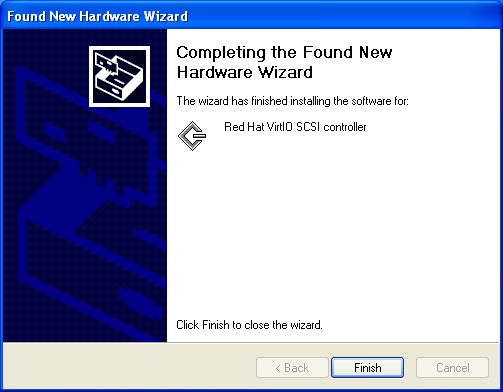
After repeating the steps for the other driver, you use the Virtio interface on your Windows hard disk image (see After Installing the Drivers…).
Installing the Drivers on Windows 7
For Windows 7, choose Browse my computer for driver software.
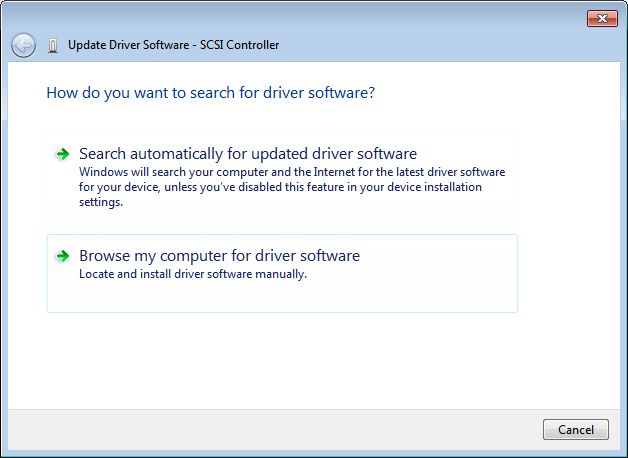
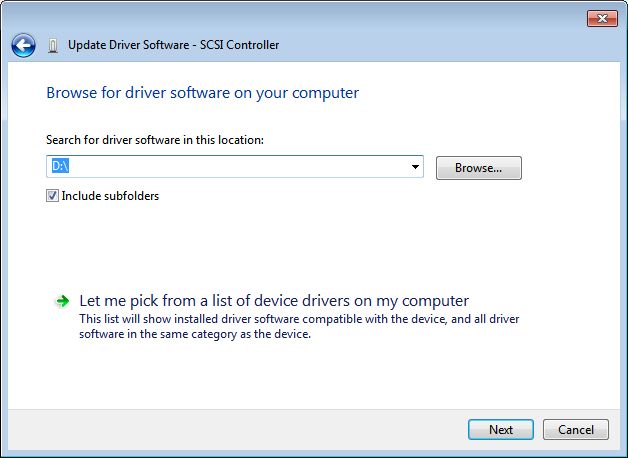
On the next screen, choose the drive for your CDROM. You should be able to let Windows search the CD for the drive.
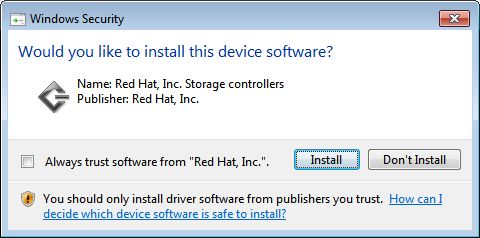
When prompted, confirm that you want to install the driver.
There will be a confirmation that the driver was installed, similar to this one:
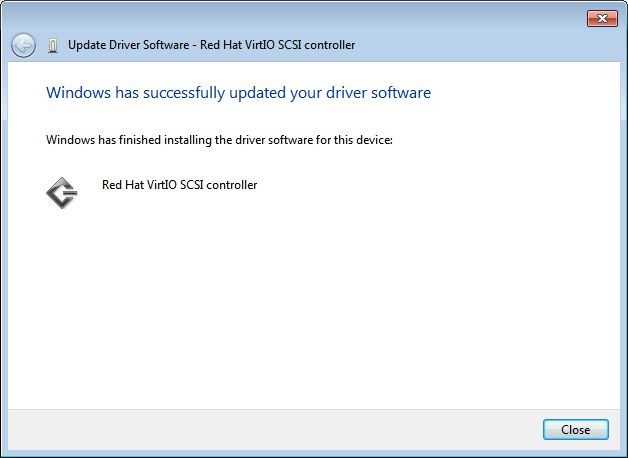
Close the dialog and repeat the steps for the other driver.
After Installing the Drivers…
After both drivers are installed, the device manager should contain a Red Hat VirtIO device for the SCSI controller and another one for the ethernet adapter.
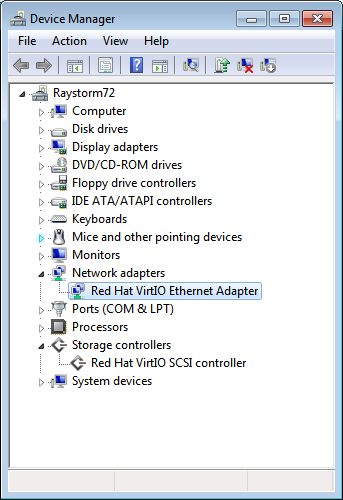
Next time you start the guest VM, you can use the Virtio interface for the Windows image:
1 | qemu-kvm \ |
2 | -drive file=<path to your Windows guest image>,if=virtio \ |
3 | -net nic,model=virtio \ |
4 | -net user \ |
5 | -vga std \ |
6 | -m 1024 |
Your Windows VM is now using the Virtio interfaces for your Windows virtual hard drive and NIC. If you wish to know more about Virtio and how it works, I suggest having a read of the article Virtio: An I/O virtualization framework for Linux.
 安装Fedora Virtio驱动在Windows客机中使用Virtio接口


 本文指导如何在Windows虚拟机中安装Fedora提供的Virtio驱动,以实现使用Virtio NIC和虚拟硬盘接口。通过创建额外的虚拟硬盘并启动虚拟机,然后安装必要的驱动,Windows可以识别并利用Virtio接口。详细步骤包括创建虚拟硬盘、启动虚拟机、安装驱动,并最终验证驱动安装成功。本文还包括针对Windows XP和Windows 7的特定驱动安装说明。


 1万+
1万+

 被折叠的 条评论
为什么被折叠?


