继SpringBoot学习笔记(二) 整合redis+mybatis+Dubbo,本篇文章我们开始分析SpringBoot的自动装配原理。
概述
前面已经介绍了Spring的加载过程,经历扫描配置文件--收集beanName--实例化bean这几步,SpringBoot同样如此,源于Spring,高于Spring,省去了”简单模式(特殊场景如多数据源引入,需要额外的单独配置)下xml配置文件的繁琐过程。下面让我们来揭秘SpringBoot的自动装配原理。
源码解读
1.先从run方法进入,
public class DemoApplication {

    public static void main(String[] args) {
        SpringApplication.run(DemoApplication.class, args);
    }
}
2.进入到run方法中
public static ConfigurableApplicationContext run(Class<?> primarySource, String... args) {
        return run(new Class[]{primarySource}, args);
    }
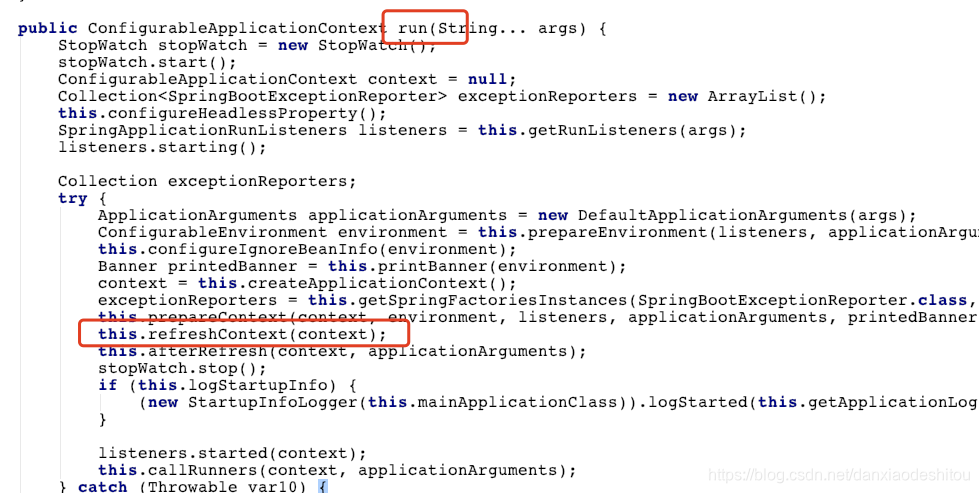
3.最后点到这里

4.继续深入
private void refreshContext(ConfigurableApplicationContext context) {
        this.refresh((ApplicationContext)context);
        if (this.registerShutdownHook) {
            try {
                context.registerShutdownHook();
            } catch (AccessControlException var3) {
                ;
            }
        }

    }
5.进入到refresh
protected void refresh(ConfigurableApplicationContext applicationContext) {
        applicationContext.refresh();
    }
6.继续进入方法
org.springframework.context.support.AbstractApplicationContext#refresh

public void refresh() throws BeansException, IllegalStateException {
        Object var1 = this.startupShutdownMonitor;
        synchronized(this.startupShutdownMonitor) {
            this.prepareRefresh();
            ConfigurableListableBeanFactory beanFactory = this.obtainFreshBeanFactory();
            this.prepareBeanFactory(beanFactory);

            try {
                this.postProcessBeanFactory(beanFactory);
                this.invokeBeanFactoryPostProcessors(beanFactory);  //看这里
                this.registerBeanPostProcessors(beanFactory);
                this.initMessageSource();
                this.initApplicationEventMulticaster();
                this.onRefresh();
                this.registerListeners();
                this.finishBeanFactoryInitialization(beanFactory);
                this.finishRefresh();
            } catch (BeansException var9) {
                if (this.logger.isWarnEnabled()) {
                    this.logger.warn("Exception encountered during context initialization - cancelling refresh attempt: " + var9);
                }

                this.destroyBeans();
                this.cancelRefresh(var9);
                throw var9;
            } finally {
                this.resetCommonCaches();
            }

        }
    }
7.进入到invokeBeanFactoryPostProcessors方法内部
protected void invokeBeanFactoryPostProcessors(ConfigurableListableBeanFactory beanFactory) {
        //这里
       PostProcessorRegistrationDelegate.invokeBeanFactoryPostProcessors(beanFactory, this.getBeanFactoryPostProcessors());
        if (beanFactory.getTempClassLoader() == null && beanFactory.containsBean("loadTimeWeaver")) {
            beanFactory.addBeanPostProcessor(new LoadTimeWeaverAwareProcessor(beanFactory));
            beanFactory.setTempClassLoader(new ContextTypeMatchClassLoader(beanFactory.getBeanClassLoader()));
        }
    }
public static void invokeBeanFactoryPostProcessors(ConfigurableListableBeanFactory beanFactory, List<BeanFactoryPostProcessor> beanFactoryPostProcessors) {
sortPostProcessors(currentRegistryProcessors, beanFactory);


 本文分析SpringBoot自动装配原理,它源于Spring,省去简单模式下xml配置文件的繁琐。通过源码解读,介绍从run方法进入,逐步深入到各个关键方法,分析如何从spring.factories中加载XXXAutoConfigration,以及将其注册为Bean的过程,最后完成自动装配。
 最低0.47元/天 解锁文章


 814
814

 被折叠的 条评论
为什么被折叠?


